 |
Madness 19 Ribbitt vs McKenna PBP Commentary |
Undercard bout
|
|
|
|
Undercard bout
|
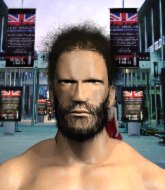
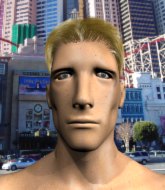
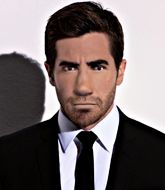
Coming up we have a featherweight MMA rules bout between Shin Tsu (ranked 24598 p4p, 467 weight class) and Pontius Pilate (ranked 24861 p4p, 498 weight class). Pilate has chosen Roman National Anthem as his entrance music. Pontius Pilate has the better chin. Will he look to stand and bang today?
 |
|
 |
| 180 cm
26
153 lbs
1 - 3 - 0 |
|
167 cm
25
152 lbs
0 - 2 - 0 |
BJJ White Belt
Excellent boxer
KO power |
|
BJJ White Belt
Excellent boxer
Tends to cut |
|
| |
|
Ladies and gentlemen. This fight is 3 rounds, in the featherweight division.
Introducing the fighter to my left, fighting out of the red corner.
With a record of
1 - 3 - 0, fighting out of New York, Shin Tsu!
And introducing the fighter to my right, fighting out of the blue corner.
With a record of
0 - 2 - 0, fighting out of Tokyo, Pontius Pilate!
The judges for this bout are Trevor Gratis, Robert Douchet and William Peck.

The bell rings for round one and we are underway!
Pilate lands the left hand.
Tsu looks shocked there as he takes a right hand to the temple.
Tsu throws a series of strikes that have Pilate backpedaling.
Pilate lands a beauty of a right hand that gets the crowd cheering.

Tsu is rocked!
Tsu get stunned by a cross and takes another one on the button. Tsu stumbles backwards and tries to bounce back off the cage but Pilate runs in and jumps on him with a leaping lead hook that puts him out! Wow, that was highlight reel stuff! Awesome finish!
Ladies and gentlemen, after 0:14 of round 1, we have a winner by way of KO (Punch). Pontius Pilate!
|
|
|
|
|
|
|
|
|
|
|
|
|
|
|
|
|
|
|
|
|
|
|
| S |
C
A |
G |
S |
C
B |
G |
|
S |
C |
G |
|
energy
A | B |
|
hype
A | B |
|
pop
A | B |
|
mgr
A | B |
|
FIGHT
RATING
100% |
|
|
|
|
|
|
|
Undercard bout
|
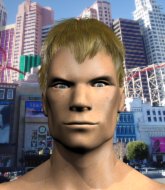
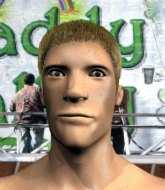
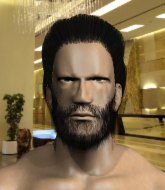
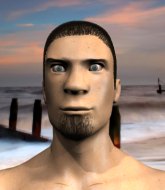
Coming up we have a heavyweight MMA rules bout between Sven Svenssson (ranked 4118 p4p, 372 weight class) and Doctor Ochila (ranked 2193 p4p, 238 weight class). The fight MMA fans around the world have waited their entire lives for!
 |
|
 |
| 175 cm
19
250 lbs
1 - 3 - 0 |
|
200 cm
19
265 lbs
2 - 2 - 0 |
Good wrestling
Counter fighter
Granite chin |
|
BJJ Purple Belt
Excellent MT
Good gas tank |
|
| |
|
Ladies and gentlemen. This fight is 3 rounds, in the heavyweight division.
Introducing the fighter to my left, fighting out of the red corner.
With a record of
1 - 3 - 0, fighting out of London, Sven Svenssson!
And introducing the fighter to my right, fighting out of the blue corner.
With a record of
2 - 2 - 0, fighting out of London, Doctor Ochila!
The judges for this bout are Alec Ball, William Peck and Elvis Blanc.
The bell rings for round one and we are underway!
Svenssson loads up on a big right hand but Ochila slips the punch.
The fighters circling - Svenssson throws out the jab but it was never going to land.
Ochila gets his head snapped back by a nice shot there.
Ochila buckles his opponent's knee momentarily with a nice leg kick.
Svenssson lands a head shot.
We've had a slow start to the round here - hopefully the action picks up.
Ochila lands with an overhand left.
Svenssson misses with a straight left.
Ochila only half commits to the counter leg kick.
Svenssson on the wrong end of a nice low kick. He's acting like it's no big deal but he doesn't want to take many more of those.
Ochila looks more muscular than last time we saw him. He must have been on the weights.

That's one minute gone in the round.
Svenssson moves out of range as Ochila strikes.
Svenssson is looking to counter the offense by Ochila and move into the clinch.
Ochila throws an overhand right that lands on Svenssson's shoulder, as Svenssson tries to avoid the shot.
Svenssson tries to counter by moving into the clinch but Ochila manages to circle out of the way.
Ochila bobs and weaves and then throws a good body kick.
Svenssson tries to clinch up.
Ochila throws out a counter right but Svenssson avoids it with no problem.
Ochila throws a big shot that misses.
As Ochila tries to get set, Svenssson tries to push him back and clinch up but Ochila manages to avoid the attempt.
Ochila scores with a jab.
Svenssson slips a jab from Ochila.
Svenssson moves away from the strike by Ochila.
Svenssson tries to counter by clinching up but Ochila breaks away and moves out of range.

That's two minutes gone in the round.
Ochila digs a good body shot into Svenssson's ribs.
Svenssson tries to close the distance and clinch up but Ochila swats him away and circles back towards the center.
Ochila looks like he wants to counter punch here.
Ochila connects with a leg kick. Svenssson looked like he was expecting something else and didn't defend it.
Ochila moves into range and lands a nice leg kick.
Svenssson has his front leg slapped to the side - a nice low kick landing there from Ochila.
Ochila misses with a hook.
Svenssson misses with an uppercut. Ochila saw that one coming.
This has been an exciting period of action!

Svenssson closes the distance and pushes Ochila back into the cage.

That's three minutes gone in the round.
Ochila lands with a left to the head.
Ochila is trying to break the clinch but Svenssson has him pressed against the cage.
Svenssson working some nice short punches in the clinch.
Svenssson has Ochila pressed against the cage, preventing Ochila from circling away and getting back to striking at range.
Ochila throws a punch but it's blocked by Svenssson.
An uppercut on the inside fails to land for Svenssson.
An uppercut on the inside fails to land for Ochila.
Ochila blocks a punch to the side of the head.
Svenssson blocks a punch to the side of the head.
Svenssson is leaning against Ochila and scores with a nice uppercut to the body.
Svenssson lands with a good tight uppercut to the head.
Ochila can't break the clinch.

Ochila breaks from the clinch.
Ochila will need to close the distance a bit before he attacks - that leg kick was thrown from too far away.
Svenssson wants to take advantage of his opponent's missed offense by moving into the clinch.

That's four minutes gone in the round.
Ochila throws a good cross that connects.
Svenssson rushes Ochila and pushes him back against the cage in a clinch.
Ochila is looking to break free of the clinch but Svenssson has double underhooks.
Svenssson can't find room to land a body shot as Ochila controls the action.
Ochila breaks the clinch and we're back to striking at distance.
Ochila ducks down and throws a hook to the body but Svenssson moves away.
Svenssson showing good head movement there, avoiding the strikes from Ochila.
Svenssson tries to counter by clinching up but Ochila breaks away and moves out of range.
This is a great period of action - very entertaining stuff!
Svenssson checks a leg kick nicely.
And thats the end of the round the fighters go back to their corners.
Doctor Ochila dominated that round.
OK. That's time! The bell goes and we're back to the action.

Ochila motions for Svenssson to come forward. Ochila throws a leg kick but it misses it's target.
Svenssson wants to take advantage of his opponent's missed offense by moving into the clinch.
Ochila misses with a wild body shot.
As Ochila tries to get set, Svenssson tries to push him back and clinch up but Ochila manages to avoid the attempt.
Ochila throws a head kick that misses.
Ochila wants to slow Svenssson down by chopping away at his legs.
Ochila throws a head kick but Svenssson moves out of range.
Ochila jabbing away but nothing is landing.
Svenssson tries to counter by moving into the clinch but Ochila manages to circle out of the way.
We've been told by Svenssson's head coaches at London BALLS OF STEEL that he's been working on his takedown defense in preparation for this fight.
We've had a slow start to the round here - hopefully the action picks up.
Ochila thows a leg kick but Svenssson checks it
and Svenssson counters into the clinch. Nicely done.
A body shot lands from Svenssson.
Ochila has had enough of the clinch and is looking to separate.
That's one minute gone in the round.
Ochila wants to break the clinch but can't.
Ochila wants to stall.
Svenssson lands with a good tight uppercut to the head.
Svenssson throws a hook to the body. More of an arm punch but it's all scoring with the judges.
Ochila working aggressively here.
Ochila escapes the clinch and we're back to striking.
Ochila scores with a head kick.
Ochila misses with a hook. Svenssson ducked under it nicely.
Svenssson is trying to close the distance and clinch up, after that failed offence from Ochila.
Ochila throws a sloppy head kick and Svenssson moves out of range easily.
Svenssson tries to counter by moving into the clinch but Ochila manages to circle out of the way.
Ochila loads up on a big right hand but Svenssson slips the punch.
Svenssson displays some good footwork, moving neatly out of range as Ochila throws out the jab.
Svenssson tries to counter by moving into the clinch but Ochila manages to circle out of the way.
That's two minutes gone in the round.
Svenssson uses good footwork to avoid the strikes from Ochila.
Svenssson tries to counter by clinching up but Ochila breaks away and moves out of range.
Ochila throws a low kick, looking for Svenssson's leg but Svenssson calmly moves out of range.
Svenssson moves out of range of the strikes.
Svenssson seemed to be looking to counter by closing the distance.
Ochila goes for a high kick. It partially lands.
Ochila swings wildly with a right hand that was never going to find it's target.
Ochila misses the jab.
Svenssson wants to take advantage of his opponent's missed offense by moving into the clinch.
Svenssson takes the fight into the clinch.
Fantastic stuff here - a very entertaining period of action, which has drawn cheers from the crowd.
Ochila pushes off and circles away, back to the middle of the mat.
That's three minutes gone in the round.
Thud! ouch! good body kick from Ochila - that will leave a mark!
Doctor Ochila seems to be the more aggressive standup fighter in this bout.
Svenssson shakes his hands off, looking to compose himself, but takes a jab to the jaw whilst he does it.
Svenssson drives through and clinches with Ochila against the cage.
The pace slowing considerably in the clinch, as Ochila takes a break from that fighting nonsense to think about the finer things in life.
Svenssson blocks a punch to the side of the head.
Ochila misses with a punch on the inside.
Ochila lands punches inside but they're not really causing much damage.
Ochila breaks the clinch and we return to the middle of the mat.
Ochila throws a chopping leg kick but Svenssson manages to avoid taking any serious damage.
That's four minutes gone in the round.
Svenssson throws a hook but Ochila blocks it.
Ochila thumps Svenssson with a low kick.
Ochila throws a head kick that misses
and Svenssson counters into the clinch. Nicely done.
Ochila's corner calls for him to break the clinch, which he does.
Ochila throws a low kick but Svenssson avoids it.
A low kick from Ochila is predictable there
and Svenssson counters by moving into the clinch. Good anticipation by Svenssson.
We've seen a great period of action over the last minute or so - credit to both fighters for going all out!
The crowd thankful this round is nearly over.
Ochila working aggressively here.
Ochila scores with an uppercut up the middle.
Svenssson misses with a hook to the ribs.
And thats the end of the round the fighters go back to their corners.
Doctor Ochila showed his class in that round. I'd imagine he'll take it on all the scorecards.
The fighters' corners scream their final instructions, as the referee calls time. Here we go, back to the action! This is the final round!

Svenssson closes the distance and presses his opponent up against the cage.
Svenssson lands with a short punch from the clinch.
Sven Svenssson has scored more points in the clinch so far.
Ochila manages to break the clinch.
A head kick from Ochila lands but Svenssson takes it in his stride.
Ochila scores with a jab to the jaw of his opponent.
Svenssson moves into the clinch.
Ochila can't break the clinch.
We've had a slow start to the round here - hopefully the action picks up.
Ochila breaks from the clinch.
Ochila has been the more effective fighter overall so far.
Ochila misses with a wild body shot.
Svenssson on the wrong end of a nice low kick. He's acting like it's no big deal but he doesn't want to take many more of those.
That's one minute gone in the round.
Svenssson stumbles momentarily as he takes a strong leg kick from Ochila.
Ochila is using his reach advantage to land shots from outside his opponent's range.
Ochila slips in close and lands a nice hook before moving back out of range.

Ochila lands a big head kick that sends Svenssson tumbling to the mat! Ochila takes a step backwards and waves Svenssson back to his feet - he wants the finish!

It looks like Sven Svenssson has been cut.
Svenssson checks a low kick. Bone on bone - not my idea of a good time.
Ochila throws a head kick but Svenssson moves out of range.
Ochila throws a head kick that Svenssson semi-blocks.
This is a great period of action - very entertaining stuff!
Like a baseball bat into the meat of his leg there - nice leg kick by Ochila.
Ochila swats away the attempt to clinch by Svenssson.
That's two minutes gone in the round.
Svenssson has managed to clinch.
Svenssson tries to work over Ochila's body with a swooping hook but it only glances the target.
Ochila has had enough of the clinch but Svenssson keeps him there for the moment.
Svenssson works for underhooks and lands a body shot in the process.
Svenssson misses with some punches.
Svenssson misses with a shot to the kidneys.
Svenssson lands an uppercut.
Nice body punch from Svenssson - that landed with a thud.
Ochila blocking some punches.
That's three minutes gone in the round.
Ochila swings away with an uppercut that misses.
Svenssson makes some space for himself and lands an uppercut.
Ochila is working hard here but doesn't seem to be able to control effectively, up against the cage.
Ochila tries to break the clinch but Svenssson is controlling the position.
An uppercut on the inside fails to land for Ochila.
Ochila lands with a right to the head.
Svenssson tries to throw a body punch but Ochila avoids it by throwing Svenssson back against the cage.
Still in the clinch, Ochila scores with a nice short uppercut.
Ochila blocks an uppercut.
Ochila scores with a nice hook to the head.
The fighters are starting to perspire pretty heavily.
Ochila misses with the head strike.
Ochila lands on the inside with an uppercut.
Svenssson blocking some punches.
That's four minutes gone in the round.
Svenssson swings wildly with an uppercut but Ochila uses good head movement to avoid it.
Svenssson blocks a couple of punches on the inside.
An uppercut to the body lands inside from Svenssson.
Ochila has a couple of punches blocked by Svenssson.
Svenssson softening up his opponent with strikes, against the cage.
Ochila throws a punch but it's blocked by Svenssson.
Wooooo! Give it up for these two warriors! They are putting on a show!
Svenssson blocking some punches.
Ochila throws a punch but it's blocked by Svenssson.
Svenssson misses with a hook to the ribs.
A head punch blocked on the inside by Svenssson.
Svenssson blocks a couple of punches on the inside.
Ochila throws a punch but it's blocked by Svenssson.
Sven Svenssson has stepped it up - he knows he needs a finish here!
Ochila tries to break the clinch but Svenssson is controlling the position.
And that's the end of the fight!
Doctor Ochila comfortably won the final round on my scorecard.
I've got Ochila winning every round here. Surely the decision will go his way and he'll pick up a well deserved decision victory. Over to the ring announcer for the scorecards.
Ladies and gentlemen, after 3 rounds of action, we go to the scorecards for a decision.
Judge Alec Ball scores the fight 27:30
Judge William Peck scores the fight 27:30
Judge Elvis Blanc scores the fight 27:30
In favor of your winner, by unanimous decision... Doctor Ochila!
Doctor Ochila managed to slip a mention for his sponsors, Sportivité, into his post fight interview.
|
|
|
|
|
|
|
|
|
|
|
|
|
|
|
|
|
|
|
|
|
|
|
| S |
C
A |
G |
S |
C
B |
G |
|
S |
C |
G |
|
energy
A | B |
|
hype
A | B |
|
pop
A | B |
|
mgr
A | B |
|
FIGHT
RATING
45% |
|
|
|
|
|
|
|
Undercard bout
|
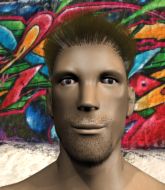
Coming up we have a welterweight MMA rules bout between Scott Frill (ranked 3502 p4p, 409 weight class) and Lucien Lachance (ranked 3097 p4p, 373 weight class). Chooooooooon! I think Frill might be my favorite fighter, now he's come out to Dedication- Nipsey Hustle. The atmosphere really building for this one as we go over to our ring announcer for the fighter introductions!
 |
|
 |
| 178 cm
22
171 lbs
3 - 1 - 0 |
|
187 cm
19
180 lbs
2 - 1 - 0 |
BJJ Blue Belt
Solid boxing
Good chin |
|
BJJ Blue Belt
Counter fighter
Good gas tank |
|
| |
|
Ladies and gentlemen. This fight is 3 rounds, in the welterweight division.
Introducing the fighter to my left, fighting out of the red corner.
With a record of
3 - 1 - 0, fighting out of Montreal, Scott Frill!
And introducing the fighter to my right, fighting out of the blue corner.
With a record of
2 - 1 - 0, fighting out of New York, Lucien Lachance!
The judges for this bout are Yves DeLean, Alec Ball and Elvis Blanc.
The bell rings for round one and we are underway!
Frill cracks Lachance with a good jab.
Frill walks into a left hand.
It looks like Scott Frill has been cut.
Frill uses good head movement to avoid the hook from Lachance.

Frill lands a left and a right that send Lachance crashing to the mat, dazed. Frill thinks about following him to the mat but decides to wave him back up to his feet!

Lachance is rocked!

It looks like Lucien Lachance has been cut.
Fantastic stuff here - a very entertaining period of action, which has drawn cheers from the crowd.
Frill lands with an overhand left.
Lachance is still on wobbly legs! Can Frill finish him?
Frill misses with the combination.
Lachance steps to the side to avoid the strikes from Frill.
Lachance seems to have recovered his senses.
A telegraphed right hand from Frill misses the target.
Lachance throws out a counter right but Frill avoids it with no problem.
Frill with a poor takedown
and Lachance counters with a lovely straight right hand!
Lachance uses good footwork to avoid the strikes from Frill.
Frill ducks down and throws a hook to the body but Lachance moves away.
Frill swings away but doesn't land with a series of punches.
A nice side step and Lachance releases a counter shot to the body, but it doesn't find it's home.

Lachance gets a clinch.
Lachance lands punches inside but they're not really causing much damage.
Lachance misses with a short punch on the inside.
Lachance lands a short shot on the inside that snaps the head of Frill backwards.
That's one minute gone in the round.
Frill looks like he'd prefer to be striking at range right now.
Lachance lands with a good tight uppercut to the head.
Lachance gets through Frill's defenses to land a nice punch to the side of the head.

Lachance gets control of Frill's arms and successfully pulls guard. Lachance will no doubt be looking for submissions off his back.

Lachance looking for a guillotine here but Frill defends easily.
Lachance throwing his legs up looking for a triangle.
Lachance has a loose triangle. He'll be looking to tighten that up but Frill can see exactly what he's planning and manages to posture up and free himself.
Frill definitely looks more muscular than last time we saw him fight.
Lachance utilising some decent striking defenses from the guard, preventing the ground and pound.
Lachance has a loose triangle. He'll be looking to tighten that up but Frill can see exactly what he's planning and manages to posture up and free himself.
Lachance keeping moving, preventing Frill from controlling successfully.
The fighters are pressed up against the cage, both looking to find a bit of space to work.
Frill wants to get up but he can't break Lachance's closed guard. He needs to be careful trying to break the legs open, as he's open to submissions here.
That's two minutes gone in the round.
Lachance trying to keep a closed guard but Frill is proving a slippery customer.

Frill stands up and waves to Lachance to follow him.
Lachance rushes Frill and presses him up against the cage.
Lachance scores with a shot to the side of Frill's head.
The crowd are loving this. Great action here.
Lachance throws a blind hook that connects with the side of Frills head.
Lachance lands a body punch.
Lachance pulls guard effortlessly.
Frill stands up and looks to throw the legs aside to pass to side control. Lachance swivels though and keeps the full guard.
Lachance is active off his back here, looking for submissions.
Lachance working the defensive guard well to avoid strikes from Frill.
Frill loading up with the ground and pound but he's missing more than he's landing in this flurry.
Lachance is throwing his legs up, looking for submissions. Frill is aware though and is defending well.
Lachance is actively looking for submissions from his back. He's worked himself a little space on the bottom and seems to be going for a triangle. No, he's switched into an armbar! That was slick! Frill rolls with it to try and escape but Lachance cranks on the arm and Frill is forced to tap out! This one is aaaaaaaaall over!
Ladies and gentlemen, after 3:58 of round 1, we have a winner by way of Submission (Armbar). Lucien Lachance!
A relieved looking Lucien Lachance thanked the fans for their support and gave the usual line about them being amazing. They seemed to believe that he actually meant it.
|
|
|
|
|
|
|
|
|
|
|
|
|
|
|
|
|
|
|
|
|
|
|
| S |
C
A |
G |
S |
C
B |
G |
|
S |
C |
G |
|
energy
A | B |
|
hype
A | B |
|
pop
A | B |
|
mgr
A | B |
|
FIGHT
RATING
65% |
|
|
|
|
|
|
|
Undercard bout
|
Coming up we have a welterweight MMA rules bout between Georges Moxley (ranked 2197 p4p, 293 weight class) and Viktor Reznov (ranked 3215 p4p, 383 weight class). The key to victory for Georges Moxley has got to be keeping the fight on the feet.
 |
|
 |
| 189 cm
19
171 lbs
3 - 0 - 0 |
|
184 cm
19
181 lbs
2 - 0 - 0 |
BJJ Brown Belt
Solid Muay Thai
Self confident |
|
Good wrestler
Basic striking
Solid chin |
|
| |
|
Ladies and gentlemen. This fight is 3 rounds, in the welterweight division.
Introducing the fighter to my left, fighting out of the red corner.
With a record of
3 - 0 - 0, fighting out of Las Vegas, Georges Moxley!
And introducing the fighter to my right, fighting out of the blue corner.
With a record of
2 - 0 - 0, fighting out of London, Viktor Reznov!
The judges for this bout are Robert Douchet, Steve Smith and Elvis Blanc.
The bell rings for round one and we are underway!
Moxley keeping his hands up high there, blocking the jab from Reznov.
Viktor Reznov seems to be the more aggressive standup fighter in this bout.
Reznov throws an off balance right hand
enabling Moxley to counter with a crisp jab.
Reznov is looking to clinch.
A quick step to the side and Moxley tries to counter with a shot to the body but it doesn't connect.
Nice jab there from Reznov.
Reznov ducks under a wild hook from Moxley.
Moxley throws an uppercut from half a mile away. Reznov sees it coming and avoids it easily.
Moxley swings wildly with a right hand that was never going to find it's target.
Reznov rushes in with a sloppy looking punch
and Reznov takes a counter punch right on the button for his troubles.
Moxley misses with a looping right.
Moxley pushing out the jab but it's not landing.
We've had a slow start to the round here - hopefully the action picks up.
Moxley takes a jab on the nose there. A little bit of blood seems to be coming out. Hopefully that won't affect his breathing.
Moxley misses the jab.
Moxley throws a jab but it's blocked by Reznov.
Reznov shoots and misses
and Moxley counters with a lovely straight right hand!
Reznov uses decent footwork to sidestep a right hand from Moxley.
We can't be sure of the tactics at this early stage but we have heard that Reznov has been working on his takedowns a lot in the buildup to the fight and we can only assume he's going to look to take this to the mat.
That's one minute gone in the round.
Moxley misses with a lunging right hand
and Reznov decides to take the opportunity to score a takedown. He's landed in Moxley's guard.
Reznov is fighting to break Moxley's control of his arms but Moxley is doing a good job of controlling the position at the moment.
Moxley looking to sweep here. No luck so far.

Moxley working for a triangle but Reznov defends it easily.
Moxley keeping moving, preventing Reznov from controlling successfully.
Reznov is intent on slowing down the pace of the fight, simply looking to control.
Moxley is working from a closed guard but he's struggling to control his opponent.
That's two minutes gone in the round.
Reznov drops back for a leg but he's not going to get it - he lets go and Moxley dives on top into guard.

Moxley wants to control from the top but Reznov keeps moving.
Reznov working a defensive guard here.
Reznov working for a triangle but Moxley defends it easily.
Moxley has gone for a leg lock! Reznov slips out almost immediately though and dives into Moxley's guard.

That's three minutes gone in the round.
Reznov pressing down on his opponent's thigh, looking to pass guard. Moxley is keeping the position for now.
Reznov stands over his opponent and dives in with a flying punch! Moxley throws up his legs and catches Reznov in a triangle! Oh this looks tight! Reznov tries to escape but he's forced to tap! Wow, fantastic work there by Moxley! That came out of nowhere!
Ladies and gentlemen, after 3:38 of round 1, we have a winner by way of Submission (Triangle Choke). Georges Moxley!
|
|
|
|
|
|
|
|
|
|
|
|
|
|
|
|
|
|
|
|
|
|
|
| S |
C
A |
G |
S |
C
B |
G |
|
S |
C |
G |
|
energy
A | B |
|
hype
A | B |
|
pop
A | B |
|
mgr
A | B |
|
FIGHT
RATING
36% |
|
|
|
|
|
|
|
Undercard bout
|
Coming up we have a welterweight MMA rules bout between Vasil Petrov (ranked 2289 p4p, 303 weight class) and Dyami Yazzie (ranked 3473 p4p, 407 weight class). Both fighters look fresh as a daisy as they make their way towards the cage.
 |
|
 |
| 179 cm
19
170 lbs
2 - 1 - 0 |
|
190 cm
19
175 lbs
2 - 1 - 0 |
BJJ Blue Belt
Lethal high kicks
Cardio machine |
|
Good wrestler
Counter fighter
Solid chin |
|
| |
|
Ladies and gentlemen. This fight is 3 rounds, in the welterweight division.
Introducing the fighter to my left, fighting out of the red corner.
With a record of
2 - 1 - 0, fighting out of Los Angeles, Vasil Petrov!
And introducing the fighter to my right, fighting out of the blue corner.
With a record of
2 - 1 - 0, fighting out of Los Angeles, Dyami Yazzie!
The judges for this bout are Steve Smith, Elvis Blanc and Yves DeLean.
The bell rings for round one and we are underway!
Petrov throws a combination but comes up with nothing but fresh air.
Yazzie feints the counter takedown.
Petrov looks to score with a jab to the body but Yazzie is just out of range.
Yazzie attempts a leg kick but it's missed by a good margin.
Petrov throws a leg kick
and Yazzie counters with a takedown into side control! That could mean trouble for Petrov!
Petrov's coaches at Sanctuary have been working on his defensive grappling in preparation for this fight so let's see if he can get out of this tricky position.
Petrov gives up the full mount - oops, sloppy defensive grappling there!
Petrov is trying to escape the mount but Yazzie keeps good control and instead manages to take Petrov's back.
We've had a slow start to the round here - hopefully the action picks up.
Yazzie has his hand under the chin of his opponent looking for the choke. He's nearly got it! This one could be all over! But no, Petrov has freed his hand and lives to survive another
well, another couple of seconds at least!
Petrov prevents Yazzie from getting a body triangle.
Petrov wants to escape the position.
That's one minute gone in the round.
Yazzie looking for the choke from the back.
Petrov defending nicely against the rear naked choke attempt.
What can Petrov do to escape this position? He's going to have to figure it out pretty quick if he wants to stay in the fight!
Yazzie is staying calm and holding on to the back position, whilst working on a rear naked choke. Petrov is defending well though. Yazzie let's go of the attempt for now.
Petrov trying to control the hands but Yazzie breaks the grip.
That's two minutes gone in the round.
Yazzie has the hooks in. Petrov is trying to push off one leg but he has to do so cautiously to avoid being submitted.
You know, I was talking to some of our celebrities at ringside tonight and they were split right down the middle on who was going to win this fight.
Yazzie wants to control but Petrov is keeping busy.
Petrov trying to control but he's just got himself in more trouble.
Petrov is really stuck here.
The crowd hopeful of a finish here - Yazzie's supporters are on their feet, screaming for him to go for the rear naked choke.
Yazzie tightening his grip on Petrov, looking for the choke.
Yazzie has his opponent's back and is working for the choke.
That's three minutes gone in the round.
Petrov biding his time here by controlling the hands, looking to escape.
Yazzie just keeping the dominant position. He can't wait too long though, otherwise the referee will stand them back up.
Yazzie is persistently looking for the submission but Petrov is defending it well.
The fighters are pressed up against the cage, both looking to find a bit of space to work.
Yazzie is looking for a rear naked choke here but Petrov reverses the position brilliantly into Yazzie's guard!
That's four minutes gone in the round.
The fighters are starting to perspire pretty heavily.
Petrov trying to move into half guard but instead Yazzie has managed to sweep!
Yazzie looking to pass the guard.
Petrov not looking particularly offensive just at the moment.
Yazzie wants to pass the guard but Petrov is keeping the position.
The crowd thankful this round is nearly over.
Yazzie trying to control but Petrov is working from the bottom.
And thats the end of the round the fighters go back to their corners.
Dyami Yazzie dominated that round.
The referee calls time. The cornermen exit stage left and we're back to business.
Petrov stuns Yazzie with a nice body shot, before stepping back out of range.
Yazzie swings away with a leg kick that misses.
Good exchange - Petrov coming out on top.
Petrov motions for Yazzie to come forward. Petrov throws a leg kick but it misses it's target.
Petrov throws out a loose jab but Yazzie uses good head movement to avoid it.
We've had a slow start to the round here - hopefully the action picks up.
Like a baseball bat into the meat of his leg there - nice leg kick by Petrov.
Petrov pivots, looking for a leg kick but Yazzie is out of range and Petrov settles back down.
Yazzie is definitely looking for the counter takedowns here.
Petrov throws a jab to the body, straight down the pipe. Boom. That sent Yazzie stumbling backwards but he manages to regain his composure quickly.
That's one minute gone in the round.
Petrov throws a leg kick
and Yazzie counters with a shoot takedown. Petrov fights it but they end up in guard.
Yazzie wants to control from the top but Petrov keeps moving.
Petrov is trying to keep Yazzie in close.
Yazzie stands up and looks to throw the legs aside to pass to side control. Petrov swivels though and keeps the full guard.
The ref warns both fighters not to hold the cage as they work up against the meshing.
Petrov trying to keep a closed guard but Yazzie is proving a slippery customer.
That's two minutes gone in the round.
Yazzie stands up and looks to throw the legs aside to pass to side control. Petrov swivels though and keeps the full guard.
Yazzie drops back for a leg! It's a sloppy attempt though and Yazzie jumps back into guard quickly, to retain the dominant position.
Petrov trying to keep a closed guard but Yazzie is proving a slippery customer.

The referee has decided to stand the fighters back up, so we'll restart on the feet.
Yazzie throws a low kick but his opponent is out of range.
Petrov misses with a straight right.
Yazzie with the counter takedown but Petrov avoids it easily.
Petrov misses with a wild body shot.
That's three minutes gone in the round.
Yazzie throws a low kick but Petrov moves out of range easily.
Yazzie looks more muscular than last time we saw him. He must have been on the weights.
Yazzie takes a jab right on the nose. That must have hurt but he shrugs his shoulders and looks to return the favor.
Petrov swings for the body but Yazzie moves out of range.
Yazzie changes levels for a counter takedown but doesn't follow through with his attempt.
Petrov throws a lazy uppercut
so Yazzie counters with a double leg into guard. Good agility.
Petrov keeping full guard, as Yazzie tries to pass.
Petrov has a closed guard, preventing anything of note from happening. Perhaps he's looking to stall.
Yazzie has been the more effective fighter overall so far.
Yazzie stands up and looks to throw the legs aside to pass to side control. Petrov swivels though and keeps the full guard.
Yazzie wants to control from the top but Petrov keeps moving.
That's four minutes gone in the round.
Yazzie stands up and looks to throw the legs aside to pass to side control. Petrov swivels though and keeps the full guard.
Yazzie controlling from the guard. I say controlling but really, he's stalling.
Yazzie is looking to advance position but Petrov has hit a scissor sweep - now he's on top in mount!
Petrov pushing the pace here, looking to move to his opponents back and work for a finish.
The crowd thankful this round is nearly over.
Yazzie is looking to get to half guard.
And thats the end of the round the fighters go back to their corners.
That was a close second round but I would say that Vasil Petrov will probably get the nod.
That's the end of the interval. I'm sure that seemed a lot quicker than a minute for our two fighters! Back to the action. This is the final round!
Petrov misses with a wild body shot.
Yazzie keeping a good distance there, avoiding the body shot.
Yazzie feints the counter takedown.
Petrov throws a hook to the body but it doesn't connect.
Yazzie with the counter takedown but Petrov avoids it easily.
Petrov connects with a looping left hand that seems like it dazed Yazzie momentarily.
Petrov pushes Yazzie away with a front kick.
A jab from Petrov misses.
We've had a slow start to the round here - hopefully the action picks up.
Petrov is the aggressor but that punch slipped nicely by Yazzie.
Yazzie tries a counter takedown but it's more of a dummy move, and he uses it to push himself away.
Petrov fakes high and swings low for a body shot but Yazzie manages to avoid it.
Yazzie with the counter takedown but Petrov avoids it easily.
That's one minute gone in the round.
Petrov attempts a leg kick but it's missed by a good margin.
Petrov misses the jab.
Yazzie is definitely looking for the counter takedowns here.
Yazzie fakes a couple of low kicks, before throwing one on the third attempt. It connects and Petrov has to reset his feet before getting ready to engage.
Petrov lands a head shot.
Petrov throws a quick inside leg kick.
Petrov lands an overhand right.
It looks like Dyami Yazzie has been cut.
Petrov tried to score with a low kick but Yazzie checks it.
Vasil Petrov seems to be the more aggressive standup fighter in this bout.
Petrov's corner calls for a 1, 2 combination and Petrov duly obliges.
That's two minutes gone in the round.
Petrov pushing out the jab but it's not landing.
Yazzie feints the counter takedown.
Yazzie uses some good footwork to avoid the body shot by Petrov.
And Yazzie tries to counter it with a takedown but Petrov pushes his down on his head and steps out.
Petrov lands a lovely overhand right.
A chopping leg kick lands by Petrov.
This has been an exciting period of action!
Petrov thows a left - swing and a miss!
Petrov tries to score with a low kick but Yazzie moves his leg out of the way.
Yazzie slips a jab from Petrov.
And Yazzie tries to counter it with a takedown but Petrov pushes his down on his head and steps out.
Petrov fakes high and swings low for a body shot but Yazzie manages to avoid it.
Yazzie is definitely looking for the counter takedowns here.
That's three minutes gone in the round.
Petrov throws an overhand right that lands on Yazzie's shoulder, as Yazzie tries to avoid the shot.
Yazzie is definitely looking for the counter takedowns here.
Petrov misses with a double jab.
Yazzie throws a decent looking leg kick but it doesn't land clean.
Petrov throws a jab, cross combination which is slipped
and Yazzie counters with a single leg into guard. Petrov didn't expect that.
Yazzie forces his way into half guard.
Yazzie tries to pass to full mount but Petrov defends it.
Yazzie is looking for a kimura but Petrov is holding onto that half guard position, so it's hard for Yazzie to get the leverage.
That's four minutes gone in the round.
Yazzie is sneakily working for an arm triangle but Petrov sees it coming and defends easily.
Petrov is concentrating on defense, preventing Yazzie from advancing position.
Yazzie is trying to control the action in half guard but Petrov is working away on the bottom, looking perhaps to get back to full guard.
Yazzie is trying for a guillotine from the top but the pressure isn't in the right place so Petrov is just riding it out for now. Yazzie eventually gives up the hold.
Petrov trying to keep hold of his opponent's head but Yazzie manages to pass to mount!
Yazzie moves to the back.
And that's the end of the fight!
Vasil Petrov showed his dominance in that final round.
I think Petrov has won this one but let's see what the judges have to say. Over to the ring announcer for the scorecards.
Ladies and gentlemen, after 3 rounds of action, we go to the scorecards for a decision.
Judge Steve Smith scores the fight 29:28
Judge Elvis Blanc scores the fight 29:28
Judge Yves DeLean scores the fight 29:28
In favor of your winner, by unanimous decision... Vasil Petrov!
After the fight, Vasil Petrov was humble in paying tribute to his opponent but made it clear he wants to go on to bigger and better things. It seemed to go down well with the crowd who cheered him loudly.
|
|
|
|
|
|
|
|
|
|
|
|
|
|
|
|
|
|
|
|
|
|
|
| S |
C
A |
G |
S |
C
B |
G |
|
S |
C |
G |
|
energy
A | B |
|
hype
A | B |
|
pop
A | B |
|
mgr
A | B |
|
FIGHT
RATING
34% |
|
|
|
|
|
|
|
Undercard bout
|
Coming up we have a light heavyweight MMA rules bout between Robert Robertsson (ranked 2240 p4p, 286 weight class) and Bruce Vanorden (ranked 3720 p4p, 428 weight class). Both fighters look fresh as a daisy as they make their way towards the cage.
 |
|
 |
| 170 cm
19
220 lbs
3 - 1 - 0 |
|
190 cm
19
213 lbs
2 - 0 - 0 |
Good wrestling
Counter fighter
Cardio machine |
|
Decent wrestler
Solid Muay Thai
Determined |
|
| |
|
Ladies and gentlemen. This fight is 3 rounds, in the light heavyweight division.
Introducing the fighter to my left, fighting out of the red corner.
With a record of
3 - 1 - 0, fighting out of London, Robert Robertsson!
And introducing the fighter to my right, fighting out of the blue corner.
With a record of
2 - 0 - 0, fighting out of London, Bruce Vanorden!
The judges for this bout are Steve Smith, Elvis Blanc and Dillan Fox.
The bell rings for round one and we are underway!
Vanorden scores with a nice strike.
Vanorden scores with a jab to the jaw of his opponent.
It looks like Robert Robertsson has been cut.
Vanorden scores with the left hand. Robertsson knows he should have avoided that one.
Robertsson walks into a jab.
Vanorden lands a jab to Robertsson's midsection.
Robertsson drops his hands and takes a jab to the jaw for his troubles.
Robertsson clinches up with Vanorden and pushes him back against the cage.
Robertsson blocking some punches.
Vanorden swings wildly with an uppercut but Robertsson uses good head movement to avoid it.
Vanorden throws a head punch that misses.
That's one minute gone in the round.
A hook to the body from Vanorden.
Vanorden wants to break the clinch but can't.
Vanorden slows down the pace here.
Vanorden can't find room to land a body shot as Robertsson controls the action.
Vanorden's corner calls for him to break the clinch, which he does.
Vanorden misses with a jab, cross combination.
Vanorden is using his reach advantage to land shots from outside his opponent's range.
Robertsson shoots in for a takedown but Vanorden shows good takedown defense there and keeps this one on the feet.
Vanorden scores with a jab to the jaw of his opponent.
A jab from Vanorden does it's job there.
That's two minutes gone in the round.
Vanorden is pawing at Robertsson, trying to feel the distance before throwing out a cross that crashes into Robertsson's nose. Robertsson is badly hurt! Vanorden pounces, throwing wild strikes as both fighters end up on the ground! Robertsson tries desperately to hold on but Vanorden is relentless in his assault! As Robertsson receives an ever increasing number of unanswered strikes the referee pulls Vanorden away and this one is in the books!
Ladies and gentlemen, after 2:09 of round 1, we have a winner by way of TKO (Strikes). Bruce Vanorden!
A relieved looking Bruce Vanorden thanked the fans for their support and gave the usual line about them being amazing. They seemed to believe that he actually meant it.
|
|
|
|
|
|
|
|
|
|
|
|
|
|
|
|
|
|
|
|
|
|
|
| S |
C
A |
G |
S |
C
B |
G |
|
S |
C |
G |
|
energy
A | B |
|
hype
A | B |
|
pop
A | B |
|
mgr
A | B |
|
FIGHT
RATING
45% |
|
|
|
|
|
|
|
Undercard bout
|
Coming up we have a welterweight MMA rules bout between Slash Slingin (ranked 1452 p4p, 198 weight class) and Sean Dickinson (ranked 4002 p4p, 445 weight class). Slingin's ring entrance music is that housewives' favourite, Drop The World. Sean Dickinson will no doubt be trying to keep this one on the feet, where he has a distinct advantage.
 |
|
 |
| 173 cm
19
170 lbs
5 - 0 - 0 |
|
189 cm
19
170 lbs
2 - 1 - 0 |
Good takedowns
Basic striking
Granite chin |
|
BJJ Blue Belt
Excellent MT
Solid chin |
|
| |
|
Ladies and gentlemen. This fight is 3 rounds, in the welterweight division.
Introducing the fighter to my left, fighting out of the red corner.
With a record of
5 - 0 - 0, fighting out of Los Angeles, Slash Slingin!
And introducing the fighter to my right, fighting out of the blue corner.
With a record of
2 - 1 - 0, fighting out of St Petersburg, Sean Dickinson!
The judges for this bout are Gregory Folan, William Peck and Alec Ball.
The bell rings for round one and we are underway!
Slingin closes the distance and clinches.
Dickinson is trying to break the clinch but Slingin has him pressed against the cage.

Slingin turns his back and goes for a hip toss. It's a bit messy but it gets the job done and Slingin manages to end up in side control.
Dickinson tries to escape but Slingin is in control.
Slingin tries for an arm triangle. That looks pretty tight to me. Is this one over!?! Possibly, maybe, no Slingin has let go of the choke. Obviously it wasn't as tight as we thought!
Slingin controlling from side mount.
Dickinson is trying to stand back up. He's worked his way up against the cage but Slingin has just dragged him back down to the mat.
Dickinson felt the need to train up his defensive grappling in the buildup to the fight. Presumably he was expecting to be in a difficult position like this, so let's see if he can get out of it.

Dickinson bucks up and manages to escape back to his feet!
Slingin tries for a takedown but Dickinson circles away easily
and Dickinson counters with a good right hand that lands right on the jaw.
Dickinson gets taken down but at least he's managed to land in guard.
The crowd are loving this. Great action here.
Dickinson wants to stand and escape but Slingin is having none of it.
That's one minute gone in the round.
Slingin looking to control the position here, rather than advance.
Slingin throwing strikes but missing.
Slingin trying to control the position from guard on top but Dickinson is wriggling around, looking for whatever he can.
Slingin might be looking to lock onto one of his opponent's long limbs for a submission, whilst we're on the ground.
Dickinson wants to get back to his feet but Slingin is in a dominant position and won't allow it.
Slingin trying to control but Dickinson is working from the bottom.
Slingin working some ground and pound from guard but it's not doing any damage.
Dickinson wants to stand up but Slingin is controlling him.
Slingin wants to control from the top but Dickinson keeps moving.
The referee has stepped in and called for a break in the action. We'll restart on the feet.
Dickinson throws a body kick, spinning off balance
and Slingin counters with a takedown into side control! That could mean trouble for Dickinson!
That's two minutes gone in the round.
Dickinson takes an elbow right on the bridge of the nose and winces in pain.
Slingin tries for a kimura. Not really close to a finish though.
Slingin throwing shots but missing, from side control.
Slingin wants to work for a kimura but he's foiled early by Dickinson, who protects the arm well.
Slingin tries for a kimura. Not really close to a finish though.
Dickinson is trying to get back to his feet.
That's three minutes gone in the round.
Slingin wants to control but Dickinson is keeping him busy.
Slingin looking for an arm triangle but it's way too loose to do anything.
Slingin is looking to finish here, going for an Americana. Dickinson knows the correct defense though, so he's OK.
Slingin is trying to get an arm triangle but Dickinson is defending well.
Dickinson pushes Slingin away and creates a bit of space to escape. He's almost out here... but no, Slingin gets a good hold of his legs and remains firmly in side control.
Dickinson takes a nasty elbow to the side of the head.
Dickinson is trying to stand back up. He's worked his way up against the cage but Slingin has just dragged him back down to the mat.
Slingin cracks Dickinson with an elbow. That is naaassty.
Slingin has been looking to land a fair amount of strikes on the ground. He might be looking to soften his opponent up in order to work for a submission.
That's four minutes gone in the round.
Slingin working hard here to secure a kimura but he's not really in the right position for it.
Slingin throws a strike aimed at the side of Dickinson's head but Dickinson avoids it well.
Slingin working hard here to secure a kimura but he's not really in the right position for it.
Dickinson is trying to get back to his feet.
Dickinson dodges the ground and pound from Slingin.
Slingin thinks about going for a far side armbar but bails out and retains the dominant position instead.
Slingin tries for a kimura. Not really close to a finish though.
Dickinson is working hard to escape and get back to his feet. After a battle for position, Slingin asserts his dominance and retains side control.
And thats the end of the round the fighters go back to their corners.
Slash Slingin dominated that round.
That's time! Slingin's corner gives him a slap on the ass as he gets ready to fight.
Excellent takedown into side control there by Slingin.
Slingin wants to control but Dickinson is keeping him busy.
Dickinson wants to get back to his feet but Slingin drags him back down.
Slingin tries for a kimura but Dickinson is defending well.
Dickinson is working hard to escape and get back to his feet. After a battle for position, Slingin asserts his dominance and retains side control.
The ref warns both fighters not to hold the cage as they work up against the meshing.
We've had a slow start to the round here - hopefully the action picks up.
Slingin tries for a kimura. Not really close to a finish though.
Dickinson wants to escape from the position here - easier said than done!
That's one minute gone in the round.
Slingin scores with a couple of nice shots to the head there. The referee takes a look at Dickinson to see if he's OK.
Dickinson is working hard to escape and get back to his feet. After a battle for position, Slingin asserts his dominance and retains side control.
Slingin is really dominating this fight. Is there anything that Dickinson can do to turn this around?
Dickinson is not content to let Slingin control the position.
Dickinson is trying to stand back up. He's worked his way up against the cage but Slingin has just dragged him back down to the mat.
Slash Slingin overall seems to be getting the better of the ground position in the fight so far.
Dickinson is using up a lot of energy trying to get back to his feet. Perhaps he should improve his position first.
Slingin is trying to land an Americana. He has the arm isolated but Dickinson is keeping cool and he's avoided the danger for now.
Dickinson wants to get back to his feet but Slingin drags him back down.
That's two minutes gone in the round.
A few boos can be heard. I'm sure they will multiply if the fighters don't pick up the pace.
Slingin misses with a strike but at least he's keeping busy, looking to cause some damage - that will still help him when it comes to the judges scorecards.
Slingin throws a knee to the body but it doesn't do much damage.
Slingin is looking to take a break and control but Dickinson is keeping him honest, looking to work from the bottom.
Slingin tries for an arm triangle. That looks pretty tight to me. Is this one over!?! Possibly, maybe, no Slingin has let go of the choke. Obviously it wasn't as tight as we thought!
Dickinson is pushing Slingin's head away, looking to escape. Slingin manages to hold on to the position though.
Slingin landing a few strikes.
Slingin trying to control the action but Dickinson is working from the bottom.
Dickinson pushes Slingin away and creates a bit of space to escape. He's almost out here... but no, Slingin gets a good hold of his legs and remains firmly in side control.
That's three minutes gone in the round.
Slingin is looking for a kimura. He might have it! No, Dickinson has escaped the position, nice work there.
Dickinson is trying to get back to his feet.
Dickinson is not content to let Slingin control the position.
Slingin prevents Dickinson from escaping the position.
Dickinson is letting Slingin control him for a moment.
Dickinson wants to get back to his feet.
Slingin scores with a couple of short elbows.
Dickinson trying to remain calm as Slingin controls from the top position.
Slingin is looking to take a break and control but Dickinson is keeping him honest, looking to work from the bottom.
That's four minutes gone in the round.
Slingin tries for an arm triangle. That looks pretty tight to me. Is this one over!?! Possibly, maybe, no Slingin has let go of the choke. Obviously it wasn't as tight as we thought!
Slingin prevents Dickinson from escaping the position.
Slingin is looking to take a break and control but Dickinson is keeping him honest, looking to work from the bottom.
Boooooooooooooooooooo!!! God, this has been a terrible round. Come on you two, sort yourselves out!
Sloppy strikes there by Slingin.
Slingin prevents Dickinson from escaping the position.
And thats the end of the round the fighters go back to their corners.
Slash Slingin dominated that second round.
The referee calls time. The cornermen exit stage left and we're back to business. This is the final round!
Slingin is looking to take this fight into the clinch.
Dickinson throws a mid kick that lands with a slap.
Slingin clinches up with Dickinson and pushes him back against the cage.
Dickinson lands an elbow inside.
Dickinson tries to circle away but Slingin has him pinned against the cage.
Dickinson manages to break the clinch.
Dickinson sizes up Slingin with a pawing jab and scores with a straight right down the middle.
We've had a slow start to the round here - hopefully the action picks up.
The fight stays on the outside here - Slingin looks like he's thinking about clinching though.
Slingin tries to clinch there but Dickinson circles away.
That's one minute gone in the round.
Slingin walks into a straight right hand from Dickinson.
Dickinson gets off balance looking for a body kick
and Slingin counters with a nice double leg into side control. Dickinson won't be happy with that.
Dickinson is looking to work his way out of this bad position but Slingin is controlling him well.
Slingin is working for what looks like an arm triangle here. Dickinson is trying to escape and Slingin transitions quickly into an armbar! He's slapped it on tight and Dickinson is forced to tap! Nice work there by Slingin! Very nice indeed!
Ladies and gentlemen, after 1:35 of round 3, we have a winner by way of Submission (Armbar). Slash Slingin!
Slash Slingin decided to go for the less than humble approach in his post fight interview, telling everyone how he is going to conquer the world. The crowd seemed to like it when really that sort of approach could have gone either way.
|
|
|
|
|
|
|
|
|
|
|
|
|
|
|
|
|
|
|
|
|
|
|
| S |
C
A |
G |
S |
C
B |
G |
|
S |
C |
G |
|
energy
A | B |
|
hype
A | B |
|
pop
A | B |
|
mgr
A | B |
|
FIGHT
RATING
40% |
|
|
|
|
|
|
|
Co-main event
|
Coming up we have a bantamweight MMA rules bout between Ma Moru (ranked 1232 p4p, 68 weight class) and Gun Seok Bak (ranked 906 p4p, 48 weight class). Bak is bobbing his head along to his entrance song: Leader, Just Give Us Your Order!. On his way into the cage it seems that Ma Moru has been attacked by a crazed fan! It looks like it might have been the just bleed guy! Luckily Ma Moru seems to be OK! I thought that lunatic was in prison!?
 |
|
 |
| 163 cm
28
140 lbs
15 - 16 - 0 |
|
165 cm
27
140 lbs
12 - 4 - 0 |
Good wrestling
Excellent boxer
Granite chin |
|
Good wrestler
World class boxer
Granite chin |
|
| |
|
Ladies and gentlemen. This fight is 3 rounds, in the bantamweight division.
Introducing the fighter to my left, fighting out of the red corner.
With a record of
15 - 16 - 0, fighting out of Amsterdam, Ma Moru!
And introducing the fighter to my right, fighting out of the blue corner.
With a record of
12 - 4 - 0, fighting out of New York, Gun Seok Bak!
The judges for this bout are Trevor Gratis, Ian Loll and Elvis Blanc.
The bell rings for round one and we are underway!
Moru clinches up with Bak and pushes him back against the cage.
Bak is trying to stall.
Moru lands a nice shot to the body.
Bak avoiding damage as Moru throws knees to the body.
Bak tried to land a shot to the body but connects with Moru's elbow.
Moru makes some space for himself and lands an uppercut.
Moru definitely looks more muscular than last time we saw him fight.
Bak blocks a knee to the body. He'll have a nicely bruised forearm in the morning.
Kneeeeees! The crowd are calling for knees to the body. Moru obliges.
Moru lands a right hand that snaps the head of Bak backwards.
Bak tries to work over Moru's body with a swooping hook but it only glances the target.
Moru just leaning against Bak, taking a breather.
Moru misses with a hook from the clinch.
Moru misses with a knee to the head.
An uppercut on the inside fails to land for Moru.
We've had a slow start to the round here - hopefully the action picks up.
Bak is working Moru over against the cage.
Bak blocking some punches.
Moru connects with a nasty looking knee right to Bak's face.
Moru holding his opponent close, against the cage.
Bak blocks a punch to the side of the head.
That's one minute gone in the round.
A short left from Moru.
Bak misses with a hook to the ribs.
Bak landing knees to the body.
With the fighters clinched against the cage, Bak creates a bit of distance for himself and scores with a nice uppercut.
A right hand to the body from Bak.
Bak lands a right hand that snaps the head of Moru backwards.
Moru tries to land knees in the clinch but Bak avoids the damage to the body.
Bak blocks a body shot from Moru.
Moru working aggressively here.
An uppercut on the inside fails to land for Moru.
Moru with the Thai clinch. He's looking to land a big knee but he's not managed it this time.
Bak lands on the inside with an uppercut.
Moru tries a shoulder strike but it doesn't do any damage.
Bak misses with a punch to the body.
Bak creates a bit of distance and throws an elbow that only just misses.
Bak trying to land knees to the body.
Bak scores with a shot to the side of Moru's head.
Wooooo! Give it up for these two warriors! They are putting on a show!
Bak tries to stall but Moru uses the opportunity to gain a better position.
Bak blocking some punches.
Bak lands with a short head shot on the inside.
That's two minutes gone in the round.
Bak tries to land a shot to the body but it's blocked.
Bak's corner are urging him to control the action in the clinch for a moment, rather than mount any serious offense. I'm sure the crowd appreciate those instructions... not.
Moru throws a punch but it's blocked by Bak.
Moru lands with a left to the head.
Bak pushes off an throws an elbow but Moru leans to the side and avoids it. We're back to clinching against the cage.
Moru holding his opponent close, against the cage.
Moru fails to land with a short punch on the inside.
Bak tried to land a shot to the body but connects with Moru's elbow.
Bak doesn't land with the attempted body shot.
Moru misses with a knee to the head.
Moru lands on the inside with an uppercut.
Nice body punch from Bak - that landed with a thud.
Moru misses with a shot to the kidneys.
Moru lands a knee to the body.
Bak lands a shoulder strike that jolts his opponent's head backwards.
Bak lands a nice uppercut.
That's three minutes gone in the round.
Moru tries to land a knee to the head but misses.
Bak misses with the head strike.
Moru lands with a short shot to the head.
Bak prevents a body shot from Moru.
Moru tries to land a shot to the body but it's blocked.
Bak goes for a body shot but it's blocked.
Moru fails to land with a short punch on the inside.
Moru blocks a couple of punches on the inside.
Moru lands a hook that snaps the head of Bak backwards.
Moru prevents a body shot from Bak.
Moru trying to stall but Bak improves his position.
Good body shot from Bak.
Bak throws a vicious knee straight up the middle but Moru blocks it with crossed arms.
Moru manages to get underhooks and slows down the pace for a moment.
Moru throws a head punch that misses.
Bak's head jolts backwards as he takes an uppercut right on the button!
Moru tries to land a knee to the head but misses.
That's four minutes gone in the round.
The referee calls for Moru to work.
Bak misses with a punch on the inside.
Bak misses with a body punch.
Moru lands a shoulder strike that jolts his opponent's head backwards.
Moru throws a knee to the head but misses.
Moru pushes Bak back against the cage and unloads with a body punch.
Wooooo! Give it up for these two warriors! They are putting on a show!
Moru swings away with an uppercut that misses.
Moru lands a short shot on the inside that snaps the head of Bak backwards.
Moru scores with a shot to the side of Bak's head.
Moru looking to throw knees to the head but Bak is blocking nicely.
Moru throws a head punch that misses.
Bak lands a right hand that snaps the head of Moru backwards.
Bak slowing the pace effectively.
Moru comes over the top with an elbow. That landed flush.
Bak throws a blind hook that connects with the side of Morus head.
Bak has been looking to improve his clinch game in recent weeks. Moru seems to have the measure of him in the clinch so far, so let's see if Bak can turn it around.
Moru is looking to control Bak's arms but Bak gets an underhook and turns him. Now Moru has his back to the cage.
Bak goes for a body shot but it's blocked.
A quick uppercut on the inside from Bak.
And thats the end of the round the fighters go back to their corners.
Ma Moru dominated that round.
Well, the break between rounds is over. Let's get back to the scrappin!
Moru misses with a hook
enabling Bak to counter with a crisp jab.
Bak dips down and scores with a jab to the body.
Bak moves into the clinch.
Moru lands on the inside with an uppercut.
Moru misses with a knee to the head.
Bak's head jolts backwards as he takes an uppercut right on the button!
Moru taking a breather.
Moru misses with some punches.
Moru throws a blind hook that connects with the side of Baks head.
Moru tries to land a knee to the head but misses.
Bak managing to block the knees to the body from Moru.
Moru blocks a body shot from Bak.
Bak lands a left hand that snaps the head of Moru backwards.
Moru is really dominating this fight. Is there anything that Bak can do to turn this around?
Moru is looking to control Bak's arms but Bak gets an underhook and turns him. Now Moru has his back to the cage.
Moru unloads a knee to the mid-section. Bak lets out a prehistoric sounding urrrrgh.
The fans in attendance giving it up for the two fighters, who have really let it all hang out in the last minute or so!
Moru connects with a nasty looking knee right to Bak's face.
Bak blocks a body shot from Moru.
Bak tries to work over Moru's body with a swooping hook but it only glances the target.
Bak landing knees to the body. They look like they could hurt.
That's one minute gone in the round.
Moru managing to block the knees to the body from Bak.
An uppercut on the inside fails to land for Bak.
Moru throws a head punch that misses.
Ma Moru has scored more points in the clinch so far.
Moru tries a shoulder strike but it doesn't do any damage.
Moru has Bak pushed against the cage.
A short right from Bak on the inside.
A nice right hand lands inside from Moru.
Bak pushes Moru back against the cage and lands a hook to the side of the head.
Moru has a couple of punches blocked by Bak.
Nice body punch from Moru.
Bak working aggressively here.
Bak tries a body shot but Moru blocks it.
Moru is trying to slow down the pace in the clinch, to catch his breath.
Bak lands a left hand.
Moru can't find room to land a body shot as Bak controls the action.
A left hand lands to the body for Bak.
That's two minutes gone in the round.
Moru with the Thai clinch, lands a knee to the head.
Bak stays in close to his opponent and throws a right hand to the body.
Moru blocks a body shot from Bak.
The crowd are loving this. Great action here.
Bak tried to land a shot to the body but connects with Moru's elbow.
A head punch on the inside from Moru fails to land.
Bak blocks a body shot from Moru.
The pace slowing considerably in the clinch, as Bak takes a break from that fighting nonsense to think about the finer things in life.
Moru doesn't land with the attempted body shot.
Moru blocks a couple of punches on the inside.
Moru lands punches inside but they're not really causing much damage.
Moru is looking to break free of the clinch but Bak has double underhooks.
Bak misses the knee to the body. Nice hip positioning from Moru.
Bak slows down the pace here.
Bak trying to land knees to the body.
Moru misses with the head strike.
Moru misses with some punches.
That's three minutes gone in the round.
Bak working on landing some head shots here - that one got through nicely.
A shot in the inside from Moru.
The fighters are pressed against the cage, as the pace of the fight slows.
Bak creates a bit of distance and throws an elbow that only just misses.
Bak lands a hook to the side of the head.
Bak tries to throw a body punch but Moru avoids it by throwing Bak back against the cage.
A short left from Bak.
Bak stalling the fight.
Moru prevents a body shot from Bak.
Moru with the Thai clinch. He's looking to land a big knee but he's not managed it this time.
Bak blocking some punches.
A short uppercut from Moru.
A short right hand to the side of the head by Bak.
Moru tries to land a knee to the head but Bak blocks with his arms.
Bak throws a blind hook that connects with the side of Morus head.
This is a great period of action - very entertaining stuff!
Moru lands with a quick shot inside that doesn't really do much damage.
That's four minutes gone in the round.
Moru has a couple of punches blocked by Bak.
Bak stalling.
Moru lands a hook to the side of the head.
Moru misses with a hook to the ribs.
Moru makes some space for himself and lands an uppercut.
Bak makes some space for himself and lands an uppercut.
Moru tries a body shot but Bak blocks it.
Bak has Moru pushed against the cage.
A left hand lands to the body for Moru.
Bak misses with a hook to the ribs.
Bak misses with a punch to the body.
Moru misses with a short punch on the inside.
Moru lands a shoulder strike.
Moru missing with knees to the body.
Bak tries a body shot but Moru blocks it.
Bak lands a right hand that snaps the head of Moru backwards.
Moru putting his Muay Thai to good use. He has Bak in a tight clinch and is doing some damage with knees to the body.
Moru misses with a knee to the head.
And thats the end of the round the fighters go back to their corners.
That was a close second round but I would say that Ma Moru will probably get the nod.
Well, the break between rounds is over. Let's get back to the scrappin! This is the final round!
A low kick from Moru misses
and Moru takes a counter punch right on the button for his troubles.
Bak moves out of range of the strikes.
Moru gets tackled into the cage by Bak. Bak maintains the clinch.
Bak struggles to land a body shot inside as Moru controls his hands.
Moru trying to control the position but instead, Bak has worked for underhooks and has pushed Moru into the cage.
Bak pushes Moru back against the cage and unloads with a body punch.
Bak goes for a body shot but it's blocked.
Moru takes a shot to the head.
Bak tries to throw a body punch but Moru avoids it by throwing Bak back against the cage.
Moru misses with a short punch on the inside.
Moru displaying some good clinch control by pressing Bak up against the cage.
We've had a slow start to the round here - hopefully the action picks up.
Bak misses with a body punch.
Moru trying to stall but Bak improves his position.
Bak lands a short shot on the inside that snaps the head of Moru backwards.
A short left from Bak.
That's one minute gone in the round.
Moru prevents a body shot from Bak.
Bak goes for a body shot but it's blocked.
A real battle for position is taking place between these two warriors.
Bak gets an overhook and lands an elbow to the side of the head.
Moru tries a body shot but Bak blocks it.
Bak lands with a short punch from the clinch.
Bak lands a shot to the body.
Still in the clinch, Moru scores with a nice short uppercut.
Bak is working Moru over against the cage.
Bak leaning his opponent against the cage.
Moru blocks a knee to the body. He'll have a nicely bruised forearm in the morning.
Moru lands with a left to the head.
Moru swings wildly with an uppercut but Bak uses good head movement to avoid it.
Bak has Moru pressed against the cage.
Moru works on Bak's body with a couple of short punches.
That's two minutes gone in the round.
Moru swings away with an uppercut that misses.
Nice body punch from Bak.
Bak lands a body punch.
Both fighters working to control the clinch.
Bak lands a body punch - he's looking to wear down Moru.
Both fighters are breathing heavily.
Moru digs a right hand into Bak's ribs. Those have got to be taking their toll on Bak's gas tank.
Moru blocks a body shot from Bak.
The crowd are loving this. Great action here.
Bak blocks a punch to the side of the head.
Moru creates a bit of distance and throws an elbow that only just misses.
Bak lands a short shot on the inside that snaps the head of Moru backwards.
Nice body punch from Bak.
Bak gets through Moru's defenses to land a nice punch to the side of the head.
Moru scores with a shot to the side of Bak's head.
A nice left hand lands by Bak.
Bak misses the knee to the body. Nice hip positioning from Moru.
Moru fails to land with a short punch on the inside.
An uppercut on the inside fails to land for Moru.
Gun Seok Bak has stepped it up - he knows he needs a finish here!
Ma Moru is fighting for a decision here - he's started to take the cautious approach.
That's three minutes gone in the round.
Bak lands a shoulder strike.
A nice right hand lands inside from Bak.
Bak tries to throw a body punch but Moru avoids it by throwing Bak back against the cage.
Bak will no doubt start fighting again in a minute but for now he's just having a little rest, leaning Moru up against the cage.
Moru prevents a body shot from Bak.
Moru avoiding damage as Bak throws knees to the body.
Bak tries to land a shot to the body but it's blocked.
Bak blocks an uppercut.
A short right from Bak.
Bak tries to throw a body punch but Moru avoids it by throwing Bak back against the cage.
That's four minutes gone in the round.
A battle for position here, against the cage.
Bak can't find room to land a body shot as Moru controls the action.
The referee is keeping an eye on Bak - much more stalling and he will separate the fighters.
A head punch on the inside from Bak fails to land.
Bak scores with a nice hook to the head.
Bak scores with an uppercut up the middle.
Bak blocks a punch to the side of the head.
Bak will no doubt start fighting again in a minute but for now he's just having a little rest, leaning Moru up against the cage.
Bak misses with a punch to the body.
And that's the end of the fight!
Gun Seok Bak comfortably won the final round on my scorecard.
I think Moru has won this one but let's see what the judges have to say. Over to the ring announcer for the scorecards.
Ladies and gentlemen, after 3 rounds of action, we go to the scorecards for a decision.
Judge Trevor Gratis scores the fight 29:28
Judge Ian Loll scores the fight 29:28
Judge Elvis Blanc scores the fight 29:28
In favor of your winner, by unanimous decision... Ma Moru!
Ma Moru took to the microphone after his victory and thanked his sponsors, Ma Balls Is Hot Clothing for their support in the buildup to the fight.
|
|
|
|
|
|
|
|
|
|
|
|
|
|
|
|
|
|
|
|
|
|
|
| S |
C
A |
G |
S |
C
B |
G |
|
S |
C |
G |
|
energy
A | B |
|
hype
A | B |
|
pop
A | B |
|
mgr
A | B |
|
FIGHT
RATING
64% |
|
|
|
|
|
|
|
Main event
|
Coming up we have a light heavyweight MMA rules bout between Robert McKenna (ranked 1056 p4p, 148 weight class) and Frog Ribbit (ranked 458 p4p, 64 weight class). McKenna kept the crowd waiting but all that was forgotten when his ring entrance music started. The incomparable musical genius that is Freedom. Robert McKenna has the better chin. Will he look to stand and bang today?
 |
|
 |
| 194 cm
28
212 lbs
14 - 12 - 0 |
|
187 cm
27
208 lbs
9 - 1 - 0 |
Great wrestler
World class boxer
Cardio machine |
|
Good wrestler
World class boxer
Good gas tank |
|
| |
|
Ladies and gentlemen. This fight is 3 rounds, in the light heavyweight division.
Introducing the fighter to my left, fighting out of the red corner.
With a record of
14 - 12 - 0, fighting out of New York, Robert McKenna!
And introducing the fighter to my right, fighting out of the blue corner.
With a record of
9 - 1 - 0, fighting out of Los Angeles, Frog Ribbit!
The judges for this bout are Trevor Gratis, Dillan Fox and Yves DeLean.
The bell rings for round one and we are underway!
McKenna closes the distance and clinches.
McKenna throws a head punch that misses.
McKenna gets the body lock takedown. After a quick scramble, Ribbit regains guard.
McKenna tries to free his leg and advance position but Ribbit is retaining full guard.
Ribbit trying to keep a closed guard but McKenna is proving a slippery customer.
McKenna trying to pass the guard but can't manage it just yet.
McKenna trying to control the position from guard on top but Ribbit is wriggling around, looking for whatever he can.
McKenna is pushing down on Ribbit's leg trying to pass to half guard. Ribbit is fighting to maintain full guard but McKenna has managed to sneak the leg through.
McKenna is figuring out what he wants to do next.
Ribbit avoiding damage under a succession of punches from McKenna.
McKenna has been looking to land a fair amount of strikes on the ground. He might be looking to soften his opponent up in order to work for a submission.
We've had a slow start to the round here - hopefully the action picks up.
Ribbit is looking to escape.
Ribbit keeping hold of McKenna's head, controlling as best he can.
That's one minute gone in the round.
McKenna is thwarting Ribbit's attempts to control the position.
The two fighters exchange a few words. I couldn't hear what they were saying but maybe it's more fun if you make it up yourself. McKenna connects with a nice short shot to Ribbit's temple.
Ribbit is holding on to half guard well.
McKenna wants to take a breather but Ribbit is having none of it.
McKenna tries to pass the half guard into mount. Ribbit knows what he's doing though and prevents the attempt.
Ribbit trying to hold on to McKenna's head to control him but McKenna postures up.
Ribbit wants to improve his position but McKenna is controlling well.
McKenna wants to pass the guard but Ribbit is defending well.
That's two minutes gone in the round.
The crowd are starting to boo a lack of action.
McKenna wants to control but Ribbit is keeping him busy.
The referee decides to stand the fighters back up.
Robert McKenna seems to be the more aggressive standup fighter in this bout.
McKenna looks to clinch
and Ribbit counters with a crisp hook to the side of the head.
It looks like Robert McKenna has been cut.
McKenna clinches with his opponent.
McKenna is trying to work for a single leg takedown but Ribbit pulls him back up using the underhooks.
McKenna has hold of a leg and is looking for a trip takedown. Ribbit avoids it nicely though and we remain in the clinch.
McKenna misses with a shot to the kidneys.

McKenna pushes off and circles away, back to the middle of the mat.
McKenna shoots in for a takedown but doesn't get it.
Ribbit throws a counter combo.
That's three failed takedown attempts in the round for Robert McKenna. That's going to take a lot out of him.
McKenna fails with the takedown
and Ribbit cracks him with a counter punch right on the button.
McKenna is trying hard to land a takedown here. Ribbit sprawls well and keeps this one on the feet.
That's three minutes gone in the round.
McKenna fails with a rather predictable takedown attempt.
Ribbit tries a quick counter leg kick but McKenna is wise to it.
McKenna shoots in looking for a takedown but Ribbit manages to keep the fight standing, pushing McKenna's face into the canvas for good measure before circling away.
Ribbit has worked on his takedown defense in the runup to this fight and it is paying off so far.
McKenna looking for a takedown here - he's got it.
Ribbit looking to control.
McKenna stops Ribbit from standing up.
Ribbit is working the butterfly guard. He manages to land a nice scissor sweep and is now in half guard on the top. Nice move.
McKenna trying to control from the bottom.
Ribbit not doing much here.
That's four minutes gone in the round.
Ribbit seems very keen to just sit and control from half guard but McKenna does not like that idea so much and is remaining active off his back.
McKenna is trying to get back to full guard.
McKenna has no desire to be mounted, so is trying to control. Ribbit is working away from the top position though.
The crowd thankful this round is nearly over.
Ribbit is figuring out what he wants to do next.
And thats the end of the round the fighters go back to their corners.
That was a close round but I would say that Robert McKenna will probably get the nod.
The cut man is working on Robert McKenna's cut.
The minute break is over - no more time for sponges and pep talks - back to the action!
Ribbit swats away the attempt to clinch by McKenna.
Ribbit was about to counter that last move with a leg kick but changes his mind.
McKenna tries to shoot in for a takedown. He's got hold of a leg but Ribbit swivels and escapes.
Ribbit tries to counter with a clinch but McKenna shakes him off and moves away.
McKenna fails to land the takedown.
McKenna shoots in for a takedown. He's persisting with it as Ribbit sprawls well. Ribbit wins this battle and keeps the fight standing. McKenna gets slowly back to his feet.
And an attempted straight right on the counter from Ribbit! But no joy.
That's three failed takedown attempts in the round for Robert McKenna. That's going to take a lot out of him.
We've had a slow start to the round here - hopefully the action picks up.
McKenna shoots in looking for a takedown but Ribbit manages to keep the fight standing, pushing McKenna's face into the canvas for good measure before circling away.
Ribbit is trying to avoid his opponent's strikes and get into the clinch.
No luck for McKenna with that takedown attempt.
That's one minute gone in the round.
McKenna tries to clinch up against the cage, rushing in to close the distance. Ribbit manages to break the clinch and circles back to the middle of the mat.
McKenna moves into the clinch.
Ribbit tries a shoulder strike but it doesn't do any damage.
McKenna throws an elbow but it misses.
McKenna avoiding damage as Ribbit throws knees to the body.
Ribbit is fighting off a takedown attempt but McKenna is just too persistent for him and manages to trip Ribbit to the mat. Ribbit regains guard as soon as the fighters hit the mat.
Ribbit looking to sweep here. No luck so far.
McKenna works a leg free and moves into half guard.
McKenna moves nicely into side control.
Ribbit gives up the full mount - oops, sloppy defensive grappling there!
McKenna tries to control but Ribbit wriggling away.
McKenna throwing sloppy strikes, which aren't doing any damage.
That's two minutes gone in the round.
Ribbit is not a happy chappy
he wants out of there.
McKenna looking to ground and pound but Ribbit is blocking nicely.
McKenna looking to control but Ribbit is working nicely, looking to advance position himself.
Ribbit really doesn't want to stay on the ground with McKenna. If he can't get it back to his feet, it's only a matter of time before he'll be tapping out.
Ribbit keeping his composure momentarily, calmly looking to get back to half guard.
This is a great period of action - very entertaining stuff!
McKenna lands with some vicious ground and pound - can Ribbit hang on?
McKenna has control of Ribbit's right arm, working for a kimura. It's a bit of a token attempt though and Ribbit regains control of the situation pretty easily.
McKenna controlling from mount.
That's three minutes gone in the round.
McKenna throwing strikes here but Ribbit is writhing around nicely and avoiding any serious damage.
Ribbit is writhing around trying to get back to his feet.
Ribbit is trying desperately to improve position.
The ref warns both fighters not to hold the cage as they work up against the meshing.
Ribbit is writhing around trying to get back to his feet.
McKenna tries to control but Ribbit wriggling away.
Ribbit is looking to get to half guard.
Ribbit in a bad spot here, taking shots to the head.
McKenna tucks in and makes sure he doesn't lose the dominant position.
That's four minutes gone in the round.
McKenna looking to ground and pound his opponent to a finish here.
McKenna putting on the heat here with some good ground and pound!
McKenna tries to control but Ribbit wriggling away.
Robert McKenna overall seems to be getting the better of the ground position in the fight so far.
Ribbit's corner are shouting for him to stand up but that's bad cornering - how is he meant to stand up when he's mounted? He should be looking to improve his position on the ground before trying to stand back up.
McKenna tries to control but Ribbit wriggling away.
Ribbit is looking to improve his position but McKenna isn't that keen on the idea.
McKenna trying to control but Ribbit is having none of it.
The crowd thankful this round is nearly over.
Ribbit is trying to escape the mount.
And thats the end of the round the fighters go back to their corners.
Robert McKenna dominated that second round.
The cut man is working on Robert McKenna's cut.
That's time! Back to the action! The crowd applaud as we get ready to start the final round!
Ribbit keeps the fight standing with a nice sprawl.
McKenna sets himself, and Ribbit steps forward looking for the clinch! McKenna avoids it this time.
McKenna shoots and misses
and Ribbit counters with an outside leg kick.
McKenna misses with a takedown
and Ribbit counters with a two punch combo.
That's three failed takedown attempts in the round for Robert McKenna. That's going to take a lot out of him.
McKenna shoots in and gets a takedown into Ribbit's guard.
Ribbit pushes McKenna off and gets back to his feet.
Wooooo! Give it up for these two warriors! They are putting on a show!
McKenna misses with a takedown attempt
and Ribbit counters into the clinch. Nicely done.
Ribbit lands an uppercut.
Ribbit tries to land a knee to the head but misses.
Ribbit is looking to score with knees to the body. Maybe he'll change it up and go body then head. McKenna is defending well for now.
Ribbit misses with a body punch.
That's one minute gone in the round.
Ribbit scores with a shoulder strike.
An uppercut to the body lands inside from Ribbit.
McKenna blocks a knee to the body. He'll have a nicely bruised forearm in the morning.
Ribbit throws a blind hook that connects with the side of McKennas head.
Ribbit looking to slow down the pace here.
McKenna goes for a takedown in the clinch but Ribbit prevents it.
McKenna avoiding damage as Ribbit throws knees to the body.
McKenna has hold of a leg and is looking for a trip takedown. Ribbit avoids it nicely though and we remain in the clinch.
McKenna drops down looking for an ankle pick but Ribbit pulls his leg out and moves away.
McKenna will have to do better than that with his takedown attempts.
Ribbit lets it all go there with a big combo counter but none of the punches connected.
Robert McKenna is looking to throw some combinations by the looks of things.
Both fighters are breathing heavily.
McKenna with a poor takedown
and Ribbit counters with a lovely shot to the body.
McKenna shoots in for a takedown. "Ole!" shouts Ribbit as he jumps to the side.
Frog Ribbit has stepped it up - he knows he needs a finish here!
Frog Ribbit is looking to keep the fight on the feet at all costs.
That's two minutes gone in the round.
McKenna misses with a takedown attempt
and Ribbit counters with a stiff right hand.
McKenna fails with the takedown.
As McKenna backs off Ribbit throws a huge counter combo but McKenna manages to avoid it all.
McKenna tries to grapple but his opponent circles
and Ribbit counters with a crisp one two that drops McKenna! Ribbit thinks about following him to the mat for a moment but instead steps back and waves McKenna to his feet! McKenna is in big trouble!
McKenna is rocked!
We've seen a great period of action over the last minute or so - credit to both fighters for going all out!
McKenna with a lazy takedown attempt
and Ribbit counters with a right, left combo that wobbles McKenna badly! Ribbit follows up with a massive right hook, straight to the bridge of the nose that knocks McKenna out cold! Oh wow, what a finish! Very reminiscent of Koscheck vs Yoshida as Ribbit finished him against the cage.
Ladies and gentlemen, after 2:45 of round 3, we have a winner by way of KO (Punches). Frog Ribbit!
A very excited looking Frog Ribbit made sure he remembered to thank all the fans both in the arena and on the internet. He said all the coolest people spend all day on MMA websites, which got a big reaction.
|
|
|
|
|
|
|
|
|
|
|
|
|
|
|
|
|
|
|
|
|
|
|
| S |
C
A |
G |
S |
C
B |
G |
|
S |
C |
G |
|
energy
A | B |
|
hype
A | B |
|
pop
A | B |
|
mgr
A | B |
|
FIGHT
RATING
47% |
|
|
|
|
|
|
|
|
|
|
