 |
OFK 28 - Wanker Vs Kelly PBP Commentary |
Undercard bout
|
Billy Booker really struggled with his weight cut for this fight. After coming in at 151.7, he had two hours to cut the additional weight. He was unable to do so and as a result, his fight with Ludvig Linguine was cancelled. |
|
|
|
Undercard bout
|
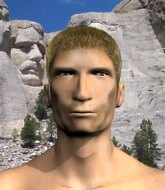
Coming up we have a welterweight MMA rules bout between Test Two (ranked 4287 p4p, 4217 weight class) and Anton Krasov (ranked 533 p4p, 531 weight class). The key to victory for Test Two has got to be keeping the fight on the feet.
 |
|
 |
| 170 cm
26
176
1 - 4 - 0 |
|
176 cm
26
178
5 - 2 - 0 |
BJJ White Belt
Lethal high kicks
KO power |
|
BJJ Blue Belt
Counter fighter
Determined |
|
| |
|
Ladies and gentlemen. This fight is 3 rounds, in the welterweight division.
Introducing the fighter to my left, fighting out of the red corner.
With a record of 1 - 4 - 0, fighting out of London, Test Two!
And introducing the fighter to my right, fighting out of the blue corner.
With a record of 5 - 2 - 0, fighting out of New York, Anton Krasov!
The judges for this bout are Patrick Alders, Nard Betker and Daniel Blasius.

The bell rings for round one and we are underway!
The bell rings for round one and we are underway!
Two works over Krasov's head and body with a nice combination.

Two tries to keep at a distance but Krasov has taken the fight into the clinch.

Krasov is fighting off a takedown attempt but Two is just too persistent for him and manages to trip Krasov to the mat. Krasov regains guard as soon as the fighters hit the mat.

Krasov manages to wriggle out and sneak his way back up to his feet, so the fighters are now clinched up against the cage.
Two lands a takedown into guard.
Krasov has butterfly guard. He's looking to stand up here. He pushes Two off him and springs to his feet nicely. The crowd applauds.
Wooooo! Give it up for these two warriors! They are putting on a show!
Krasov shoots in for a takedown but Two shows good takedown defense.
Krasov moves into the clinch.
Krasov goes for a body shot but it's blocked.
Krasov tries to land a shot to the body but it's blocked.
Krasov dictating the pace here, as the fighters clinch against the cage.

That's one minute gone in the round.
Krasov doesn't land with the attempted body shot.
Krasov tried to land a shot to the body but connects with Two's elbow.
Krasov stalling.
Krasov doesn't land with the attempted body shot.

Krasov's corner calls for him to break the clinch, which he does.
Krasov doesn't manage to clinch there - Two circles away.
A left and a right from Two both land. Nice combination.
Krasov gets a clinch.
Krasov scores with an uppercut up the middle.
Krasov misses with a hook to the ribs.

That's two minutes gone in the round.
Krasov lands a body punch.
Krasov just leaning against Two, taking a breather.
Two works for the underhooks and manages to get a trip takedown into guard.
Krasov has his feet on Two's hips. He pushes off and gets to his feet. Nice work.
Wooooo! Give it up for these two warriors! They are putting on a show!
Two shapes like he's going to throw a leg kick but settles back down.
Krasov showing good head movement there, avoiding the strikes from Two.
Krasov tries a head kick but it misses.
As Krasov looks to move away, Two throws a big counter combo but Krasov just gets out of the way.
Two keeps the fight on the outside.
Two could do with losing a few pounds - he looks very soft around the mid section, to put it politely.
Krasov rushes Two and pushes him back against the cage in a clinch.

That's three minutes gone in the round.
Krasov is fighting off a takedown attempt but Two is just too persistent for him and manages to trip Krasov to the mat. Krasov regains guard as soon as the fighters hit the mat.
Krasov uses the cage to get back to his feet.
Krasov dives in and grabs Two's left leg, looking for a takedown. Two pushes down on Krasov's head and hops out.
Krasov misses with a takedown
and Two counters with a three punch combination, finished off with a leg kick. Nice work.
Test Two has stuffed three takedown attempts in the round now. That's going to take a lot out of Anton Krasov.
Krasov moves into range and clinches up with Two.
Our sources have told us that Two has been working on his elbows in the gym.
A short right from Krasov.
The fans in attendance giving it up for the two fighters, who have really let it all hang out in the last minute or so!
Krasov presses Two against the cage and delivers a mid-strength body shot.
Krasov makes some space for himself and lands an uppercut.
Krasov displaying some good clinch control by pressing Two up against the cage.

That's four minutes gone in the round.
Krasov effectively controlling the action here.
Two gets double underhooks and manages to take the fight to the ground.
Krasov has his feet on Two's hips. He pushes off and gets to his feet. Nice work.
Test Two is looking to keep the fight on the feet at all costs.
Two throws a good cross that connects.
The crowd applaud the fighters' efforts here as the round comes to an end.
Two lands a high kick!
Krasov closes the distance and clinches.
And that�s the end of the round � the fighters go back to their corners.
Anton Krasov dominated that round.
That's time! Back to the action!

Two misses with a jab and misses with a cross straight after too.
Two lands a kick to the ribs of his opponent. Nice work there - in and out in a flash.
Two scores with a nice looking left hook and follows it up with an uppercut!
Two throws a hard body shot but it just misses.
Two throws a sloppy head kick and Krasov moves out of range easily.
Two lands a nice leg kick that just misses Krasov's sensitive parts.
Left hook, right uppercut from Two.
We've had a slow start to the round here - hopefully the action picks up.
Krasov has taken the fight to the clinch.
Krasov misses with a hook to the ribs.
Two turns his back and goes for a hip toss. It's a bit messy but it gets the job done and Two manages to end up in side control.
Krasov throws Two to one side and escapes!
That's one minute gone in the round.
Krasov shoots in for a takedown - he's clinched up with Two but Two pushes him off and we're back to square one.
Krasov tries for a takedown but Two circles away easily
and Two counters with a three punch combination, finished off with a leg kick. Nice work.
Krasov fakes high and shoots in for a takedown but Two avoids it really well and circles away.
Test Two has stuffed three takedown attempts in the round now. That's going to take a lot out of Anton Krasov.
Krasov darts in and clinches Two up against the cage.
That's two minutes gone in the round.
Two has picked Krasov up - he's going for a ride! Two dumps his opponent to the mat with a thud and settles into half guard.
Krasov manages to create a bit of space in order to work his way back to his feet. Two keeps hold of his opponent and drives him back against the cage.
This has been an exciting period of action!
Krasov stalling here - the referee won't stand for too much of that.
Krasov's corner calls for him to break the clinch, which he does.
Two will need to tighten up his combinations if he doesn't want to gas himself out, swinging at thin air.
Two lands a nice leg kick that just misses Krasov's sensitive parts.
That's three minutes gone in the round.
Two thumps Krasov with a low kick.
Krasov clinches with his opponent.
Krasov pressing his opponent against the cage.
Two gets a trip takedown into half guard.
Krasov pushes Two off and gets back to his feet.
Two tries a head kick but it misses.
Anton Krasov seems to be the more aggressive standup fighter in this bout.
Two misses with a head kick.
A head kick misses from Two.
Krasov swings away with a counter right hand but no contact made.
That's four minutes gone in the round.
Two throws a series of punches but Krasov avoids them all with ease.
This has been an exciting period of action!
Krasov closes the distance and clinches.
Krasov has Two pushed against the cage.
Krasov tries a body shot but Two blocks it.
Krasov effectively controlling the action here.
Krasov tried to land a shot to the body but connects with Two's elbow.
Krasov misses with a punch to the body.
Krasov tries to work over Two's body with a swooping hook but it only glances the target.
Krasov can't find room to land a body shot as Two controls the action.
And that�s the end of the round � the fighters go back to their corners.
That was a close second round but I would say that Test Two will probably get the nod.
The fighters' corners scream their final instructions, as the referee calls time. Here we go, back to the action! So, we enter the final round. Let's see if either fighter can bring us a finish, or whether we're going to the judges scorecards.

Krasov has Two up against the cage in a clinch.
Nice body punch from Krasov - that landed with a thud.
Krasov is stalling here. The referee will be looking to step in if he doesn't pick up the pace.
Two letting Krasov take a breather here.
A bit of stalling here from Krasov.
We've had a slow start to the round here - hopefully the action picks up.
Krasov tried to land a shot to the body but connects with Two's elbow.
Krasov misses with a body punch.
Krasov misses with a punch to the body.
That's one minute gone in the round.
Krasov doesn't land with the attempted body shot.
Two has double underhooks and is working for a body lock takedown. He's got it. The fighters land in half guard but Krasov regains guard immediately.
Krasov kicks Two off and gets to his feet.
Nice takedown defense from Two. No joy for Krasov on that attempt.
Krasov shoots for a double leg takedown but Two sprawls well. He's pushed Krasov's face into the mat and manages to get back to his feet relatively easily.
Two scores with a nice looking left hook and follows it up with an uppercut!
Krasov throws a sloppy head kick and Two moves out of range easily.
This has been an exciting period of action!
Krasov is trying hard to land a takedown here. Two sprawls well and keeps this one on the feet.
Test Two has stuffed three takedown attempts in the round now. That's going to take a lot out of Anton Krasov.
Two slaps away a takedown attempt from Krasov, before circling back to the center of the mat.
The fighters are starting to perspire pretty heavily.
That's two minutes gone in the round.
Krasov closes the distance and clinches.
Two gets double underhooks and manages to take the fight to the ground.
Krasov pushes Two off and scrambles back to his feet.
Two tries a switch kick but it misses it's target.
Krasov fakes with an overhand right and moves in to clinch with Two, pushing him back against the cage.
Two lands a takedown into guard.
Krasov pushes Two off and gets back to his feet.
That's three minutes gone in the round.
Krasov forces Two back against the cage and clinches.
Krasov pressing his opponent against the cage.
Krasov has been the more effective fighter overall so far.
Two has picked Krasov up - he's going for a ride! Two dumps his opponent to the mat with a thud and settles into half guard.
Krasov kicks Two off and gets back to his feet.
Two throws a series of punches but Krasov moves out of range.
That's four minutes gone in the round.
Krasov clinches up with Two and pushes him back against the cage.
The crowd are loving this. Great action here.
Krasov working some nice short punches in the clinch.
Krasov will no doubt start fighting again in a minute but for now he's just having a little rest, leaning Two up against the cage.
The pace really dropping off here, momentarily.
Two has moved round to his opponent's back and is looking for a suplex! Oh snap! He's tossed Krasov clear over his head and slammed him to the mat!
Krasov is looking to stand back up. He's having to work hard to escape but eventually he manages it.
And that's the end of the fight!
Anton Krasov comfortably won the final round on my scorecard.
I think Krasov has won this one but let's see whether the judges agree with me. Over to the ring announcer for the scorecards.
Ladies and gentlemen, after 3 rounds of action, we go to the scorecards for a decision.
Judge Patrick Alders scores the fight 27:30
Judge Nard Betker scores the fight 28:29
Judge Daniel Blasius scores the fight 27:30
In favor of your winner, by unanimous decision... Anton Krasov!
|
|
|
|
|
|
|
|
|
|
|
|
|
|
|
|
|
|
|
|
|
|
|
| S |
C
A |
G |
S |
C
B |
G |
|
S |
C |
G |
|
energy
A | B |
|
hype
A | B |
|
pop
A | B |
|
mgr
A | B |
|
FIGHT
RATING
69% |
|
|
|
|
|
|
|
Undercard bout
|
Patricia Videira had a terrible time trying to make weight. After initially coming in at 175.9, he had two hours to make the official fight weight. Stepping on the scales for a second time, he still failed to make the required weight and after much deliberation, his fight with Phil Quincy was cancelled. |
|
|
|
Undercard bout
|
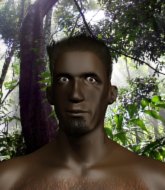
Coming up we have a welterweight MMA rules bout between Don Barnes (ranked 2242 p4p, 6677 weight class) and Jack Falcon (ranked 327 p4p, 643 weight class). Jack Falcon told me before the fight that he's been watching a lot of DVDs so let's see if that helps him in this one! I can't wait to find out!
 |
|
 |
| 180 cm
20
176
3 - 1 - 0 |
|
174 cm
25
180
4 - 8 - 0 |
BJJ Blue Belt
Basic striking
Very quick |
|
BJJ Blue Belt
Decent boxing
Heavy handed |
|
| |
|
Ladies and gentlemen. This fight is 3 rounds, in the welterweight division.
Introducing the fighter to my left, fighting out of the red corner.
With a record of 3 - 1 - 0, fighting out of Hilo, Don Barnes!
And introducing the fighter to my right, fighting out of the blue corner.
With a record of 4 - 8 - 0, fighting out of Amsterdam, Jack Falcon!
The judges for this bout are Paulsen Ambrosius, Radbod Blank and Aafke Stam.
The bell rings for round one and we are underway!
The bell rings for round one and we are underway!
Falcon slips in close and lands a nice hook before moving back out of range.
We've been hearing reports that Barnes has been drilling takedowns in recent sessions so let's see if that has an impact on the result of this fight.
Falcon misses with a takedown attempt. He shot from a bit too far out.
Falcon lands a leg kick. The shin dug right into the meat of the thigh.
Falcon swings and misses with a hook to the body.
Barnes throws a right and a left that Falcon avoids nicely.
Barnes misses with a double jab.
Falcon takes one on the chin but keeps coming.
Excellent takedown into side control there by Barnes.
Falcon tries to improve position but can't.
We've seen a great period of action over the last minute or so - credit to both fighters for going all out!
Barnes throws an elbow but Falcon slips to the side and avoids it well.
Barnes is trying to ground and pound but Falcon uses the momentary lack of control by Barnes to regain half guard.
Barnes thows a huge punch but Falcon dodges it nicely.
That's one minute gone in the round.
Barnes misses with a head shot. Falcon uses the momentum to regain guard.
Barnes postures up.
Barnes postures up to throw the ground and pound strikes but they don't connect.
Falcon utilising some decent striking defenses from the guard, preventing the ground and pound.
Barnes looking to sit in guard and control but Falcon gets the butterfly guard and sweeps. He's now in the guard on the top.


Barnes looking for a guillotine here but Falcon defends easily.
Falcon lands a couple of elbows.
That's two minutes gone in the round.
Barnes manages to sweep nicely, so he's now on top. Falcon manages to get himself to full guard.

The fighters are pressed up against the cage, both looking to find a bit of space to work.
Barnes controls the pace of the fight for a moment.
Barnes looking to sit in guard and control but Falcon gets the butterfly guard and sweeps. He's now in the guard on the top.
Falcon wants to stand but Barnes has a closed guard, so he can't escape.
There's a bit of a scramble here and now Barnes is on top in guard.
Falcon not looking particularly offensive just at the moment.
Falcon is looking to get back to his feet but can't, whilst Barnes is controlling him.
Falcon is trying to control the position but Barnes postures up.
That's three minutes gone in the round.
Barnes with a nice head shot there.
The fighters are starting to perspire pretty heavily.
Barnes loading up with the ground and pound but he's missing more than he's landing in this flurry.
Barnes looking to sit in guard and control but Falcon gets the butterfly guard and sweeps. He's now in the guard on the top.
Falcon would like to get this fight back to the feet but can't get free from the closed guard.
Falcon passes easily into side control. Nice work.
Barnes is trying to improve his position.
Barnes manages to get back to half guard.
Barnes moves his hips nicely and gets into full guard.
That's four minutes gone in the round.
Barnes looking to sweep here. No luck so far.
Falcon wants to control from the top but Barnes keeps moving.
Barnes looking for submissions from the bottom here. Moving his hips around, possibly looking for an armbar.
Falcon looking to sit in guard and control but Barnes gets the butterfly guard and sweeps. He's now in the guard on the top.
Falcon keeping moving, preventing Barnes from controlling successfully.
Barnes throws a big right hand that misses.

Falcon had isolated an arm as going for a kimura. Barnes defends it easily.
Falcon working a defensive guard here.
And that�s the end of the round � the fighters go back to their corners.
That was a close round but I would say that Don Barnes will probably get the nod.
That's time! Barnes's corner gives him a slap on the ass as he gets ready to fight.
Barnes misses with a two punch combination.
Falcon gets caught napping as Barnes dives in and scores a takedown. Falcon manages to retain guard.
Barnes trying to control but Falcon is working from the bottom.
Falcon is trying to keep Barnes in close.
Barnes content to strike from guard, landing some decent shots.
We've had a slow start to the round here - hopefully the action picks up.
Barnes wants to pass the guard but Falcon is keeping the position.
Falcon preventing the ground and pound from doing any damage.
Barnes throwing shots from guard but he's hitting more mat than opponent.
Barnes landing some decent shots from guard.
That's one minute gone in the round.
Falcon keeping moving, preventing Barnes from controlling successfully.
Barnes working in close now, lands a nice elbow to the side of Falcon's head.
Barnes cracks Falcon with a solid left hand.
Falcon keeping moving, preventing Barnes from controlling successfully.
Falcon is working from a closed guard but he's struggling to control his opponent.
Barnes throwing strikes but missing.
Barnes working in close now, lands a nice elbow to the side of Falcon's head.
That's two minutes gone in the round.
Barnes is fighting to break Falcon's control of his arms but Falcon is doing a good job of controlling the position at the moment.
Barnes throwing strikes but missing.
Barnes throwing shots from guard but he's hitting more mat than opponent.
Barnes working some ground and pound from guard but it's not doing any damage.
Barnes trying to land body shots but he keeps hitting the mat.
Barnes in full guard, throwing the ground and pound. No damage this time.
Falcon avoiding any damage from the ground and pound.
Barnes connects with a couple of short punches.
Falcon avoiding any damage from the ground and pound.
Barnes with a flurry of punches that miss.
Falcon working a defensive guard here.
That's three minutes gone in the round.
Barnes wants to control from the top but Falcon keeps moving.

The referee decides to stand the fighters back up.
Falcon throws a series of strikes that have Barnes backpedaling.
Falcon lands with a two punch combination before moving back out of range.
Barnes is really dominating this fight. Is there anything that Falcon can do to turn this around?
Barnes scores with a decent looking hook.
Falcon misses with a body kick.
Falcon lands with a cross to side of his opponent's head.
Jack Falcon seems to be getting the better of the standup.
Falcon gets cracked with a nice right hand there by Barnes.
Barnes uses some good footwork to avoid the body shot by Falcon.
Falcon throws a right hand that Barnes ducks under and follows up with a left that Barnes also avoids with ease.
Some wild striking there from Falcon.
This has been an exciting period of action!
Falcon uses good head movement to avoid the hook from Barnes.
That's four minutes gone in the round.
Left hook, right uppercut from Barnes.
A slow jab from Falcon misses its intended target.
Barnes jabs Falcon to the body, keeping him at a distance.
Falcon throws a lazy uppercut
and Barnes counters with a driving takedown into guard. Nice work there by Barnes.
Barnes missing there with some ground and pound from the guard.
Barnes trying to land body shots but he keeps hitting the mat.
Barnes stands over his opponent and dives in with a flying punch! Falcon throws up his legs and catches Barnes in a triangle! Oh this looks tight! Barnes tries to escape but he's forced to tap! Wow, fantastic work there by Falcon! That came out of nowhere!
Ladies and gentlemen, after 4:46 of round 2, we have a winner by way of Submission (Triangle Choke). Jack Falcon!
Jack Falcon thanked the fans post fight for their support.
|
|
|
|
|
|
|
|
|
|
|
|
|
|
|
|
|
|
|
|
|
|
|
| S |
C
A |
G |
S |
C
B |
G |
|
S |
C |
G |
|
energy
A | B |
|
hype
A | B |
|
pop
A | B |
|
mgr
A | B |
|
FIGHT
RATING
47% |
|
|
|
|
|
|
|
Undercard bout
|
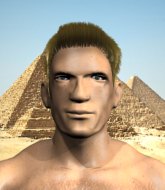
Coming up we have a light heavyweight MMA rules bout between Illegal Immigrant (ranked 1922 p4p, 3334 weight class) and Arnor Sigurdsson (ranked 264 p4p, 435 weight class). Immigrant comes to the cage accompanied by Immigrant Song. Both these guys have solid standup skills and neither is particularly fantastic on the ground, so let's hope for a nice standup war!
 |
|
 |
| 184 cm
30
205
12 - 5 - 0 |
|
192 cm
23
211
3 - 2 - 0 |
BJJ White Belt
Excellent MT
Cardio machine |
|
Decent wrestler
World class MT
Granite chin |
|
| |
|
Ladies and gentlemen. This fight is 3 rounds, in the light heavyweight division.
Introducing the fighter to my left, fighting out of the red corner.
With a record of 12 - 5 - 0, fighting out of New York, Illegal Immigrant!
And introducing the fighter to my right, fighting out of the blue corner.
With a record of 3 - 2 - 0, fighting out of New York, Arnor Sigurdsson!
The judges for this bout are Albert Achterberg, Radbod Blank and Daniel Blasius.
The bell rings for round one and we are underway!
The bell rings for round one and we are underway!
Immigrant fakes high and swings low for a body shot but Sigurdsson manages to avoid it.
Immigrant takes a jab on the nose. He smiles like he loves it and keeps coming.
Immigrant throws a jab but it's blocked by Sigurdsson.
Sigurdsson scores with a jab to the jaw.
Sigurdsson bobbing and weaving, closes the distance and lands a hook to the side of Immigrant's head.
Immigrant lands a head shot.
 It looks like Arnor Sigurdsson has been cut. It looks like Arnor Sigurdsson has been cut.
Immigrant takes a solid shot to the body. That one hurt him but he's trying not to show it.
Immigrant throws the left hand but Sigurdsson avoids the punch easily.
Sigurdsson uses good footwork to get in and out and land a nice right hand before Immigrant has time to react.
 Immigrant is rocked! Immigrant is rocked!
Sigurdsson sees an opening and throws a straight punch right through Immigrant's defenses. It connects perfectly with Immigrant's jaw and knocks him out cold! Wow - that's a contender for knockout of the year - absolutely brutal!
Ladies and gentlemen, after 0:36 of round 1, we have a winner by way of KO (Punch). Arnor Sigurdsson!
|
|
|
|
|
|
|
|
|
|
|
|
|
|
|
|
|
|
|
|
|
|
|
| S |
C
A |
G |
S |
C
B |
G |
|
S |
C |
G |
|
energy
A | B |
|
hype
A | B |
|
pop
A | B |
|
mgr
A | B |
|
FIGHT
RATING
100% |
|
|
|
|
|
|
|
Undercard bout
|
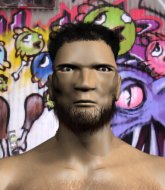
Coming up we have a welterweight MMA rules bout between Danny Raggazza (ranked 3233 p4p, 6686 weight class) and Chicken Destroyer (ranked 446 p4p, 645 weight class). Chicken Destroyer has the eye of the tiger tonight.
 |
|
 |
| 175 cm
22
165
3 - 3 - 0 |
|
170 cm
30
167
16 - 16 - 0 |
Good wrestling
Solid boxing
Cardio machine |
|
Excellent grappler
Excellent MT
Good gas tank |
|
| |
|
Ladies and gentlemen. This fight is 3 rounds, in the welterweight division.
Introducing the fighter to my left, fighting out of the red corner.
With a record of 3 - 3 - 0, fighting out of Tokyo, Danny Raggazza!
And introducing the fighter to my right, fighting out of the blue corner.
With a record of 16 - 16 - 0, fighting out of St Petersburg, Chicken Destroyer!
The judges for this bout are Wagner Zegers, Aafke Stam and Paul Aken.
The bell rings for round one and we are underway!
The bell rings for round one and we are underway!

Destroyer shoots in for a takedown and gets it.
Raggazza regains full guard. Nicely done.
Destroyer trying to control the position from guard on top but Raggazza is wriggling around, looking for whatever he can.
Raggazza looking to sweep here. No luck so far.
Raggazza throwing his legs up looking for a triangle.
Raggazza trying to punch from his back but it's not doing any damage.
Raggazza looking to hit a scissor sweep but Destroyer is one step ahead there.
Raggazza keeping moving, preventing Destroyer from controlling successfully.
We've had a slow start to the round here - hopefully the action picks up.
Destroyer is intent on slowing down the pace of the fight, simply looking to control.
Raggazza working a defensive guard here.
Raggazza wants to improve his position but instead Destroyer has moved into half guard.
That's one minute gone in the round.
Raggazza is looking to regain full guard. Not this time though.
Raggazza actively working from the bottom here.
Raggazza is defending against the submission attempts here by Destroyer.
Destroyer is working hard to pass the guard. He's done it - he's now in full mount! Trouble for Raggazza!
Raggazza regains half guard.
Raggazza moves his hips nicely and gets into full guard.
Raggazza trying to control the position.
My spies in The Factory inform me that Destroyer has been getting involved in the gym's BJJ sparring sessions. Let's see whether that pays dividends!
That's two minutes gone in the round.
Raggazza wants to sweep but no luck.
Raggazza is looking for a guillotine. You can't force these things though and Destroyer defends well.
Raggazza keeping moving, preventing Destroyer from controlling successfully.
Destroyer trying to pass the guard but can't manage it just yet.
Raggazza is working an open guard here, looking to improve his position. No doubt that will leave him open to counters but at least he's being more offensive.
Destroyer sneaks a leg through and gets to half guard. That was like a knife through butter how easily he passed Raggazza's guard.
Raggazza is looking to improve his position.
Raggazza is looking to control Destroyer's leg but it's slowly edging free. Can Raggazza avoid being mounted?
Raggazza regains full guard. Nicely done.
Destroyer wanted to stand there but Raggazza had control of the position.
That's three minutes gone in the round.
Raggazza looking to hit a scissor sweep but Destroyer is one step ahead there.
Raggazza has an omoplata and is looking to use it perhaps as a submission or perhaps to transition. Destroyer is in a bit of discomfort here, but he's managed to free himself and has dived into side control! That didn't work out too well for Raggazza.
Destroyer trying to control the position but Raggazza is working away.
Raggazza throws a couple of strikes even though he's not really in a good position to do so.
Raggazza looks to move to half guard but instead Destroyer has passed into mount! Damn!
The fighters are pressed up against the cage, both looking to find a bit of space to work.
Destroyer controlling his opponent.
Raggazza is wriggling around trying to escape.
That's four minutes gone in the round.
Raggazza sneaks a leg under to get to half guard.
Raggazza gets back to full guard.
Destroyer lands a couple of digs.
The ref warns both fighters not to hold the cage as they work up against the meshing.
Raggazza wants to improve his position but instead Destroyer has moved into half guard.
Raggazza trying to control from the bottom.
Destroyer seems very keen to just sit and control from half guard but Raggazza does not like that idea so much and is remaining active off his back.
The fighters are battling for position here. Raggazza manages to regain full guard. Nice work.
The crowd thankful this round is nearly over.
Raggazza is throwing his legs up, looking for submissions. Destroyer is aware though and is defending well.
Raggazza looking for a sweep. Not yet Raggazza, not yet.
Destroyer pressing down on his opponent's thigh, looking to pass guard. Raggazza is keeping the position for now.
Destroyer got a little sloppy there for a moment and Raggazza has worked his way into a loose triangle - can he finish it?! No, Destroyer has managed to get both his arms back between Raggazza's legs - danger averted.
And that�s the end of the round � the fighters go back to their corners.
Chicken Destroyer dominated that round.
That's the end of the interval. I'm sure that seemed a lot quicker than a minute for our two fighters! Back to the action.
Nice sprawl there from Destroyer as Raggazza shoots in.
Raggazza misses with a body punch
and Destroyer counters with a nice jab to the body that keeps Raggazza thinking.
Raggazza takes a swing at Destroyer's ribcage but misses.
And an attempted straight right on the counter from Destroyer! But no joy.
Destroyer uses good head movement to avoid the hook from Raggazza.
Destroyer uses some good footwork to avoid the body shot by Raggazza.
Danny Raggazza seems to be the more aggressive standup fighter in this bout.
Raggazza shoots in for a takedown. "Ole!" shouts Destroyer as he jumps to the side.
A really sloppy takedown attempt there from Raggazza.
Destroyer wants to counter with a clinch but Raggazza pushes him away.
That's three failed takedown attempts in the round for Danny Raggazza. That's going to take a lot out of him.
Destroyer looks shocked there as he takes a right hand to the temple.
Destroyer has been the more effective fighter overall so far.
We've had a slow start to the round here - hopefully the action picks up.
Destroyer goes for a double leg but Raggazza avoids the attempt and the two fighters end up clinched against the cage as Raggazza continues to drive forward.
Raggazza throws a right hand that misses
and Destroyer counters with a lovely shot to the body.
Raggazza has a takedown stuffed.
That's one minute gone in the round.
Raggazza throws a body punch but Destroyer moves out of range.
Destroyer looked like he wanted to counter with a punch but didn't throw it.
Raggazza lands a straight punch to the body, keeping Destroyer at a distance.
Raggazza slaps away a takedown attempt from Destroyer, before circling back to the center of the mat.
Raggazza will have to do better than that with his takedown attempts.
Raggazza looks to score with a jab to the body but Destroyer is just out of range.
Raggazza just misses with a punch to the body.
Destroyer jabs Raggazza to the body, keeping him at a distance.
Raggazza misses with a wild body shot.
Raggazza looks to have improved his striking defense since last time we saw him fight.
Raggazza throws a loose over hand right and dives in with a double leg takedown. Destroyer tries to sprawl but it's too late and the fighters hit the mat. Raggazza is in Destroyer's guard.
Destroyer is trying to stand up but he's not managed so far.
Raggazza landing with the ground and pound.
That's two minutes gone in the round.
Destroyer is trying to control the position from the bottom.
Raggazza with a flurry of punches that miss.
Destroyer looking for a sweep. Not yet Destroyer, not yet.
Destroyer preventing the ground and pound from doing any damage.
Destroyer looking to hit a scissor sweep but Raggazza is one step ahead there.
Destroyer escapes his hips to the side and looks to be working for an armbar. Raggazza gives him a little smile and shakes his head. No chance.
Destroyer keeping full guard, as Raggazza tries to pass.
Destroyer preventing the ground and pound from doing any damage.
That's three minutes gone in the round.
Raggazza trying to land body shots but he keeps hitting the mat.
Raggazza trying to control but Destroyer is working from the bottom.
Raggazza in full guard, throwing the ground and pound. No damage this time.
Destroyer wants to stand up but Raggazza is controlling him.
Destroyer is doing well to control the posture of his opponent and prevent any damage.
Raggazza has to be careful here, sitting in the guard of a superior BJJ player.
Destroyer striking off his back but it's not causing Raggazza any problems.
The referee wants the fighters to be more active or he's going to reset them on the feet.
Destroyer is trying to control the position but Raggazza postures up.
The referee decides to stand the fighters back up.
Raggazza throws a series of punches but Destroyer avoids them all with ease.
A nice side step and Destroyer releases a counter shot to the body, but it doesn't find it's home.
Raggazza misses with a two punch combination.
Destroyer is clearly trying to counter these attacks from Raggazza with a body shot.
Raggazza fakes low and throws an overhand right that catches Destroyer on the side of the head.
Raggazza rushes forward with a series of wild hooks but Destroyer moves out of range and avoids them all easily.
Destroyer slips under a jab.
Destroyer swings away with a counter right hand but no contact made.
That's four minutes gone in the round.
Raggazza throws a predictable looking body shot
and Destroyer counters with a right hand to the body.
Raggazza misses with a wild body shot.
Raggazza sets himself, and Destroyer steps forward looking for the clinch! Raggazza avoids it this time.
Raggazza throws an ugly left hook that misses
and Destroyer counters with a right hand to the body.
Both fighters are absolutely exhausted here.
Destroyer takes a shot to the nose. Hopefully that hasn't broken it.
Destroyer defending well as Raggazza loads up on a big left hand.
Raggazza is looking for a takedown here. He's shot in and has managed to get it, finishing up in Destroyer's half guard.
Destroyer kicks off Raggazza and gets to his feet.
We've seen a great period of action over the last minute or so - credit to both fighters for going all out!
Destroyer loads up on a big right hand but Raggazza slips the punch.
Raggazza drops down looking for a counter takedown but Destroyer sprawls and moves away.
Raggazza scores with a punch to the head.
Raggazza rushes in with a sloppy looking punch
and Destroyer counters with a stiff right hand.
Raggazza looks to land a right hand but Destroyer moved out of range.
Destroyer takes a jab on the nose there. A little bit of blood seems to be coming out. Hopefully that won't affect his breathing.
Destroyer swings for the body but Raggazza moves out of range.
And that�s the end of the round � the fighters go back to their corners.
That was a close second round but I would say that Danny Raggazza will probably get the nod.
Well, the break between rounds is over. Let's get back to the scrappin! And we move into the final round!
Raggazza changes levels and scores with a jab to the body.
Raggazza takes one to the side of the head.
Destroyer avoids the body shot from Raggazza.
Destroyer was about to counter that last move with a leg kick but changes his mind.
Destroyer avoids a lazy jab quite easily.
Destroyer doesn't fully commit to the body shot counter.
Destroyer uses some good footwork to avoid the body shot by Raggazza.
Raggazza swings for the body but Destroyer moves out of range.
A looping hook to the body misses from Destroyer. Raggazza does a little dance to reset his feet.
Raggazza attempts a counter takedown but Destroyer avoids it well and moves away.
Raggazza swings and misses with a hook to the body.
Destroyer now looks to counter with a shot at the body.
Raggazza misses with a body shot. Nice footwork from Destroyer.
Destroyer throws a big counter head kick but Raggazza avoids it with no problem.
Danny Raggazza is winning the standup battle so far.
We've had a slow start to the round here - hopefully the action picks up.
Raggazza shoots in and bounces Destroyer off the cage to secure the takedown into guard.
Destroyer is trying to keep Raggazza in close.
Chicken Destroyer has got the better of the ground game so far.
Raggazza throws a strike but Destroyer rolls with it and manages to sweep. Now he's in guard on top.
That's one minute gone in the round.
Raggazza trying to punch from his back but it's not doing any damage.
Destroyer stopping the sweep attempt from Raggazza.
Raggazza is working hard here to advance position.
Raggazza is active off his back here, looking for submissions.
Both fighters are breathing heavily.
Destroyer engaging in some classic timewasting tactics.
Raggazza is working the butterfly guard. He manages to land a nice scissor sweep and is now in half guard on the top. Nice move.
Destroyer is looking to improve his position.
Raggazza is keeping good posture, landing some ground and pound.
Destroyer trying to hold on to Raggazza's head to control him but Raggazza postures up.
Raggazza throws a big elbow that misses, also allowing Destroyer to regain full guard.
That's two minutes gone in the round.
Raggazza loading up with the ground and pound but he's missing more than he's landing in this flurry.
Destroyer utilising some decent striking defenses from the guard, preventing the ground and pound.
Raggazza looking to sit in guard and control but Destroyer gets the butterfly guard and sweeps. He's now in the guard on the top.
Destroyer connects with a couple of short punches.
Destroyer sitting in guard, not really doing much.
Raggazza lands a couple of decent looking body shots there.
Raggazza tries to land a sweep but no joy.
Destroyer is in close to Raggazza's body, working some short punches and elbows.
Destroyer is just sitting in guard, looking to avoid any submissions.
Raggazza looking for a sweep. Not yet Raggazza, not yet.
Destroyer trying to control the position from guard on top but Raggazza is wriggling around, looking for whatever he can.
That's three minutes gone in the round.
Destroyer stopping the sweep attempt from Raggazza.
Destroyer wants to control from the top but Raggazza keeps moving.
Destroyer connects with a couple of short punches.
Raggazza keeping moving, preventing Destroyer from controlling successfully.
Destroyer forces his way into half guard.
Destroyer controlling the pace.
Destroyer prevents Raggazza from improving his position.
Raggazza missing with punches from the bottom.
Raggazza trying to hold on to Destroyer's head to control him but Destroyer postures up.
That's four minutes gone in the round.
The crowd are starting to boo a lack of action.
Destroyer controlling the pace.
Destroyer trying to control from half guard but Raggazza is working away.
Destroyer sitting and controlling from the half guard.
Raggazza wants to get back to full guard.
Destroyer is nestled in close to Raggazza, controlling him well. He's worked in a nice elbow to the side of the head as well, for good measure.
Raggazza is trying to get back to full guard.
Raggazza actively working from the bottom here.
The crowd thankful this round is nearly over.
Raggazza gets full guard.
Destroyer slows down the pace of the fight, as he sits in guard.
And that's the end of the fight!
I would just about give that final round to Chicken Destroyer.
I think Destroyer has won this one but let's see whether the judges agree with me. Over to the ring announcer for the scorecards.
Ladies and gentlemen, after 3 rounds of action, we go to the scorecards for a decision.
Judge Wagner Zegers scores the fight 28:29
Judge Aafke Stam scores the fight 29:29
Judge Paul Aken scores the fight 29:29
The fight is ruled a majority draw!
|
|
|
|
|
|
|
|
|
|
|
|
|
|
|
|
|
|
|
|
|
|
|
| S |
C
A |
G |
S |
C
B |
G |
|
S |
C |
G |
|
energy
A | B |
|
hype
A | B |
|
pop
A | B |
|
mgr
A | B |
|
FIGHT
RATING
39% |
|
|
|
|
|
|
|
Undercard bout
|
Coming up we have a featherweight MMA rules bout between Gene Steve Duterte (ranked 2249 p4p, 4651 weight class) and Samuel Little (ranked 251 p4p, 418 weight class). Over to our ring announcer for the fighter introductions!
 |
|
 |
| 165 cm
23
140
7 - 4 - 0 |
|
171 cm
25
140
6 - 9 - 0 |
Good wrestling
World class boxer
Granite chin |
|
BJJ Purple Belt
World class MT
Knockout power |
|
| |
|
Ladies and gentlemen. This fight is 3 rounds, in the featherweight division.
Introducing the fighter to my left, fighting out of the red corner.
With a record of 7 - 4 - 0, fighting out of Amsterdam, Gene Steve Duterte!
And introducing the fighter to my right, fighting out of the blue corner.
With a record of 6 - 9 - 0, fighting out of Tokyo, Samuel Little!
The judges for this bout are Paul Aken, Paulsen Ambrosius and Albert Achterberg.
The bell rings for round one and we are underway!
The bell rings for round one and we are underway!
Little throws a big shot that misses.
Duterte ducks under a wild hook from Little.
Duterte shoots in from a long way out. He's driving through with the takedown attempt and he eventually gets it, landing in Little's guard.
Little is looking to stand back up... there's a bit of a scramble and Duterte dives into side control.
Little is trying to improve his position.
Little trying to control but Duterte flips him over like a cheap hooker and has his back!
Duterte has the hooks in. Little is trying to push off one leg but he has to do so cautiously to avoid being submitted.
We've had a slow start to the round here - hopefully the action picks up.
Duterte is remaining active here, looking for the choke. The more discerning members of the crowd will appreciate his efforts.
Little is displaying good submission defense - not really looking in danger of submitting to the rear naked choke at the moment. That could change in an instant of course if Duterte gets his way!
The ref warns both fighters not to hold the cage as they work up against the meshing.
That's one minute gone in the round.
Duterte is staying calm and holding on to the back position, whilst working on a rear naked choke. Little is defending well though. Duterte let's go of the attempt for now.
Little defends a rear naked choke attempt by controlling one of Duterte's arms.
Little trying to control but he's just got himself in more trouble.
Little defending nicely against the rear naked choke attempt.
Little preventing the rear naked choke attempt from Duterte.
That's two minutes gone in the round.
The crowd are getting on the fighters' backs, as the pace has dropped off in the last minute or so.
Good control from Duterte.
Duterte is not going to allow Little to sit and survive in this position.
Little rolls, trying to escape but Duterte keeps control of the position.
Duterte has his hand under the chin of his opponent looking for the choke. He's nearly got it! This one could be all over! But no, Little has freed his hand and lives to survive another� well, another couple of seconds at least!
Duterte is working hard for the rear naked choke here.
That's three minutes gone in the round.
Little can't escape the position.
Little defending nicely against the rear naked choke attempt.
Little trying to control but not successfully.
Little wants to escape the position.
The fighters are pressed up against the cage, both looking to find a bit of space to work.
Duterte is working really hard to secure the rear naked choke. Little defends successfully for a significant amount of time. Both fighters are looking very determined.
That's four minutes gone in the round.
A lull in the action here being met with boos from the crowd.
Duterte looking for the choke but no joy.
Little trying to control but not successfully.
Little is being controlled on the ground here - he must escape this position otherwise surely the end is near.
Boooooooooooooooooooo!!! God, this has been a terrible round. Come on you two, sort yourselves out!
And that�s the end of the round � the fighters go back to their corners.
Gene Steve Duterte dominated that round.
The corners get their ten second warning. Both fighters stand from their stools and stare eachother down, ready to get back to the action.
Little with a jab.
Samuel Little has stepped it up - he knows he needs a finish here!
Duterte connects with a body shot that sends Little's belly button to the back.
Little attempts a leg kick but it's missed by a good margin.
An inside leg kick from Little misses.
A counter left hand to the body from Duterte misses its target.
A looping hook to the body misses from Little. Duterte does a little dance to reset his feet.
Duterte shoots in for a takedown and gets it. Let's see what he's got on the mat.
Duterte with a flurry of punches that miss.
Little looking for subs off his back but Duterte has passed one foot through into half guard.
We've had a slow start to the round here - hopefully the action picks up.
Little is defending against the submission attempts here by Duterte.
That's one minute gone in the round.
Duterte seems content to maintain position for now, rather than mounting any offense.
Duterte missing with the ground and pound from half guard.
Little has no desire to be mounted, so is trying to control. Duterte is working away from the top position though.
Duterte scoring with strikes to the body and head.
Duterte wants to take a breather but Little is having none of it.
That's two minutes gone in the round.
The crowd are showing their displeasure at the lack of action as loud boos ring out around the arena.
Duterte slows the pace down in half guard.
Little moves his hips nicely and gets into full guard.
Duterte tries to free his leg and advance position but Little is retaining full guard.
Duterte is holding a leg here, probably looking for an ankle lock - he drops back and goes for it! Little is in trouble! Is it all over??? No! Little has escaped and now he's on top!
Duterte had isolated an arm as going for a kimura. Little defends it easily.
Duterte is controlling Little's posture.
That's three minutes gone in the round.

Little decides he's had enough of playing guard and decides to stand. Come on Duterte, up you get!
Little swings widly with a right hand
and Duterte counters with a one-two to the body.
Duterte looking to score a takedown here. Little is defending well but Duterte drives through and ends up in Little's guard.
Little is trying to control the position but Duterte postures up.
Little has a butterfly guard looking to sweep but Duterte has passed into side control.
Duterte has knee on belly and now moves to full mount! Trouble for Little!
Little squirming around on the bottom, looking to escape.
Duterte working for a submission but Little is keeping him at bay.
That's four minutes gone in the round.
Duterte tries to stand up but he's trapped just for the moment.
Duterte content just to control the position here.
Duterte jumps to side control looking for an arm triangle but Little manages to avoid the submission attempt.
Little wants to control but Duterte postures up.
The crowd thankful this round is nearly over.
Little seems a little lost for a moment, as Duterte dominates the positioning.
And that�s the end of the round � the fighters go back to their corners.
Gene Steve Duterte dominated that second round.
OK. That's time! The bell goes and we're back to the action. This is the final round!
Little connects with the punch.
Little swings and misses with a hook to the body.
Duterte closes the distance and gets a trip takedown into side control. Little quickly recovers to half guard.
Little won't allow Duterte to pass to mount.
Little makes his way to full guard. A much better position for Little.
A big thud reverberates around the arena there as Duterte accidentally thumps the mat. Hopefully he's not broken his hand.
Little has a loose triangle. He'll be looking to tighten that up but Duterte can see exactly what he's planning and manages to posture up and free himself.
We've had a slow start to the round here - hopefully the action picks up.
Little looking for submissions from the bottom but instead Duterte passes into half guard.
Duterte throwing shots but Little is blocking nicely.
That's one minute gone in the round.
Little keeping control of the leg, stopping his opponent passing to mount.
Duterte controlling the action here.
Duterte is trying a forearm choke� I don't think that's going to do much at this level of the game.
Duterte seems content to maintain position for now, rather than mounting any offense.
Gene Steve Duterte is fighting for a decision here - he's started to take the cautious approach.
That's two minutes gone in the round.
The crowd are showing their displeasure at the lack of action as loud boos ring out around the arena.
Duterte is thwarting Little's attempts to control the position.
Neither fighter is being very active at the moment, with Duterte in particular looking to stall.
Duterte trying to pass the guard but Little defending well.
We may be looking at a referee standup if the pace doesn't pick up soon.
Duterte prevents Little from improving his position.
The referee has stepped in and called for a break in the action. We'll restart on the feet.
That's three minutes gone in the round.
Duterte scores a trip takedown into side control. Nice.
The referee tells the fighters to keep busy.
Duterte tries for a kimura. Not really close to a finish though.
Little tries to get back to half guard but can't.
Little struggling a bit here.
That's four minutes gone in the round.
Duterte controls the position from side control.
Duterte wants to work for a kimura but he's foiled early by Little, who protects the arm well.
Little is not content to let Duterte control the position.
Boooooooooooooooooooo!!! God, this has been a terrible round. Come on you two, sort yourselves out!
Duterte tries for a kimura. Not really close to a finish though.
And that's the end of the fight!
Gene Steve Duterte showed his dominance in that final round.
Well I reckon that's a shut out for Duterte, winning every round. Will the judges agree? They are the ones who matter, even if they are often depressingly incompetent. Over to the ring announcer for the scorecards.
Ladies and gentlemen, after 3 rounds of action, we go to the scorecards for a decision.
Judge Paul Aken scores the fight 30:27
Judge Paulsen Ambrosius scores the fight 30:27
Judge Albert Achterberg scores the fight 30:27
In favor of your winner, by unanimous decision... Gene Steve Duterte!
A very excited looking Gene Steve Duterte rambled incoherently for about 5 minutes post fight about how awesome he is. It was kinda funny for a while but then everyone got annoyed.
|
|
|
|
|
|
|
|
|
|
|
|
|
|
|
|
|
|
|
|
|
|
|
| S |
C
A |
G |
S |
C
B |
G |
|
S |
C |
G |
|
energy
A | B |
|
hype
A | B |
|
pop
A | B |
|
mgr
A | B |
|
FIGHT
RATING
25% |
|
|
|
|
|
|
|
Co-main event
|
Coming up we have a featherweight MMA rules bout between Ryan Mcarthy (ranked 2582 p4p, 3928 weight class) and Winston Cooper (ranked 278 p4p, 384 weight class). This should be fireworks!
 |
|
 |
| 170 cm
23
155
7 - 5 - 0 |
|
175 cm
28
152
11 - 19 - 0 |
Good wrestling
World class MT
Cardio machine |
|
BJJ Brown Belt
World class MT
Good gas tank |
|
| |
|
Ladies and gentlemen. This fight is 3 rounds, in the featherweight division.
Introducing the fighter to my left, fighting out of the red corner.
With a record of 7 - 5 - 0, fighting out of London, Ryan Mcarthy!
And introducing the fighter to my right, fighting out of the blue corner.
With a record of 11 - 19 - 0, fighting out of Las Vegas, Winston Cooper!
The judges for this bout are Albert Achterberg, Paulsen Ambrosius and Aafke Stam.
The bell rings for round one and we are underway!
The bell rings for round one and we are underway!
Cooper tries to clinch but Mcarthy moves out of range.
Mcarthy looked to counter with a high kick but didn't commit.
Mcarthy manages to get an easy takedown there - catching Cooper on his heels. He'll look to pass Cooper's guard now, I'm sure.
We could do with one of the fighters taking the initiative a bit more on the ground - they're both waiting to capitalize on a mistake.
Cooper has a loose triangle. He'll be looking to tighten that up but Mcarthy can see exactly what he's planning and manages to posture up and free himself.
Cooper wants to sweep but no luck.
Mcarthy got a little sloppy there for a moment and Cooper has worked his way into a loose triangle - can he finish it?! No, Mcarthy has managed to get both his arms back between Cooper's legs - danger averted.

Mcarthy decides to stand up and beckons his opponent to follow.
Cooper tries to clinch
and Mcarthy counters with a series of strikes. Cooper will be more careful next time no doubt.
Mcarthy has been talking about how he's improved his wrestling in the run up to the fight so let's see if that's enough to sway the balance.
Cooper blocks a head kick by Mcarthy.
Ooooh, nice body kick lands from Mcarthy. Cooper shrugs it off though.
Cooper tries to clinch up but Mcarthy circles away and keeps his distance.
Cooper tries to close the distance and clinch but Mcarthy swats him to one side with an open hand palm strike and circles away.
Well, he's not going to score with shots like that. A lazy body kick attempt from Mcarthy.
We've seen a great period of action over the last minute or so - credit to both fighters for going all out!
Cooper tries to clinch there but Mcarthy circles away.
That's one minute gone in the round.
Cooper doesn't manage to clinch there - Mcarthy circles away.
It looked like Mcarthy was looking amped, ready to throw a big counter but didn't commit.
Whack! Mcarthy lands a heavy head kick that drops Cooper. The ref tackles Mcarthy to stop the fight - a great save by the referee because Cooper was done.
Ladies and gentlemen, after 1:09 of round 1, we have a winner by way of TKO (Head Kick). Ryan Mcarthy!
Ryan Mcarthy was full of energy after the big win and talked about how he thinks he can do big things in this sport. The crowd were appreciative of his determination to succeed.
|
|
|
|
|
|
|
|
|
|
|
|
|
|
|
|
|
|
|
|
|
|
|
| S |
C
A |
G |
S |
C
B |
G |
|
S |
C |
G |
|
energy
A | B |
|
hype
A | B |
|
pop
A | B |
|
mgr
A | B |
|
FIGHT
RATING
64% |
|
|
|
|
|
|
|
Main event
|
Coming up we have a middleweight MMA rules bout between Pat Kelly (ranked 2328 p4p, 1226 weight class) and Orla Wanker (ranked 305 p4p, 169 weight class). Well, the cameraman is lingering on a pretty young lady for a bit too long there. Keep your eyes on the prize buddy or you'll miss the fighter intros!
 |
|
 |
| 185 cm
20
190
5 - 1 - 0 |
|
190 cm
26
191
11 - 10 - 0 |
BJJ Purple Belt
Solid boxing
Cardio machine |
|
Excellent grappler
Good low kicks
Good gas tank |
|
| |
|
Ladies and gentlemen. This fight is 3 rounds, in the middleweight division.
Introducing the fighter to my left, fighting out of the red corner.
With a record of 5 - 1 - 0, fighting out of Los Angeles, Pat Kelly!
And introducing the fighter to my right, fighting out of the blue corner.
With a record of 11 - 10 - 0, fighting out of Amsterdam, Orla Wanker!
The judges for this bout are Wagner Zegers, Paul Aken and Nard Betker.
The bell rings for round one and we are underway!
The bell rings for round one and we are underway!
Wanker swings and misses with a hook to the body.
Wanker shoots in for a double leg but Kelly sprawls well. That's going to sap some energy.
Kelly pushing out the jab but it's not landing.
Kelly throws an overhand right that lands on Wanker's shoulder, as Wanker tries to avoid the shot.
A slow jab from Wanker misses its intended target.
Wanker throws a head kick but Kelly moves out of range.
Kelly uses some good footwork to avoid the body shot by Wanker.
Wanker slips a straight right by Kelly.
Wanker avoids a punch combination nicely.
Kelly takes a nice looking leg kick right on the meat of his thigh there.
Kelly pushing out the jab but it's not landing.
Orla Wanker seems to be the more aggressive standup fighter in this bout.

Kelly takes the fight into the clinch.
We've had a slow start to the round here - hopefully the action picks up.
Wanker wants to strike at distance but he can't break free of the clinch.
A short right hand to the side of the head by Kelly.
Wanker has Kelly pressed up against the cage and is working for takedown. Kelly manages to improve position though and keeps the fight standing.
Wanker drops to a knee looking for a takedown but Kelly gets the underhooks and prevents it.
Pat Kelly has stuffed three takedown attempts in the round now. That's going to take a lot out of Orla Wanker.
Wanker gets the body lock takedown. After a quick scramble, Kelly regains guard.
That's one minute gone in the round.
Kelly wants to stand up but Wanker is controlling him.

Kelly is edging up against the cage. He's using the cage to get back to his feet. Nice work there - the fighters are clinched.
Wanker is looking for a takedown up against the cage. Kelly gets underhooks though and prevents the takedown attempt.
Wanker has dropped down and is looking to force the takedown but it's defended by Kelly after a bit of a struggle.
Kelly tries a body shot but Wanker blocks it.
Kelly struggles to land a body shot inside as Wanker controls his hands.

Kelly manages to break the clinch.
Wanker walks straight into an uppercut. Luckily it didn't land flush.
Kelly takes a body kick right on the floating rib. Ouchie.
Wanker throws an ugly left hook that misses
letting Kelly counter with a right hand.
Wanker throws a looping left and ducks down for a takedown. He's got his arms around Kelly's waist but Kelly gets an underhook and avoids the takedown by throwing Wanker off to one side.
Wanker scores with a takedown into Kelly's guard.
The crowd cheering loudly, showing their appreciation for the quality fight we're seeing here.
Kelly wants to stand up but Wanker is controlling him.
Wanker is just sitting in guard, looking to avoid any submissions.
That's two minutes gone in the round.
Wanker is trying to work a guillotine from the top, or something like that? Don't know how he thinks he's going to get a finish from there.
Wanker won't allow Kelly to get back to his feet.
Wanker content to strike from guard, landing some decent shots.
The ref warns both fighters not to hold the cage as they work up against the meshing.
Wanker's corner is telling him to maintain position.
Kelly is trying to stand up but he's not managed so far.
Wanker passes into half guard.
Kelly is trying to stand back up but Wanker is controlling him
Wanker seems like he's working for an arm triangle here. He's freed his trapped foot and he's rotating nicely. Kelly is in big trouble! He's tapping out! This one is aaaaaaaaaaaall over!
Ladies and gentlemen, after 2:55 of round 1, we have a winner by way of Submission (Arm Triangle). Orla Wanker!
|
|
|
|
|
|
|
|
|
|
|
|
|
|
|
|
|
|
|
|
|
|
|
| S |
C
A |
G |
S |
C
B |
G |
|
S |
C |
G |
|
energy
A | B |
|
hype
A | B |
|
pop
A | B |
|
mgr
A | B |
|
FIGHT
RATING
52% |
|
|
|
|
|
|
|
|
|
|
