 |
GDL 79: Gomez VS Weadababyitsa PBP Commentary |
Undercard bout
|
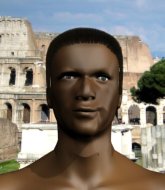
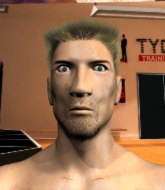
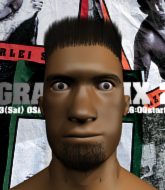
Coming up we have a super heavyweight MMA rules bout between Antonia Oliveira (ranked 5727 p4p, 6360 weight class) and Chad Lincoln (ranked 181 p4p, 180 weight class). Chad Lincoln is staring across the cage at his opponent, tweaking his nipples.
 |
|
 |
| 205 cm
25
250
0 - 1 - 0 |
|
198 cm
23
266
1 - 2 - 0 |
BJJ Brown Belt
Brawler
Hates pizza |
|
BJJ Blue Belt
Decent boxing
Likes musicals |
|
| |
|
Ladies and gentlemen. This fight is 3 rounds, in the super heavyweight division.
Introducing the fighter to my left, fighting out of the red corner.
With a record of 0 - 1 - 0, fighting out of Rio de Janeiro, Antonia Oliveira!
And introducing the fighter to my right, fighting out of the blue corner.
With a record of 1 - 2 - 0, fighting out of St Petersburg, Chad Lincoln !
The judges for this bout are Daniel Franklin, Cecil Peabody and George Francis.

The bell rings for round one and we are underway!
Lincoln shoots in looking for a takedown. Oliveira tries to sprawl out of it but Lincoln keeps driving through. The fighters are pinned against the cage. Oliveira manages to get underhooks and after a bit of a struggle, circles away and we're back to standing.
Oliveira dives in for a single leg takedown but Lincoln sprawls and the fighters end up clinched against the cage.
And Lincoln tries to counter it with a takedown but Oliveira pushes his down on his head and steps out.

Oliveira breaks the clinch and we return to the middle of the mat.
Lincoln keeps the fight standing with a nice sprawl.

Lincoln clinches up with Oliveira and pushes him back against the cage.
Lincoln blocks a body shot from Oliveira.
We've had a slow start to the round here - hopefully the action picks up.
Lincoln tries to break free but Oliveira pushes him back against the cage.
Lincoln slowing the pace effectively.
A real battle for position is taking place between these two warriors.
Lincoln tries to land knees in the clinch but Oliveira avoids the damage to the body.
Lincoln wants a takedown.

That's one minute gone in the round.
Lincoln wants to break free. God knows he wants to breaaaak freeee.
Lincoln slows down the pace here.
The fighters are pressed against the cage, as the pace of the fight slows.
Lincoln receives a warning from the referee for stalling.
Lincoln managing to block the knees to the body from Oliveira.
Oliveira is working for a takedown up against the cage. He can't get it on this occasion though.
That's three failed takedown attempts in the round for Antonia Oliveira. That's going to take a lot out of him.
Lincoln tries a knee to the head but Oliveira blocks it.
Oliveira prevents a takedown attempt there.
Oliveira has a body lock and is looking for a takedown. Lincoln is bouncing around trying to prevent the takedown and somehow he has indeed managed to stay on his feet.

That's two minutes gone in the round.
My god... these two guys really need to pick up the pace or everyone will leave to go get a beer.
Lincoln tries to pull guard but Oliveira holds him up against the cage and eventually Lincoln drops back down to his feet.
Lincoln working hard to break the clinch.
Oliveira wants a takedown but no success here.

Lincoln has managed to pull guard. Let's see whether he can work an aggressive guard. It will also be interesting to see what tactics Oliveira uses from the top position.
Oliveira trying to control but Lincoln is working from the bottom.
Oliveira stands up and looks to throw the legs aside to pass to side control. Lincoln swivels though and keeps the full guard.
Oliveira stops Lincoln from standing up.
Oliveira postures up.
Lincoln really doesn't want to stay on the ground with Oliveira. If he can't get it back to his feet, it's only a matter of time before he'll be tapping out.
Oliveira passes Lincoln 's right leg, so he's now in half guard.

That's three minutes gone in the round.

Oliveira seems to be looking for submissions.
The ref warns both fighters not to hold the cage as they work up against the meshing.
Oliveira is trying to control the action in half guard but Lincoln is working away on the bottom, looking perhaps to get back to full guard.
Lincoln is looking to regain full guard. Not this time though.
Lincoln keeping hold of Oliveira's head, controlling as best he can.
Oliveira is keen to just control but Lincoln is a slippery customer.

Oliveira decides to stand up and try his luck on the feet.

That's four minutes gone in the round.
The crowd are starting to boo a lack of action.
Lincoln stuffs the takedown attempt from Oliveira. Oliveira gets slowly back to his feet.
Lincoln fails with the takedown.
Oliveira darts in looking for a takedown but Lincoln gets double underhooks and turns Oliveira into the cage.
Lincoln is trying to pull guard but being pressed up against the cage enables Oliveira to keep the fight standing.
Lincoln can't break the clinch.
Lincoln has hold of a leg and is looking for a trip takedown. Oliveira avoids it nicely though and we remain in the clinch.
Oliveira blocks a knee to the body. He'll have a nicely bruised forearm in the morning.
Boooooooooooooooooooo!!! God, this has been a terrible round. Come on you two, sort yourselves out!
Oliveira escapes the clinch and we're back to striking.
Lincoln forces Oliveira back against the cage and clinches.
Lincoln wants to push off and get back to the center of the mat but Oliveira has him pressed against the cage.
Oliveira looking for a takedown.
And that is the end of the round. The fighters go back to their corners.
Chad Lincoln dominated that round.
The minute break is over - no more time for sponges and pep talks - back to the action!

Lincoln shoots in for a takedown but doesn't get it.
Oliveira fakes high and shoots in for a takedown but Lincoln avoids it really well and circles away.
A punch combination from Lincoln misses.

Oliveira shoots in for a takedown and gets it.
Oliveira seems to be working for a kimura but Lincoln defends the submission attempt.
We've had a slow start to the round here - hopefully the action picks up.
Lincoln is looking to regain full guard. Not this time though.
That's one minute gone in the round.
Lincoln has no desire to be mounted, so is trying to control. Oliveira is working away from the top position though.
The two fighters exchange a few words. I couldn't hear what they were saying but maybe it's more fun if you make it up yourself. Oliveira connects with a nice short shot to Lincoln 's temple.
Oliveira stalling.
Oliveira wants to take a breather but Lincoln is having none of it.
Oliveira is trying to work for a kimura. This could be trouble! No, Lincoln has managed to free his arm - good work.
Lincoln is looking to regain full guard. Not this time though.
That's two minutes gone in the round.
A few boos can be heard. I'm sure they will multiply if the fighters don't pick up the pace.
Still in half guard, Oliveira seems content to control.
Oliveira is sneakily working for an arm triangle but Lincoln sees it coming and defends easily.
Lincoln is concentrating on defense, preventing Oliveira from advancing position.
Oliveira trying to mount his opponent but Lincoln defends it.
Lincoln tries to roll over but Oliveira keeps him under control.
If this pace continues, the referee will definitely step in and force a standup.
That's three minutes gone in the round.

The referee has stepped in and called for a break in the action. We'll restart on the feet.
Oliveira tries to shoot in for a takedown. He's got hold of a leg but Lincoln swivels and escapes.
Oliveira tries for a takedown but Lincoln circles away easily
and Lincoln counters with a series of strikes. Oliveira will be more careful next time no doubt.
That's three failed takedown attempts in the round for Antonia Oliveira. That's going to take a lot out of him.
No luck with that takedown attempt from Lincoln .
Oliveira appears to be looking for a counter punch to the body.
Oliveira tries to close the distance and clinch up against the cage but Lincoln paws at him with a jab and circles away.
Oliveira shoots in for a takedown but doesn't get it.
Oliveira blocks a leg kick.
Lincoln takes the fight into the clinch.
Lincoln has had enough of the clinch and is looking to separate.
That's four minutes gone in the round.
Lincoln drops to a knee looking for a takedown but Oliveira gets the underhooks and prevents it.
Lincoln tries to land a knee to the body but he is off balance and Oliveira avoids it.
Oliveira fails to pull guard.
Oliveira pushes off and circles away, back to the middle of the mat.
Lincoln scores to the head and body with a nice combination!
Lincoln tries to clinch up but Oliveira circles away and keeps his distance.
Lincoln has been the more effective fighter overall so far.
Boooooooooooooooooooo!!! God, this has been a terrible round. Come on you two, sort yourselves out!
Oliveira leaves Lincoln with his face pressed against the mat as he sprawls beautifully, defending against a solid takedown attempt.
Oliveira stuffs the takedown attempt from Lincoln . Lincoln gets slowly back to his feet.
And that is the end of the round. The fighters go back to their corners.
Chad Lincoln showed his class in that round. I'd imagine he'll take it on all the scorecards.
That's the end of the round. The referee orders the cornermen out of the cage so we can get back down to business. This is the final round!

A telegraphed takedown attempt from Oliveira is defended easily by Lincoln .
Oliveira defends well against a solid takedown attempt from Lincoln .
Lincoln is trying hard to land a takedown here. Oliveira sprawls well and keeps this one on the feet.
Oliveira shoots in but no luck this time.
Lincoln stuffs the takedown.
That's three failed takedown attempts in the round for Antonia Oliveira. That's going to take a lot out of him.
Oliveira tries to score a power double leg takedown but Lincoln sees that one coming and sprawls well. That will dishearten Oliveira somewhat.
We've had a slow start to the round here - hopefully the action picks up.
Oliveira misses with a low kick.
Lincoln lands a body shot.
Lincoln tries a switch kick but it misses it's target.
That's one minute gone in the round.
No luck for Lincoln with that takedown attempt.
Oliveira was looking to counter that last move with a shot to the body but he didn't commit.
Lincoln takes a big intake of breath there - he's definitely tired.
Lincoln gets a clinch.
Oliveira gets underhooks to prevent Lincoln 's takedown attempt.
Oliveira ties up his opponent against the cage and manages to drag the fight down to the ground. Oliveira no doubt will be looking to work submissions from his guard.

Lincoln decides to stand up and beckons his opponent to follow.
Lincoln wants to clinch.
Lincoln defends well against a solid takedown attempt from Oliveira.
That's two minutes gone in the round.
Oliveira will have to do better than that with his takedown attempts.
Lincoln goes for a double leg but Oliveira avoids the attempt and the two fighters end up clinched against the cage as Oliveira continues to drive forward.
Lincoln takes the fight into the clinch.
Oliveira is trying to pull guard but being pressed up against the cage enables Lincoln to keep the fight standing.
Lincoln manages to pull guard.
Oliveira trying to control but Lincoln is working from the bottom.
Lincoln striking off his back but it's not causing Oliveira any problems.
Lincoln not looking particularly offensive just at the moment.
That's three minutes gone in the round.

Lincoln throwing his legs up looking for a triangle.
Lincoln is working an open guard so Oliveira takes the opportunity to get back to his feet.
Oliveira wants to clinch up but Lincoln keeps it at a distance.
Lincoln drops down looking to force a counter takedown but Oliveira defends it well.
No luck for Oliveira with that takedown attempt.
Oliveira pivots as if he's going to throw a leg kick but stops half way.
Lincoln shoots in for a takedown. "Ole!" shouts Oliveira as he jumps to the side.
Oliveira checks a leg kick nicely.
That's four minutes gone in the round.
Oliveira tries to keep at a distance but Lincoln has taken the fight into the clinch.
Lincoln fails to pull the fight into his guard.
Lincoln goes for a takedown attempt but Oliveira pushes him away and we're back to fighting at a distance.
Oliveira shoots in looking for a takedown but Lincoln manages to keep the fight standing, pushing Oliveira's face into the canvas for good measure before circling away.
Lincoln avoids the clinch attempt nicely.
Lincoln wants to counter the offense by Oliveira and move into the clinch position.
Lincoln pushes Oliveira up against the cage in a clinch.
Lincoln has dropped down and is looking to force the takedown but it's defended by Oliveira after a bit of a struggle.
Boooooooooooooooooooo!!! God, this has been a terrible round. Come on you two, sort yourselves out!
Oliveira jumps guard but his hands slip and he falls flat on his back. Well, he's made himself look a right mug there, as Lincoln walks away with a smile on his face. Oliveira gets slowly back to his feet and shakes his head.
Lincoln has Oliveira up against the cage in a clinch.
Antonia Oliveira has stepped it up - he knows he needs a finish here!
Chad Lincoln is fighting for a decision - hopefully he's judged it right and he's actually winning the fight.
Lincoln tries to take the fight to the ground by pulling guard but can't manage it.
And that's the end of the fight!
Chad Lincoln comfortably won the final round on my scorecard.
I've got Lincoln winning every round here. Surely the decision will go his way and he'll pick up a well deserved decision victory. Over to the ring announcer for the scorecards.
Ladies and gentlemen, after 3 rounds of action, we go to the scorecards for a decision.
Judge Daniel Franklin scores the fight 27:30
Judge Cecil Peabody scores the fight 27:30
Judge George Francis scores the fight 27:30
In favor of your winner, by unanimous decision... Chad Lincoln !
|
|
|
|
|
|
|
|
|
|
|
|
|
|
|
|
|
|
|
|
|
|
|
| S |
C
A |
G |
S |
C
B |
G |
|
S |
C |
G |
|
energy
A | B |
|
hype
A | B |
|
pop
A | B |
|
mgr
A | B |
|
FIGHT
RATING
27% |
|
|
|
|
|
|
|
Undercard bout
|
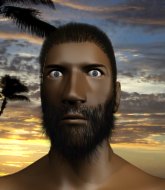
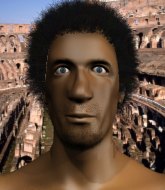
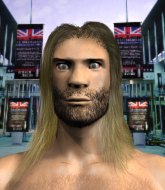
Coming up we have a super heavyweight MMA rules bout between King Mohammed Ali (ranked 4696 p4p, 4323 weight class) and Francisco Alvarez (ranked 149 p4p, 164 weight class). We have two fighters making their debuts here, so let's see who comes out of this one with their first professional victory.
 |
|
 |
| 192 cm
25
265
0 - 0 - 0 |
|
207 cm
25
250
0 - 0 - 0 |
BJJ Purple Belt
Solid boxing
Very strong |
|
BJJ White Belt
Great elbows
Powerful |
|
| |
|
Ladies and gentlemen. This fight is 3 rounds, in the super heavyweight division.
Introducing the fighter to my left, fighting out of the red corner.
With a record of 0 - 0 - 0, fighting out of Montreal, King Mohammed Ali!
And introducing the fighter to my right, fighting out of the blue corner.
With a record of 0 - 0 - 0, fighting out of Hilo, Francisco Alvarez!
The judges for this bout are Daniel Franklin, Chris Downing and George Francis.
The bell rings for round one and we are underway!
Jab, cross, leg kick. Nice combination by Alvarez!
Ali fakes high and swings low for a body shot but Alvarez manages to avoid it.
Ali takes one to the chin there.
Alvarez lunges in with swinging rights and lefts but Ali circles away quickly and effectively.
Ali scores with a punch to the gut of his opponent.
Alvarez looks winded!
Ali fakes low and throws an overhand right that catches Alvarez on the side of the head.
 It looks like Francisco Alvarez has been cut. It looks like Francisco Alvarez has been cut.

Ali drops Alvarez with a hook right on the temple. He thinks about going to the ground but Alvarez looks back up at him and smiles so Ali waves him back to his feet - he obviously thinks he can knock him out after that shot landed.
We've seen a great period of action over the last minute or so - credit to both fighters for going all out!
Nice defenses there by Alvarez.
BAM! Ali delivers a spinning backfist that drops Alvarez like a ragdoll! This is all oooooveeeer! He was out before he hit the ground!
Ladies and gentlemen, after 0:24 of round 1, we have a winner by way of KO (Spinning Backfist). King Mohammed Ali!
|
|
|
|
|
|
|
|
|
|
|
|
|
|
|
|
|
|
|
|
|
|
|
| S |
C
A |
G |
S |
C
B |
G |
|
S |
C |
G |
|
energy
A | B |
|
hype
A | B |
|
pop
A | B |
|
mgr
A | B |
|
FIGHT
RATING
100% |
|
|
|
|
|
|
|
Undercard bout
|
Coming up we have a featherweight MMA rules bout between Doesnt Matter (ranked 5464 p4p, 5745 weight class) and Kojima Hisashi (ranked 426 p4p, 444 weight class). Doesnt Matter has the better chin. Will he look to stand and bang today?
 |
|
 |
| 225 cm
18
145
0 - 1 - 0 |
|
176 cm
20
145
0 - 1 - 0 |
BJJ White Belt
Dangerous knees
Big right hand |
|
BJJ White Belt
Excellent boxer
Determined |
|
| |
|
Ladies and gentlemen. This fight is 3 rounds, in the featherweight division.
Introducing the fighter to my left, fighting out of the red corner.
With a record of 0 - 1 - 0, fighting out of Los Angeles, Doesnt Matter!
And introducing the fighter to my right, fighting out of the blue corner.
With a record of 0 - 1 - 0, fighting out of Tokyo, Kojima Hisashi!
The judges for this bout are Cecil Peabody, George Francis and Chris Downing.
The bell rings for round one and we are underway!
Hisashi throws a shot from downtown. Matter moves away and avoids it.
Matter takes a shot to the eye socket. That's gotta hurt.
Matter tries to close the distance and clinch up against the cage but Hisashi paws at him with a jab and circles away.
We've been hearing reports that Matter has been drilling takedowns in recent sessions so let's see if that has an impact on the result of this fight.
Matter is looking to clinch but Hisashi is avoiding it.
Hisashi tries to counter by closing the distance.
Hisashi with the inside leg kick.
Hisashi throws a head kick that misses and slips in the process. He scrambles back to his feet and the fighters circle.
Matter has his takedown stuffed
and Hisashi counters with a three punch combo that has Matter backing up. Matter nods at Hisashi to acknowledge the strikes.
We've had a slow start to the round here - hopefully the action picks up.
Matter shoots in but doesn't get the takedown
and Hisashi counters with a series of strikes. Matter will be more careful next time no doubt.
Matter tries for a takedown but Hisashi circles away easily
and Hisashi counters by moving into the clinch.
That's three failed takedown attempts in the round for Doesnt Matter. That's going to take a lot out of him.
That's one minute gone in the round.
Matter breaks from the clinch.
Hisashi misses with the combination.
Hisashi darts in looking for a takedown but Matter gets double underhooks and turns Hisashi into the cage.
Matter fakes high and shoots in for a takedown but Hisashi avoids it really well and circles away.
Despite the aggression on Hisashi's face he doesn't fully commit to the counter.
Hisashi misses with a half-hearted attempt at a head kick.
Matter has a takedown stuffed.
That's two minutes gone in the round.
A jab from Hisashi finds it's way through Matter's defenses.
Matter looks for a takedown here. Will he get it? Hisashi is fending him off so far but Matter persists. Nope, Hisashi circles away and we're back to standing.
Matter looks to land a body kick but Hisashi moved away.
Matter fakes with the hands and throws a leg kick but Hisashi is out of range.
Matter tries to clinch but Hisashi is having none of it.
Hisashi displays good takedown defense there as he swats away a double leg from Matter.
Matter tries to close the distance and clinch up but Hisashi swats him away and circles back towards the center.
Doesnt Matter seems to be the more aggressive standup fighter in this bout.

Matter gets to the clinch - let's see what his plan is here.

Hisashi breaks the clinch and we return to the middle of the mat.
That's three minutes gone in the round.
Hisashi throws a head kick that misses.
Matter misses with a body kick.
Hisashi looks to land a combination but Matter avoids it well.
Hisashi throws a right and a left that Matter avoids nicely.
Nice takedown defense from Hisashi. No joy for Matter on that attempt.
Matter tries a switch kick but it misses it's target.
Hisashi is looking for the big counter here.
Matter tries to clinch but Hisashi moves out of range.
Hisashi throws a fast counter high kick but Matter manages to duck under it in time.
Hisashi throws a head kick that misses and slips in the process. He scrambles back to his feet and the fighters circle.
Matter tries to counter with a takedown but Hisashi is quick to defend against it.
Matter looks frustrated there after his takedown attempt is stuffed easily.
That's four minutes gone in the round.
Hisashi motions for Matter to come forward. Hisashi throws a leg kick but it misses it's target.
Matter with a poor takedown
and Matter takes a counter punch right on the button for his troubles.
Matter tries for a takedown but Hisashi circles away easily
and Hisashi counters with a straight right hand.
Matter tries to clinch but Hisashi is having none of it.
Hisashi changes levels and drives through with a really nice takedown into side control. Matter looks really pissed at himself for not defending that better.
The fans in attendance giving it up for the two fighters, who have really let it all hang out in the last minute or so!
Hisashi lands some shots froms side control.
Hisashi tries to get to his feet but he's trapped momentarily.
Matter can't do much from the bottom here.
And that is the end of the round. The fighters go back to their corners.
Kojima Hisashi dominated that round.
That's the end of the interval. I'm sure that seemed a lot quicker than a minute for our two fighters! Back to the action.
Matter misses with a wild body shot.
Hisashi is trying to avoid his opponent's strikes and get into the clinch.
Matter doesn't manage to clinch there - Hisashi circles away.
Matter blocks a head kick by Hisashi.
Kojima Hisashi seems to be getting the better of the standup.
Matter with a poor takedown
and Hisashi counters with a three punch combo that has Matter backing up. Matter nods at Hisashi to acknowledge the strikes.
Sloppy strikes from Hisashi. Those never looked like landing.
Matter seemed to be looking to counter by closing the distance.
A jab lands there for Hisashi.
A head kick misses from Hisashi.
We've had a slow start to the round here - hopefully the action picks up.
Matter closes the distance but Hisashi moves to the side
and Hisashi counters with a one-two to the body.
Matter shoots for a double leg takedown but Hisashi sprawls well. He's pushed Matter's face into the mat and manages to get back to his feet relatively easily.
That's one minute gone in the round.
Hisashi keeps the fight on the outside.
Matter misses with a half-hearted attempt at a head kick.
Matter shoots in but doesn't get the takedown
and Hisashi counters with a three punch combination, finished off with a leg kick. Nice work.
That's three failed takedown attempts in the round for Doesnt Matter. That's going to take a lot out of him.
Hisashi will have to do better than that with his takedown attempts.
Matter shoots in but no luck this time.
Matter listening to his corner there, landing a nice uppercut.
Hisashi misses with a body kick.
A telegraphed takedown attempt from Matter is defended easily by Hisashi.
A countering left hand to the body from Hisashi misses.
That's two minutes gone in the round.
Matter checks a low kick. Bone on bone - not my idea of a good time.
A little feinted left hand from Matter on the counter but he doesn't commit to it.
Matter fails with the takedown
and Hisashi counters with a three punch combination, finished off with a leg kick. Nice work.
Matter shoots in for a takedown - he's clinched up with Hisashi but Hisashi pushes him off and we're back to square one.
Both fighters are absolutely exhausted here.
Hisashi wings a very wild body shot but it does the job and lands to the midsection.
Matter tries to land a leg kick but Hisashi saw it coming and moves away.
As Matter backs off Hisashi throws a huge counter combo but Matter manages to avoid it all.
That's three minutes gone in the round.
Matter rushes in with a sloppy looking punch
and Hisashi counters with a three punch combo that has Matter backing up. Matter nods at Hisashi to acknowledge the strikes.
Matter throws a lazy head kick
and Hisashi counters with a left and a right that stings Matter.
Matter with a lazy takedown attempt
and Hisashi counters by moving into the clinch. Good anticipation by Hisashi.
Matter manages to break the clinch.
Hisashi lands three nice shots there - that looked like it hurt!
Doesnt Matter is looking to throw some combinations by the looks of things.
Matter misses with an uppercut.
Hisashi tries a switch kick but it misses it's target.
Matter fails with the takedown.
That's four minutes gone in the round.
Hisashi swinging wildly here.
Matter closes the distance and clinches up with Hisashi, looking for a takedown. Matter pushes Hisashi against the cage but Hisashi circles to the side and manages to break the clinch.
Matter moves out of the way of the counter high kick from Hisashi.
The crowd are loving this. Great action here.
Matter doesn't succeed with the takedown
and Hisashi counters by moving into the clinch. Good anticipation by Hisashi.
Hisashi blocks a knee to the body. He'll have a nicely bruised forearm in the morning.
Matter manages to break the clinch.
Hisashi throws a head kick but Matter moves out of range.
Matter tries to shoot in for a takedown. He's got hold of a leg but Hisashi swivels and escapes.
And that is the end of the round. The fighters go back to their corners.
Kojima Hisashi showed his class in that round. I'd imagine he'll take it on all the scorecards.
Well, the break between rounds is over. Let's get back to the scrappin! This is the final round!
Matter finds nothing but air with that leg kick attempt.
Matter misses with a takedown
and Hisashi counters with a three punch combo that has Matter backing up. Matter nods at Hisashi to acknowledge the strikes.
Hisashi will need to tighten up his combinations if he doesn't want to gas himself out, swinging at thin air.
Matter slips a jab and a cross from Hisashi.
Matter misses with a jab and misses with a cross straight after too.
We've had a slow start to the round here - hopefully the action picks up.
Hisashi stuffs a takedown. It's all about dictating where the fight takes place and Hisashi wants it to stay on the feet.
Hisashi looks frustrated there after his takedown attempt is stuffed easily.
It looked like Matter was trying to counter with a body shot coming off that last attack from Hisashi.
That's one minute gone in the round.
Matter throws a head kick but Hisashi moves out of range.
Despite the aggression on Hisashi's face he doesn't fully commit to the counter.
Both fighters are breathing heavily.
Matter shoots in for a takedown. "I don't think so" says Hisashi as he avoids it easily.
That's three failed takedown attempts in the round for Doesnt Matter. That's going to take a lot out of him.
Hisashi circles away from the clinch attempt.
Matter misses with a telegraphed body shot
and Hisashi counters with a three punch combo that has Matter backing up. Matter nods at Hisashi to acknowledge the strikes.
Matter fails with the takedown
and Hisashi counters with a lovely straight right hand!
Matter gets his takedown attempt stuffed easily
and Hisashi counters with a one-two to the body.
Hisashi misses with a few strikes there.
That's two minutes gone in the round.
Hisashi misses with a head kick.
Matter shoots for a double leg takedown but Hisashi sprawls well. He's pushed Matter's face into the mat and manages to get back to his feet relatively easily.
Hisashi has Matter up against the cage in a clinch.
Hisashi lands a short shot on the inside that snaps the head of Matter backwards.
Hisashi has been the more effective fighter overall so far.
This is a great period of action - very entertaining stuff!
Matter jumps guard but Hisashi turns him against the cage and keeps the fight standing.
Hisashi breaks the clinch and we're back to striking at distance.
Matter takes a hook to the side of the head. I wonder if that's got his ears ringing.
This is turning into a torrid day at the office for Matter. He's trying desperately to land a takedown but he's failing miserably and getting slapped silly on the feet to compound his misery.
Hisashi misses with a double jab.
That's three minutes gone in the round.
Matter blocks a head kick by Hisashi.
Hisashi misses with a jab and misses with a cross straight after too.
Matter seem to be loading up, looking for a big counter.
Matter misses with a takedown attempt - Hisashi sprawls well and throws a nice strike on the way out which just misses.
Hisashi throws a right and a left that Matter avoids nicely.
Hisashi takes a nice looking leg kick right on the meat of his thigh there.
Matter fails with a takedown attempt.
Despite the aggression on Hisashi's face he doesn't fully commit to the counter.
That's four minutes gone in the round.
Hisashi with the inside leg kick.
Hisashi rushes forward with a series of wild hooks but Matter moves out of range and avoids them all easily.
Matter throws a sloppy head kick and Hisashi moves out of range easily.
Matter misses with a series of wild punches.
The crowd thankful this round is nearly over.
Hisashi circles away from the clinch attempt
and Hisashi counters with a three punch combination, finished off with a leg kick. Nice work.
And that's the end of the fight!
Kojima Hisashi comfortably won the final round on my scorecard.
Well Hisashi has outworked and out performed his opponent in all aspects of the game today. He was simply too good and the decision should be no more than a formality. Over to the ring announcer for the scorecards.
Ladies and gentlemen, after 3 rounds of action, we go to the scorecards for a decision.
Judge Cecil Peabody scores the fight 27:30
Judge George Francis scores the fight 27:30
Judge Chris Downing scores the fight 27:30
In favor of your winner, by unanimous decision... Kojima Hisashi!
|
|
|
|
|
|
|
|
|
|
|
|
|
|
|
|
|
|
|
|
|
|
|
| S |
C
A |
G |
S |
C
B |
G |
|
S |
C |
G |
|
energy
A | B |
|
hype
A | B |
|
pop
A | B |
|
mgr
A | B |
|
FIGHT
RATING
43% |
|
|
|
|
|
|
|
Undercard bout
|
Coming up we have a welterweight MMA rules bout between Barion Montgomery (ranked 4562 p4p, 4876 weight class) and Senor Submission (ranked 527 p4p, 547 weight class). Both these guys have really solid chins. Will we see a standup war or will they both decide that a knockout is unlikely and try to win the fight elsewhere?
 |
|
 |
| 185 cm
18
179
1 - 0 - 0 |
|
179 cm
18
170
0 - 0 - 0 |
BJJ White Belt
Dangerous knees
Granite chin |
|
BJJ Blue Belt
Basic striking
Granite chin |
|
| |
|
Ladies and gentlemen. This fight is 3 rounds, in the welterweight division.
Introducing the fighter to my left, fighting out of the red corner.
With a record of 1 - 0 - 0, fighting out of Las Vegas, Barion Montgomery!
And introducing the fighter to my right, fighting out of the blue corner.
With a record of 0 - 0 - 0, fighting out of Amsterdam, Senor Submission!
The judges for this bout are Alan Glass, Frank Dennis and George Francis.
The bell rings for round one and we are underway!
Submission just misses with a punch to the body.
Montgomery gets taken down but at least he's managed to land in guard.
Submission in full guard, throwing the ground and pound. No damage this time.
Submission won't allow Montgomery to sweep him here.
Submission stands up from guard. Let's bang!
Submission shoots in with a lovely double leg takedown. Montgomery manages to land in full guard to minimise the damage.
Submission's corner is telling him to maintain position.
Submission's corner are shouting for him to control the position and he seems happy to oblige.
Montgomery knows he needs to get back to his feet asap. He's simply no match for Submission on the ground.
We've had a slow start to the round here - hopefully the action picks up.
Submission stands up and looks to throw the legs aside to pass to side control. Montgomery swivels though and keeps the full guard.
Montgomery on his back here. We all know that wrestlers don't like being on their back so let's see if Montgomery tries to get out of the position.
Submission thinks about going for a leg but decides against it, in order to maintain the position.
Submission controls from within his opponent's guard.
That's one minute gone in the round.
More stalling from Submission.
Submission is pushing down on Montgomery's leg trying to pass to half guard. Montgomery is fighting to maintain full guard but Submission has managed to sneak the leg through.
Neither fighter is being very active at the moment, with Submission in particular looking to stall.
Submission has hold of the far side arm. He's working for the Kimura, can Montgomery defend it? Submission steps over the head and cranks it - Montgomery is tapping out! That was textbook stuff right there - nice submission victory for Submission!
Ladies and gentlemen, after 2:57 of round 1, we have a winner by way of Submission (Kimura). Senor Submission!
|
|
|
|
|
|
|
|
|
|
|
|
|
|
|
|
|
|
|
|
|
|
|
| S |
C
A |
G |
S |
C
B |
G |
|
S |
C |
G |
|
energy
A | B |
|
hype
A | B |
|
pop
A | B |
|
mgr
A | B |
|
FIGHT
RATING
38% |
|
|
|
|
|
|
|
Undercard bout
|
Coming up we have a middleweight MMA rules bout between Max Crazen (ranked 5930 p4p, 5089 weight class) and Mo Money (ranked 630 p4p, 578 weight class). I'm sure you'll be fascinated to know that I was talking to some pointless Z list celebrity before the fight and he thought that Mo Money was going to win. Let's see if he was right.
 |
|
 |
| 185 cm
23
185
0 - 1 - 0 |
|
183 cm
18
185
1 - 1 - 0 |
BJJ White Belt
Solid boxing
Good chin |
|
BJJ Blue Belt
Counter fighter
Determined |
|
| |
|
Ladies and gentlemen. This fight is 3 rounds, in the middleweight division.
Introducing the fighter to my left, fighting out of the red corner.
With a record of 0 - 1 - 0, fighting out of Los Angeles, Max Crazen!
And introducing the fighter to my right, fighting out of the blue corner.
With a record of 1 - 1 - 0, fighting out of London, Mo Money!
The judges for this bout are Tiny Johnson, Alan Glass and Wesley Smith.
The bell rings for round one and we are underway!
Crazen throws a hard body shot but it just misses.
And an attempted straight right on the counter from Money! But no joy.
Crazen doesn't manage to clinch there - Money circles away.
And an attempted straight right on the counter from Money! But no joy.
Crazen tries to close the distance and clinch but Money swats him to one side with an open hand palm strike and circles away.
And an attempted straight right on the counter from Money! But no joy.
Crazen throws a push kick but Money slaps the foot to one side.
Money throws out a counter right but Crazen avoids it with no problem.
Crazen displaying good standup as he scores with a three punch combination.
It looks like Mo Money has been cut.
Crazen throws a right and a left that both miss.
It seemed like Money was going to counter with the hook but didn't fully commit to it.
Crazen drops Money with a hook right on the temple. He thinks about going to the ground but Money looks back up at him and smiles so Crazen waves him back to his feet - he obviously thinks he can knock him out after that shot landed.
 Money is rocked! Money is rocked!
The crowd cheering loudly, showing their appreciation for the quality fight we're seeing here.
Money leaves Crazen with his face pressed against the mat as he sprawls beautifully, defending against a solid takedown attempt.
Money is still on wobbly legs! Can Crazen finish him?
A head kick from Crazen lands but Money takes it in his stride.
That's one minute gone in the round.
Crazen dives in and grabs Money's left leg, looking for a takedown. Money pushes down on Crazen's head and hops out.
Money seems to have recovered his senses.
Crazen throws a looping left and ducks down for a takedown. He's got his arms around Money's waist but Money gets an underhook and avoids the takedown by throwing Crazen off to one side.
That's three failed takedown attempts in the round for Max Crazen. That's going to take a lot out of him.
Crazen shoots in for a double leg but Money sprawls well. That's going to sap some energy.
Crazen throws the left hand but Money avoids the punch easily.
It seemed like Money was going to counter with the hook but didn't fully commit to it.
Crazen misses with a head kick.
And an attempted straight right on the counter from Money! But no joy.
Crazen is breathing heavily.
Crazen fails in his attempt to clinch.
Money ducks under an overhand right and circles away with a smile on his face.
That's two minutes gone in the round.
Money is on the wrong end of a nice combination from Crazen.
Crazen fails with an attempt to clinch.
Crazen closes this distance looking for a takedown but Money circles away.
Money looked like he wanted to counter with a punch but didn't throw it.
No luck with that takedown attempt from Crazen.
It seemed like Money was going to counter with the hook but didn't fully commit to it.
Crazen tries a head kick but it misses.
Money looks like he wants to counter punch here.
A combination from Crazen does no damage.
Crazen throws a half hearted mid kick.
Money looked like he wanted to counter with a punch but didn't throw it.
Crazen throws a right hand that Money ducks under and follows up with a left that Money also avoids with ease.
That's three minutes gone in the round.
Crazen misses with the combination.
And an attempted straight right on the counter from Money! But no joy.
Money uses some good footwork to avoid the body shot by Crazen.
No luck with that takedown attempt from Crazen.
Money looks like he wants to counter punch here.
Crazen fails with an attempt to clinch.
And an attempted straight right on the counter from Money! But no joy.
Crazen swinging wildly here.
Crazen tries a head kick but it misses.
Money looks like he wants to counter punch here.
That's four minutes gone in the round.
Crazen tries to clinch but is not successful on this occasion.
Crazen throws a head kick that misses.
Money looks like he wants to counter punch here.
Crazen tries to close the distance and clinch up against the cage but Money paws at him with a jab and circles away.
Crazen changes levels and looks for a double leg takedown. Money tries to avoid it but Crazen manages to keep hold of a leg and drag Money to the ground. Money escapes though and pops straight back up to his feet.
Money throws out a counter right but Crazen avoids it with no problem.
Crazen dives in and grabs Money's left leg, looking for a takedown. Money pushes down on Crazen's head and hops out.
Money looked like he wanted to counter with a punch but didn't throw it.
Crazen tries a head kick but it misses.
Money swings away with a counter right hand but no contact made.
Crazen changes levels and looks for a double leg takedown. Money tries to avoid it but Crazen manages to keep hold of a leg and drag Money to the ground. Money escapes though and pops straight back up to his feet.
Money looked like he wanted to counter with a punch but didn't throw it.
A punch combination from Crazen misses.
Max Crazen seems to be the more aggressive standup fighter in this bout.
Crazen throws a leg kick but Money sees it coming and checks it nicely.
And that is the end of the round. The fighters go back to their corners.
Max Crazen dominated that round.
The cut man is working on Mo Money's cut.
The fighters get back to their feet, the hooter sounds and we're back to the action!
Crazen throws a jab, cross combination which is slipped
and Money counters with a lovely straight right hand!
Crazen looking to throw a kick but he's pulled out of it.
And an attempted straight right on the counter from Money! But no joy.
Both these guys seem content to just stand up and trade with each other but Money might want to think about changing up his gameplan a bit because over the course of the fight, Crazen has got the better of the exchanges.
Crazen doesn't manage to clinch there - Money circles away.
Money throws out a counter right but Crazen avoids it with no problem.
A head kick misses from Crazen.
Money might want to mix his strikes up a bit more. He's just going for head shots at the moment and that can become a bit predictable.
Money moves out of range of the body kick from Crazen.
Crazen tries to clinch up.
Money throws out a counter right but Crazen avoids it with no problem.
We've had a slow start to the round here - hopefully the action picks up.
Crazen punishes Money's body with a nice straight punch.
Crazen tries a head kick but it misses.
It seemed like Money was going to counter with the hook but didn't fully commit to it.
Crazen tries a switch kick but it misses it's target.
And an attempted straight right on the counter from Money! But no joy.
Crazen is really dominating this fight. Is there anything that Money can do to turn this around?
Both fighters are absolutely exhausted here.
That's one minute gone in the round.
Crazen wants to clinch up but Money keeps it at a distance.
Crazen doesn't manage to clinch there - Money circles away.
Crazen tries a switch kick but it misses it's target.
Money swings away with a counter right hand but no contact made.
Crazen swings away but doesn't land with a series of punches.
Crazen misses with a body kick.
It seemed like Money was going to counter with the hook but didn't fully commit to it.
Crazen misses with a straight left.
Money looked like he wanted to counter with a punch but didn't throw it.
Crazen goes for a double leg but Money avoids the attempt and the two fighters end up clinched against the cage as Money continues to drive forward.
Money ties up his opponent against the cage and manages to drag the fight down to the ground. Money no doubt will be looking to work submissions from his guard.
Money wants to sweep here but Crazen controlling him for the moment.
We get told so often about how wrestlers don't like to be on their backs. Let's see if Money can do anything to dispel that myth.
Money is adopting a defensive guard.
The ref warns both fighters not to hold the cage as they work up against the meshing.
That's two minutes gone in the round.
Crazen is sitting in close to Money's body. Money has gone for a guillotine from the bottom. Oh damn, that looks pretty tight! Crazen is panicking - it looks like this one could be all over! Yes, Crazen is tapping! That was a very nice submission by Money.
Ladies and gentlemen, after 2:21 of round 2, we have a winner by way of Submission (Guillotine). Mo Money!
|
|
|
|
|
|
|
|
|
|
|
|
|
|
|
|
|
|
|
|
|
|
|
| S |
C
A |
G |
S |
C
B |
G |
|
S |
C |
G |
|
energy
A | B |
|
hype
A | B |
|
pop
A | B |
|
mgr
A | B |
|
FIGHT
RATING
39% |
|
|
|
|
|
|
|
Undercard bout
|
Coming up we have a lightweight MMA rules bout between Jake Neil (ranked 4409 p4p, 5917 weight class) and Noah Williams (ranked 442 p4p, 552 weight class). Both fighters look fresh as a daisy as they make their way towards the cage.
 |
|
 |
| 180 cm
21
155
0 - 0 - 0 |
|
177 cm
19
155
0 - 1 - 0 |
BJJ Blue Belt
Solid boxing
Granite chin |
|
BJJ Purple Belt
Brawler
Solid chin |
|
| |
|
Ladies and gentlemen. This fight is 3 rounds, in the lightweight division.
Introducing the fighter to my left, fighting out of the red corner.
With a record of 0 - 0 - 0, fighting out of Los Angeles, Jake Neil!
And introducing the fighter to my right, fighting out of the blue corner.
With a record of 0 - 1 - 0, fighting out of St Petersburg, Noah Williams!
The judges for this bout are Gwen Towbar, Daniel Franklin and Tiny Johnson.
The bell rings for round one and we are underway!
Neil lands with a kick to the temple. Williams shrugs as if to say "is that all you've got?"
Neil lands three nice shots there - that looked like it hurt!
Williams shoots for a takedown but Neil saw that one coming a mile off and avoided it easily.
The fight stays on the outside here - Williams looks like he's thinking about clinching though.
Neil misses with a jab and misses with a cross straight after too.
Neil dips down and scores with a jab to the body.
Williams fails with a takedown attempt from distance.
Neil throws a series of punches but Williams avoids them all with ease.
Williams tries to clinch there but Neil circles away.
Neil scores with a shot to the body.
Jab, cross, leg kick. Nice combination by Neil!
We've seen a great period of action over the last minute or so - credit to both fighters for going all out!
Neil misses with a two punch combination.
Neil throws a right and a left that Williams avoids nicely.
No joy there for Neil, who threw a few shots but didn't land.
Neil throws a wild combination but nothing lands.
Neil shuffles to his left behind two crisp jabs. Williams eats them both and turns towards Neil to reposition himself and eats a stinging right hand-left hook combo.
That's one minute gone in the round.
Neil lands with a straight right. Williams didn't see that one coming.
No luck for Williams with that takedown attempt.
Jake Neil has stuffed three takedown attempts in the round now. That's going to take a lot out of Noah Williams.
Neil lands with a nice body punch.
Neil throws a right and a left that both miss.
Neil throws a combination but it was largely blocked by Williams.
Williams drops down looking to force a counter takedown but Neil defends it well.
Neil closes the distance and lands a one-two.
Williams shoots in with a takedown attempt and he has Neil pinned against the cage. Neil gets the underhooks and manages to circle away.
Neil tries a switch kick but it misses it's target.
Neil checks a low kick from Williams.
Williams shoots for a takedown but Neil saw that one coming a mile off and avoided it easily.
That's two minutes gone in the round.
Neil scores with a kick to the body.
Neil lands a jab to the head.
The fans in attendance giving it up for the two fighters, who have really let it all hang out in the last minute or so!
Neil throws a series of punches but Williams moves out of range.
Williams fails in his attempt to clinch.
Neil with a body punch. A glancing blow.
Williams doesn't manage to clinch there - Neil circles away.
Neil lands three nice shots there - that looked like it hurt!
Neil uses good footwork to get in and out, landing a nice hook.
Neil connects with a looping left hand that seems like it dazed Williams momentarily.
Williams on the wrong end of a nice hook.
Neil lands a nice shot to the body.
The fight stays on the outside here - Williams looks like he's thinking about clinching though.
Jake Neil seems to be the more aggressive standup fighter in this bout.
Neil fails to land with a series of punches.
That's three minutes gone in the round.
Williams takes a punch to the jaw and another one to the bread basket.
Williams looks for a takedown but Neil sprawls well.
Williams looks winded!
Neil works over Williams's head and body with a nice combination.
Neil rushes forward with a series of wild hooks but Williams moves out of range and avoids them all easily.
Williams slips a jab and a cross from Neil.
Neil lets the fists fly and connects with a left straight followed by a right hook.
Well, he's not going to score with shots like that. A lazy body kick attempt from Neil.
Williams takes a head kick and shrugs it off.
The crowd are loving this. Great action here.
Williams will have to do better than that with his takedown attempts.
Some wild striking there from Williams.
That's four minutes gone in the round.
Neil throws a head kick that misses and slips in the process. He scrambles back to his feet and the fighters circle.
Neil feints a jab promting Williams to slip. Neil then demonstrates his capabilities by jabbing again. Williams slips again and ducks right into an uppercut.
No luck with that takedown attempt from Williams.
Williams takes a jab right on the kisser.
Neil scores with a one two! Williams had his feet all tangled up there and couldn't avoid the strikes.
Williams throws the overhand right but ducks down into a quick takedown attempt. Neil was covering up waiting for the punch and Williams finishes the takedown easily into guard.

Neil manages to wriggle out and sneak his way back up to his feet, so the fighters are now clinched up against the cage.
The crowd applaud the fighters' efforts here as the round comes to an end.
Neil pushes off and circles away, back to the middle of the mat.
And that is the end of the round. The fighters go back to their corners.
Jake Neil dominated that round.
The corners get their ten second warning. Both fighters stand from their stools and stare each other down, ready to get back to the action.
Williams is looking to clinch.
No luck for Neil with that takedown attempt.
Neil throws a nice looking combination but Williams bobs and weaves to avoid any damage.
Williams shapes to counter with a head kick.
Williams stuffs the takedown attempt from Neil. Neil gets slowly back to his feet.
Williams is trying to avoid his opponent's strikes and get into the clinch.
Williams shoots in for a takedown. "Ole!" shouts Neil as he jumps to the side.
Neil scores with a nice looking left hook and follows it up with an uppercut!
Jake Neil is winning the standup battle so far.
We've had a slow start to the round here - hopefully the action picks up.
Williams throws a combination but comes up with nothing but fresh air.
Neil lands three nice shots there - that looked like it hurt!
Neil stuffs a takedown. It's all about dictating where the fight takes place and Neil wants it to stay on the feet.
Williams connects with a slap. Keep your fist closed son.
That's one minute gone in the round.
Neil leaves Williams with his face pressed against the mat as he sprawls beautifully, defending against a solid takedown attempt.
Jake Neil has stuffed three takedown attempts in the round now. That's going to take a lot out of Noah Williams.
Williams is breathing heavily.
A left and a right from Neil both land. Nice combination.
Neil jabs Williams to the body, keeping him at a distance.
Neil lands a head kick. Williams smiles back at him and beckons him forward.
Williams walks straight into a jab right on the nose. That one stung - he's blinking and trying to clear his head.
Neil misses with a few strikes there.
Williams shoots in for a takedown - he's clinched up with Neil but Neil pushes him off and we're back to square one.
Neil scores with a shot to the body.
Neil throws a series of strikes that have Williams backpedaling.
The crowd cheering loudly, showing their appreciation for the quality fight we're seeing here.
Neil throws a right hand that Williams ducks under and follows up with a left that Williams also avoids with ease.
That's two minutes gone in the round.
Neil lands a two punch combo.
Neil lands a vicious shot with the stealth of a sniper and the strength of a viper. Are vipers that strong? I can think of lots of things that are stronger than a viper - not many rhyme with sniper though.
Horrible takedown attempt by Williams or perhaps it was just good defense by Neil, which made it look bad.
A left and a right from Neil both land. Nice combination.
Neil looks to land a combination. Williams sees it coming but can only parry a couple of the shots.
Williams is rocked!
Neil misses with a takedown attempt - Williams sprawls well and throws a nice strike on the way out which just misses.
Neil misses with a takedown attempt. He shot from a bit too far out.
Williams slaps away a takedown attempt from Neil, before circling back to the center of the mat.
That's three minutes gone in the round.
No luck for Williams with that takedown attempt.
Neil goes to the watering hole and comes back with a big thumbs up from the judges as he scores a three punch combo.
Williams misses with a wild body shot.
Neil throws a right hand that Williams ducks under and follows up with a left that Williams also avoids with ease.
Neil looks to land a combination but Williams avoids it well.
Neil pushes forward with a 1-2 combination that forces Williams back to the cage. Neil follows up with a solid lead hook to the liver.
Neil is really dominating this fight. Is there anything that Williams can do to turn this around?
Neil defends well against a solid takedown attempt from Williams.
Neil stalks Williams and leaps in with a furious combination of punches. Uppercuts and crosses smash into Williams's face. Williams staggers backwards, shaken.
A combination from Neil does no damage.
The fighters are starting to perspire pretty heavily.
Neil will have to do better than that with his takedown attempts.
That's four minutes gone in the round.
We've seen a great period of action over the last minute or so - credit to both fighters for going all out!
Neil chopped to the floor by a nice leg kick but he springs right back up before Williams can pounce on him.
Williams rushes forward with a series of wild hooks but Neil moves out of range and avoids them all easily.
Neil dives in for a single leg takedown but Williams sprawls and the fighters end up clinched against the cage.
Neil manages to break the clinch.
Williams takes a body punch but keeps moving.
Williams drives through with a takedown into Neil's guard. Let's see what he can do from the top position.
Neil is scooting his butt against the cage and has managed to get back to his feet. Williams presses him back against the cage, presumably looking to take the fight back to the mat.
Williams fails to pull guard.
The crowd applaud the fighters' efforts here as the round comes to an end.
Neil works for underhooks and lands a body shot in the process.
Good anti-grappling being displayed by Neil as Williams tries to tie him up.
And that is the end of the round. The fighters go back to their corners.
Jake Neil dominated that second round.
The fighters get back to their feet, the hooter sounds and we're back to the action! Let's hear some noise people - this is the final round!
Neil lands a jab. Then a cross. Then finally a nice hook to the body. Good work there by Neil.
Williams looks for a takedown but Neil sprawls well.
As Williams looks to move away, Neil throws a big counter combo but Williams just gets out of the way.
Jake Neil is looking to throw some combinations by the looks of things.
Williams fails with the takedown.
Neil scores with a nice one two combo and darts back out of range to avoid anything coming in the opposite direction.
Williams swings and misses with a hook to the body.
We've had a slow start to the round here - hopefully the action picks up.
Williams drops his hands and takes a jab to the jaw for his troubles.
Neil lands a jab followed by a nice looking cross.
Williams goes for a double leg but Neil avoids the attempt and the two fighters end up clinched against the cage as Neil continues to drive forward.
Neil wants to take advantage of his opponent's missed offense by moving into the clinch.
Jake Neil has stuffed three takedown attempts in the round now. That's going to take a lot out of Noah Williams.
Danga de danga de dang - Neil scores with a four punch combination!
Neil is working the combinations to good effect here.
Williams takes a big intake of breath there - he's definitely tired.
We've seen a great period of action over the last minute or so - credit to both fighters for going all out!
Neil is trying hard to land a takedown here. Williams sprawls well and keeps this one on the feet.
That's one minute gone in the round.
Neil fails to land with the punch combination there - jab, cross, hook, miss, miss, miss.
Williams tries to clinch up but Neil circles away and keeps his distance.
Neil was looking to counter that last move with a shot to the body but he didn't commit.
Williams stuffs the takedown.
Neil goes to the watering hole and comes back with a big thumbs up from the judges as he scores a three punch combo.
No luck with that takedown attempt from Neil.
Williams feints the counter takedown.
Williams throws a low kick but it's checked well by Neil.
Williams fails to land the takedown.
Nice sprawl there from Williams as Neil shoots in.
Williams throws a right and a left that both miss.
Neil feinted there with a counter leg kick.
Neil scores with a body shot.
That's two minutes gone in the round.
Williams with poor footwork there. He got himself in a bit of a tangle, enabling Neil to score with a decent uppercut.
Neil lands a two punch combo.
Fantastic stuff here - a very entertaining period of action, which has drawn cheers from the crowd.
Williams is on the wrong end of a nice combination from Neil.
Neil scores with a one two! Williams had his feet all tangled up there and couldn't avoid the strikes.
Williams shoots in for a takedown but doesn't get it.
A right-left combo lands from Neil.
Neil misses with a series of wild punches.
Williams tries to clinch up but Neil circles away and keeps his distance.
Williams wants to clinch up but Neil keeps it at a distance.
Neil will need to tighten up his combinations if he doesn't want to gas himself out, swinging at thin air.
That's three minutes gone in the round.
Neil tries to bum rush Williams with a series of wild strikes but Williams uses good footwork to avoid the assault.
Williams gets a takedown into half guard.
Williams looking to pass the half guard. Not this time.
Williams is trying to control the action in half guard but Neil is working away on the bottom, looking perhaps to get back to full guard.
Neil tries to kick Williams off but Williams keeps his base steady and stays in half guard.
Williams is looking to take a break and control but Neil is keeping him honest, looking to work from the bottom.
The ref warns both fighters not to hold the cage as they work up against the meshing.

Neil has one foot on Williams's thigh - he pushes off and manages to get back to his feet.
That's four minutes gone in the round.
A nice combination there by Neil.
Sloppy strikes from Neil. Those never looked like landing.
This has been an exciting period of action!
Neil throws a right and a left that both miss.
Williams is definitely looking for the counter takedowns here.
Neil stuffs a takedown. It's all about dictating where the fight takes place and Neil wants it to stay on the feet.
Williams is on the wrong end of a nice combination from Neil.
Neil pushes forward with a 1-2 combination that forces Williams back to the cage. Neil follows up with a solid lead hook to the liver.
Horrible takedown attempt by Williams or perhaps it was just good defense by Neil, which made it look bad.
Neil looks for a takedown. He's got it. We're now in half guard.
And that's the end of the fight!
Jake Neil showed his dominance in that final round.
Well Neil has outscored his opponent in every aspect of the fight today. Only a scarily incompetent judge or two will keep him from a well deserved win... Over to the ring announcer for the scorecards.
Ladies and gentlemen, after 3 rounds of action, we go to the scorecards for a decision.
Judge Gwen Towbar scores the fight 30:26
Judge Daniel Franklin scores the fight 30:26
Judge Tiny Johnson scores the fight 30:26
In favor of your winner, by unanimous decision... Jake Neil!
|
|
|
|
|
|
|
|
|
|
|
|
|
|
|
|
|
|
|
|
|
|
|
| S |
C
A |
G |
S |
C
B |
G |
|
S |
C |
G |
|
energy
A | B |
|
hype
A | B |
|
pop
A | B |
|
mgr
A | B |
|
FIGHT
RATING
81% |
|
|
|
|
|
|
|
Undercard bout
|
Coming up we have a middleweight MMA rules bout between Mick Matthews (ranked 23539 p4p, 6434 weight class) and Fred El Celso (ranked 717 p4p, 663 weight class). Mick Matthews had real problems making weight for this fight. After initially coming in at 187.3lbs, he had two hours to make the official fight weight. He made it but it will have taken a lot out of him to cut those extra few pounds. Fred El Celso has the power to score a knockout today if he connects clean with Mick Matthews's chin.
 |
|
 |
| 186 cm
21
196
0 - 3 - 0 |
|
168 cm
25
183
9 - 10 - 0 |
BJJ Purple Belt
Solid boxing
Self confident |
|
Good takedowns
Basic striking
Solid chin |
|
| |
|
Ladies and gentlemen. This fight is 3 rounds, in the middleweight division.
Introducing the fighter to my left, fighting out of the red corner.
With a record of 0 - 3 - 0, fighting out of Las Vegas, Mick Matthews!
And introducing the fighter to my right, fighting out of the blue corner.
With a record of 9 - 10 - 0, fighting out of Rio de Janeiro, Fred El Celso!
The judges for this bout are Wesley Smith, Cecil Peabody and Robert Twigg.
The bell rings for round one and we are underway!
El Celso shoots in looking for a single leg takedown. Matthews is trying to defend but El Celso finishes it well and ends up in half guard. Let's see if he can advance position further.
Matthews looks exhausted already! Oh dear, he should have come in in better shape than this!
El Celso missing with some ground and pound from the half guard.
The fighters are pressed up against the cage, both looking to find a bit of space to work.
El Celso uses his free foot to push down on Matthews's thigh. Eventually he works his other foot free and he's advanced to mount - this is trouble for Matthews.
El Celso looks like he's working for a submission but he's not found anything just yet.
El Celso working for a submission here. He's tucked his head under his opponent's arm, looking for an arm triangle. He's hopped off into side control, looking to tighten the submission... is it going to work? He's given up a good position looking for it. Matthews looks OK. Oh, I spoke too soon, he's out! That must have been tighter than I thought! Excellent work there by El Celso! Submission of the night perhaps?
Ladies and gentlemen, after 0:49 of round 1, we have a winner by way of Submission (Arm Triangle). Fred El Celso!
A victorious Fred El Celso thanked his army of followers in his post fight interview, telling people to make sure they follow him on Twitter.
In defeat, Mick Matthews stepped up to the mic, saying 'We will meet again !!!'.
|
|
|
|
|
|
|
|
|
|
|
|
|
|
|
|
|
|
|
|
|
|
|
| S |
C
A |
G |
S |
C
B |
G |
|
S |
C |
G |
|
energy
A | B |
|
hype
A | B |
|
pop
A | B |
|
mgr
A | B |
|
FIGHT
RATING
100% |
|
|
|
|
|
|
|
Undercard bout
|
Coming up we have a welterweight MMA rules bout between Akane Akasuki (ranked 6170 p4p, 5832 weight class) and Marcin Turas (ranked 633 p4p, 611 weight class). Over to our ring announcer for the fighter introductions!
 |
|
 |
| 180 cm
25
170
0 - 1 - 0 |
|
185 cm
25
183
0 - 1 - 0 |
BJJ Blue Belt
Excellent MT
Big right hand |
|
BJJ White Belt
Excellent MT
Heavy handed |
|
| |
|
Ladies and gentlemen. This fight is 3 rounds, in the welterweight division.
Introducing the fighter to my left, fighting out of the red corner.
With a record of 0 - 1 - 0, fighting out of Tokyo, Akane Akasuki!
And introducing the fighter to my right, fighting out of the blue corner.
With a record of 0 - 1 - 0, fighting out of New York, Marcin Turas!
The judges for this bout are Chris Downing, Alan Glass and Tiny Johnson.
The bell rings for round one and we are underway!
Akasuki throws a sloppy head kick and Turas moves out of range easily.
Akasuki throws a looping overhand right but Turas ducks down to avoid it.
Akasuki scores with a head kick.
Akasuki throws a head kick that misses and slips in the process. He scrambles back to his feet and the fighters circle.
Turas lets it all go there with a big combo counter but none of the punches connected.
Turas avoids the head kick by Akasuki.
As Akasuki backs off Turas throws a huge counter combo but Akasuki manages to avoid it all.
Akasuki looks to land a combination but Turas avoids it well.
Turas tries a counter takedown but it's more of a dummy move, and he uses it to push himself away.
Akasuki misses with a head kick.
Turas blocks a head kick by Akasuki.
Turas ducks under a wild hook from Akasuki.
We've had a slow start to the round here - hopefully the action picks up.
Akasuki throws a head kick but Turas moves out of range.
Jab from Akasuki.
Akasuki tries a head kick but it misses.
Akasuki misses with an uppercut. Turas saw that one coming.
Turas is loading up here, looking for a big counter of his own.
That's one minute gone in the round.
Akasuki tries a head kick but it misses.
Turas drops down looking to force a counter takedown but Akasuki defends it well.
Nice shot lands for Akasuki.
Turas blocks a head kick by Akasuki.
As Akasuki backs off Turas throws a huge counter combo but Akasuki manages to avoid it all.
Akasuki tries a head kick but it misses.
Akasuki misses with a double jab
and Turas counters with a series of strikes. Akasuki will be more careful next time no doubt.
Akasuki throws a combination that misses
and Turas counters with a two punch combo.
Akasuki throws a sloppy head kick and Turas moves out of range easily.
Turas is definitely looking for the counter takedowns here.
A head kick by Akasuki misses
and Turas counters with a two punch combo.
Akasuki throws a head kick that misses and slips in the process. He scrambles back to his feet and the fighters circle.
Despite the aggression on Turas's face he doesn't fully commit to the counter.
Turas avoids the head kick by Akasuki.
Turas throws a counter combo.
This has been an exciting period of action!
Akasuki tries a switch kick but it misses it's target.
That's two minutes gone in the round.
Akasuki pulls out of a head kick attempt.
Akasuki lands with a hook. Turas tried to avoid it but it clipped the top of his head.
Akasuki pulls out of a head kick attempt.
A head kick misses from Akasuki.
Akasuki throws a head kick that misses.
Despite the aggression on Turas's face he doesn't fully commit to the counter.
Akasuki bobs and weaves and throws out a fast jab that snaps Turas's head backwards.
Akasuki lands with a slapping head kick.
Akasuki throws a head kick that misses and slips in the process. He scrambles back to his feet and the fighters circle.
Akasuki throws a head kick but Turas moves out of range.
Akasuki misses with a half-hearted attempt at a head kick.
Turas changes levels for a counter takedown but doesn't follow through with his attempt.
Turas dodges the punch combination from Akasuki.
Turas drops down looking to force a counter takedown but Akasuki defends it well.
That's three minutes gone in the round.
Akasuki lands with a head kick! That's gotta hurt.
Akasuki throws a lazy head kick
letting Turas counter with a right hand.
Akasuki throws a lazy uppercut
and Turas counters with a three punch combination, finished off with a leg kick. Nice work.
Akasuki throws a head kick that misses.
Akasuki tries a head kick but it misses.
Turas slips a jab from Akasuki.
Turas moves out of range of the strikes.
Akasuki throws out a loose jab but Turas uses good head movement to avoid it.
Turas feints the counter takedown.
Akasuki misses with an uppercut
and Turas counters with a nice uppercut.
Akasuki pulls out of a head kick attempt.
Despite the aggression on Turas's face he doesn't fully commit to the counter.
That's four minutes gone in the round.
Akasuki tries a switch kick but it misses it's target.
Akasuki throws a head kick that misses and slips in the process. He scrambles back to his feet and the fighters circle.
Akasuki goes for a high kick. It partially lands.
This is a great period of action - very entertaining stuff!
Akasuki tries a head kick but it misses.
Akasuki throws a head kick that misses and slips in the process. He scrambles back to his feet and the fighters circle.
Akasuki is breathing heavily.
Akasuki scores with a head kick.
Akasuki misses with a head kick.
And Turas tries to counter it with a takedown but Akasuki pushes his down on his head and steps out.
Akasuki is really head hunting here, hardly looking to strike to the body at all.
Turas avoids the head kick by Akasuki.
Akasuki throws a head kick but Turas moves out of range.
Turas lets it all go there with a big combo counter but none of the punches connected.
Akasuki throws a hook but Turas blocks it.
Turas throws a counter combo.
Akasuki throws a head kick that misses.
Turas avoids the head kick by Akasuki.
And that is the end of the round. The fighters go back to their corners.
Akane Akasuki dominated that round.
The fighters get back to their feet, the hooter sounds and we're back to the action!
A head kick misses from Akasuki.
Akane Akasuki seems to be the more aggressive standup fighter in this bout.
Turas blocks a head kick by Akasuki.
Turas is definitely looking for the counter takedowns here.
A head kick from Akasuki lands but Turas takes it in his stride.
Akasuki misses with a half-hearted attempt at a head kick.
Akasuki scores with a hook.
Akasuki pulls out of a head kick attempt.
A jab lands there for Akasuki.
Akasuki pulls out of a head kick attempt.
Turas is loading up here, looking for a big counter of his own.
We've had a slow start to the round here - hopefully the action picks up.
Akasuki throws a lazy head kick
and Turas counters with a series of strikes. Akasuki will be more careful next time no doubt.
Akasuki misses with a head kick.
As Akasuki backs off Turas throws a huge counter combo but Akasuki manages to avoid it all.
Akasuki tries a head kick but it misses.
Turas tries a counter takedown but it's more of a dummy move, and he uses it to push himself away.
Akasuki misses with a half-hearted attempt at a head kick.
Turas throws a counter combo.
That's one minute gone in the round.
Akasuki throws a head kick that misses and slips in the process. He scrambles back to his feet and the fighters circle.
Both fighters are absolutely exhausted here.
Akasuki throws a head kick that misses and slips in the process. He scrambles back to his feet and the fighters circle.
Turas feints the counter takedown.
Akasuki tries a switch kick but it misses it's target.
Turas drops down looking to force a counter takedown but Akasuki defends it well.
Akasuki misses the jab.
Turas swings away with a counter right hand but no contact made.
Akasuki throws a head kick that misses
and Turas counters with a crisp hook to the side of the head.
Akasuki throws a head kick that misses.
Akasuki throws a good cross that connects.
Akasuki misses with a head kick.
Turas is looking for the big counter here.
A head kick by Akasuki misses
and Turas counters with a quick right hand to the jaw.
Akasuki throws a jab but it's blocked by Turas.
Turas tries a counter takedown but it's more of a dummy move, and he uses it to push himself away.
Akasuki tries a switch kick but it misses it's target.
Akasuki throws a head kick that looked like it stung.
That's two minutes gone in the round.
A head kick by Akasuki misses
and Turas counters with a lovely straight right hand!
Akasuki throws a head kick that misses.
Turas throws a counter combo.
Akasuki tries a switch kick but it misses it's target.
Turas throws out a counter right but Akasuki avoids it with no problem.
Turas displays some good footwork, moving neatly out of range as Akasuki throws out the jab.
This has been an exciting period of action!
A head kick by Akasuki misses
and Turas counters with a shoot takedown. Akasuki fights it but they end up in guard.
Turas is looking to stand up but Akasuki won't let him.
Turas stands up and waves to Akasuki to follow him.
A head kick by Akasuki misses
enabling Turas to counter with a crisp jab.
Akasuki misses with a lunging right hand
and Turas counters with a quick right hand to the jaw.
Akasuki misses with a head kick.
And Turas tries to counter it with a takedown but Akasuki pushes his down on his head and steps out.
Akasuki pulls out of a head kick attempt.
Turas avoids the head kick by Akasuki.
That's three minutes gone in the round.
Akasuki throws a big shot that misses.
Turas throws a counter combo.
Turas blocks a head kick by Akasuki.
Akasuki tries a head kick but it misses.
Turas unleashes a big counter combination but Akasuki bobs and weaves and avoids any damage.
Akasuki misses with a wild combination.
Akasuki pulls out of a head kick attempt.
Akane Akasuki is winning the standup battle so far.
Turas uses decent footwork to sidestep a right hand from Akasuki.
Turas is looking for the big counter here.
Akasuki pulls out of a head kick attempt.
Akasuki throws a head kick that misses.
Akasuki misses with an uppercut
and Turas counters with a quick right hand to the jaw.
Akasuki pulls out of a head kick attempt.
That's four minutes gone in the round.
Akasuki throws a monster uppercut resembling something out of street fighter but it doesn't land.
Akasuki tries a switch kick but it misses it's target.
Turas unleashes a big counter combination but Akasuki bobs and weaves and avoids any damage.
Akasuki misses with a right hand
and Turas counters with a series of strikes. Akasuki will be more careful next time no doubt.
Turas avoids the head kick by Akasuki.
Turas with the counter takedown but Akasuki avoids it easily.
Akasuki misses with a head kick.
Akasuki connects with a nice looking jab.
Akasuki thows a left - swing and a miss!
Turas changes levels for a counter takedown but doesn't follow through with his attempt.
This has been an exciting period of action!
Akasuki pushing out the jab but it's not landing.
Akasuki is really dominating this fight. Is there anything that Turas can do to turn this around?
Akasuki misses with a straight right.
Akasuki tries a head kick but it misses.
Akasuki misses with a hook
and Turas counters with a one-two to the body.
Akasuki throws a sloppy head kick and Turas moves out of range easily.
And that is the end of the round. The fighters go back to their corners.
Akane Akasuki dominated that second round.
That's the end of the interval. I'm sure that seemed a lot quicker than a minute for our two fighters! Back to the action. Ladies and gentlemen, this is the final round!
A head kick misses from Akasuki.
Turas unleashes a big counter combination but Akasuki bobs and weaves and avoids any damage.
Akasuki misses with a head kick.
Turas is looking for the big counter here.
Boom, another hit is landed. "You're gunna get knocked out" taunts Akasuki, as that shot connected.
Akasuki throws a sloppy head kick and Turas moves out of range easily.
Turas throws a counter combo.
Akasuki throws a lazy head kick
and Turas counters with a straight right hand.
Turas avoids the head kick by Akasuki.
As Akasuki backs off Turas throws a huge counter combo but Akasuki manages to avoid it all.
Akasuki throws a head kick that misses and slips in the process. He scrambles back to his feet and the fighters circle.
Akasuki misses with a half-hearted attempt at a head kick.
Turas changes levels for a counter takedown but doesn't follow through with his attempt.
We've had a slow start to the round here - hopefully the action picks up.
Akasuki misses with a half-hearted attempt at a head kick.
Turas is definitely looking for the counter takedowns here.
Both fighters are breathing heavily.
Akasuki tries a switch kick but it misses it's target.
Turas unleashes a big counter combination but Akasuki bobs and weaves and avoids any damage.
Akasuki looks to throw the jab but Turas is out of range.
Marcin Turas is looking to throw some combinations by the looks of things.
Akasuki pulls out of a head kick attempt.
Turas is loading up here, looking for a big counter of his own.
That's one minute gone in the round.
A head kick misses from Akasuki.
Turas throws a counter combo.
Akasuki throws a head kick that misses
and Turas counters with a stiff right hand.
A head kick misses from Akasuki.
Turas throws a counter combo.
Akasuki misses with a looping right.
Turas lets it all go there with a big combo counter but none of the punches connected.
Turas ducks under an overhand right and circles away with a smile on his face.
Akasuki misses with a head kick.
Akasuki pulls out of a head kick attempt.
Turas swings away with a counter right hand but no contact made.
Turas blocks a head kick by Akasuki.
Akasuki misses with a half-hearted attempt at a head kick.
As Akasuki backs off Turas throws a huge counter combo but Akasuki manages to avoid it all.
Akasuki throws a sloppy head kick and Turas moves out of range easily.
Akasuki throws a monster uppercut resembling something out of street fighter but it doesn't land.
That's two minutes gone in the round.
Akasuki throws a head kick but Turas moves out of range.
Akasuki throws a poor cross that misses
and Turas counters with a three punch combination, finished off with a leg kick. Nice work.
Akasuki throws a head kick that misses and slips in the process. He scrambles back to his feet and the fighters circle.
And Turas tries to counter it with a takedown but Akasuki pushes his down on his head and steps out.
Akasuki throws a sloppy head kick and Turas moves out of range easily.
Turas is loading up here, looking for a big counter of his own.
Turas avoids the head kick by Akasuki.
Akasuki tries a head kick but it misses.
Turas tries a counter takedown but it's more of a dummy move, and he uses it to push himself away.
Turas avoids the head kick by Akasuki.
Akasuki tries a switch kick but it misses it's target.
Turas drops down looking to force a counter takedown but Akasuki defends it well.
The crowd cheering loudly, showing their appreciation for the quality fight we're seeing here.
A slow jab from Akasuki misses its intended target.
Akasuki tries a switch kick but it misses it's target.
Akasuki throws a head kick that misses
and Turas counters with a two punch combo.
That's three minutes gone in the round.
Akasuki misses with a straight right.
As Akasuki backs off Turas throws a huge counter combo but Akasuki manages to avoid it all.
Akasuki throws a head kick that misses and slips in the process. He scrambles back to his feet and the fighters circle.
Akasuki throws a lazy head kick
and Turas counters with a left and a right that stings Akasuki.
A telegraphed right hand from Akasuki misses the target.
Turas feints the counter takedown.
Akasuki misses with a head kick.
Akasuki will need to tighten up his combinations if he doesn't want to gas himself out, swinging at thin air.
Turas lets it all go there with a big combo counter but none of the punches connected.
A head kick by Akasuki misses
and Turas counters with a series of strikes. Akasuki will be more careful next time no doubt.
A head kick misses from Akasuki.
Turas lets it all go there with a big combo counter but none of the punches connected.
Akasuki throws a combination but comes up with nothing but fresh air.
It seemed like Turas was going to counter with the hook but didn't fully commit to it.
Akasuki tries a head kick but it misses.
That's four minutes gone in the round.
Akasuki tries a switch kick but it misses it's target.
Despite the aggression on Turas's face he doesn't fully commit to the counter.
Akasuki throws a head kick that misses
and Turas counters with a three punch combo that has Akasuki backing up. Akasuki nods at Turas to acknowledge the strikes.
Wooooo! Give it up for these two warriors! They are putting on a show!
Akasuki throws a sloppy head kick and Turas moves out of range easily.
Turas with the counter takedown but Akasuki avoids it easily.
Akasuki misses with a half-hearted attempt at a head kick.
Turas throws a counter combo.
Akasuki loads up on a big right hand but Turas slips the punch.
Akasuki misses with a half-hearted attempt at a head kick.
Akasuki pushing out the jab but it's not landing.
Turas moves out of range of the strikes.
Akasuki misses with a right hand
and Turas counters with a nice shoot takedown that brings the fighters to the ground.
Turas gets to his feet. Akasuki looking to butt scoot but the ref puts an end to that. On your feet son!
Turas avoids the head kick by Akasuki.
Turas with the counter takedown but Akasuki avoids it easily.
Marcin Turas has stepped it up - he knows he needs a finish here!
Akane Akasuki is fighting for a decision here - he's started to take the cautious approach.
Turas staying out of range there.
Turas is looking for the big counter here.
And that's the end of the fight!
Akane Akasuki showed his dominance in that final round.
Well I reckon that's a shut out for Akasuki, winning every round. Will the judges agree? They are the ones who matter, even if they are often depressingly incompetent. Over to the ring announcer for the scorecards.
Ladies and gentlemen, after 3 rounds of action, we go to the scorecards for a decision.
Judge Chris Downing scores the fight 30:27
Judge Alan Glass scores the fight 30:27
Judge Tiny Johnson scores the fight 30:27
In favor of your winner, by unanimous decision... Akane Akasuki!
|
|
|
|
|
|
|
|
|
|
|
|
|
|
|
|
|
|
|
|
|
|
|
| S |
C
A |
G |
S |
C
B |
G |
|
S |
C |
G |
|
energy
A | B |
|
hype
A | B |
|
pop
A | B |
|
mgr
A | B |
|
FIGHT
RATING
59% |
|
|
|
|
|
|
|
Co-main event
|
Coming up we have a welterweight MMA rules bout between Milo Vicente (ranked 1037 p4p, 3516 weight class) and Little Bitch (ranked 146 p4p, 448 weight class). The key to victory for Milo Vicente has got to be keeping the fight on the feet.
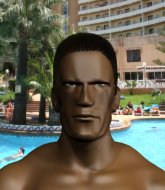 |
|
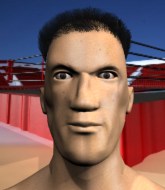 |
| 180 cm
25
181
8 - 7 - 0 |
|
189 cm
21
181
5 - 11 - 0 |
BJJ Purple Belt
Excellent MT
Cardio machine |
|
Good wrestler
Good kicks
Good gas tank |
|
| |
|
Ladies and gentlemen. This fight is 3 rounds, in the welterweight division.
Introducing the fighter to my left, fighting out of the red corner.
With a record of 8 - 7 - 0, fighting out of Las Vegas, Milo Vicente!
And introducing the fighter to my right, fighting out of the blue corner.
With a record of 5 - 11 - 0, fighting out of Las Vegas, Little Bitch!
The judges for this bout are Wesley Smith, Stewart Dunkirk and Frank Dennis.
The bell rings for round one and we are underway!
Bitch throws a right and a left that Vicente avoids nicely.
Vicente goes for a spinning back kick but it misses.
Vicente getting the better of the striking in that exchange.
Vicente lands a pitter patter jab to the forehead of his opponent.
Vicente lands a nice shot that snaps Bitch's head back.
Vicente with a nice cross.
Vicente ducks under a wild hook from Bitch.
Vicente gets caught flat footed, as Bitch shoots in with a quick takedown into guard.
Bitch wants to control from the top but Vicente keeps moving.
Bitch trying to land body shots but he keeps hitting the mat.
Bitch postures up to throw the ground and pound strikes but they don't connect.
We've seen a great period of action over the last minute or so - credit to both fighters for going all out!
Bitch showing good wrestling skills to control the position.
Bitch pressing down on his opponent's thigh, looking to pass guard. Vicente is keeping the position for now.
Bitch wants to control from the top but Vicente keeps moving.
Bitch controls from within his opponent's guard.
That's one minute gone in the round.
Vicente is trying to control the position but Bitch postures up.
Bitch with a flurry of punches that miss.
Vicente bucks up whilst keeping hold of a body lock, managing to reverse the position. Now he's in top in Bitch's guard.

Vicente is sitting in guard, working some ground and pound.
Vicente scoring with punches to the head and body.
Bitch is rocked!
Vicente arches his back and unloads with a massive left and a right! Bitch's eyes roll back into his head, he's out cold! The ref dives in to stop the fight - wow, they were hard shots!
Ladies and gentlemen, after 1:53 of round 1, we have a winner by way of KO (Strikes). Milo Vicente!
|
|
|
|
|
|
|
|
|
|
|
|
|
|
|
|
|
|
|
|
|
|
|
| S |
C
A |
G |
S |
C
B |
G |
|
S |
C |
G |
|
energy
A | B |
|
hype
A | B |
|
pop
A | B |
|
mgr
A | B |
|
FIGHT
RATING
55% |
|
|
|
|
|
|
|
Main event
|
Coming up we have a middleweight MMA rules bout between Tonny Gomez (ranked 700 p4p, 3126 weight class) and Bob Weadababyitsaboy (ranked 88 p4p, 403 weight class). Gomez comes to the cage accompanied by Heal our Land. Both fighters look fresh as a daisy as they make their way towards the cage.
 |
|
 |
| 200 cm
23
203
7 - 2 - 0 |
|
182 cm
24
191
4 - 13 - 0 |
Good wrestling
Excellent boxer
Cardio machine |
|
BJJ Brown Belt
Excellent MT
Granite chin |
|
| |
|
Ladies and gentlemen. This fight is 3 rounds, in the middleweight division.
Introducing the fighter to my left, fighting out of the red corner.
With a record of 7 - 2 - 0, fighting out of New York, Tonny Gomez!
And introducing the fighter to my right, fighting out of the blue corner.
With a record of 4 - 13 - 0, fighting out of Las Vegas, Bob Weadababyitsaboy!
The judges for this bout are Alan Glass, Wesley Smith and George Francis.
The bell rings for round one and we are underway!
Weadababyitsaboy cracks Gomez with a right hand to the side of the head.
Weadababyitsaboy has been spending a lot of time sparring his boxing in the run up to the fight, trying to sharpen up those hands and look for a knockout.
Bob Weadababyitsaboy seems to be the more aggressive standup fighter in this bout.
Weadababyitsaboy misses with a few strikes there.
Weadababyitsaboy misses with a hook. Gomez ducked under it nicely.
A looping hook to the body misses from Gomez. Weadababyitsaboy does a little dance to reset his feet.
Weadababyitsaboy fakes high and swings low for a body shot but Gomez manages to avoid it.
Weadababyitsaboy feints a straight left to the body, then turns around with a flashy move and hits Gomezs jaw with a dramatic spinning back fist!
Gomez lands with a hook. Weadababyitsaboy tried to avoid it but it clipped the top of his head.
It looks like Bob Weadababyitsaboy has been cut.
Weadababyitsaboy connects with a looping right hand.
The fight moves into the clinch position.
Weadababyitsaboy breaks the clinch and we return to the middle of the mat.
Weadababyitsaboy steps to the side to avoid the strikes from Gomez.
Gomez looks to throw the jab but Weadababyitsaboy is out of range.
Gomez swings away but doesn't land with a series of punches.
This has been an exciting period of action!
Gomez circles away from the clinch attempt.
A shot to the liver by Weadababyitsaboy. Beautiful body shot.
Weadababyitsaboy closes the distance and clinches up with Gomez, looking for a takedown. Weadababyitsaboy pushes Gomez against the cage but Gomez circles to the side and manages to break the clinch.
Weadababyitsaboy lands a powerful looking uppercut that connected with his opponent's jaw.
Weadababyitsaboy misses with a head kick.
That's one minute gone in the round.
Weadababyitsaboy misses with a right hand
and Gomez counters with a straight right hand.
Gomez circles away from the clinch attempt.
Gomez is looking to counter punch.
Gomez with a hook.
Gomez swings away but doesn't land with a series of punches.
Weadababyitsaboy throws a looping overhand right but Gomez ducks down to avoid it.
Gomez drops his hands and takes a jab to the jaw for his troubles.
Weadababyitsaboy works the jab nicely.
Weadababyitsaboy keeping a good distance there, avoiding the body shot.
Gomez swings away but doesn't land with a series of punches.
Weadababyitsaboy scores with a nice right hand.
Weadababyitsaboy connects with the punch.
Weadababyitsaboy is landing a lot of head punches in this opening round! Gomez had better start moving his head a bit unless he wants his face to turn into mush.
Fantastic stuff here - a very entertaining period of action, which has drawn cheers from the crowd.
Gomez blocks a jab.
Weadababyitsaboy throws a head kick that misses.
Gomez swings away but doesn't land with a series of punches.
Weadababyitsaboy fakes a jab and then connects with a hook.
Weadababyitsaboy lands with an uppercut that bounces Gomez off the cage and back into range.
Weadababyitsaboy lands a slapping body shot.
That's two minutes gone in the round.
Weadababyitsaboy connects with a solid leg kick.
Gomez with a nice cross.
Gomez ducks right into an uppercut from Weadababyitsaboy.
Gomez feints a jab promting Weadababyitsaboy to slip. Gomez then demonstrates his capabilities by jabbing again. Weadababyitsaboy slips again and ducks right into an uppercut.
A jab from Weadababyitsaboy does it's job there.
 Gomez is rocked! Gomez is rocked!
Gomez is using his height advantage well here, landing a good percentage of his punches.
Weadababyitsaboy circles and sees the opportunity to plant his feet and throw a really nice straight left hand that drops Gomez to the canvas! Gomez doesn't know where he is but he's trying to survive - Weadababyitsaboy keeps piling on the pressure and forces the referee to step in! This one is aaaaaall over!
Ladies and gentlemen, after 2:29 of round 1, we have a winner by way of TKO (Strikes). Bob Weadababyitsaboy!
A very excited looking Bob Weadababyitsaboy rambled incoherently for about 5 minutes post fight about how awesome he is. It was kinda funny for a while but then everyone got annoyed.
In defeat, Tonny Gomez stepped up to the mic, saying 'Hes a better man tonight but i aint going nowhere hi there kids @ #HouseOfChange we gon do it i Promise 🙂'.
|
|
|
|
|
|
|
|
|
|
|
|
|
|
|
|
|
|
|
|
|
|
|
| S |
C
A |
G |
S |
C
B |
G |
|
S |
C |
G |
|
energy
A | B |
|
hype
A | B |
|
pop
A | B |
|
mgr
A | B |
|
FIGHT
RATING
71% |
|
|
|
|
|
|
|
|
|
|

