|
TWGC 36 (205lbs, D4): Tokyo Qualifier - Round 2 PBP Commentary |
Co-main event
|
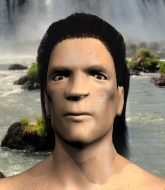
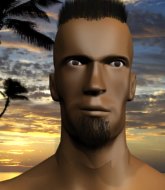
This TWGC bout is 1 fifteen minute round in the light heavyweight division. Introducing today's competitors. In the red corner, competing out of Hilo, with a TWGC record of 1 wins and 0 losses; Carr Cartwright! And in the blue corner, fighting out of Rio de Janeiro, with a TWGC record of 1 wins and 0 losses; Isaia Palamo!
The judges for this bout are Yasuomi Hirokawa, Yukihiro Yamamoto and Shirou Masuda.
Let's get this grappling contest under way! Who will be victorious?#TD2#
Palamo shoots in for a takedown and gets it. Let's see what he's got on the mat. Score +2 for takedown into guard / half guard: Cartwright (0) vs (2) Palamo
The fighters are pressed up against the cage, both looking to find a bit of space to work.
Palamo wants to control from the top but Cartwright keeps moving.
Cartwright working a defensive guard here.
Palamo controls the pace of the fight for a moment.
Palamo trying to control but Cartwright is working from the bottom.
The ref warns both fighters not to hold the cage as they work up against the meshing.
Cartwright trying to control the position.
#SUB2#
Palamo drops back for a leg but he's not going to get it - he lets go and Cartwright dives on top into guard. Score +2 for sweep to guard / half guard: Cartwright (2) vs (2) Palamo
We've had a slow start to the round here - hopefully the action picks up.
Palamo wants to control here, rather than go for any submissions from the bottom. At least for now.
Palamo's corner are shouting for him to control the position and he seems happy to oblige.
Palamo tries to land a sweep but no joy. #T1#
Cartwright trying to control the position from guard on top but Palamo is wriggling around, looking for whatever he can.
Palamo has control of Cartwright's left arm, preventing Cartwright from doing any damage.
Cartwright won't allow Palamo to sweep him here.
Palamo keeping moving, preventing Cartwright from controlling successfully.
Palamo wants to sweep but no luck.
Palamo keeping full guard, as Cartwright tries to pass.
Palamo seems keen to control Cartwright's posture.
Cartwright pressing down on his opponent's thigh, looking to pass guard. Palamo is keeping the position for now. #T2#
Palamo seems keen to control Cartwright's posture.
Cartwright preventing the sweep.
Palamo is doing well to control the posture of his opponent and prevent any damage.
There's a bit of a scramble here and now Palamo is on top in guard.
Score +2 for sweep to guard / half guard: Cartwright (2) vs (4) Palamo
Cartwright is working an open guard here, looking to improve his position. No doubt that will leave him open to counters but at least he's being more offensive.#T3##SUB#
Palamo got a little sloppy there for a moment and Cartwright has worked his way into a loose triangle - can he finish it?! No, Palamo has managed to get both his arms back between Cartwright's legs - danger averted.
Palamo stands up and looks to throw the legs aside to pass to side control. Cartwright swivels though and keeps the full guard.
Palamo not doing a lot at the moment. He'll have to show some more aggression or the fight will get stood up.
Palamo must be cautious of submissions here, given that his opponent has the superior Jiu Jitsu.
Cartwright is trying to control the position from the bottom.
Cartwright being controlled here, momentarily.
Palamo wants to control from the top but Cartwright keeps moving. #T4#
Cartwright looking to control.
Cartwright being controlled here, momentarily.
Palamo wants to control from the top but Cartwright keeps moving.
Cartwright is trying to control the position but Palamo postures up. #SUB#
Palamo got a little sloppy there for a moment and Cartwright has worked his way into a loose triangle - can he finish it?! No, Palamo has managed to get both his arms back between Cartwright's legs - danger averted.#SUB#
Cartwright has an active guard here but Palamo has managed to pass into half guard.
Palamo wants to pass the guard but Cartwright is defending well. #T5##SUB2#
Palamo is looking for a kimura but he's never going to get it from there.
Cartwright is looking to control Palamo's leg but it's slowly edging free. Can Cartwright avoid being mounted?#SUB2#
Palamo is working for a submission of some sort.
Cartwright has no desire to be mounted, so is trying to control. Palamo is working away from the top position though.#SUB2#
Palamo is trying to work for a kimura but Cartwright is defending well.
#T6##SUB2#
Palamo wants to work for an arm triangle but Cartwright is really keeping half guard well and defending the submission attempt.
#SUB2#
Palamo is trying to work for a kimura. This could be trouble! No, Cartwright has managed to free his arm - good work.
Cartwright wants to get back to full guard.
Cartwright is working hard here to advance position.
Cartwright gets back to full guard.
#T7#
Cartwright controls Palamo momentarily but Palamo frees himself. #SUB2#
Palamo drops back looking for a leg! Cartwright is in trouble here! The fighters roll with the hold and Cartwright manages to kick Palamo off! Palamo jumps back into Cartwright's guard.
Palamo is stalling in the full guard.
Cartwright trying to control the position.
#T8#
Cartwright seems keen to control Palamo's posture.
Palamo postures up.
Palamo preventing the sweep.
Palamo trying to control but Cartwright is working from the bottom.
Cartwright working a defensive guard here.
Cartwright working a defensive guard but Palamo manages to pass into side control anyway.
Score +3 for passing guard: Cartwright (2) vs (7) Palamo
Palamo controlling the position from side mount. #T9##SUB2#
Palamo swings around for an armbar but Cartwright sees it coming a mile off and turns beautifully into Palamo's guard. Score +2 for sweep to guard / half guard: Cartwright (4) vs (7) Palamo
Palamo tries to land a sweep but no joy.
Cartwright advances to half guard.
Palamo is looking to get back to full guard here but Cartwright has managed to pass to side control instead. Score +3 for passing guard: Cartwright (7) vs (7) Palamo
Palamo is trying to control Cartwright's posture but Cartwright avoids it.
Palamo is trying to improve his position.
Cartwright wants to lay and pray for a moment but Palamo keeps working. #SUB#
Cartwright goes for an armbar here - this could be all over! But no, Palamo has escaped beautifully and is now on top in side control! Oh, that's unlucky for Cartwright but great work by Palamo. Score +4 for clean sweep to past guard: Cartwright (7) vs (11) Palamo#T10#
Palamo tries to advance position but instead Cartwright slips a leg back in to half guard. #SUB2#
Cartwright is defending against the submission attempts here by Palamo.
Cartwright tries to get to full guard but Palamo has control of the leg.
Cartwright is working for an escape here. He's hooked one of Palamo's legs and he's managed to sneak out and take Palamo's back! Score +4 for clean sweep to past guard: Cartwright (11) vs (11) Palamo
You can see the frustration on Palamo's face� He knows he is in trouble unless he improves his position sooner rather than later.
#T11#
You know, I was talking to some of our celebrities at ringside tonight and they were split right down the middle on who was going to win this fight.
Palamo trying to control the action but Cartwright just sinks the hooks in. #SUB#
Cartwright is staying calm and holding on to the back position, whilst working on a rear naked choke. Palamo is defending well though. Cartwright let's go of the attempt for now.#SUB#
Cartwright has his hand under the chin of his opponent looking for the choke. He's nearly got it! This one could be all over! But no, Palamo has freed his hand and lives to survive another� well, another couple of seconds at least!
Palamo turns into Cartwright and is now in his guard.
Score +2 for sweep to guard / half guard: Cartwright (11) vs (13) Palamo#T12#
Palamo looking to control the position here, rather than advance.
Cartwright trying to control the position.
Palamo pressing down on his opponent's thigh, looking to pass guard. Cartwright is keeping the position for now.
Cartwright wants to control here, rather than go for any submissions from the bottom. At least for now.
Palamo stands up and looks to throw the legs aside to pass to side control. Cartwright swivels though and keeps the full guard. #SUB2#
Palamo is trying to work a guillotine from the top, or something like that? Don't know how he thinks he's going to get a finish from there. #T13#
Cartwright trying to control the position.
Palamo wants to control from the top but Cartwright keeps moving.
Palamo sitting in guard, not really doing much.
Palamo looking to pass the guard.
Cartwright lands a beautiful sweep and he's now moved into his opponent's guard. Score +2 for sweep to guard / half guard: Cartwright (13) vs (13) Palamo
Cartwright wants to control from the top but Palamo keeps moving. #T14#
Palamo pulls Cartwright in close to prevent any damage.
Palamo trying to control the position.
Our spies down at at Besta-Fera Training Center inform us that Palamo has really been working on his submissions in the buildup to this fight. Will it pay off?
Palamo wants to sweep but no luck.
Palamo is working the butterfly guard. He manages to land a nice scissor sweep and is now in half guard on the top. Nice move. Score +2 for sweep to guard / half guard: Cartwright (13) vs (15) Palamo
Palamo tries to pass the half guard into mount. Cartwright knows what he's doing though and prevents the attempt.
Boooooooooooooooooooo!!! God, this has been a terrible round. Come on you two, sort yourselves out!#SUB2#
Palamo wants to work for an arm triangle but Cartwright is really keeping half guard well and defending the submission attempt.
And that's the end of the fight!
Palamo wins on points by 15 to 13.
Isaia Palamo thanked the fans post fight for their support. |
|
|
|
Main event
|
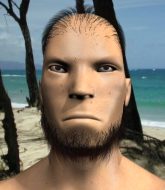
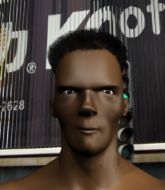
This TWGC bout is 1 fifteen minute round in the light heavyweight division. Introducing today's competitors. In the red corner, competing out of Los Angeles, with a TWGC record of 1 wins and 1 losses; Rubadub Dubberly! And in the blue corner, fighting out of Las Vegas, with a TWGC record of 1 wins and 0 losses; Sauvage Thibodeaux!
The judges for this bout are Yuuki Gou, Yukihiro Shimada and Shigeki Fujiwara.
The fighters bow as they face eachother in the middle of the mat and we are under way.#TD#
Thibodeaux gets caught flat footed, as Dubberly shoots in with a quick takedown into guard. Score +2 for takedown into guard / half guard: Dubberly (2) vs (0) Thibodeaux
Thibodeaux is controlling Dubberly's posture.
Dubberly wants to pass the guard but Thibodeaux is keeping the position.#SUB2#
Thibodeaux looking for submissions off his back, moving his hips, looking for an opening.
Dubberly's corner is telling him to maintain position.
Dubberly looking to pass the guard.
Dubberly passes into half guard. #SUB#
Dubberly is looking for a kimura but Thibodeaux is holding onto that half guard position, so it's hard for Dubberly to get the leverage.
Thibodeaux is controlling Dubberly's trapped leg to prevent Dubberly from advancing to side control.
We've had a slow start to the round here - hopefully the action picks up.
Dubberly wants to lay and pray for a moment but Thibodeaux keeps working.
Dubberly wants to free his trapped foot but Thibodeaux is holding on for dear life with his legs. #SUB#
Dubberly is looking for a kimura. It's going to be difficult to finish that from half guard though and Thibodeaux defends it well.
Thibodeaux has found himself in a tricky position here. He's been working his transitions in training so let's see if he can work his way out of it.#T1##SUB#
Dubberly is trying a forearm choke� I don't think that's going to do much at this level of the game.
#SUB#
Dubberly seems to be looking for submissions.
Dubberly is looking to pass the guard... He's managed it - he's now in full mount! Score +3 for passing guard: Dubberly (5) vs (0) Thibodeaux
Thibodeaux has given up his back here. Will Dubberly look for the submission or keep pounding away?
Score +3 for taking back: Dubberly (8) vs (0) Thibodeaux
Thibodeaux is in bad spot here.
#SUB#
Dubberly is looking to finish the fight by rear naked choke. Thibodeaux knows exactly what he's got planned though, so he's defending well. Maybe a few strikes would soften Thibodeaux for a finish. #SUB#
Dubberly has his hand under the chin of his opponent looking for the choke. He's nearly got it! This one could be all over! But no, Thibodeaux has freed his hand and lives to survive another� well, another couple of seconds at least!
#T2#
The fighters are going at a pretty good pace and they're both starting to sweat now.
Thibodeaux trying to control the hands but Dubberly won't let him.
Thibodeaux tries to escape the position - he's now mounted. Is that better or worse? Hard to tell! #SUB#
Dubberly wants to finish this one by submission but Thibodeaux is holding onto his waist, trying to prevent any attacks from Dubberly.
Dubberly fails to advance to Thibodeaux's back.
Dubberly trying to control but he's not successful this time.
Thibodeaux tries to reverse the position but Dubberly maintains control.
Thibodeaux stops Dubberly from taking his back. Still, being mounted isn't any better.
Dubberly wants to control the pace but Thibodeaux is squirming around nicely. #SUB#
Dubberly has hold of Thibodeaux's left arm, perhaps looking for a submission. The two fighters tussle over control of the isolated limb and Thibodeaux manages to get his arm back to his side and away from danger.
#T3#
Thibodeaux has given up his back here. Will Dubberly look for the submission or keep pounding away?
Score +3 for taking back: Dubberly (11) vs (0) Thibodeaux#SUB#
Dubberly looking for the choke from the back. #SUB#
Dubberly is looking to finish the fight by rear naked choke. Thibodeaux knows exactly what he's got planned though, so he's defending well. Maybe a few strikes would soften Thibodeaux for a finish. #SUB#
Dubberly is staying calm and holding on to the back position, whilst working on a rear naked choke. Thibodeaux is defending well though. Dubberly let's go of the attempt for now.#SUB#
Dubberly tightening his grip on Thibodeaux, looking for the choke.
Dubberly controlling well, preventing Thibodeaux from escaping the position.
#SUB#
Dubberly is looking for the choke from the back position but Thibodeaux is controlling his hands well. #T4##SUB#
Thibodeaux fending off the submission attempt from Dubberly.
Thibodeaux is in bad spot here.
#SUB#
Dubberly is working really hard to secure the rear naked choke. Thibodeaux defends successfully for a significant amount of time. Both fighters are looking very determined. #SUB#
Dubberly looking for the RNC. #SUB#
Dubberly has his hand under the chin of his opponent looking for the choke. He's nearly got it! This one could be all over! But no, Thibodeaux has freed his hand and lives to survive another� well, another couple of seconds at least!
Thibodeaux tries to break free.
#SUB#
Dubberly tightening his grip on Thibodeaux, looking for the choke.
The ref warns both fighters not to hold the cage as they work up against the meshing.#SUB#
Thibodeaux preventing the rear naked choke attempt from Dubberly. #T5#
Thibodeaux wants to control his opponent's hands but Dubberly gets his hands free. #SUB#
Thibodeaux fending off the submission attempt from Dubberly.
Thibodeaux trying to control but he's just got himself in more trouble. #SUB#
Dubberly is looking for the choke from the back position but Thibodeaux is controlling his hands well.
Dubberly trying to control.#SUB#
Thibodeaux is staying cool under pressure, defending well against the rear naked choke attempt from his opponent.
#SUB#
Thibodeaux fending off the submission attempt from Dubberly.
Thibodeaux tries to break free.
The fighters are pressed up against the cage, both looking to find a bit of space to work.#T6##SUB#
Dubberly is looking to finish the fight by rear naked choke. Thibodeaux knows exactly what he's got planned though, so he's defending well. Maybe a few strikes would soften Thibodeaux for a finish.
Thibodeaux rolls, trying to escape but Dubberly keeps control of the position.
#SUB#
Dubberly patiently working for the choke. Which fighter will keep their nerve here?
Thibodeaux rolls, trying to escape but Dubberly keeps control of the position.
The crowd hopeful of a finish here - Dubberly's supporters are on their feet, screaming for him to go for the rear naked choke.
#SUB#
Dubberly looking for the RNC. #SUB#
Dubberly is working for the rear naked choke. He has one arm under the chin but Thibodeaux has hold of the other arm. A bit of a stalemate here.
Thibodeaux trying to control the position but Dubberly manages to sink in the hooks. #T7#
I really don't envy Thibodeaux right now.
Dubberly trying desperately to keep hold of the dominant position.
Dubberly avoiding Thibodeaux 's attempts to control his hands.
Dubberly tries to keep control of the position but Thibodeaux is staying busy.
Dubberly is really struggling to control Thibodeaux but he's trying to hold on to the position.
Thibodeaux is defending well here and trying to improve his position.
#SUB#
Thibodeaux defends a rear naked choke attempt by controlling one of Dubberly's arms.
Dubberly not allowing Thibodeaux to control his hands.
Thibodeaux is in bad spot here.
#T8#
Dubberly tries to get the hooks in deep but Thibodeaux pushed the leg off. #SUB#
Dubberly is working hard for the rear naked choke here.
Dubberly struggling to keep hold of the position.
#SUB#
Dubberly patiently working for the choke. Which fighter will keep their nerve here?#SUB#
Thibodeaux defending nicely against the rear naked choke attempt.
#SUB#
Dubberly patiently working for the choke. Which fighter will keep their nerve here?#SUB#
Dubberly is looking to finish the fight by rear naked choke. Thibodeaux knows exactly what he's got planned though, so he's defending well. Maybe a few strikes would soften Thibodeaux for a finish.
Thibodeaux wants to control his opponent's hands but Dubberly gets his hands free. #SUB#
Thibodeaux defends a rear naked choke attempt by controlling one of Dubberly's arms.
Dubberly not allowing Thibodeaux to control his hands. #T9#
Dubberly has the hooks in. Thibodeaux is trying to push off one leg but he has to do so cautiously to avoid being submitted.
Thibodeaux looking very determined here, making life difficult for Dubberly.
Thibodeaux trying to control but not successfully. #SUB#
Thibodeaux fending off the submission attempt from Dubberly. #SUB#
Dubberly is looking for a choke. Thibodeaux gets to his feet with his opponent on his back and slams him to the mat. Thibodeaux manages to squirm out of the attempted choke and turns into his opponent's guard. Score +2 for sweep to guard / half guard: Dubberly (11) vs (2) Thibodeaux#SUB#
Dubberly looking for submissions from the bottom here. Moving his hips around, possibly looking for an armbar.
#T10#
There's a bit of a scramble here and now Dubberly is on top in guard.
Score +2 for sweep to guard / half guard: Dubberly (13) vs (2) Thibodeaux#SUB2#
Dubberly avoids a guillotine attempt easily.
Thibodeaux keeping moving, preventing Dubberly from controlling successfully.
Dubberly is pushing down on Thibodeaux's leg trying to pass to half guard. Thibodeaux is fighting to maintain full guard but Dubberly has managed to sneak the leg through.
Dubberly wants to control but Thibodeaux is keeping him busy.
Dubberly works his foot free and advances to mount. Score +3 for passing guard: Dubberly (16) vs (2) Thibodeaux
Dubberly looking to control but Thibodeaux is working nicely, looking to advance position himself.
Thibodeaux stops Dubberly from taking his back. Still, being mounted isn't any better. #T11#
Thibodeaux is working to get back to half guard.
Thibodeaux has given up his back here. Will Dubberly look for the submission or keep pounding away?
Score +3 for taking back: Dubberly (19) vs (2) Thibodeaux#SUB#
Dubberly looking for the choke but no joy. #SUB#
Dubberly is looking to finish the fight by rear naked choke. Thibodeaux knows exactly what he's got planned though, so he's defending well. Maybe a few strikes would soften Thibodeaux for a finish. #SUB#
Thibodeaux preventing the rear naked choke attempt from Dubberly. #SUB#
Dubberly working for the choke. #T12#
Thibodeaux controlling the position well but he knows he's in a bad spot.
Dubberly keeps control of the position as Thibodeaux tries to break free.
Dubberly is not going to allow Thibodeaux to sit and survive in this position.
Thibodeaux is in bad spot here.
#SUB#
Thibodeaux defends a rear naked choke attempt by controlling one of Dubberly's arms.
Dubberly has the hooks in. Thibodeaux is trying to push off one leg but he has to do so cautiously to avoid being submitted. #SUB#
Dubberly has the rear naked choke here! This is very bad for Thibodeaux! Can he survive? No! He's out! Dubberly gets to his feet and celebrates with his cornermen. He looks absolutely delighted. In the post fight interviews he takes time to thank his parents and everyone who has believed in him from the start. How sweet.
Ladies and gentlemen, after 13:55 of round 1, we have a winner by way of Submission (RNC). Rubadub Dubberly!
Rubadub Dubberly decided to thank the fans in attendance for making a great atmosphere. It seemed to go down pretty well. |
|
|
|
|
|
|