 |
Highland 167 PBP Commentary |
Undercard bout
|
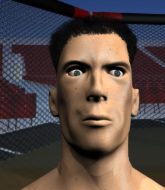
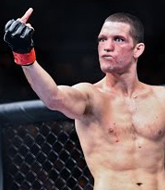
Coming up we have a welterweight MMA rules bout between Joseph Monferand (ranked 3152 p4p, 24115 weight class) and Ted Meredith (ranked 390 p4p, 633 weight class). Meredith has chosen Skinny Boys - Skinny (They Can't Get Enough) as his entrance music. Joseph Monferand has the better chin. Will he look to stand and bang today?
 |
|
 |
| 160 cm
26
180
3 - 1 - 0 |
|
184 cm
29
185
5 - 11 - 0 |
Good wrestling
Counter fighter
Very quick |
|
Decent wrestler
Decent boxing
Powerful |
|
| |
|
Ladies and gentlemen. This fight is 3 rounds, in the welterweight division.
Introducing the fighter to my left, fighting out of the red corner.
With a record of 3 - 1 - 0, fighting out of Montreal, Joseph Monferand!
And introducing the fighter to my right, fighting out of the blue corner.
With a record of 5 - 11 - 0, fighting out of London, Ted Meredith!
The judges for this bout are Steven Brown, Phil Schofield and William Gold.

The bell rings for round one and we are underway!
We've got one fighter who appears to only be looking to counter and the other not looking particularly aggressive either, so we could be in for a dull fight.
Monferand uses decent footwork to sidestep a right hand from Meredith.
Meredith misses the jab.
Monferand tries to counter with a takedown but Meredith is quick to defend against it.
Meredith lands a jab.
Meredith throws a shot from downtown. Monferand moves away and avoids it.
Monferand attempts a counter takedown but Meredith avoids it well and moves away.
We've had a slow start to the round here - hopefully the action picks up.
Monferand slips under a jab from Meredith.
Monferand drops down looking for a counter takedown but Meredith sprawls and moves away.
Monferand looks shocked there as he takes a right hand to the temple.

That's one minute gone in the round.
Monferand doesn't react quick enough there as he takes a shot to the body.
Both fighters are looking to counter, which isn't making for the most exciting fight in the world.
Meredith listening to his corner there, landing a nice uppercut.
The fighters circling - Meredith throws out the jab but it was never going to land.
Ted Meredith is looking to keep the fight on the feet at all costs.
A telegraphed right hand from Meredith misses the target.
Monferand drops down looking for a counter takedown but Meredith sprawls and moves away.
Monferand takes a punch to the jaw and another one to the bread basket.
Meredith dips to his left and cracks Monferand with an uppercut!

That's two minutes gone in the round.
Meredith misses with a double jab.
Monferand appears to be looking for a counter takedown.
Monferand moves out of range as Meredith strikes.
Monferand avoids the body shot from Meredith.
A big left from Meredith misses.
A combination from Meredith does no damage.
Monferand drops down looking for a counter takedown but Meredith sprawls and moves away.

That's three minutes gone in the round.
Meredith stuns Monferand with a nice body shot, before stepping back out of range.
Monferand displays some good footwork, moving neatly out of range as Meredith throws out the jab.
Monferand half commits to a counter takedown before pushing away, out of range.
Meredith missing with a left hand there. Monferand was out of range so wasted energy throwing that one.
Monferand half commits to a counter takedown before pushing away, out of range.
Ted Meredith seems to be the more aggressive standup fighter in this bout.
Meredith misses with a few strikes there.
Meredith takes a step towards his opponent and connects with a left hand, before circling away.
Meredith scores with a straight right hand, right through his opponent's guard.

That's four minutes gone in the round.
Monferand bobs and weaves well there to avoid the strikes.
Monferand tries to counter with a takedown but Meredith is quick to defend against it.
Meredith throws a hook but Monferand blocks it.
Monferand changes levels looking for a counter takedown but doesn't commit.
Meredith misses with a hook.
Monferand tries to counter with a takedown but Meredith is quick to defend against it.
Donk. Meredith catches Monferand right on the button with a cross.
The crowd thankful this round is nearly over.
Meredith lands a vicious shot with the stealth of a sniper and the strength of a viper. Are vipers that strong? I can think of lots of things that are stronger than a viper - not many rhyme with sniper though.
And that is the end of the round. The fighters go back to their corners.
Ted Meredith dominated that round.
That's the end of the interval. I'm sure that seemed a lot quicker than a minute for our two fighters! Back to the action.

Meredith lands with a two punch combination before moving back out of range.
Meredith has been the more effective fighter overall so far.
Meredith throws a big shot that misses.
Meredith tests Monferand's chin there with a solid looking shot.
A looping hook to the body misses from Meredith. Monferand does a little dance to reset his feet.
Monferand appears to be looking for a counter takedown.
We've had a slow start to the round here - hopefully the action picks up.
Meredith throws a hook but Monferand blocks it.
Meredith misses with a few strikes there.
That's one minute gone in the round.
Monferand uses decent footwork to sidestep a right hand from Meredith.
Monferand ducks under a wild hook from Meredith.
Meredith might want to mix his strikes up a bit more. He's just going for head shots at the moment and that can become a bit predictable.
Meredith scores with a jab to the body.
Monferand doesn't react quick enough there as he takes a shot to the body.
Meredith darts in and out, connecting with a jab.
That's two minutes gone in the round.
Meredith fakes high and swings low for a body shot but Monferand manages to avoid it.
Meredith waving his hands out in front of him, looking to distract Monferand.
Monferand changes levels looking for a counter takedown but doesn't commit.
Monferand steps to the side to avoid the strikes from Meredith.
Monferand ducks right into an uppercut from Meredith.
Monferand takes one on the button.
Meredith lunges at Monferand with a hook that half lands and is half blocked by Monferand's hand.
 Monferand is rocked! Monferand is rocked!
That's three minutes gone in the round.
Meredith cracks Monferand with a nasty uppercut that draws ooohs from the crowd and sends Monferand tumbling backwards onto the mat. He tries to recover but Meredith pounces and lands a hail of unanswered strikes that forces the referee to step in to end the fight! Monferand is not happy but he gave the referee no choice!
Ladies and gentlemen, after 3:15 of round 2, we have a winner by way of TKO (Strikes). Ted Meredith!
A relieved looking Ted Meredith thanked the fans for their support and gave the usual line about them being amazing. They seemed to believe that he actually meant it.
|
|
|
|
|
|
|
|
|
|
|
|
|
|
|
|
|
|
|
|
|
|
|
| S |
C
A |
G |
S |
C
B |
G |
|
S |
C |
G |
|
energy
A | B |
|
hype
A | B |
|
pop
A | B |
|
mgr
A | B |
|
FIGHT
RATING
37% |
|
|
|
|
|
|
|
Undercard bout
|
Coming up we have a welterweight MMA rules bout between Jonathan St Pierre (ranked 3190 p4p, 1014 weight class) and Jake Damien (ranked 394 p4p, 147 weight class). Buckle up people - heeeeeeeeeere we go!
 |
|
 |
| 180 cm
28
179
7 - 5 - 0 |
|
180 cm
30
176
14 - 10 - 0 |
BJJ Purple Belt
Solid Muay Thai
Experienced |
|
Powerful takedowns
Brawler
Good gas tank |
|
| |
|
Ladies and gentlemen. This fight is 3 rounds, in the welterweight division.
Introducing the fighter to my left, fighting out of the red corner.
With a record of 7 - 5 - 0, fighting out of Los Angeles, Jonathan St Pierre!
And introducing the fighter to my right, fighting out of the blue corner.
With a record of 14 - 10 - 0, fighting out of Rio de Janeiro, Jake Damien!
The judges for this bout are Andrew Berry, Donald Grub and James Ackerman.
The bell rings for round one and we are underway!

St Pierre drives through with a really nice takedown into side control.
Damien regains half guard.
St Pierre thows a huge punch but Damien dodges it nicely.
Damien is looking to regain full guard. Not this time though.
Damien is trying to control but can't.

Damien looking to work for a kimura from the bottom.
The fighters are pressed up against the cage, both looking to find a bit of space to work.
We've had a slow start to the round here - hopefully the action picks up.
Damien wants to get back to full guard.
Damien makes his way to full guard. A much better position for Damien.
That's one minute gone in the round.
Damien looking for a sweep. Not yet Damien, not yet.
Damien preventing the ground and pound from doing any damage.
Damien bucks up whilst keeping hold of a body lock, managing to reverse the position. Now he's in top in St Pierre's guard.

St Pierre pulls Damien in close to his closed guard and prevents Damien from doing any damage or advancing position.
Damien postures up as if he's going to throw some strikes but drops back for an ankle! St Pierre is in big trouble! He looks ready to tap! But no, he's escaped and dives on top of Damien, into his guard.

Damien is working actively off his back, looking to secure an arm or perhaps work for a triangle.
Damien manages to sweep nicely, so he's now on top. St Pierre manages to get himself to full guard.
That's two minutes gone in the round.
Damien stopping the sweep attempt from St Pierre.
Damien tries to free his leg and advance position but St Pierre is retaining full guard.

St Pierre working for submissions but it's allowed Damien to get to half guard.
The fighters are starting to get a bit slippery now, which will make submissions a bit more difficult.
Damien is working for submissions here but there's nothing on.
St Pierre is trying to get back to full guard.
Damien works his foot free and advances to mount.
St Pierre looks to be in better condition than last time we saw him fight. Obviously he's been working hard on his cardio.
St Pierre sneaks a leg back under and regains half guard and is working straight away to try and get back to guard. He hasn't managed just yet though.
That's three minutes gone in the round.
Damien wants to work for an arm triangle but St Pierre is really keeping half guard well and defending the submission attempt.
The ref warns both fighters not to hold the cage as they work up against the meshing.
Damien is pressing down on St Pierre's thigh, looking to free his foot. St Pierre is holding on for now.
Damien works his way into side control.
Damien working hard here to secure a kimura but he's not really in the right position for it.
Damien is trying to land an Americana. He has the arm isolated but St Pierre is keeping cool and he's avoided the danger for now.
Damien wants to control but St Pierre is keeping him busy.
That's four minutes gone in the round.
St Pierre is looking for a sweep.
Damien works to advance to full mount. St Pierre defends for a few seconds but eventually he succumbs.
Damien moves into side control, trying to work for a kimura. That looks painful! Will he finish!!?? No, St Pierre has worked his arm free - good work by St Pierre!
This fight is sponsored by Chainsaw 7. More blood and guts and stuff like that, in cinemas everywhere now!
St Pierre can't do much from the bottom here.
Damien tries for an arm triangle. That looks pretty tight to me. Is this one over!?! Possibly, maybe, no Damien has let go of the choke. Obviously it wasn't as tight as we thought!
The crowd thankful this round is nearly over.
Damien tries for a kimura but St Pierre is defending well.
And that is the end of the round. The fighters go back to their corners.
Jake Damien dominated that round.
That's time! St Pierre's corner gives him a slap on the ass as he gets ready to fight.

Damien shoots in looking for a single leg takedown. St Pierre is trying to defend but Damien finishes it well and ends up in half guard. Let's see if he can advance position further.
Damien is trying to work for a kimura but St Pierre is defending well.
Damien is looking for an arm triangle, whilst trying to pass to side control. St Pierre doesn't seem that keen to cooperate though. No luck this time Damien.
Damien is trying to work for a kimura. This could be trouble! No, St Pierre has managed to free his arm - good work.
We've had a slow start to the round here - hopefully the action picks up.
Damien is looking for a kimura here.
That's one minute gone in the round.
Damien wants to pass to mount but St Pierre is defending the position.
Damien is keen to just control but St Pierre is a slippery customer.
Damien is looking to advance position but St Pierre won't allow it.
St Pierre trying to control but Damien postures up.
St Pierre is looking to sinch up a guillotine here but Damien pulls his head out easily.
Damien is looking for a kimura. It's going to be difficult to finish that from half guard though and St Pierre defends it well.
That's two minutes gone in the round.
Neither fighter has done anything of merit for a good minute or two here and the crowd are not happy about it.
Damien is working for a submission of some sort.
St Pierre tries to roll over but Damien keeps him under control.
Damien seems to be working for a kimura but St Pierre defends the submission attempt.
Damien trying to control from half guard but St Pierre is working away.
That's three minutes gone in the round.
Damien is looking for a kimura. It's going to be difficult to finish that from half guard though and St Pierre defends it well.
St Pierre moves into full guard.
Damien trying to control the position from guard on top but St Pierre is wriggling around, looking for whatever he can.
St Pierre is trying to control the position from the bottom.
St Pierre keeping full guard, as Damien tries to pass.
St Pierre keeping moving, preventing Damien from controlling successfully.
That's four minutes gone in the round.
A few boos can be heard. I'm sure they will multiply if the fighters don't pick up the pace.
Damien tries to free his leg and advance position but St Pierre is retaining full guard.
Damien drops back looking for a leg! St Pierre is in trouble here! The fighters roll with the hold and St Pierre manages to kick Damien off! Damien jumps back into St Pierre's guard.
Damien trying to pass the guard but can't manage it just yet.
Damien slips nicely into half guard.
Damien not doing much here.
St Pierre is trying to control but can't.
Boooooooooooooooooooo!!! God, this has been a terrible round. Come on you two, sort yourselves out!
Damien trying to control the pace.
And that is the end of the round. The fighters go back to their corners.
Jake Damien showed his class in that round. I'd imagine he'll take it on all the scorecards.
Well, the break between rounds is over. Let's get back to the scrappin! This is the final round!

Damien feints and then dives in with a takedown. That was a long way out but the feint bought him enough time to close the distance and complete the takedown. Now we'll play guard for a bit and see who can get the better of that position.
Damien trying to control but St Pierre is working from the bottom.
Damien advances to half guard.
Well, if Damien is going to just lie there, perhaps we should talk about what we're having for dinner tonight� I'm having a ham and pineapple pizza� Yum. Can't wait.
Jake Damien has got the better of the ground game so far.
Damien is looking for an arm triangle, whilst trying to pass to side control. St Pierre doesn't seem that keen to cooperate though. No luck this time Damien.
St Pierre is looking for a sweep. Damien is wise to his cunning plan and keeps the top position.
That's one minute gone in the round.
We've had a slow start to the round here - hopefully the action picks up.
St Pierre regains full guard. Nicely done.
Damien tries to free his leg and advance position but St Pierre is retaining full guard.
Damien thinks about going for a leg but decides against it, in order to maintain the position.
Damien pushes down on St Pierre's leg and manages to get into half guard.
St Pierre wants to control but Damien is keeping busy.
Damien is looking to pass the guard... He's managed it - he's now in full mount!
Damien goes for an armbar but he's fallen flat on his backside there and now St Pierre is on top in guard.
St Pierre advances position into side control!
That's two minutes gone in the round.
Damien wants to control but St Pierre postures up.
Damien tries to get back to half guard but can't.
St Pierre wants to lay and pray for a moment but Damien keeps working.
Damien tries to bench press St Pierre off him but St Pierre keeps the position.
Damien regains half guard.
Damien slips a foot under and gets full guard. Nice work.
St Pierre trying to pass the guard but can't manage it just yet.
Damien bucks up whilst keeping hold of a body lock, managing to reverse the position. Now he's in top in St Pierre's guard.
St Pierre looking to sweep here. No luck so far.
Damien passes St Pierre's right leg, so he's now in half guard.
That's three minutes gone in the round.
St Pierre wants to improve his position but Damien is controlling well.
Damien is looking for an arm triangle, whilst trying to pass to side control. St Pierre doesn't seem that keen to cooperate though. No luck this time Damien.
Damien is looking for an arm triangle, whilst trying to pass to side control. St Pierre doesn't seem that keen to cooperate though. No luck this time Damien.
Damien wants to work for an arm triangle but St Pierre is really keeping half guard well and defending the submission attempt.
That's four minutes gone in the round.
Well. There's a bit of a lull in the action here and the crowd are starting to get restless.
St Pierre is looking to control Damien's leg but it's slowly edging free. Can St Pierre avoid being mounted?
Damien works his foot free and advances to mount.
St Pierre is flailing around, obviously not happy about being mounted. Damien locks hold of one of his arms and spins for an armbar. He's got it! St Pierre is forced to tap!
Ladies and gentlemen, after 4:39 of round 3, we have a winner by way of Submission (Armbar). Jake Damien!
|
|
|
|
|
|
|
|
|
|
|
|
|
|
|
|
|
|
|
|
|
|
|
| S |
C
A |
G |
S |
C
B |
G |
|
S |
C |
G |
|
energy
A | B |
|
hype
A | B |
|
pop
A | B |
|
mgr
A | B |
|
FIGHT
RATING
37% |
|
|
|
|
|
|
|
Undercard bout
|
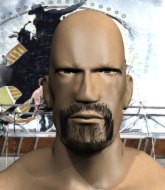
Coming up we have a featherweight MMA rules bout between Harry Henderson (ranked 2925 p4p, 1567 weight class) and Magnus Goddard (ranked 336 p4p, 175 weight class). I don't know about you partner, but I'm pumped for this one!
 |
|
 |
| 159 cm
30
147
8 - 12 - 0 |
|
183 cm
30
155
8 - 6 - 0 |
Good wrestling
Basic striking
Very quick |
|
Good takedowns
Basic striking
Determined |
|
| |
|
Ladies and gentlemen. This fight is 3 rounds, in the featherweight division.
Introducing the fighter to my left, fighting out of the red corner.
With a record of 8 - 12 - 0, fighting out of London, Harry Henderson!
And introducing the fighter to my right, fighting out of the blue corner.
With a record of 8 - 6 - 0, fighting out of Helsinki, Magnus Goddard!
The judges for this bout are Chris Edwards, James Atkins and Daniel Bishop.
The bell rings for round one and we are underway!
Goddard throws a head kick that misses and slips in the process. He scrambles back to his feet and the fighters circle.
Henderson looking to shoot here. He's gone for it and he's landed a takedown into side control! Oh, that's bad for Goddard!
Goddard tries to bench press Henderson off him but Henderson keeps the position.
Henderson wants to lay and pray for a moment but Goddard keeps working.
Henderson is really struggling to control Goddard but he's trying to hold on to the position.
Henderson taking a break here but Goddard is having none of it and regains half guard.
We've had a slow start to the round here - hopefully the action picks up.
Goddard has no desire to be mounted, so is trying to control. Henderson is working away from the top position though.
Henderson with a momentary lay and pray from half guard.
That's one minute gone in the round.
Goddard is looking to regain full guard. Not this time though.
Henderson passes the half guard and he's now in mount! Big trouble for Goddard!
Goddard is desperately trying to improve his position but Henderson has a good base and remains in mount.
Goddard wants to control but Henderson is having none of it.
Henderson wants to take Goddard's back but he can't do it this time.
Henderson content just to control the position here.
Henderson swings around for an armbar but it's a sloppy attempt and Goddard is now in Henderson's guard. A big mistake from Henderson there, giving up the dominant position!
That's two minutes gone in the round.
Henderson seems keen to control rather than go for a submission, at least for now.
Henderson has controlled the position for a good 20 seconds, which will no doubt be starting to frustrate his opponent.
Henderson looking for a sweep. Not yet Henderson, not yet.
We could do with one of the fighters taking the initiative a bit more on the ground - they're both waiting to capitalize on a mistake.
Henderson preventing the ground and pound from doing any damage.
Henderson utilising some decent striking defenses from the guard, preventing the ground and pound.
That's three minutes gone in the round.
Henderson wants to sweep but no luck.
Henderson is working hard here to advance position.
Henderson preventing the ground and pound from doing any damage.
Goddard looks more muscular than last time we saw him. He must have been on the weights.
Henderson might be looking to lock onto one of his opponent's long limbs for a submission, whilst we're on the ground.
Henderson trying to control the position.
Goddard looking to pass the guard.
It looks like the ref is thinking about a standup.
Goddard postures up.

The referee decides to stand the fighters back up.
That's four minutes gone in the round.
A lull in the action here being met with boos from the crowd.
Henderson misses with a takedown attempt - Goddard sprawls well and throws a nice strike on the way out which just misses.

Goddard gets to the clinch - let's see what his plan is here.
Henderson is looking for a takedown.
Goddard content to slow the pace in the clinch.
Henderson is looking for a takedown up against the cage. Goddard gets underhooks though and prevents the takedown attempt.
That's three failed takedown attempts in the round for Harry Henderson. That's going to take a lot out of him.
Goddard gets underhooks to prevent Henderson's takedown attempt.
Goddard avoiding damage.
Henderson wants the takedown. Goddard is fighting it off but Henderson persists and manages to bring the fight to the ground, ending up in Goddard's guard against the cage.
Henderson is looking to pass into half guard but Goddard pushes him away with his feet and jumps on top - now Goddard is in guard.
Goddard postures up to throw the ground and pound strikes but they don't connect.
Henderson is breathing heavily.
The crowd thankful this round is nearly over.
Goddard looking to pass the guard.
And that is the end of the round. The fighters go back to their corners.
A close round but Magnus Goddard will probably get the nod.
OK. That's time! The bell goes and we're back to the action.
Henderson shoots in and gets a takedown into half guard. Henderson showed some decent athleticism there.
Harry Henderson overall seems to be getting the better of the ground position in the fight so far.
Goddard is working for an escape here. He's hooked one of Henderson's legs and he's managed to sneak out and take Henderson's back!
Henderson is trying to break free.
The ref warns both fighters not to hold the cage as they work up against the meshing.
Goddard misses with a punch to the head.
Henderson covering up well under a series of strikes from Goddard.
We've had a slow start to the round here - hopefully the action picks up.
Goddard misses with punches from the back.
Henderson covers up after that shot from Goddard.
That's one minute gone in the round.
Goddard is hanging on to Henderson's back as he tries to escape.
Goddard lands shots from the back.
Henderson rolls and manages to get back to half guard. Nicely done.
Goddard has hold of the far side arm. He's working for the Kimura, can Henderson defend it? Goddard steps over the head and cranks it - Henderson is tapping out! That was textbook stuff right there - nice submission victory for Goddard!
Ladies and gentlemen, after 1:41 of round 2, we have a winner by way of Submission (Kimura). Magnus Goddard!
Magnus Goddard decided to thank the fans in attendance for making a great atmosphere. It seemed to go down pretty well.
|
|
|
|
|
|
|
|
|
|
|
|
|
|
|
|
|
|
|
|
|
|
|
| S |
C
A |
G |
S |
C
B |
G |
|
S |
C |
G |
|
energy
A | B |
|
hype
A | B |
|
pop
A | B |
|
mgr
A | B |
|
FIGHT
RATING
34% |
|
|
|
|
|
|
|
Undercard bout
|
Coming up we have a heavyweight MMA rules bout between Schlunckr Diesel (ranked 4417 p4p, 904 weight class) and Mariusz Dominator (ranked 510 p4p, 139 weight class). Mariusz Dominator has the better chin. Will he look to stand and bang today?
 |
|
 |
| 202 cm
30
265
10 - 5 - 0 |
|
225 cm
30
278
14 - 10 - 1 |
Decent wrestler
Excellent MT
Very quick |
|
Decent wrestler
Good kicks
Powerful |
|
| |
|
Ladies and gentlemen. This fight is 3 rounds, in the heavyweight division.
Introducing the fighter to my left, fighting out of the red corner.
With a record of 10 - 5 - 0, fighting out of New York, Schlunckr Diesel!
And introducing the fighter to my right, fighting out of the blue corner.
With a record of 14 - 10 - 1, fighting out of London, Mariusz Dominator!
The judges for this bout are Chris Edwards, Phil Schofield and Paul Tew.
The bell rings for round one and we are underway!
Dominator walks into a left hand.
Diesel takes a shot to the eye socket. That's gotta hurt.
Diesel missing with a left hand there. Dominator was out of range so wasted energy throwing that one.
Dominator slips a straight right by Diesel.
Wow, both these guys are really going for it!
Diesel lands an overhand left. A wild punch that just about connected.

Diesel closes the distance and presses his opponent up against the cage.
An uppercut to the body lands inside from Diesel.
A head punch on the inside from Diesel fails to land.
Dominator is a painfully thin specimen of a man. You do wonder whether a good body kick would snap him clean in two.
Nice body punch from Diesel - that landed with a thud.
Dominator looks winded!
Diesel lands a right uppercut that snaps the head of Dominator backwards.
Diesel lands a shoulder strike that jolts his opponent's head backwards.
Diesel lands a body punch - he's looking to wear down Dominator.
Diesel lands with a short punch from the clinch.
Wooooo! Give it up for these two warriors! They are putting on a show!
Diesel throws a hook to the body. More of an arm punch but it's all scoring with the judges.
Diesel misses with a short punch on the inside.
Diesel throws a punch but it's blocked by Dominator.
Diesel misses with some punches.
Diesel is leaning against Dominator and scores with a nice uppercut to the body.
A short body shot lands from Diesel as the two fighters clinch.
Diesel misses with a punch on the inside.
Diesel lands with a right to the head.
A quick uppercut on the inside from Diesel.
Dominator blocks a couple of punches on the inside.
Diesel lands a nice uppercut.
That's one minute gone in the round.
Diesel cracks Dominator with a nice body shot.
Diesel lands a body punch in the clinch.
Diesel scores with a shoulder strike.
A short uppercut from Diesel.
Diesel lands a shot to the body.
Nice body punch from Diesel.
Diesel digs a right hand into Dominator's ribs. Those have got to be taking their toll on Dominator's gas tank.
Nice body punch from Diesel.
Diesel lands with a left to the head.
Diesel lands with a good tight uppercut to the head.
A shot in the inside from Diesel.
Diesel digs a right hand underneath Dominator's ribcage. Dominator let out a lung full of air as it connected.
Diesel lands with a short punch from the clinch.
 Dominator is rocked! Dominator is rocked!
The crowd cheering loudly, showing their appreciation for the quality fight we're seeing here.
Diesel lands with a short punch from the clinch.
Dominator is still on wobbly legs! Can Diesel finish him?
Diesel dips a shoulder and cracks Dominator with a mighty uppercut! Dominator falls back against the cage and Diesel unloads with a barrage of strikes! Dominator is completely out with his eyes open, only supported by the cage! Save him ref! Eventually the ref decides to do his job and jumps in - Diesel screams abuse at the incompetent official before going over to celebrate with his corner. Brutal stuff!
Ladies and gentlemen, after 1:49 of round 1, we have a winner by way of TKO (Strikes). Schlunckr Diesel!
Schlunckr Diesel decided to thank the fans in attendance for making a great atmosphere. It seemed to go down pretty well.
|
|
|
|
|
|
|
|
|
|
|
|
|
|
|
|
|
|
|
|
|
|
|
| S |
C
A |
G |
S |
C
B |
G |
|
S |
C |
G |
|
energy
A | B |
|
hype
A | B |
|
pop
A | B |
|
mgr
A | B |
|
FIGHT
RATING
80% |
|
|
|
|
|
|
|
Undercard bout
|
Coming up we have a featherweight MMA rules bout between Catchy Cartwright (ranked 1658 p4p, 2138 weight class) and Millard Masters (ranked 188 p4p, 233 weight class). Cartwright kept the crowd waiting but all that was forgotten when his ring entrance music started. The incomparable musical genius that is Spiders. Masters has chosen Enter the Sandman as his entrance music. Millard Masters has the better chin. Will he look to stand and bang today?
 |
|
 |
| 171 cm
30
150
9 - 4 - 0 |
|
160 cm
30
157
13 - 9 - 0 |
BJJ Brown Belt
Solid boxing
Very quick |
|
Good wrestler
Counter fighter
Powerful |
|
| |
|
Ladies and gentlemen. This fight is 3 rounds, in the featherweight division.
Introducing the fighter to my left, fighting out of the red corner.
With a record of 9 - 4 - 0, fighting out of Hilo, Catchy Cartwright!
And introducing the fighter to my right, fighting out of the blue corner.
With a record of 13 - 9 - 0, fighting out of Las Vegas, Millard Masters!
The judges for this bout are Donald Grub, Sam Margolis and James Ackerman.
The bell rings for round one and we are underway!
Cartwright bobs and weaves and unloads with a good uppercut.
A big left from Cartwright misses.
Cartwright lands three nice shots there - that looked like it hurt!
Cartwright swings and misses with a shot to the body

and Masters counters with a right hand that sends Cartwright tumbling to the canvas! Can Masters finish him? He dives into Cartwright's guard looking to do just that!
Cartwright is rocked!
We've seen a great period of action over the last minute or so - credit to both fighters for going all out!
Masters passes Cartwright's right leg, so he's now in half guard.
Oh Cartwright is still in real trouble! Will he be able to recover?!!
Cartwright is looking to escape.
Cartwright seems to have got his legs back now.
My spies in The Jungle Room inform me that Masters has been getting involved in the gym's BJJ sparring sessions. Let's see whether that pays dividends!
Masters looking for a kimura but he'll have to free his other leg if he wants to finish that. Perhaps he's just using it as a distraction technique.
Cartwright makes his way to full guard, as Masters worked for a kimura.
Cartwright will need to keep those long limbs tucked in whilst he's on the ground, to prevent any submissions.
That's one minute gone in the round.
Masters stands up and looks to throw the legs aside to pass to side control. Cartwright swivels though and keeps the full guard.
Cartwright seems to have improved his submission grappling technique since last time we saw him. Let's see if he can pull off a submission.
The ref warns both fighters not to hold the cage as they work up against the meshing.
Masters wants to control from the top but Cartwright keeps moving.
Masters is in a good position here but he's just trying to control... And he's not even managing to do that successfully.
Cartwright wants to stand up but Masters is controlling him.
That's two minutes gone in the round.
A few boos can be heard. I'm sure they will multiply if the fighters don't pick up the pace.
Masters trying to move into half guard but instead Cartwright has managed to sweep!
Cartwright avoids a guillotine attempt easily.
Cartwright landing some decent shots from guard.
Cartwright landing some decent shots from guard.
Masters looking to control.
Cartwright stands up over Masters, holding his feet. He dives back in and lands a decent shot to the head.
Masters keeping moving, preventing Cartwright from controlling successfully.
Cartwright postures up and lands a big shot to Masters's brow.
That's three minutes gone in the round.
Cartwright drops back for a leg! It's a sloppy attempt though and Cartwright jumps back into guard quickly, to retain the dominant position.
Cartwright in full guard, throwing the ground and pound. No damage this time.
Cartwright looking to pass the guard.
Cartwright slips effortlessly into side control - very nice.
Cartwright working the head with strikes.
The fighters are pressed up against the cage, both looking to find a bit of space to work.
Cartwright is looking for a kimura. He might have it! No, Masters has escaped the position, nice work there.
Masters tries to get back to half guard but can't.
Cartwright misses with the ground and pound.
Cartwright fails to land a wild elbow strike.
That's four minutes gone in the round.
Masters looks to move to half guard but instead Cartwright has passed into mount! Damn!
Cartwright has been looking to land a fair amount of strikes on the ground. He might be looking to soften his opponent up in order to work for a submission.
Masters can't escape the position.
Cartwright scoring with some good ground and pound from mount here. Will he manage to finish Masters?
Cartwright lands with some strikes.
Cartwright working away from the top, dropping strikes.
Cartwright goes for an armbar but he's not got it� Masters turns into him and now he's in Cartwright's guard.
Wooooo! Give it up for these two warriors! They are putting on a show!
Masters looking to pass the guard.
And that is the end of the round. The fighters go back to their corners.
Catchy Cartwright dominated that round.
The minute break is over - no more time for sponges and pep talks - back to the action!
Masters avoids the body shot from Cartwright.
A little jabbing left from Masters on the counter but it doesn't find it's target.
Cartwright scores with a crisp jab that stopped Masters in his tracks.
Cartwright misses with a body shot.
Cartwright tries to bum rush Masters with a series of wild strikes but Masters uses good footwork to avoid the assault.
Masters looks like he wants to counter punch here.
Cartwright connects with a right hand. Masters shakes it off.
Cartwright throws a hook to the body but it doesn't connect.
Masters throws the overhand right but ducks down into a quick takedown attempt. Cartwright was covering up waiting for the punch and Masters finishes the takedown easily into guard.
Masters is intent on slowing down the pace of the fight, simply looking to control.
We've had a slow start to the round here - hopefully the action picks up.
Masters looking to pass the guard.
That's one minute gone in the round.
Cartwright is trying to stand up but he's not managed so far.
Masters trying to move into half guard but instead Cartwright has managed to sweep!
Masters wants to sweep here but Cartwright controlling him for the moment.
Cartwright has gone for a leg lock! Masters slips out almost immediately though and dives into Cartwright's guard.
Cartwright wants to stand and escape but Masters is having none of it.
Masters passes easily into side control. Nice work.
That's two minutes gone in the round.
Cartwright is working hard to escape and get back to his feet. After a battle for position, Masters asserts his dominance and retains side control.
Masters taking a breather here.
Masters tries to advance to mount but Cartwright denies him.
Masters looking to control but instead Cartwright has slipped a leg in, to regain half guard.
That's three minutes gone in the round.
Cartwright pushes Masters off, looking to escape but Masters dives into side control. He's locked up a kimura now - that was fast! He's cranking on it and Cartwright is forced to tap! The fight is over!
Ladies and gentlemen, after 3:24 of round 2, we have a winner by way of Submission (Kimura). Millard Masters!
A loyal slave to those sponsorship dollars, Millard Masters made sure he mentioned Conquer, along with how happy he was to win his fight.
|
|
|
|
|
|
|
|
|
|
|
|
|
|
|
|
|
|
|
|
|
|
|
| S |
C
A |
G |
S |
C
B |
G |
|
S |
C |
G |
|
energy
A | B |
|
hype
A | B |
|
pop
A | B |
|
mgr
A | B |
|
FIGHT
RATING
41% |
|
|
|
|
|
|
|
Undercard bout
|
Coming up we have a lightweight MMA rules bout between Aiko San (ranked 893 p4p, 2235 weight class) and Dax Crumper (ranked 123 p4p, 264 weight class). Aiko San has a significant reach advantage - let's see if he can make it count.
 |
|
 |
| 178 cm
28
158
9 - 3 - 0 |
|
165 cm
30
166
9 - 12 - 1 |
Decent wrestler
Excellent MT
KO power |
|
Good wrestler
Brawler
Fast |
|
| |
|
Ladies and gentlemen. This fight is 3 rounds, in the lightweight division.
Introducing the fighter to my left, fighting out of the red corner.
With a record of 9 - 3 - 0, fighting out of Helsinki, Aiko San!
And introducing the fighter to my right, fighting out of the blue corner.
With a record of 9 - 12 - 1, fighting out of London, Dax Crumper!
The judges for this bout are Richard Clark, Paul Tew and James Ackerman.
The bell rings for round one and we are underway!
San moves into the clinch.
A right handed body shot lands from San.
San is pressed up against the cage. Crumper has hold of a leg and is looking to drag San down to the mat. San avoids the attempt though and has circled away. We're back to striking at a distance.
Crumper dives in and grabs San's left leg, looking for a takedown. San pushes down on Crumper's head and hops out.
San listening to his corner there, landing a nice uppercut.
San fakes with an overhand right and moves in to clinch with Crumper, pushing him back against the cage.
San lands a short shot on the inside that snaps the head of Crumper backwards.
San misses with a shot to the kidneys.
San lands a nice shot to the body.
San gets through Crumper's defenses to land a nice punch to the side of the head.
Crumper wants a takedown.
Aiko San has stuffed three takedown attempts in the round now. That's going to take a lot out of Dax Crumper.
Crumper looks winded!
San scores with a shoulder strike.
San makes some space for himself and lands an uppercut.
Fantastic stuff here - a very entertaining period of action, which has drawn cheers from the crowd.
Crumper drops to a knee looking for a takedown but San gets the underhooks and prevents it.
Crumper looks more muscular than last time we saw him. He must have been on the weights.
A short right from San.
Crumper has hold of a leg and is looking for a trip takedown. San avoids it nicely though and we remain in the clinch.
San pushes Crumper back against the cage and unloads with a body punch.
San lands with a light punch inside.
San presses Crumper against the cage and delivers a mid-strength body shot.
San throws a blind hook that connects with the side of Crumpers head.
San lands a body punch in the clinch.
San lands with a short head shot on the inside.
That's one minute gone in the round.
San lands with a short head shot on the inside.
San lands with a light punch inside.
San lands a body shot.
A short left from San.
San lands a right hand that snaps the head of Crumper backwards.
San lands with a right to the head.
Crumper is rocked!
Crumper blocks a punch to the side of the head.
Crumper is still on wobbly legs! Can San finish him?
San throws a punch but it's blocked by Crumper.
San swings away with an uppercut that misses.
A head punch blocked on the inside by Crumper.
A head punch on the inside from San fails to land.
A head punch blocked on the inside by Crumper.
A body shot lands from San.
Crumper blocking some punches.
San tries a shoulder strike but it doesn't do any damage.
Crumper blocks a punch to the side of the head.
San tries a shoulder strike but it doesn't do any damage.
This has been an exciting period of action!
Crumper has a body lock and is looking for a takedown. San is bouncing around trying to prevent the takedown and somehow he has indeed managed to stay on his feet.
San throws a head punch that misses.
San swings away with an uppercut that misses.
Crumper seems to have recovered his senses.
San is leaning against Crumper and scores with a nice uppercut to the body.
San digs a right hand underneath Crumper's ribcage. Crumper let out a lung full of air as it connected.
An uppercut to the body lands inside from San.
An uppercut to the body lands inside from San.
San makes some space for himself and lands an uppercut.
San lands with a good tight uppercut to the head.
With the fighters clinched against the cage, San creates a bit of distance for himself and scores with a nice uppercut.
San lands a body punch in the clinch.
San throws a big uppercut that drops Crumper! More strikes from San and the referee jumps in to stop the fight! Crumper lies dazed against the cage as San celebrates with his cornermen!
Ladies and gentlemen, after 2:57 of round 1, we have a winner by way of TKO (Strikes). Aiko San!
|
|
|
|
|
|
|
|
|
|
|
|
|
|
|
|
|
|
|
|
|
|
|
| S |
C
A |
G |
S |
C
B |
G |
|
S |
C |
G |
|
energy
A | B |
|
hype
A | B |
|
pop
A | B |
|
mgr
A | B |
|
FIGHT
RATING
79% |
|
|
|
|
|
|
|
Undercard bout
|
Coming up we have a lightweight MMA rules bout between Genji Kamogawa (ranked 930 p4p, 1899 weight class) and Liam Murphy (ranked 127 p4p, 223 weight class). Kamogawa comes to the cage accompanied by The Veer Union - Bitter End. Murphy is bobbing his head along to his entrance song: I'm Shipping Up To Boston- Dropkick Murphy's. The crowd giving both fighters a great reception on their way into the arena. That's good to see.
 |
|
 |
| 170 cm
30
147
14 - 9 - 0 |
|
172 cm
30
165
12 - 13 - 0 |
Good wrestling
Solid boxing
Cardio machine |
|
Good wrestler
Decent boxing
Determined |
|
| |
|
Ladies and gentlemen. This fight is 3 rounds, in the lightweight division.
Introducing the fighter to my left, fighting out of the red corner.
With a record of 14 - 9 - 0, fighting out of London, Genji Kamogawa!
And introducing the fighter to my right, fighting out of the blue corner.
With a record of 12 - 13 - 0, fighting out of Los Angeles, Liam Murphy!
The judges for this bout are Paul Tew, Phil Schofield and Richard Clark.
The bell rings for round one and we are underway!

Kamogawa lands a big right hand that sends Murphy crashing to the mat! Kamogawa stays standing though and waves Murphy back to his feet!
Murphy is rocked!
Murphy moves out of range of the strikes.
Murphy is still on wobbly legs! Can Kamogawa finish him?
Kamogawa jabbing away but nothing is landing.
Murphy seems to have recovered his senses.
The fighters circling - Kamogawa throws out the jab but it was never going to land.
Murphy misses with a head kick.
Genji Kamogawa seems to be the more aggressive standup fighter in this bout.
Murphy takes a jab on the nose there. A little bit of blood seems to be coming out. Hopefully that won't affect his breathing.
Fantastic stuff here - a very entertaining period of action, which has drawn cheers from the crowd.
Kamogawa swings wildly with a right hand that was never going to find it's target.
Kamogawa lands a big uppercut and Murphy crumbles to the floor! The ref thinks about stopping the fight but Murphy looks OK. Kamogawa waves Murphy back to his feet!
Murphy takes a swing at Kamogawa's ribcage but misses.
Murphy takes a shot right to the bread basket.
Kamogawa throws a lazy uppercut
and Kamogawa takes a counter punch right on the button for his troubles.
Kamogawa lands with a good body shot.
Kamogawa misses with a looping left.
And an attempted straight right on the counter from Murphy! But no joy.
Kamogawa lands with an overhand left.
Kamogawa circles away before darting back in with a big straight right hand. It connects beautifully and sends Murphy tumbling to the canvas! He's out cold! Kamogawa wins by KO!
Ladies and gentlemen, after 0:52 of round 1, we have a winner by way of KO (Punch). Genji Kamogawa!
In his post fight interview, Genji Kamogawa started talking himself up. Luckily his charisma kept the crowd on side and gave him a good reception.
|
|
|
|
|
|
|
|
|
|
|
|
|
|
|
|
|
|
|
|
|
|
|
| S |
C
A |
G |
S |
C
B |
G |
|
S |
C |
G |
|
energy
A | B |
|
hype
A | B |
|
pop
A | B |
|
mgr
A | B |
|
FIGHT
RATING
100% |
|
|
|
|
|
|
|
Undercard bout
|
Coming up we have a featherweight MMA rules bout between Daron Acemoglu (ranked 2333 p4p, 536 weight class) and Ricky Luciano (ranked 250 p4p, 67 weight class). Daron Acemoglu could well score a knockout today. He has the power to get to Ricky Luciano's chin.
 |
|
 |
| 173 cm
30
158
11 - 11 - 1 |
|
178 cm
30
155
22 - 8 - 0 |
Good wrestling
Solid boxing
Big right hand |
|
Good wrestler
Excellent MT
Good gas tank |
|
| |
|
Ladies and gentlemen. This fight is 3 rounds, in the featherweight division.
Introducing the fighter to my left, fighting out of the red corner.
With a record of 11 - 11 - 1, fighting out of Rio de Janeiro, Daron Acemoglu!
And introducing the fighter to my right, fighting out of the blue corner.
With a record of 22 - 8 - 0, fighting out of London, Ricky Luciano!
The judges for this bout are Paul Tew, Sam Margolis and James Ackerman.
The bell rings for round one and we are underway!
Luciano missing with a left hand there. Acemoglu was out of range so wasted energy throwing that one.
Acemoglu tries to work over Luciano's front leg with a kick but Luciano checks it.
A little jabbing left from Luciano on the counter but it doesn't find it's target.
Luciano scores with a jab to the jaw.
A shot to the body from Luciano misses
and Acemoglu counters with a straight right hand.
Luciano gets to the clinch - let's see what his plan is here.
Acemoglu has a body lock and is looking for a takedown. Luciano is bouncing around trying to prevent the takedown and somehow he has indeed managed to stay on his feet.
Acemoglu is looking for a takedown up against the cage. Luciano gets underhooks though and prevents the takedown attempt.
Acemoglu's head jolts backwards as he takes an uppercut right on the button!
Luciano misses with a punch on the inside.
We've had a slow start to the round here - hopefully the action picks up.
Acemoglu blocks an uppercut.
Luciano lands a shoulder strike that jolts his opponent's head backwards.
Acemoglu tries to land a knee to the head but Luciano blocks with his arms.
Luciano doesn't land with the attempted body shot.
Luciano tries a shoulder strike but it doesn't do any damage.

Acemoglu breaks the clinch.
That's one minute gone in the round.
Acemoglu rushes in with a sloppy looking punch
and Luciano counters with an inside leg kick.
Luciano blocks a jab.
The fight moves into the clinch position.
Luciano doesn't land with the attempted body shot.
Acemoglu wants a takedown.
That's three failed takedown attempts in the round for Daron Acemoglu. That's going to take a lot out of him.
Acemoglu swings away with an uppercut that misses.
Luciano has a couple of punches blocked by Acemoglu.
Acemoglu has dropped down and is looking to force the takedown but it's defended by Luciano after a bit of a struggle.
Acemoglu tries to break free but Luciano pushes him back against the cage.
Luciano lands a shoulder strike that jolts his opponent's head backwards.
Acemoglu is struggling to control the position.
Acemoglu is trying to maintain a safe position but Luciano gets an underhook and turns Acemoglu into the cage.
Luciano lands a left hand.
A hook to the body from Luciano.
That's two minutes gone in the round.
Acemoglu is working on a leg, looking for a takedown but Luciano is defending well.
Acemoglu tries for a takedown. No joy.
Acemoglu stalling in the clinch but Luciano improves position.
Luciano softening up his opponent with strikes, against the cage.
Nice body punch from Luciano.
Acemoglu goes for a takedown attempt but Luciano pushes him away and we're back to fighting at a distance.
Luciano's coach down at Deathsquad was telling us pre-fight that they have been working on Luciano's balance. Obviously they view that as a key factor in the outcome of this fight.
Acemoglu is breathing heavily.
Luciano forces Acemoglu back against the cage and clinches.
Wooooo! Give it up for these two warriors! They are putting on a show!
A short right from Luciano on the inside.
Luciano misses with the head strike.
Luciano misses with a shot to the kidneys.
Luciano misses with a body punch.
A head punch blocked on the inside by Acemoglu.
With the fighters clinched against the cage, Luciano creates a bit of distance for himself and scores with a nice uppercut.
Luciano lands a hook that snaps the head of Acemoglu backwards.
That's three minutes gone in the round.
Luciano struggles to land a body shot inside as Acemoglu controls his hands.
Acemoglu tries for a takedown. No joy.
Acemoglu has clasped his hands together around Luciano's back... aaand, he's got a takedown into side control. Nicely done.

Luciano throws his opponent off and manages to get back to his feet! Nicely done!
Luciano moves into range and clinches up with Acemoglu.
Acemoglu can't get the takedown.
Luciano scores with a shot to the side of Acemoglu's head.
The crowd are loving this. Great action here.
Acemoglu blocks a couple of punches on the inside.
Luciano can't find room to land a body shot as Acemoglu controls the action.
Luciano misses with a shot to the kidneys.
Luciano goes for a body shot but it's blocked.
Luciano lands a shoulder strike.
Luciano lands a shoulder strike that jolts his opponent's head backwards.
Acemoglu is trying to slow down the pace in the clinch, to catch his breath.
Luciano is working Acemoglu over against the cage.
That's four minutes gone in the round.
Luciano misses with a hook to the ribs.
Luciano works for underhooks and lands a body shot in the process.
Luciano lands with a quick shot inside that doesn't really do much damage.
Acemoglu blocking some punches.
Luciano works on Acemoglu's body with a couple of short punches.
Luciano struggles to land a body shot inside as Acemoglu controls his hands.
Luciano gets underhooks to prevent Acemoglu's takedown attempt.
Luciano working aggressively here.
Luciano tries a shoulder strike but it doesn't do any damage.
Luciano softening up his opponent with strikes, against the cage.
Acemoglu drops to a knee looking for a takedown but Luciano gets the underhooks and prevents it.

Luciano manages to break the clinch.
Luciano slips in close and lands a nice hook before moving back out of range.
And that is the end of the round. The fighters go back to their corners.
Ricky Luciano dominated that round.
That's the end of the round. The referee orders the cornermen out of the cage so we can get back down to business.
Acemoglu throws a low kick, looking for Luciano's leg but Luciano calmly moves out of range.
Luciano flicks out a counter leg kick but Acemoglu steps away.
Acemoglu looks to land a right hand but Luciano moved out of range.
Luciano ducks low and lands a nice hook to the body of his opponent.
Acemoglu misses with a straight left.
Luciano misses with a low kick.
Acemoglu gets tackled into the cage by Luciano. Luciano maintains the clinch.
Acemoglu goes for a takedown in the clinch but Luciano prevents it.
A left hand lands to the body for Luciano.
We've had a slow start to the round here - hopefully the action picks up.
Acemoglu blocks a couple of punches on the inside.
A short right hand to the side of the head by Luciano.
Acemoglu looking for a takedown.
Acemoglu blocks a couple of punches on the inside.
Acemoglu is trying to break free.
That's one minute gone in the round.
Acemoglu wants a takedown.
That's three failed takedown attempts in the round for Daron Acemoglu. That's going to take a lot out of him.
Luciano makes some space for himself and lands an uppercut.
Acemoglu has dropped down and is looking to force the takedown but it's defended by Luciano after a bit of a struggle.
Luciano lands a hook to the side of the head.
Luciano lands a nice uppercut.
Luciano is defending well against a takedown attempt.
Both fighters are absolutely exhausted here.
Luciano gets underhooks to prevent Acemoglu's takedown attempt.
Acemoglu wants to push off and get back to the center of the mat but Luciano has him pressed against the cage.
Acemoglu's head jolts backwards as he takes an uppercut right on the button!
Luciano tried to land a shot to the body but connects with Acemoglu's elbow.
Luciano is working Acemoglu over against the cage.
Luciano lands a right hand.
A short right from Luciano.
Luciano lands with a right to the head.
A short right from Luciano.
The fans in attendance giving it up for the two fighters, who have really let it all hang out in the last minute or so!
Luciano scores with a hook to the body.
Luciano has been the more effective fighter overall so far.
Luciano lands a shot to the body.
That's two minutes gone in the round.
Luciano lands a body punch in the clinch.
Acemoglu's head jolts backwards as he takes an uppercut right on the button!
Luciano working some nice short punches in the clinch.
Luciano tries a body shot but Acemoglu blocks it.
A short uppercut from Luciano.
Acemoglu is rocked!
Luciano lands a hook that snaps the head of Acemoglu backwards.
Oh Acemoglu is still all over the place! His legs are completely gone! Will he be able to recover?!!
A right hook to the body lands for Luciano.
Luciano cracks Acemoglu with a nice body shot.
Luciano lands with a short shot to the head.
Luciano works for underhooks and lands a body shot in the process.
Luciano pushes Acemoglu back against the cage and unloads with a body punch.
Luciano pushes Acemoglu against the cage. Luciano is working some dirty boxing. Luciano pushes off with a quick right hook! Acemoglu goes down! Acemoglu tries to stand but stumbles back to his kness! Luciano moves in to finish and the ref steps in to prevent any more damage!
Ladies and gentlemen, after 2:37 of round 2, we have a winner by way of TKO (Strikes). Ricky Luciano!
Ricky Luciano very nearly forgot to thank Conviction amongst all the excitement of his win but just as the interview came to a close, he screamed their name. Hopefully he'll get a few nice freebies in the mail as a thank you.
|
|
|
|
|
|
|
|
|
|
|
|
|
|
|
|
|
|
|
|
|
|
|
| S |
C
A |
G |
S |
C
B |
G |
|
S |
C |
G |
|
energy
A | B |
|
hype
A | B |
|
pop
A | B |
|
mgr
A | B |
|
FIGHT
RATING
61% |
|
|
|
|
|
|
|
Co-main event
|
Coming up we have a welterweight MMA rules bout between Aderbar Moura (ranked 260 p4p, 2079 weight class) and Little Late (ranked 47 p4p, 278 weight class). Little Late acknowledges the crowd's support as he enters the cage.
 |
|
 |
| 181 cm
28
171
13 - 8 - 0 |
|
189 cm
30
181
3 - 8 - 0 |
Powerful takedowns
Brawler
Insanely flexible |
|
Decent wrestler
Excellent boxer
Good gas tank |
|
| |
|
Ladies and gentlemen. This fight is 3 rounds, in the welterweight division.
Introducing the fighter to my left, fighting out of the red corner.
With a record of 13 - 8 - 0, fighting out of Rio de Janeiro, Aderbar Moura!
And introducing the fighter to my right, fighting out of the blue corner.
With a record of 3 - 8 - 0, fighting out of Las Vegas, Little Late!
The judges for this bout are James Atkins, Richard Clark and Colin Fotheringham.
The bell rings for round one and we are underway!
Late gets a clinch.
Late escapes the clinch and we're back to striking.
Late throws out a powerful jab.
Moura throws a looping left and ducks down for a takedown. He's got his arms around Late's waist but Late gets an underhook and avoids the takedown by throwing Moura off to one side.
Late takes a step towards his opponent and connects with a left hand, before circling away.
Nice shot by Late.
Moura on the wrong end of a nice low kick. He's acting like it's no big deal but he doesn't want to take many more of those.
Nice takedown defense from Late. No joy for Moura on that attempt.
Moura will have to do better than that with his takedown attempts.
That's three failed takedown attempts in the round for Aderbar Moura. That's going to take a lot out of him.
Some wild striking there from Late.
Moura fails miserably with a takedown attempt.
Late punishes Moura's body with a nice straight punch.
Wooooo! Give it up for these two warriors! They are putting on a show!
Moura closes the distance and gets a trip takedown into side control. Late quickly recovers to half guard.
Moura is looking for an arm triangle, whilst trying to pass to side control. Late doesn't seem that keen to cooperate though. No luck this time Moura.
Late is defending against the submission attempts here by Moura.
That's one minute gone in the round.
Moura tries to pass to full mount but Late defends it.
Moura has improved his flexibility recently so we will have to see if he can use that to his advantage.
Moura working to pass to mount. He's got his hand pressing down on Late's thigh. Late counters though and makes it back to full guard.
Moura stands up and looks to throw the legs aside to pass to side control. Late swivels though and keeps the full guard.
Moura is holding a leg here, probably looking for an ankle lock - he drops back and goes for it! Late is in trouble! Is it all over??? No! Late has escaped and now he's on top!
Late trying to pass the guard but can't manage it just yet.
That's two minutes gone in the round.
Late keeps trying to improve his position.
Moura has a loose triangle. He'll be looking to tighten that up but Late can see exactly what he's planning and manages to posture up and free himself.
Late wants to pass the guard but Moura is keeping the position.
Late advances to half guard.
Late tries to pass the half guard into mount. Moura knows what he's doing though and prevents the attempt.
Moura tries to get to full guard but Late has control of the leg.
That's three minutes gone in the round.
Late controlling the action here.
Late wants to stand up but Moura is controlling the position.
Late wants to lay and pray for a moment but Moura keeps working.
Moura looking to work for a kimura from the bottom.
The referee calls for the fighters to work.
That's four minutes gone in the round.
The crowd are showing their displeasure at the lack of action as loud boos ring out around the arena.
Moura looking for submissions from an awkward position here.
Late trying to control the pace.
Late seems to be working for a kimura but Moura defends the submission attempt.
The crowd thankful this round is nearly over.
Late is sneakily working for an arm triangle but Moura sees it coming and defends easily.
And that is the end of the round. The fighters go back to their corners.
Little Late dominated that round.
The fighters' corners scream their final instructions, as the referee calls time. Here we go, back to the action!
Late misses with a wild combination.
Little Late seems to be the more aggressive standup fighter in this bout.
Late lands a straight punch to the body, keeping Moura at a distance.
A really sloppy takedown attempt there from Moura.
Late stooping low to avoid any incoming strikes and then lunges in with an uppercut come cross that lands flush.
Late lands a left and a right that send Moura crashing to the mat, dazed. Late thinks about following him to the mat but decides to wave him back up to his feet!
Moura is rocked!
 It looks like Aderbar Moura has been cut. It looks like Aderbar Moura has been cut.
Fantastic stuff here - a very entertaining period of action, which has drawn cheers from the crowd.
Late feints a kick and comes over the top with a right hand, followed by a left hook - both land, sending Moura crashing to the mat! This one is all over!
Ladies and gentlemen, after 0:35 of round 2, we have a winner by way of KO (Punches). Little Late!
During a confident post fight interview, Little Late thanked all his fans. He seemed very genuine when describing how motivated his fans keep him.
|
|
|
|
|
|
|
|
|
|
|
|
|
|
|
|
|
|
|
|
|
|
|
| S |
C
A |
G |
S |
C
B |
G |
|
S |
C |
G |
|
energy
A | B |
|
hype
A | B |
|
pop
A | B |
|
mgr
A | B |
|
FIGHT
RATING
39% |
|
|
|
|
|
|
|
Main event
|
Coming up we have a welterweight MMA rules bout between Noel Diaz (ranked 80 p4p, 40 weight class) and Odd Job (ranked 15 p4p, 7 weight class). Diaz's ring entrance music is that housewives' favourite, The Stockton Slap Song. Both fighters look pumped up here. Let's hope this is a good fight!
 |
|
 |
| 180 cm
30
172
23 - 3 - 0 |
|
179 cm
30
174
16 - 10 - 0 |
Abu Dhabi Champ
Excellent boxer
Insanely flexible |
|
Good wrestler
Basic striking
Good gas tank |
|
| |
|
Ladies and gentlemen. This fight is 5 rounds, for the welterweight championship of the world!
Introducing the champion to my left, fighting out of the red corner.
With a record of 23 - 3 - 0, fighting out of London, Noel Diaz!
And introducing the challenger to my right, fighting out of the blue corner.
With a record of 16 - 10 - 0, fighting out of New York, Odd Job!
The judges for this bout are James Atkins, Paul Tew and Donald Grub.
The bell rings for round one and we are underway!
Diaz misses with a hook.
Job swings widly with a right hand
and Diaz cracks him with a counter punch right on the button.
Job ducks under a wild hook from Diaz.
Diaz throws a monster uppercut resembling something out of street fighter but it doesn't land.
Job bobs and weaves into range and then changes levels and scores with a nice takedown into side control.
Diaz's coaches at Arcalimon Top Team have been working on his defensive grappling in preparation for this fight so let's see if he can get out of this tricky position.
Diaz regains half guard.
Diaz moves into full guard.
Job advances to half guard.
Job is sneakily working for an arm triangle but Diaz sees it coming and defends easily.
Job is taking a breather. Diaz says something to him but it's hard to make out. Perhaps he's telling him to get on with it and actually do something.
Job seems very keen to just sit and control from half guard but Diaz does not like that idea so much and is remaining active off his back.
That's one minute gone in the round.
Job perhaps working for something from half guard, or maybe not. It looks like he's just sitting there.
Diaz is trying to get back to full guard.
Diaz is pressing down on Job's left leg trying to get back to full guard. He's managed it.
Job looking to sit in guard and control but Diaz gets the butterfly guard and sweeps. He's now in the guard on the top.
Diaz's corner is telling him to maintain position.
Job has a loose triangle. He'll be looking to tighten that up but Diaz can see exactly what he's planning and manages to posture up and free himself.
Job keeping full guard, as Diaz tries to pass.
That's two minutes gone in the round.
Diaz advances to half guard.
Diaz controlling the action here.
Job tries to get to full guard but Diaz has control of the leg.
Job controlling the position for now.
Diaz trying to mount his opponent but Job defends it.
Diaz controlling the action here.
That's three minutes gone in the round.
Job trying to control from the bottom.
We may be looking at a referee standup if the pace doesn't pick up soon.
Diaz wants to control but Job is keeping him busy.
The ref stands the fighters back up due to a lack of activity.
Diaz scores with a sloppy punch to the body. Not much technique there but it did the business.
Job doesn't succeed with the takedown
and Diaz counters with a stiff right hand.
Job throws a jab but it's blocked by Diaz.
Job slips a straight right by Diaz.
Diaz throws a hook to the side of Job's head but Job sees it coming and ducks under it beautifully.
Job shoots in for a takedown. He's persisting with it as Diaz sprawls well. Diaz wins this battle and keeps the fight standing. Job gets slowly back to his feet.
That's four minutes gone in the round.
Diaz slips under a jab from Job.
Job has his takedown stuffed
and Diaz cracks him with a counter punch right on the button.
Noel Diaz has stuffed three takedown attempts in the round now. That's going to take a lot out of Odd Job.
Diaz scores with a hook to the body. Job takes a step back and tries to catch his breath.
Job shoots in for a takedown. "Ole!" shouts Diaz as he jumps to the side.
Diaz lands a powerful looking uppercut that connected with his opponent's jaw.
Job uses some good footwork to avoid the body shot by Diaz.
Diaz misses with a telegraphed body shot
and Diaz takes a counter punch right on the button for his troubles.
Fantastic stuff here - a very entertaining period of action, which has drawn cheers from the crowd.
Diaz misses with a jab, cross combination.
A telegraphed right hand from Job misses the target.
Job thows a left - swing and a miss!
Diaz throws a monster uppercut resembling something out of street fighter but it doesn't land.
Job walks into a stiff left hand from Diaz.
And that is the end of the round. The fighters go back to their corners.
Noel Diaz dominated that round.
The fighters' corners scream their final instructions, as the referee calls time. Here we go, back to the action!
Job misses with a looping left.
Job shoots for a takedown but Diaz saw that one coming a mile off and avoided it easily.
Diaz is looking to counter the offense by Job and move into the clinch.
Diaz throws a jab when Job was well out of range.
Diaz throws a shot from downtown. Job moves away and avoids it.
Diaz moves into range and connects with a jab.
A shot to the body from Diaz misses
and Diaz takes a counter punch right on the button for his troubles.
Diaz throws a monster uppercut resembling something out of street fighter but it doesn't land.
Job looks like he wants to counter punch here.
Job shoots in for a takedown but doesn't get it.
Job throws a poor cross that misses
and Diaz connects with a straight left hand counter down the middle.
Job swats away the attempt to clinch by Diaz.
We've had a slow start to the round here - hopefully the action picks up.
Diaz misses with a looping left.
Jab by Diaz.
Odd Job seems to be the more aggressive standup fighter in this bout.
A lazy left from Job finds it's target.
Diaz with a jab.
Job is rocked!
Wooooo! Give it up for these two warriors! They are putting on a show!
The crowd cheers as Diaz lands an impressive looking overhand right. Job doesn't seem phased though.
Job is still on wobbly legs! Can Diaz finish him?
That's one minute gone in the round.
Diaz just misses with a punch to the body.
Noel Diaz is winning the standup battle so far.
Job throws out a token jab with nothing on it.
Diaz is looking to counter the offense by Job and move into the clinch.
Sloppy strikes from Diaz. Those never looked like landing.
Job seems to have recovered his senses.
Job lands with a straight right. Diaz didn't see that one coming.
Job misses with a looping right.
Diaz lands an overhand right.
Job closes the distance, clinches up and gets a nice trip takedown into side control. Very smooth.
Job laying and praying for a moment but Diaz takes advantage and regains half guard.
The referee walks around the fighters to get a better view of the action. Job lands a nice short elbow.
Odd Job has got the better of the ground game so far.
Job works his foot free and advances to mount.
Fantastic stuff here - a very entertaining period of action, which has drawn cheers from the crowd.
Diaz is wriggling around trying to escape.
The fighters are pressed up against the cage, both looking to find a bit of space to work.
That's two minutes gone in the round.
Job in mount throwing good strikes here, bouncing his opponent's head off the canvas.
Job looking to finish with strikes here!
Job controlling from the full mount.
Diaz can't escape the position.
Diaz regains half guard.
The ref warns both fighters not to hold the cage as they work up against the meshing.
Diaz trying to control but Job postures up.
That's three minutes gone in the round.
Job lands with an elbow from half guard - that looked like it hurt.
Diaz is looking to control Job's leg but it's slowly edging free. Can Diaz avoid being mounted?
Job throwing shots but Diaz is blocking nicely.
Job lands with a punch from half guard.
Diaz moves into full guard.
Diaz is really dominating this fight. Is there anything that Job can do to turn this around?
Diaz keeping moving, preventing Job from controlling successfully.
Diaz wants to sweep here but Job controlling him for the moment.
That's four minutes gone in the round.
Job wants to control from the top but Diaz keeps moving.
Job controls from within his opponent's guard.
Job preventing the sweep.
Job looking to sit in guard and control but Diaz gets the butterfly guard and sweeps. He's now in the guard on the top.
Job wants to sweep but no luck.
And that is the end of the round. The fighters go back to their corners.
That was a close second round but I would say that Noel Diaz will probably get the nod.
That's time! Back to the action!
Job shoots in for a takedown - he's clinched up with Diaz but Diaz pushes him off and we're back to square one.
Diaz walks into a left hand.
Job has his takedown stuffed
and Diaz counters with a good right hand that lands right on the jaw.
Job with a poor takedown
and Diaz counters with a right hand to the body.
Noel Diaz has stuffed three takedown attempts in the round now. That's going to take a lot out of Odd Job.
Diaz throws a looping overhand right but Job ducks down to avoid it.
Job swings away with a counter right hand but no contact made.
Job fakes high and shoots in for a takedown but Diaz avoids it really well and circles away.
A quick step to the side and Diaz tries to counter with a shot to the body but it doesn't connect.
We've had a slow start to the round here - hopefully the action picks up.
Diaz tries to sprawl but Job drives through with a takedown into half guard.
Job is trying to control the action in half guard but Diaz is working away on the bottom, looking perhaps to get back to full guard.
That's one minute gone in the round.
Diaz is looking to control Job's leg but it's slowly edging free. Can Diaz avoid being mounted?
Diaz regains full guard, whilst avoiding punches from Job.
Job trying to land body shots but he keeps hitting the mat.
Diaz wants to sweep here but Job controlling him for the moment.
Job trying to control but Diaz is working from the bottom.
Diaz has Job pulled in close to control his posture.
Diaz looking for a guillotine here but Job defends easily.
That's two minutes gone in the round.
The crowd are getting on the fighters' backs, as the pace has dropped off in the last minute or so.
Diaz tries to land a sweep but no joy.
Diaz working a defensive guard here.
Job wants to control from the top but Diaz keeps moving.
Diaz not looking particularly offensive just at the moment.
The referee has decided to stand the fighters back up, so we'll restart on the feet.
Diaz throws a body punch but Job moves out of range.
Diaz slips under a jab.
That's three minutes gone in the round.
Job feints and as Diaz raises his hands in defense, Job changes levels and drives through with a takedown into guard.
Diaz trying to control the position.
Diaz can't do much from the bottom at the moment, as Job controls the pace.
Job must be cautious of submissions here, given that his opponent has the superior Jiu Jitsu.
Job wants to control from the top but Diaz keeps moving.
Diaz has his feet on Job's thighs here. He's pushed Job off and worked for a very quick armbar from the bottom! He's flipped onto his stomach and he's cranking hard on the arm! Job screams in pain and taps out! This one is all over!
Ladies and gentlemen, after 3:52 of round 3, we have a winner by way of Submission (Armbar). Noel Diaz!
Noel Diaz is the new welterweight champion!
During a confident post fight interview, Noel Diaz thanked all his fans. He seemed very genuine when describing how motivated his fans keep him.
|
|
|
|
|
|
|
|
|
|
|
|
|
|
|
|
|
|
|
|
|
|
|
| S |
C
A |
G |
S |
C
B |
G |
|
S |
C |
G |
|
energy
A | B |
|
hype
A | B |
|
pop
A | B |
|
mgr
A | B |
|
FIGHT
RATING
39% |
|
|
|
|
|
|
|
|
|
|
