 |
MMAH 91 PBP Commentary |
Undercard bout
|
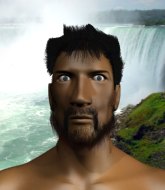
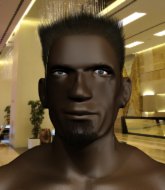
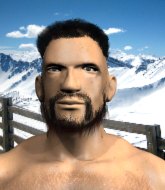
Coming up we have a welterweight MMA rules bout between Brody MacDonald (ranked 24326 p4p, 4716 weight class) and Johnny Slivers (ranked 545 p4p, 496 weight class). Over to our ring announcer for the fighter introductions!
 |
|
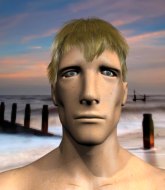 |
| 187 cm
20
170
1 - 2 - 0 |
|
200 cm
24
175
0 - 1 - 0 |
BJJ Purple Belt
Excellent MT
Granite chin |
|
BJJ White Belt
Decent knees
Tends to cut |
|
| |
|
Ladies and gentlemen. This fight is 3 rounds, in the welterweight division.
Introducing the fighter to my left, fighting out of the red corner.
With a record of 1 - 2 - 0, fighting out of Montreal, Brody MacDonald!
And introducing the fighter to my right, fighting out of the blue corner.
With a record of 0 - 1 - 0, fighting out of Helsinki, Johnny Slivers!
The judges for this bout are Tarja Halkonen, Matti Vanhoillinen and Johanna Lukiainen.

The bell rings for round one and we are underway!
MacDonald misses with an uppercut. Slivers saw that one coming.
MacDonald uses good head movement to avoid the hook from Slivers.
MacDonald throws a nice looking combination but Slivers bobs and weaves to avoid any damage.
It seemed like Slivers was going to counter with the hook but didn't fully commit to it.
Slivers misses with an uppercut
and MacDonald counters with a nice uppercut.
 It looks like Johnny Slivers has been cut. It looks like Johnny Slivers has been cut.
Slivers misses with a double jab.
MacDonald slips a straight right by Slivers.
MacDonald takes an uppercut right on the jaw but it doesn't phase him.
MacDonald misses with the combination.
Slivers avoids a punch combination nicely.
Slivers misses with a looping right.
MacDonald drops Slivers with a naaaaasty hook - Slivers is in real trouble here! MacDonald dives in to side control and pounds out his opponent for a TKO victory! The crowd goes nuts!
Ladies and gentlemen, after 0:46 of round 1, we have a winner by way of TKO (Strikes). Brody MacDonald!
|
|
|
|
|
|
|
|
|
|
|
|
|
|
|
|
|
|
|
|
|
|
|
| S |
C
A |
G |
S |
C
B |
G |
|
S |
C |
G |
|
energy
A | B |
|
hype
A | B |
|
pop
A | B |
|
mgr
A | B |
|
FIGHT
RATING
86% |
|
|
|
|
|
|
|
Undercard bout
|
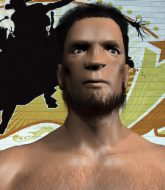
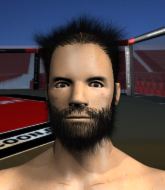
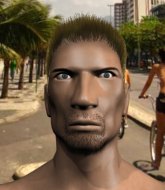
Coming up we have a welterweight MMA rules bout between Amir Hadrovic (ranked 4976 p4p, 3621 weight class) and Blue River (ranked 509 p4p, 425 weight class). Both fighters look fresh as a daisy as they make their way towards the cage.
 |
|
 |
| 188 cm
20
180
1 - 4 - 0 |
|
186 cm
20
182
6 - 5 - 0 |
BJJ White Belt
Excellent boxer
Granite chin |
|
BJJ White Belt
Counter fighter
Powerful |
|
| |
|
Ladies and gentlemen. This fight is 3 rounds, in the welterweight division.
Introducing the fighter to my left, fighting out of the red corner.
With a record of 1 - 4 - 0, fighting out of Las Vegas, Amir Hadrovic!
And introducing the fighter to my right, fighting out of the blue corner.
With a record of 6 - 5 - 0, fighting out of St Petersburg, Blue River !
The judges for this bout are Marco Blurstr�m, Anni Minnem�ki and Matti Vanhoillinen.
The bell rings for round one and we are underway!
Hadrovic will need to tighten up his combinations if he doesn't want to gas himself out, swinging at thin air.
River swings away with a counter right hand but no contact made.
River throws a hook but Hadrovic blocks it.
River takes a shot right to the liver - Bas would have been proud of that punch.
River looks more muscular than last time we saw him. He must have been on the weights.
Hadrovic throws a right and a left that River avoids nicely.
Hadrovic lands a two punch combo.
River is on the wrong end of a nice combination from Hadrovic.
River takes a punch to the jaw and another one to the bread basket.
This has been an exciting period of action!
A lazy body kick from Hadrovic
and River counters with a straight punch to the midsection.
Hadrovic avoids the body shot from River .
River is the aggressor but that punch slipped nicely by Hadrovic.
Hadrovic misses with a jab, cross combination.

That's one minute gone in the round.
Hadrovic will need to tighten up his combinations if he doesn't want to gas himself out, swinging at thin air.
It seemed like River was going to counter with the hook but didn't fully commit to it.
Hadrovic pulls out of a head kick attempt.
Hadrovic misses with a few strikes there.
Hadrovic misses with a double jab
letting River counter with a right hand.
 It looks like Amir Hadrovic has been cut. It looks like Amir Hadrovic has been cut.
Hadrovic lands three nice shots there - that looked like it hurt!
River slips a jab and a cross from Hadrovic.
Hadrovic throws a series of punches but River moves out of range.
Hadrovic throws a head kick but River moves out of range.
River throws a monster uppercut resembling something out of street fighter but it doesn't land.
Hadrovic misses with a wild combination.
It seemed like River was going to counter with the hook but didn't fully commit to it.

That's two minutes gone in the round.
Hadrovic gets cracked there but stands up to it.
We've seen a great period of action over the last minute or so - credit to both fighters for going all out!
Hadrovic throws a right and a left that both miss.
River throws a big shot that misses.
No joy there for Hadrovic, who threw a few shots but didn't land.
River appears to be waiting to throw a counter punch to the body.
Hadrovic walks into a left hand.
River throws a body shot but no joy.
Hadrovic lands a nice looking body shot.
Hadrovic lands three nice shots there - that looked like it hurt!
Hadrovic throws a right hand that River ducks under and follows up with a left that River also avoids with ease.

That's three minutes gone in the round.
Hadrovic keeping his hands up high there, blocking the jab from River .
Hadrovic moves away from the strike by River .
Hadrovic definitely looks more muscular than last time we saw him fight.
Hadrovic scores with a three punch combo!
Hadrovic lands three nice shots there - that looked like it hurt!
River with a body punch. A glancing blow.
A punch combination from Hadrovic misses.
Some wild striking there from Hadrovic.
A slow jab from River misses its intended target.
Hadrovic throws a mid kick that lands with a slap.
River 's jab looks to have found its range, popping Hadrovic under the eye.

That's four minutes gone in the round.
Wooooo! Give it up for these two warriors! They are putting on a show!
Nice jab there from Hadrovic.
Hadrovic looks to land a combination but River avoids it well.
River swings away with a counter right hand but no contact made.
River misses the jab.
Hadrovic wants to take advantage of his opponent's missed offense by moving into the clinch.
River slips a jab and a cross from Hadrovic.
River pushing out the jab but it's not landing.
Hadrovic is looking for a counter combo.
River fakes high and swings low for a body shot but Hadrovic manages to avoid it.
River walks straight into a jab right on the nose. That one stung - he's blinking and trying to clear his head.
Hadrovic defending well as River loads up on a big left hand.
River avoids a punch combination nicely.
A nice side step and River releases a counter shot to the body, but it doesn't find it's home.
River slips a jab and a cross from Hadrovic.
And that is the end of the round. The fighters go back to their corners.
Amir Hadrovic dominated that round.
The cut man is working on Amir Hadrovic's cut.
That's the end of the interval. I'm sure that seemed a lot quicker than a minute for our two fighters! Back to the action.

River takes a solid shot to the body. That one hurt him but he's trying not to show it.
No joy there for Hadrovic, who threw a few shots but didn't land.
Hadrovic pulls out of a head kick attempt.
Hadrovic scores with a nice looking left hook and follows it up with an uppercut!
Hadrovic lands a right hook to the body.
Hadrovic is really dominating this fight. Is there anything that River can do to turn this around?
River dodges the punch combination from Hadrovic.
River just misses with a punch to the body.
We've had a slow start to the round here - hopefully the action picks up.
River misses with a body shot.
Jab, cross, leg kick. Nice combination by Hadrovic!
River misses with an uppercut. Hadrovic saw that one coming.
Hadrovic throws a two punch combo that lands nicely.
That's one minute gone in the round.
River swings and misses with a hook to the body.
River avoids the body shot from Hadrovic.
Hadrovic throws a combination. River tries to block but a couple of punches get through.
Hadrovic paws at his opponent with the jab and then lunges in with a straight, right on the button.
River throws a hook to the body but it doesn't connect.
No joy there for Hadrovic, who threw a few shots but didn't land.
An inside leg kick lands from Hadrovic.
Amir Hadrovic is winning the standup battle so far.
Hadrovic tries to score with an inside leg kick but telegraphs it and River is able to avoid easily.
River showing good head movement there, avoiding the strikes from Hadrovic.
Hadrovic is working the combinations to good effect here.
That's two minutes gone in the round.
Hadrovic pulls out of a head kick attempt.
A little jabbing left from River on the counter but it doesn't find it's target.
River misses with a body shot. Nice footwork from Hadrovic.
No joy there for Hadrovic, who threw a few shots but didn't land.
Danga de danga de dang - Hadrovic scores with a four punch combination!
The fans in attendance giving it up for the two fighters, who have really let it all hang out in the last minute or so!
Hadrovic throws a combination but comes up with nothing but fresh air.
Hadrovic throws a combination but it was largely blocked by River .
River let fly with a counter punch to the body but it didn't land.
Both these guys seem content to just stand up and trade with each other but River might want to think about changing up his gameplan a bit because over the course of the fight, Hadrovic has got the better of the exchanges.
Hadrovic waving his hands out in front of him, looking to distract River .
Hadrovic looks to land a combination but River avoids it well.
River with a jab.
Hadrovic throws a combination but it was largely blocked by River .
River throws a hook to the side of Hadrovic's head but Hadrovic sees it coming and ducks under it beautifully.
That's three minutes gone in the round.
River looks to land a right hand but Hadrovic moved out of range.
River jabbing away but nothing is landing.
Hadrovic misses with a double jab.
River swings away with a counter right hand but no contact made.
River loads up on a big right hand but Hadrovic slips the punch.
Hadrovic ducks right into an uppercut from River .
Hadrovic fails to land with a series of punches.
Amir Hadrovic is looking to throw some combinations by the looks of things.
Hadrovic comes forward and lands a shot to the body, then darts back out of range.
River misses the shot to the body.
Hadrovic misses with a body kick.
River throws an overhand right that lands on Hadrovic's shoulder, as Hadrovic tries to avoid the shot.
Hadrovic lands a powerful looking uppercut that connected with his opponent's jaw.
That's four minutes gone in the round.
Hadrovic throws a decent looking leg kick but it doesn't land clean.
Hadrovic throws a left and a right that both miss
and Hadrovic takes a counter punch right on the button for his troubles.
River looks to land a right hand but Hadrovic moved out of range.
River is the aggressor but that punch slipped nicely by Hadrovic.
River misses with the combination.
We've seen a great period of action over the last minute or so - credit to both fighters for going all out!
River takes a shot right to the liver - Bas would have been proud of that punch.
River looks to land a right hand but Hadrovic moved out of range.
Hadrovic throws a right and a left that River avoids nicely.
River is clearly trying to counter these attacks from Hadrovic with a body shot.
Hadrovic rushes forward with a series of wild hooks but River moves out of range and avoids them all easily.
And that is the end of the round. The fighters go back to their corners.
Amir Hadrovic dominated that second round.
The cut man is working on Amir Hadrovic's cut.
Well, the break between rounds is over. Let's get back to the scrappin! This is the final round!

Hadrovic throws a right and a left that both miss.
A countering left hand to the body from River misses.
Hadrovic is looking to score with low kicks.
River swings away with a counter right hand but no contact made.
Hadrovic throws a nice looking combination but River bobs and weaves to avoid any damage.
Hadrovic feints a jab promting River to slip. Hadrovic then demonstrates his capabilities by jabbing again. River slips again and ducks right into an uppercut.
Amir Hadrovic seems to be the more aggressive standup fighter in this bout.
River throws a jab but it's blocked by Hadrovic.
Hadrovic misses with a head kick.
River looks like he wants to counter punch here.
River loads up on a big right hand but Hadrovic slips the punch.
Hadrovic misses with a two punch combination.
We've had a slow start to the round here - hopefully the action picks up.
River throws a lazy right hand but Hadrovic sees it coming a mile off and sidesteps it easily.
Hadrovic misses with a double jab.
Hadrovic swinging wildly here.
That's one minute gone in the round.
Hadrovic misses with a half-hearted attempt at a head kick.
River looked like he wanted to counter with a punch but didn't throw it.
Hadrovic misses with the combination.
Both fighters are breathing heavily.
Hadrovic fakes high and swings low for a body shot but River manages to avoid it.
A jab from River misses.
Hadrovic steps to the side to avoid the strikes from River .
River showing good head movement there, avoiding the strikes from Hadrovic.
River misses with an uppercut.
A looping hook to the body misses from River . Hadrovic does a little dance to reset his feet.
That's two minutes gone in the round.
Hadrovic throws a right and a left that River avoids nicely.
Hadrovic rushes forward with a series of wild hooks but River moves out of range and avoids them all easily.
River looks like he wants to counter punch here.
Hadrovic misses with a few strikes there.
Hadrovic swings away but doesn't land with a series of punches.
A little jabbing left from River on the counter but it doesn't find it's target.
Blue River has stepped it up - he knows he needs a finish here!
Hadrovic ducks under a wild hook from River .

River closes the distance and clinches.
A short left from River .
River lands a body punch - he's looking to wear down Hadrovic.
Hadrovic tries to jump guard but he falls flat on his backside. River smiles and moves away.
Hadrovic is looking to wear down River with body shots, infact he's throwing more body shots than head shots at the moment.
Hadrovic throws a right hand that River ducks under and follows up with a left that River also avoids with ease.
That's three minutes gone in the round.
River waving his hands out in front of him, looking to distract Hadrovic.
River tries to land with a swinging hook to the body but Hadrovic was well out of range. Poor timing from River .
Hadrovic avoids the body shot from River .
River uses some good footwork to avoid the body shot by Hadrovic.
River swings away with a counter right hand but no contact made.
Hadrovic lands a leg kick. The shin dug right into the meat of the thigh.
River lands a nice shot to the body.
A combination from Hadrovic does no damage.
River looks like he wants to counter punch here.
Hadrovic throws a nice looking combination but River bobs and weaves to avoid any damage.
River waving his hands out in front of him, looking to distract Hadrovic.
River swings for the body but Hadrovic moves out of range.
Hadrovic fails to land with a series of punches.
That's four minutes gone in the round.
Hadrovic throws a jab, cross combination which is slipped
and River cracks him with a counter punch right on the button.
Hadrovic staying out of range there.
Hadrovic throws a right and a left that River avoids nicely.
River looks like he wants to counter punch here.
Hadrovic throws a combination but it was largely blocked by River .
A punch combination from Hadrovic misses.
The fans in attendance giving it up for the two fighters, who have really let it all hang out in the last minute or so!
Hadrovic misses with a right hand

and River counters with a nice right hand that sends Hadrovic toppling to the canvas! Hadrovic scrambles and gets back to his feet - can River finish him?!
River ducks down and throws a hook to the body but Hadrovic moves away.
Sloppy strikes from Hadrovic. Those never looked like landing.
River is the aggressor but that punch slipped nicely by Hadrovic.
The fighters are starting to perspire pretty heavily.
Amir Hadrovic is fighting for a decision here - he's started to take the cautious approach.
River slips a jab and a cross from Hadrovic.
And that's the end of the fight!
I would just about give that final round to Blue River .
I think Hadrovic has won this one but let's see what the judges have to say. Over to the ring announcer for the scorecards.
Ladies and gentlemen, after 3 rounds of action, we go to the scorecards for a decision.
Judge Marco Blurstr�m scores the fight 29:28
Judge Anni Minnem�ki scores the fight 30:28
Judge Matti Vanhoillinen scores the fight 30:27
In favor of your winner, by unanimous decision... Amir Hadrovic!
|
|
|
|
|
|
|
|
|
|
|
|
|
|
|
|
|
|
|
|
|
|
|
| S |
C
A |
G |
S |
C
B |
G |
|
S |
C |
G |
|
energy
A | B |
|
hype
A | B |
|
pop
A | B |
|
mgr
A | B |
|
FIGHT
RATING
62% |
|
|
|
|
|
|
|
Undercard bout
|
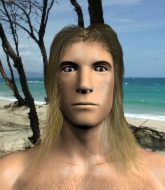
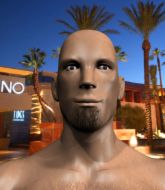
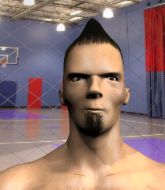
Coming up we have a welterweight MMA rules bout between Charles Hatcher (ranked 4854 p4p, 3751 weight class) and Praew Dao (ranked 500 p4p, 436 weight class). Both these guys have solid standup skills and neither is particularly fantastic on the ground, so let's hope for a nice standup war!
 |
|
 |
| 180 cm
21
177
0 - 0 - 0 |
|
182 cm
20
182
1 - 1 - 0 |
BJJ Blue Belt
Excellent MT
Granite chin |
|
BJJ Blue Belt
Excellent boxer
Granite chin |
|
| |
|
Ladies and gentlemen. This fight is 3 rounds, in the welterweight division.
Introducing the fighter to my left, fighting out of the red corner.
With a record of 0 - 0 - 0, fighting out of New York, Charles Hatcher !
And introducing the fighter to my right, fighting out of the blue corner.
With a record of 1 - 1 - 0, fighting out of Los Angeles, Praew Dao!
The judges for this bout are Roosa J�rvil�inen, Anni Minnem�ki and Arvi Lind.
The bell rings for round one and we are underway!
Dao connects with a single shot there.
Dao throws an overhand right that lands on Hatcher 's shoulder, as Hatcher tries to avoid the shot.
Dao wants to slow Hatcher down by chopping away at his legs.
Hatcher tries to counter with a takedown but Dao is quick to defend against it.
Dao lands with a thumping leg kick.
A big left from Dao misses.
Dao uses some good footwork to avoid the body shot by Hatcher .
Hatcher walks straight into an uppercut. Luckily it didn't land flush.
Hatcher tries to clinch but Dao moves out of range.
Dao closes the distance and presses his opponent up against the cage.
Hatcher wants to take the fight to the mat but Dao manages to get underhooks and keep the fight in the clinch.
Hatcher tries to pull guard but can't drag his opponent to the mat. Dao just stands there and leans against the cage.
Hatcher has had enough of the clinch but Dao keeps him there for the moment.
Dao managing to block the knees to the body from Hatcher .
We've had a slow start to the round here - hopefully the action picks up.

Dao manages to break the clinch.
A good leg kick by Dao.
A telegraphed right hand from Dao misses the target.
Dao lands a body shot.
Hatcher on the wrong end of a nice hook.
That's one minute gone in the round.
Hatcher pulls out of a head kick attempt.
Dao rushes Hatcher and pushes him back against the cage in a clinch.
Dao breaks the clinch and we're back to striking at distance.
Dao takes a step towards his opponent and connects with a left hand, before circling away.
Dao scores with a decent looking hook.
Dao clinches up with Hatcher and pushes him back against the cage.
Hatcher is working on a leg, looking for a takedown but Dao is defending well.
That's three failed takedown attempts in the round for Charles Hatcher . That's going to take a lot out of him.
Dao lands a right hand.
Hatcher wants to break the clinch but can't.
Dao lands a shoulder strike.
Hatcher tries for a takedown. No joy.
Dao tries to throw a body punch but Hatcher avoids it by throwing Dao back against the cage.
Dao cracks Hatcher with a nice body shot.
Dao lands with a short shot to the head.
That's two minutes gone in the round.
Wooooo! Give it up for these two warriors! They are putting on a show!
Hatcher tried to land a shot to the body but connects with Dao's elbow.
A short right from Dao on the inside.
Hatcher stalls.
Hatcher jumps guard but Dao turns him against the cage and keeps the fight standing.
Dao lands with a short head shot on the inside.

Hatcher breaks from the clinch.
Dao comes forward and lands a shot to the body, then darts back out of range.
Dao scores with a hook.
Nice jab there from Dao.
Dao moves into range and clinches up with Hatcher .
Nice body punch from Dao.
Dao working on landing some head shots here - that one got through nicely.
Hatcher is working on a leg, looking for a takedown but Dao is defending well.
Dao lands a body shot in the clinch.
That's three minutes gone in the round.
Dao lands with a light punch inside.
Dao lands with a good tight uppercut to the head.
Hatcher is trying to pull guard but Dao has him pressed against the cage.
Dao lands on the inside with an uppercut.
Dao lands a body punch in the clinch.
A nice left hand lands by Dao.
A head punch on the inside from Hatcher fails to land.
Dao misses with a hook to the ribs.
Dao prevents a takedown attempt there.
Hatcher is trying to break the clinch but Dao has him pressed against the cage.
Dao lands with a short shot to the head.
Dao doesn't land with the attempted body shot.
That's four minutes gone in the round.
Dao goes for a body shot but it's blocked.
Hatcher jumps guard but his hands slip and he falls flat on his back. Well, he's made himself look a right mug there, as Dao walks away with a smile on his face. Hatcher gets slowly back to his feet and shakes his head.
Dao scores with a sloppy punch to the body. Not much technique there but it did the business.
A shot to the liver by Dao. Beautiful body shot.
We've seen a great period of action over the last minute or so - credit to both fighters for going all out!
Hatcher walks straight into a jab right on the nose. That one stung - he's blinking and trying to clear his head.
Praew Dao seems to be the more aggressive standup fighter in this bout.
Hatcher moves his head to the side to avoid a jab but walks straight into a cross.
Dao scores with a punch to the head.
It looks like Charles Hatcher has been cut.
Dao clinches with his opponent.
Dao lands a body punch - he's looking to wear down Hatcher .
Dao breaks from the clinch.
Hatcher takes a punch right to his stomach. That took the wind out of him momentarily.

Hatcher looks for a takedown. He's got it. We're now in half guard.

Dao makes some distance and scrambles quickly back to his feet. Nice work!
Hatcher is breathing heavily.
The crowd applaud the fighters' efforts here as the round comes to an end.
A shot to the liver by Dao. Beautiful body shot.
Dao sizes up Hatcher with a pawing jab and scores with a straight right down the middle.
And that is the end of the round. The fighters go back to their corners.
Praew Dao dominated that round.
The cut man is working on Charles Hatcher 's cut.
That's time! Back to the action!
A left lands for Dao.
Dao listening to his corner there, landing a nice uppercut.
Hatcher throws a lazy head kick
and Dao connects with a straight left hand counter down the middle.
Dao has been the more effective fighter overall so far.
Dao drives through and clinches with Hatcher against the cage.
Hatcher tries to score a body lock takedown but Dao shows good agility there to stay on his feet.
Hatcher wants to break free. God knows he wants to breaaaak freeee.
Dao gets underhooks to prevent Hatcher 's takedown attempt.
Hatcher misses the knee to the body. Nice hip positioning from Dao.
Hatcher tries to pull guard but Dao won't allow it.
That's three failed takedown attempts in the round for Charles Hatcher . That's going to take a lot out of him.
Hatcher putting his Muay Thai to good use. He has Dao in a tight clinch and is doing some damage with knees to the body.
We've had a slow start to the round here - hopefully the action picks up.
Dao breaks from the clinch.
Hatcher takes one on the chin but keeps coming.
Dao connects with a leg kick. He turned his hip over nicely there.
Hatcher takes a body punch but keeps moving.
This is a great period of action - very entertaining stuff!
Dao cracks Hatcher with a hook to the jaw. Both fighters smile at eachother and high-five before getting back down to business.
That's one minute gone in the round.
Nice straight punches there by Dao. You know Roy Jones Jr respects the hands of Dao.
Dao has been working his punching technique in the buildup to the fight and it appears to be paying off.
Dao closes the distance and clinches.
Dao lands a right uppercut that snaps the head of Hatcher backwards.
Dao lands a shot to the body.
Dao lands a body shot in the clinch.
Both fighters are absolutely exhausted here.
Hatcher 's corner calls for him to break the clinch, which he does.
Dao gets a clinch.
Dao lands a hook to the body. It's hard to tell if that hurt Hatcher or not.
Dao breaks the clinch and we're back to striking at distance.
The fight stays on the outside here - Hatcher looks like he's thinking about clinching though.
Hatcher has his hands up protecting his head but a hook from Dao finds it's way round the side to connect with Hatcher 's head.
Dao scores with a decent looking hook.
A nice leg kick from Dao, right into the meat of the thigh.
That's two minutes gone in the round.
The crowd are loving this. Great action here.
Hatcher tried to score with a low kick but Dao checks it.
Dao lands with a good body shot.
Hatcher shoots in and drives through. Dao sprawls well.
Hatcher takes a jab right on the nose. That must have hurt but he shrugs his shoulders and looks to return the favor.
Charles Hatcher is looking to throw some combinations by the looks of things.
Dao pushes Hatcher up against the cage in a clinch.
Dao works on Hatcher 's body with a couple of short punches.
Dao digs a right hand underneath Hatcher 's ribcage. Hatcher let out a lung full of air as it connected.
Dao lands with a right to the head.
Nice body punch from Dao.
Dao scores with a shot to the side of Hatcher 's head.
Praew Dao seems to be working more effectively in the clinch in the fight so far.
Dao lands a hook that snaps the head of Hatcher backwards.
Dao lands a body punch.
Dao is leaning against Hatcher and scores with a nice uppercut to the body.
Dao lands with a good tight uppercut to the head.
That's three minutes gone in the round.
A short right from Dao.
Hatcher tries to score a body lock takedown but Dao shows good agility there to stay on his feet.
A short body shot lands from Dao as the two fighters clinch.
Hatcher wants a takedown.
Dao works for underhooks and lands a body shot in the process.
Nice body punch from Dao - that landed with a thud.
Dao manages to break the clinch.
Hatcher takes a jab on the nose there. A little bit of blood seems to be coming out. Hopefully that won't affect his breathing.
Hatcher tries to close the distance and clinch up against the cage but Dao paws at him with a jab and circles away.
Hatcher looks like he's developed a pretty tasty lump over his left eye. He'll need to avoid taking much more damage to that.
Hatcher takes one on the button.
Dao punishes Hatcher 's body with a nice straight punch.
Dao lands with a hook. Hatcher tried to avoid it but it clipped the top of his head.
Dao throws a nice hook to the body that draws an oooh from the crowd.
Dao looking to take his opponent's legs away with the low kicks.
Wooooo! Give it up for these two warriors! They are putting on a show!
Dao lands a leg kick. The shin dug right into the meat of the thigh.
That's four minutes gone in the round.
Dao scores with a sloppy punch to the body. Not much technique there but it did the business.
Dao connects with a jab.
 Hatcher is rocked! Hatcher is rocked!
A punch lands to the side of Hatcher 's head but he takes it in his stride.
Oh Hatcher is still all over the place! His legs are completely gone! Will he be able to recover?!!
OH! Hatcher has been rocked by a huge right hand and is in deep trouble! Dao smells blood and charges in for the finish! Dao unloads a vicious overhand right and connects to the jaw of Hatcher sending him face first to the canvas! Unbelievable!
Ladies and gentlemen, after 4:19 of round 2, we have a winner by way of KO (Punches). Praew Dao!
A relieved looking Praew Dao thanked the fans for their support and gave the usual line about them being amazing. They seemed to believe that he actually meant it.
|
|
|
|
|
|
|
|
|
|
|
|
|
|
|
|
|
|
|
|
|
|
|
| S |
C
A |
G |
S |
C
B |
G |
|
S |
C |
G |
|
energy
A | B |
|
hype
A | B |
|
pop
A | B |
|
mgr
A | B |
|
FIGHT
RATING
79% |
|
|
|
|
|
|
|
Undercard bout
|
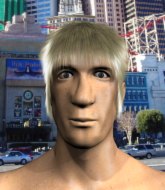
Coming up we have a lightweight MMA rules bout between Fony Terguson (ranked 4593 p4p, 3507 weight class) and Harper Kollhouse (ranked 426 p4p, 382 weight class). Kollhouse has chosen Purge announcement as his entrance music. Fony Terguson could well score a knockout today. He has the power to get to Harper Kollhouse's chin.
 |
|
 |
| 181 cm
20
165
1 - 1 - 0 |
|
168 cm
18
155
0 - 1 - 0 |
BJJ Blue Belt
Great elbows
Very strong |
|
BJJ White Belt
Excellent boxer
Determined |
|
| |
|
Ladies and gentlemen. This fight is 3 rounds, in the lightweight division.
Introducing the fighter to my left, fighting out of the red corner.
With a record of 1 - 1 - 0, fighting out of New York, Fony Terguson!
And introducing the fighter to my right, fighting out of the blue corner.
With a record of 0 - 1 - 0, fighting out of Los Angeles, Harper Kollhouse!
The judges for this bout are Ben Zyskovitsi, Arvi Lind and Anni Minnem�ki.
The bell rings for round one and we are underway!
Kollhouse scores with the left hand. Terguson knows he should have avoided that one.
Kollhouse swings away but doesn't land with a series of punches.
Kollhouse fails to land with the punch combination there - jab, cross, hook, miss, miss, miss.
No joy there for Kollhouse, who threw a few shots but didn't land.
Kollhouse lands a pitter patter jab to the forehead of his opponent.
Terguson with poor footwork there. He got himself in a bit of a tangle, enabling Kollhouse to score with a decent uppercut.
Kollhouse scores with a nice one two combo and darts back out of range to avoid anything coming in the opposite direction.
Kollhouse looks to land a combination but Terguson avoids it well.
Terguson seemed to be looking to counter by closing the distance.
This fight brought to you by 5M nutrition - it's mmmmm tasty. Nice jab by Kollhouse.
Wooooo! Give it up for these two warriors! They are putting on a show!
Terguson wants to clinch.
Terguson tries to clinch but is not successful on this occasion.
Terguson definitely looks more muscular than last time we saw him fight.

Terguson moves into the clinch.
Terguson lands an elbow just above Kollhouse 's eye.
It looks like Harper Kollhouse has been cut.
Kollhouse wants to push off and get back to the center of the mat but Terguson has him pressed against the cage.
Terguson ties up his opponent against the cage and manages to drag the fight down to the ground. Terguson no doubt will be looking to work submissions from his guard.
Terguson throws a couple of weedy looking strikes off his back.
That's one minute gone in the round.

Terguson escapes his hips to the side and looks to be working for an armbar. Kollhouse gives him a little smile and shakes his head. No chance.

Kollhouse stands up and waves to Terguson to follow him.
Terguson swings away with a body shot that misses
and Terguson takes a counter punch right on the button for his troubles.
Kollhouse throws a right hand that Terguson ducks under and follows up with a left that Terguson also avoids with ease.
Terguson tries to counter by moving into the clinch but Kollhouse manages to circle out of the way.
Kollhouse jabs at Terguson's body.
Kollhouse tries to keep at a distance but Terguson has taken the fight into the clinch.
Terguson creates a bit of distance and throws an elbow that only just misses.
Kollhouse is trying to work out of this bad position, with his back against the cage.
Terguson jumps guard but Kollhouse stands there with Terguson around his waist. Terguson gives up and drops back to his feet. We remain in the clinch.
Terguson throws an elbow but it misses.
Terguson lands an elbow just above Kollhouse 's eye.
Kollhouse has had enough of the clinch but Terguson keeps him there for the moment.
That's two minutes gone in the round.
Kollhouse is trying to break the clinch but Terguson has him pressed against the cage.
Kollhouse is trying to break the clinch but Terguson has him pressed against the cage.
Terguson tries to jump guard but he falls flat on his backside. Kollhouse smiles and moves away.
Terguson avoids a punch combination nicely.
Terguson tries to counter by clinching up but Kollhouse breaks away and moves out of range.
Good shot there by Kollhouse.
The fans in attendance giving it up for the two fighters, who have really let it all hang out in the last minute or so!
Terguson tries to clinch up against the cage, rushing in to close the distance. Kollhouse manages to break the clinch and circles back to the middle of the mat.
Kollhouse cracks Terguson with an open hand slap.
Kollhouse connects with a hook to the side of his opponent's head.
Terguson doesn't react quick enough there as he takes a shot to the body.
Terguson tries to clinch but Kollhouse moves out of range.
As Terguson backs off Kollhouse throws a huge counter combo but Terguson manages to avoid it all.
Kollhouse rushes forward with a series of wild hooks but Terguson moves out of range and avoids them all easily.
Kollhouse misses with a jab and misses with a cross straight after too.
Terguson looks to clinch
and Kollhouse counters with a two punch combo.
Harper Kollhouse seems to be the more aggressive standup fighter in this bout.
That's three minutes gone in the round.
Kollhouse stalks Terguson and leaps in with a furious combination of punches. Uppercuts and crosses smash into Terguson's face. Terguson staggers backwards, shaken.
Terguson throws a leg kick which misses Kollhouse's front leg but catches the back leg as Kollhouse tries to avoid it.
Terguson walks into a left hand.
Terguson misses with the combination.
Kollhouse scores with a nice right hand.
We've been informed that Kollhouse has been working hard on his conditioning in the buildup to the fight.
Kollhouse paws at his opponent with the jab and then lunges in with a straight, right on the button.
A combination from Kollhouse does no damage.
Terguson tries to close the distance and clinch but Kollhouse swats him to one side with an open hand palm strike and circles away.
Kollhouse pushes forward with a 1-2 combination that forces Terguson back to the cage. Kollhouse follows up with a solid lead hook to the liver.
This is a great period of action - very entertaining stuff!
Terguson moves in looking to clinch but Kollhouse pushes him off.
Kollhouse bobs and weaves and unloads with a good uppercut.
Terguson scores with a kick to the body.
That's four minutes gone in the round.
Kollhouse misses with a few strikes there.
Kollhouse throws a right and a left that Terguson avoids nicely.
Kollhouse throws a right and a left that Terguson avoids nicely.
Kollhouse might want to mix his strikes up a bit more. He's just going for head shots at the moment and that can become a bit predictable.
Kollhouse cracks Terguson with a hook to the jaw. Both fighters smile at eachother and high-five before getting back down to business.
Terguson tries to clinch but is not successful on this occasion.
Terguson moves out of range of the strikes.
Terguson tries to clinch there but Kollhouse circles away.
Terguson connects with a looping left hand that seems like it dazed Kollhouse momentarily.
That has opened up Harper Kollhouse's cut even more.
Nice uppercut lands for Kollhouse. That snapped Terguson's head back.
Kollhouse misses with the combination.
The crowd applaud the fighters' efforts here as the round comes to an end.
Kollhouse throws a hook but Terguson avoids it easily.
Kollhouse is landing a lot of head punches in this opening round! Terguson had better start moving his head a bit unless he wants his face to turn into mush.
Terguson tries to clinch but Kollhouse moves out of range.
Kollhouse misses with a few strikes there.
Kollhouse throws a right and a left that Terguson avoids nicely.
And that is the end of the round. The fighters go back to their corners.
Harper Kollhouse dominated that round.
The cut man is working on Harper Kollhouse's cut.
Well, the break between rounds is over. Let's get back to the scrappin!
Kollhouse lunges at Terguson with a hook that half lands and is half blocked by Terguson's hand.
Kollhouse scores with a one two! Terguson had his feet all tangled up there and couldn't avoid the strikes.
Terguson showing good head movement there, avoiding the strikes from Kollhouse.
Terguson keeping his hands up high there, blocking the jab from Kollhouse.
Terguson doesn't manage to clinch there - Kollhouse circles away.
Terguson tries to clinch up against the cage, rushing in to close the distance. Kollhouse manages to break the clinch and circles back to the middle of the mat.
Kollhouse looks to land a right hand but Terguson moved out of range.
As Kollhouse tries to get set, Terguson tries to push him back and clinch up but Kollhouse manages to avoid the attempt.
Terguson walks straight into a jab right on the nose. That one stung - he's blinking and trying to clear his head.
Left hook, right uppercut from Kollhouse.
Kollhouse misses with a double jab.
Kollhouse throws a combination but comes up with nothing but fresh air.
This has been an exciting period of action!
Terguson moves in looking to clinch but Kollhouse pushes him off.
Terguson tries to clinch but is not successful on this occasion.
Kollhouse pushing out the jab but it's not landing.
That's one minute gone in the round.
Terguson fails with an attempt to clinch.
Terguson looks to clinch
and Kollhouse counters with a three punch combo that has Terguson backing up. Terguson nods at Kollhouse to acknowledge the strikes.
Kollhouse throws a right and a left that both miss.
Kollhouse misses with a series of wild punches.
Terguson misses with a wild combination.
Terguson avoids a punch combination nicely.
Kollhouse swats away the attempt to clinch by Terguson.
Kollhouse fails to land with the punch combination there - jab, cross, hook, miss, miss, miss.
Terguson moves away from the strike by Kollhouse.
Kollhouse throws a jab to the body, straight down the pipe. Boom. That sent Terguson stumbling backwards but he manages to regain his composure quickly.
Kollhouse with a jab.
That's two minutes gone in the round.
Terguson avoids a punch combination nicely.
Terguson wants to clinch up but Kollhouse keeps it at a distance.
Fantastic stuff here - a very entertaining period of action, which has drawn cheers from the crowd.
Terguson wants to clinch up but Kollhouse keeps it at a distance.
Kollhouse misses with a jab and misses with a cross straight after too.
As Kollhouse tries to get set, Terguson tries to push him back and clinch up but Kollhouse manages to avoid the attempt.
Terguson showing good head movement there, avoiding the strikes from Kollhouse.
Kollhouse feints a jab promting Terguson to slip. Kollhouse then demonstrates his capabilities by jabbing again. Terguson slips again and ducks right into an uppercut.
Kollhouse avoids the clinch attempt nicely.
Terguson tries to clinch but is not successful on this occasion.
Kollhouse avoids the clinch attempt nicely.
Kollhouse fails to land with a series of punches.
Nice uppercut there from Kollhouse.
Terguson looks like he's developed a pretty tasty lump over his left eye. He'll need to avoid taking much more damage to that.
Kollhouse misses with a jab and misses with a cross straight after too.
Terguson wants to take advantage of his opponent's missed offense by moving into the clinch.
That's three minutes gone in the round.
Kollhouse takes a punch to the jaw and another one to the bread basket.
Kollhouse throws a one two combo.
Kollhouse avoids the clinch attempt nicely.
The fighters are starting to perspire pretty heavily.
Terguson moves into the clinch successfully.
Terguson pulls guard.
Kollhouse has been the more effective fighter overall so far.
Terguson throws a couple of weedy looking strikes off his back.
Terguson is looking for a guillotine. You can't force these things though and Kollhouse defends well.
Terguson throws a couple of weedy looking strikes off his back.
Terguson trying to strike off his back.
Terguson working for a triangle but Kollhouse defends it easily.
Wooooo! Give it up for these two warriors! They are putting on a show!
Kollhouse avoids a guillotine attempt easily.
That's four minutes gone in the round.
Terguson has a loose triangle. He'll be looking to tighten that up but Kollhouse can see exactly what he's planning and manages to posture up and free himself.
Terguson escapes his hips to the side and looks to be working for an armbar. Kollhouse gives him a little smile and shakes his head. No chance.
Terguson looking for submissions off his back, moving his hips, looking for an opening.
Terguson working from the bottom, still in full guard. He's managed to get a loose triangle. Kollhouse doesn't seem to be doing much to defend here, obviously he feels comfortable in the position. Kollhouse manages to throw the legs off his shoulder and he's back into guard - no problem.
Terguson is throwing his legs up, looking for submissions. Kollhouse is aware though and is defending well.
And that is the end of the round. The fighters go back to their corners.
Harper Kollhouse showed his class in that round. I'd imagine he'll take it on all the scorecards.
The cut man is working on Harper Kollhouse's cut.
The fighters get back to their feet, the hooter sounds and we're back to the action! This is the final round!
No joy there for Kollhouse, who threw a few shots but didn't land.
Terguson wants to clinch up but Kollhouse keeps it at a distance.
Terguson wants to clinch.
Kollhouse is loading up here, looking for a big counter of his own.
Kollhouse bobs and weaves and throws out a fast jab that snaps Terguson's head backwards.
Kollhouse fails to land with the punch combination there - jab, cross, hook, miss, miss, miss.
Kollhouse getting the better of the striking in that exchange.
We've had a slow start to the round here - hopefully the action picks up.
Kollhouse tests Terguson's chin there with a solid looking shot.
The fight stays on the outside here - Terguson looks like he's thinking about clinching though.
Fony Terguson is looking to throw some combinations by the looks of things.
Kollhouse smiles there as he lands a nice right hand right on the button.
That's one minute gone in the round.
Terguson is looking to take this fight into the clinch.
Terguson is looking to clinch but Kollhouse is avoiding it.
Kollhouse connects with a looping right hand.
A punch combination from Kollhouse misses.
Terguson is trying to close the distance and clinch up, after that failed offence from Kollhouse.
No joy there for Kollhouse, who threw a few shots but didn't land.
Terguson wants to clinch.
Kollhouse throws a series of punches but Terguson avoids them all with ease.
Terguson moves his head to the side to avoid a jab but walks straight into a cross.
Danga de danga de dang - Kollhouse scores with a four punch combination!
Terguson tries to clinch but Kollhouse moves out of range.
Kollhouse moves into range and throws a combination. A nice jab followed by a hook to the body.
That's two minutes gone in the round.
Left hook, right uppercut from Kollhouse.
This is a great period of action - very entertaining stuff!
Kollhouse scores with a nice head shot.
A kick lands to the mid section there for Terguson.
Kollhouse takes a big intake of breath there - he's definitely tired.
Kollhouse takes a nasty kick to the mid section... That should keep him thinking. Does he try and block and risk a head kick landing?
Terguson fails with an attempt to clinch.
Terguson tries to land with a swinging hook to the body but Kollhouse was well out of range. Poor timing from Terguson.
Kollhouse throws a right hand that Terguson ducks under and follows up with a left that Terguson also avoids with ease.
Terguson is looking to counter the offense by Kollhouse and move into the clinch.
Kollhouse lunges in with swinging rights and lefts but Terguson circles away quickly and effectively.
Terguson is looking to take this fight into the clinch.
Terguson doesn't manage to clinch there - Kollhouse circles away.
Terguson misses with a two punch combination.
Kollhouse looks like he wants to counter punch here.
Terguson darts in trying to clinch
and Kollhouse counters with a good right hand that lands right on the jaw.
That's three minutes gone in the round.
Terguson moves in looking to clinch but Kollhouse pushes him off.
Terguson tries to clinch but is not successful on this occasion.
A little jabbing left from Kollhouse on the counter but it doesn't find it's target.
Terguson tries to close the distance and clinch but Kollhouse swats him to one side with an open hand palm strike and circles away.
Terguson wants to clinch
and Kollhouse counters with a three punch combination, finished off with a leg kick. Nice work.
No joy there for Kollhouse, who threw a few shots but didn't land.
Terguson moves in looking to clinch but Kollhouse pushes him off.
Kollhouse looked like he wanted to counter with a punch but didn't throw it.
Terguson walks into a jab.
Kollhouse's jab looks to have found its range, popping Terguson under the eye.
Terguson is looking to clinch.
Terguson fails with an attempt to clinch.
Kollhouse misses with a two punch combination.
That's four minutes gone in the round.

A jab-cross combination lands for Terguson and sends Kollhouse crashing to the mat! Terguson follows him down to the mat - Kollhouse regains half guard but he's not out of trouble yet!
 Kollhouse is rocked! Kollhouse is rocked!
This has been an exciting period of action!
Terguson is trying for a guillotine from the top but the pressure isn't in the right place so Kollhouse is just riding it out for now. Terguson eventually gives up the hold.
Kollhouse is still in real trouble! Can Terguson finish him?
Terguson is trying to control. Kollhouse wants to improve his position but can't escape this time.
Terguson passes the half guard and he's now in mount! Big trouble for Kollhouse!
Terguson looking to secure an arm triangle but Kollhouse defends it well.
Kollhouse has given up his back here. Will Terguson look for the submission or keep pounding away?
The ref warns both fighters not to hold the cage as they work up against the meshing.
Kollhouse is trying to get back to his feet but Terguson has full control of the position and if anything, Kollhouse has just worked his way into a worse spot.
Kollhouse seems to have recovered his senses.
Terguson working for a RNC but it's not happening just yet.
Terguson working for the rear naked choke here. He's got one arm under but Kollhouse is defending well. A couple of punches soften him up though and Terguson has tightened the hold! This one could be all over! It is! Kollhouse taps out!
Ladies and gentlemen, after 4:55 of round 3, we have a winner by way of Submission (RNC). Fony Terguson!
After the big win, Fony Terguson made sure to do all the important stuff like thanking his sponsors Northern Zombie and telling the interviewer how much he loves him.
|
|
|
|
|
|
|
|
|
|
|
|
|
|
|
|
|
|
|
|
|
|
|
| S |
C
A |
G |
S |
C
B |
G |
|
S |
C |
G |
|
energy
A | B |
|
hype
A | B |
|
pop
A | B |
|
mgr
A | B |
|
FIGHT
RATING
94% |
|
|
|
|
|
|
|
Undercard bout
|
Coming up we have a welterweight MMA rules bout between Bjorn Haelfson (ranked 3838 p4p, 3979 weight class) and Eisen Bleis (ranked 442 p4p, 456 weight class). Haelfson's ring entrance music is that housewives' favourite, 80/20SKYBEEF. Eisen Bleis will no doubt be trying to keep this one on the feet, where he has a distinct advantage.
 |
|
 |
| 170 cm
20
177
2 - 1 - 0 |
|
183 cm
22
176
1 - 0 - 0 |
Good wrestling
Counter fighter
Cardio machine |
|
BJJ Blue Belt
Excellent MT
Solid chin |
|
| |
|
Ladies and gentlemen. This fight is 3 rounds, in the welterweight division.
Introducing the fighter to my left, fighting out of the red corner.
With a record of 2 - 1 - 0, fighting out of Sydney, Bjorn Haelfson!
And introducing the fighter to my right, fighting out of the blue corner.
With a record of 1 - 0 - 0, fighting out of New York, Eisen Bleis!
The judges for this bout are Matti Vanhoillinen, Roosa J�rvil�inen and Tarja Halkonen.
The bell rings for round one and we are underway!
Bleis with a nice looking leg kick. You could hear that one land in a back row.
Eisen Bleis seems to be the more aggressive standup fighter in this bout.
Haelfson on the wrong end of a nice low kick. He's acting like it's no big deal but he doesn't want to take many more of those.
Bleis closes the distance and presses his opponent up against the cage.
Bleis tries to stall but Haelfson uses the opportunity to gain a better position.
Haelfson drops down for a takedown but doesn't get it.
Haelfson has Bleis pressed up against the cage and is working for takedown. Bleis manages to improve position though and keeps the fight standing.
Bleis lands a glancing elbow in the clinch.
Bleis is defending well against a takedown attempt.
That's three failed takedown attempts in the round for Bjorn Haelfson. That's going to take a lot out of him.
Bleis lands a good knee to the midsection. Haelfson won't want to take too many of those.
Haelfson looking for a takedown.
Bleis is clearly stalling here... Pick up the pace son.
Bleis with a knee to the head.
Bleis comes over the top with an elbow. That landed flush.
The pace really dropping off here, momentarily.
Haelfson is looking for a takedown up against the cage. Bleis gets underhooks though and prevents the takedown attempt.
Bleis has been looking to improve his clinch game in recent weeks. Haelfson seems to have the measure of him in the clinch so far, so let's see if Bleis can turn it around.
That's one minute gone in the round.
A short body shot lands from Bleis as the two fighters clinch.
Haelfson is looking for a takedown up against the cage. Bleis gets underhooks though and prevents the takedown attempt.
Bleis utilising his Muay Thai to score with a knee to the body.
Haelfson has Bleis pressed up against the cage and is working for takedown. Bleis manages to improve position though and keeps the fight standing.
Bleis is pressed up against the cage. Haelfson has hold of a leg and is looking to drag Bleis down to the mat. Bleis avoids the attempt though and has circled away. We're back to striking at a distance.
That kick from Bleis tenderised Haelfson's leg. Haelfson is trying to keep his angry face on.
A nice leg kick from Bleis, right into the meat of the thigh.
We've been hearing reports that Haelfson has been drilling takedowns in recent sessions so let's see if that has an impact on the result of this fight.
Bleis fakes with an overhand right and moves in to clinch with Haelfson, pushing him back against the cage.
Haelfson has dropped down and is looking to force the takedown but it's defended by Bleis after a bit of a struggle.
Bleis stops a takedown attempt from Haelfson.
Bleis landing knees to the body. They look like they could hurt.
Haelfson is breathing heavily.
Bleis lands a good knee to the midsection. Haelfson won't want to take too many of those.
Bleis lands a knee to the body.
Bleis leaning against his opponent.
Bleis lands a damaging elbow.
That's two minutes gone in the round.
We've seen a great period of action over the last minute or so - credit to both fighters for going all out!
Haelfson goes for a takedown attempt but Bleis pushes him away and we're back to fighting at a distance.
Haelfson tries to keep at a distance but Bleis has taken the fight into the clinch.
Knees to the body from Bleis.
A bit of stalling here from Bleis.
Haelfson goes for a takedown attempt but Bleis pushes him away and we're back to fighting at a distance.
Bleis rushes Haelfson and pushes him back against the cage in a clinch.
Bleis has Haelfson pressed against the cage.
Bleis utilising his Muay Thai to score with a knee to the body.
Haelfson is working on a leg, looking for a takedown but Bleis is defending well.
That's three minutes gone in the round.
Bleis slowing the pace effectively.
Bleis leaning his opponent against the cage.
Bleis lands an elbow just above Haelfson 's eye.
It looks like Bjorn Haelfson has been cut.
Bleis stalling.
Bleis taking a breather.
The ref breaks the fighters up, due to lack of action by Eisen Bleis.
Haelfson tries to clinch up against the cage, rushing in to close the distance. Bleis manages to break the clinch and circles back to the middle of the mat.
Haelfson shoots in but Bleis avoids the takedown attempt easily.
Haelfson takes a push kick to the midsection and stumbles backwards.
Haelfson walks into a straight right hand from Bleis.
Bleis tries to clinch up against the cage, rushing in to close the distance. Haelfson manages to break the clinch and circles back to the middle of the mat.
Bleis fakes with an overhand right and moves in to clinch with Haelfson, pushing him back against the cage.
That's four minutes gone in the round.
Bleis putting his Muay Thai to good use. He has Haelfson in a tight clinch and is doing some damage with knees to the body.
Haelfson goes for a takedown attempt but Bleis pushes him away and we're back to fighting at a distance.
Bleis throws a leg kick which misses Haelfson's front leg but catches the back leg as Haelfson tries to avoid it.
Haelfson takes a body kick right on the floating rib. Ouchie.
Bleis looking to take his opponent's legs away with the low kicks.
Wooooo! Give it up for these two warriors! They are putting on a show!
Bleis throws a lazy right hand but Haelfson sees it coming a mile off and sidesteps it easily.
Bleis tries to clinch up.
Haelfson shoots in and drives through. Bleis sprawls well.
Haelfson has his front leg slapped to the side - a nice low kick landing there from Bleis.
Bleis scores with a slapping inside leg kick.
Bleis has closed the distance and engaged Haelfson in a clinch.
Bleis lands a nice elbow from the clinch.
And that is the end of the round. The fighters go back to their corners.
Eisen Bleis dominated that round.
The cut man is working on Bjorn Haelfson's cut.
The fighters get back to their feet, the hooter sounds and we're back to the action!
Bleis fakes with an overhand right and moves in to clinch with Haelfson, pushing him back against the cage.
Bleis scores a nice knee to the body.
Bleis lands an elbow inside.
Bleis is pressed up against the cage. Haelfson has hold of a leg and is looking to drag Bleis down to the mat. Bleis avoids the attempt though and has circled away. We're back to striking at a distance.
Haelfson shoots and misses
and Bleis moves into the clinch.
Haelfson looking for a takedown.
That's three failed takedown attempts in the round for Bjorn Haelfson. That's going to take a lot out of him.
Bleis creates a bit of space for himself and sneaks an elbow through Haelfson's defenses.
Bleis stops a takedown attempt from Haelfson.
Good body shot from Bleis.
Haelfson is looking for a takedown up against the cage. Bleis gets underhooks though and prevents the takedown attempt.
Bleis stalling.
Bleis pressing his opponent against the cage.
We've had a slow start to the round here - hopefully the action picks up.
Bleis comes over the top with an elbow. That landed flush.
Bleis is defending well against a takedown attempt.
Bleis unloads a knee to the mid-section. Haelfson lets out a prehistoric sounding urrrrgh.
Both fighters are absolutely exhausted here.
A short left from Bleis.
That's one minute gone in the round.
Bleis slows down the pace here.
Bleis unloads a knee to the mid-section.
Eisen Bleis seems to be working more effectively in the clinch in the fight so far.
Bleis lands a damaging elbow.
Bleis cracks Haelfson with a nice body shot.
Haelfson has a body lock and is looking for a takedown. Bleis is bouncing around trying to prevent the takedown and somehow he has indeed managed to stay on his feet.
Bleis lands a knee to the head there! That was nasty!
Bleis lands a hook to the body. It's hard to tell if that hurt Haelfson or not.
Bleis working Haelfson over with knees to the body.
Bleis pushes Haelfson back against the cage and unloads with a body punch.
Bleis has been the more effective fighter overall so far.
Stalling in the clinch from Bleis.
Bleis lands a knee to the head.
Haelfson is working for a takedown up against the cage. He can't get it on this occasion though.
Bleis creates a bit of space for himself and sneaks an elbow through Haelfson's defenses.
Knees in the clinch landing for Bleis.
The crowd cheering loudly, showing their appreciation for the quality fight we're seeing here.
Bleis unloads a knee to the mid-section. Haelfson lets out a prehistoric sounding urrrrgh.
That's two minutes gone in the round.
A nice glancing elbow lands by Bleis.
The pace slowing considerably in the clinch, as Bleis takes a break from that fighting nonsense to think about the finer things in life.
Haelfson wants a takedown but no success here.
Bleis has Haelfson pushed against the cage.
Bleis with a knee to the head.
Bleis lands a knee to the head.

Bleis lands a nice trip takedown into half guard.
Haelfson is looking for a sweep. Bleis is wise to his cunning plan and keeps the top position.
Haelfson is working hard here to advance position.
Bleis is looking to take a break and control but Haelfson is keeping him honest, looking to work from the bottom.
Haelfson moves into full guard.
Haelfson looking for submissions from the bottom here. Moving his hips around, possibly looking for an armbar.
Bleis must be cautious of submissions here, given that his opponent has the superior Jiu Jitsu.
That's three minutes gone in the round.
Haelfson is working actively off his back, looking to secure an arm or perhaps work for a triangle.
Haelfson wants to sweep here but Bleis controlling him for the moment.
Bleis stands up and looks to throw the legs aside to pass to side control. Haelfson swivels though and keeps the full guard.
Bleis throwing strikes from guard but Haelfson blocks nicely.
Bleis gets to his feet. Haelfson looking to butt scoot but the ref puts an end to that. On your feet son!
Bleis throws a wild body kick that Haelfson sees coming a mile off.
As Bleis backs away, Haelfson returns fire with a leg kick that just misses.
That's four minutes gone in the round.
My god... these two guys really need to pick up the pace or everyone will leave to go get a beer.
Bleis connects with a leg kick. He turned his hip over nicely there.
Haelfson takes a kick to the side of the head.
Eisen Bleis seems to be getting the better of the standup.
Bleis throws a sloppy head kick and Haelfson moves out of range easily.
Bleis wants to clinch.
Haelfson circles away from the clinch attempt
and Bleis takes a counter punch right on the button for his troubles.
Bleis tries to clinch up but Haelfson circles away and keeps his distance.
Haelfson has managed to clinch.
Bleis landing knees to the body. They look like they could hurt.
And that is the end of the round. The fighters go back to their corners.
Eisen Bleis showed his class in that round. I'd imagine he'll take it on all the scorecards.
The cut man is working on Bjorn Haelfson's cut.
Well, the break between rounds is over. Let's get back to the scrappin! This is the final round!
Bleis moves into the clinch.
Bleis tried to land a shot to the body but connects with Haelfson's elbow.
Haelfson drops down looking for an ankle pick but Bleis pulls his leg out and moves away.
Bleis lands a nice leg kick that just misses Haelfson's sensitive parts.
Bleis tries to clinch up against the cage, rushing in to close the distance. Haelfson manages to break the clinch and circles back to the middle of the mat.
Haelfson has his front leg slapped to the side - a nice low kick landing there from Bleis.
Haelfson changes levels and looks for a double leg takedown. Bleis tries to avoid it but Haelfson manages to keep hold of a leg and drag Bleis to the ground. Bleis escapes though and pops straight back up to his feet.
We've had a slow start to the round here - hopefully the action picks up.
Bleis scores with a nice looking left hook and follows it up with an uppercut!
Bleis clinches with his opponent.
Bleis lands a damaging elbow.
Haelfson is working on a leg, looking for a takedown but Bleis is defending well.
That's three failed takedown attempts in the round for Bjorn Haelfson. That's going to take a lot out of him.
Haelfson is looking for a takedown.
That's one minute gone in the round.
Bleis wants to stall.
Both fighters are breathing heavily.
Bleis leaning against his opponent.
The pace slowing considerably in the clinch, as Bleis takes a break from that fighting nonsense to think about the finer things in life.
Haelfson is working on a single leg takedown against the cage. Bleis can't fight it off and eventually Haelfson manages to take the fight to the floor. Bleis looks annoyed but at least he's managed to land in guard.
Bleis is working an open guard here, looking to improve his position. No doubt that will leave him open to counters but at least he's being more offensive.
Bleis wants to stand but Haelfson is controlling the position.
Haelfson pressing down on his opponent's thigh, looking to pass guard. Bleis is keeping the position for now.
Haelfson advances to half guard.
That's two minutes gone in the round.
Bleis trying to control from the bottom.
Haelfson is controlling the pace.
Bleis tries to get to full guard but Haelfson has control of the leg.
Bleis trying to control here.
Haelfson passes the half guard and he's now in mount! Big trouble for Bleis!
Bleis regains half guard.
That's three minutes gone in the round.
Bleis misses with some strikes from the bottom.
Haelfson is trying to control. Bleis wants to improve his position but can't escape this time.
Haelfson is working hard to pass the guard. He's done it - he's now in full mount! Trouble for Bleis!
Haelfson looking to isolate an arm here. Bleis doesn't see it coming and as Haelfson extends the arm, he's forced to tap out! Nice submission by Haelfson!
Ladies and gentlemen, after 3:49 of round 3, we have a winner by way of Submission (Armbar). Bjorn Haelfson!
Our winner, Bjorn Haelfson, made sure he spent some time buttering up the crowd during his post fight interview, which will no doubt bring him a few more fans.
|
|
|
|
|
|
|
|
|
|
|
|
|
|
|
|
|
|
|
|
|
|
|
| S |
C
A |
G |
S |
C
B |
G |
|
S |
C |
G |
|
energy
A | B |
|
hype
A | B |
|
pop
A | B |
|
mgr
A | B |
|
FIGHT
RATING
66% |
|
|
|
|
|
|
|
Undercard bout
|
Coming up we have a super heavyweight MMA rules bout between Repa Pulkkinen (ranked 4176 p4p, 3362 weight class) and Reuben Blackwell (ranked 174 p4p, 138 weight class). Reuben Blackwell is the more experienced fighter, so let's see if that makes a difference tonight.
 |
|
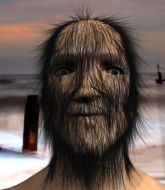 |
| 150 cm
18
195
0 - 0 - 0 |
|
186 cm
18
200
0 - 1 - 0 |
BJJ White Belt
Excellent MT
Granite chin |
|
BJJ White Belt
Counter fighter
Inexperienced |
|
| |
|
Ladies and gentlemen. This fight is 1 rounds, in the super heavyweight division.
Introducing the fighter to my left, fighting out of the red corner.
With a record of 0 - 0 - 0, fighting out of Helsinki, Repa Pulkkinen!
And introducing the fighter to my right, fighting out of the blue corner.
With a record of 0 - 1 - 0, fighting out of Helsinki, Reuben Blackwell!
The judges for this bout are Johanna Lukiainen, Ben Zyskovitsi and Tarja Halkonen.
The bell rings for round one and we are underway!
Blackwell throws a hard body shot but it just misses.
Pulkkinen sends Blackwell crashing to the mat with a devastating uppercut! Pulkkinen is motioning to the referee to let Blackwell up. He wants to try and finish this one on the feet!
Blackwell is rocked!
Blackwell is wiping some vaseline out of his eye. Pulkkinen doesn't give a rats ass about fair play and cracks him with a massive hook to the side of the head! Blackwell crumples to the floor out cold! The cornerman is going to be in Blackwell's bad books for that mishap!
Ladies and gentlemen, after 0:14 of round 1, we have a winner by way of KO (Punch). Repa Pulkkinen!
|
|
|
|
|
|
|
|
|
|
|
|
|
|
|
|
|
|
|
|
|
|
|
| S |
C
A |
G |
S |
C
B |
G |
|
S |
C |
G |
|
energy
A | B |
|
hype
A | B |
|
pop
A | B |
|
mgr
A | B |
|
FIGHT
RATING
100% |
|
|
|
|
|
|
|
Undercard bout
|
Coming up we have a super heavyweight MMA rules bout between Rodolfo Kaufman (ranked 2658 p4p, 4135 weight class) and Larry Obrien (ranked 133 p4p, 176 weight class). Both fighters look fresh as a daisy as they make their way towards the cage.
 |
|
 |
| 225 cm
25
300
3 - 0 - 0 |
|
190 cm
25
270
0 - 0 - 0 |
BJJ White Belt
Excellent MT
Big right hand |
|
BJJ Blue Belt
Basic striking
Solid chin |
|
| |
|
Ladies and gentlemen. This fight is 3 rounds, in the super heavyweight division.
Introducing the fighter to my left, fighting out of the red corner.
With a record of 3 - 0 - 0, fighting out of Helsinki, Rodolfo Kaufman!
And introducing the fighter to my right, fighting out of the blue corner.
With a record of 0 - 0 - 0, fighting out of Montreal, Larry Obrien!
The judges for this bout are Roosa J�rvil�inen, Johanna Lukiainen and Marco Blurstr�m.
The bell rings for round one and we are underway!
Kaufman keeps the fight on the outside.
It looked like Kaufman wanted to counter with a hook but didn't fully commit.
Obrien shoots for a double leg takedown but Kaufman sprawls well. He's pushed Obrien's face into the mat and manages to get back to his feet relatively easily.
Obrien tries to clinch up.
Obrien is looking to clinch but Kaufman is avoiding it.
Larry Obrien seems to be the more aggressive standup fighter in this bout.
Kaufman swats away the attempt to clinch by Obrien.
Kaufman pushes Obrien up against the cage in a clinch.
A quick uppercut on the inside from Kaufman.
Obrien misses with a body punch.
Kaufman stalling against the cage.
Obrien can't find room to land a body shot as Kaufman controls the action.
We've had a slow start to the round here - hopefully the action picks up.
Kaufman lands a nice uppercut.
Obrien doesn't land with the attempted body shot.
Obrien is trying to drag Kaufman to the mat but Kaufman just about manages to keep his footing. He used the cage to his advantage there.
Kaufman lands a short shot on the inside that snaps the head of Obrien backwards.
Obrien has a body lock and is looking for a takedown. Kaufman is bouncing around trying to prevent the takedown and somehow he has indeed managed to stay on his feet.
Rodolfo Kaufman has stuffed three takedown attempts in the round now. That's going to take a lot out of Larry Obrien.
A short body shot lands from Kaufman as the two fighters clinch.
Obrien looks winded!
That's one minute gone in the round.
Obrien misses with a hook to the ribs.
Kaufman lands with a quick shot inside that doesn't really do much damage.
With the fighters clinched against the cage, Kaufman creates a bit of distance for himself and scores with a nice uppercut.
Kaufman lands a body shot in the clinch.
Kaufman stalls.
Kaufman scores with a shot to the side of Obrien's head.
A short left from Kaufman.
Kaufman lands with a light punch inside.
Kaufman working on landing some head shots here - that one got through nicely.
Kaufman definitely looks more muscular than last time we saw him fight.
Kaufman lands a right uppercut that snaps the head of Obrien backwards.
Kaufman holding his opponent close, against the cage.
Kaufman is working Obrien over against the cage.
A short right hand to the side of the head by Kaufman.
We've seen a great period of action over the last minute or so - credit to both fighters for going all out!
Kaufman lands with a quick shot inside that doesn't really do much damage.
Kaufman working on landing some head shots here - that one got through nicely.
A short body shot lands from Kaufman as the two fighters clinch.
Kaufman lands a nice shot to the body.
Kaufman lands a left hand that snaps the head of Obrien backwards.
A short right from Kaufman.
Obrien is rocked!
Kaufman unloads with a big right hand that wobbles Obrien! He's leaning against the cage trying to keep his feet but Kaufman is unloading with more strikes now! Obrien drops to his knees and the referee stops the fight for a TKO!
Ladies and gentlemen, after 2:56 of round 1, we have a winner by way of TKO (Strikes). Rodolfo Kaufman!
|
|
|
|
|
|
|
|
|
|
|
|
|
|
|
|
|
|
|
|
|
|
|
| S |
C
A |
G |
S |
C
B |
G |
|
S |
C |
G |
|
energy
A | B |
|
hype
A | B |
|
pop
A | B |
|
mgr
A | B |
|
FIGHT
RATING
61% |
|
|
|
|
|
|
|
Co-main event
|
Coming up we have a super heavyweight MMA rules bout between Heavy Zak Dos (ranked 2514 p4p, 2948 weight class) and Hope Restless (ranked 129 p4p, 142 weight class). Both fighters look pumped up here. Let's hope this is a good fight!
 |
|
 |
| 204 cm
20
300
5 - 2 - 0 |
|
190 cm
20
300
4 - 4 - 0 |
BJJ Blue Belt
Excellent MT
Granite chin |
|
BJJ Purple Belt
Solid Muay Thai
Powerful |
|
| |
|
Ladies and gentlemen. This fight is 5 rounds, for the super heavyweight championship of the world!
Introducing the champion to my left, fighting out of the red corner.
With a record of 5 - 2 - 0, fighting out of Montreal, Heavy Zak Dos!
And introducing the challenger to my right, fighting out of the blue corner.
With a record of 4 - 4 - 0, fighting out of St Petersburg, Hope Restless!
The judges for this bout are Marco Blurstr�m, Johanna Lukiainen and Arvi Lind.
The bell rings for round one and we are underway!
A combination from Restless does no damage.
Restless walks into a straight right hand from Zak Dos.
Restless takes a really solid shot there but just smiles back and shrugs his shoulders.
Zak Dos dips to his left and cracks Restless with an uppercut!
It looks like Hope Restless has been cut.
Zak Dos keeping at a good range here, avoiding a leg kick.
A thudding body kick lands there by Zak Dos!
Restless's coach down at ubergym was telling us pre-fight that they have been working on Restless's balance. Obviously they view that as a key factor in the outcome of this fight.
Restless looks winded!
Zak Dos fakes with a right hand and throws a good leg kick, right into the thigh. That had to hurt Restless.
Hope Restless seems to be the more aggressive standup fighter in this bout.
Zak Dos scores with a kick to the body.
Restless throws a head kick but Zak Dos moves out of range.
Zak Dos with a nice looking leg kick. You could hear that one land in a back row.
Zak Dos scores with a spinning back kick!
We've seen a great period of action over the last minute or so - credit to both fighters for going all out!
Zak Dos bobs and weaves and then throws a good body kick.
Ooooh, nice body kick lands from Zak Dos. Restless shrugs it off though.
A solid body kick from Zak Dos.
Zak Dos connects with a leg kick.
That's one minute gone in the round.
Zak Dos connects with a lovely jab that went straight through the gap between Restless's hands.
Zak Dos lands an overhand left. A wild punch that just about connected.
Zak Dos keeps Restless at a distance using the push kick.
Zak Dos seems to be stalking Restless here. He circles momentarily and then unleashes a devastating head kick! Restless drops like a stone, out cold! WOW! Are you kidding me!? What a knockout!
Ladies and gentlemen, after 1:22 of round 1, we have a winner by way of KO (Head Kick). Heavy Zak Dos!
Heavy Zak Dos is the new super heavyweight champion!
After winning the bout, Heavy Zak Dos thanked all his fans and promised he'd do even better in his next fight. The crowd seemed to love his humility.
|
|
|
|
|
|
|
|
|
|
|
|
|
|
|
|
|
|
|
|
|
|
|
| S |
C
A |
G |
S |
C
B |
G |
|
S |
C |
G |
|
energy
A | B |
|
hype
A | B |
|
pop
A | B |
|
mgr
A | B |
|
FIGHT
RATING
72% |
|
|
|
|
|
|
|
Main event
|
Coming up we have a super heavyweight MMA rules bout between Artem Ramazanov (ranked 1635 p4p, 3309 weight class) and Din Mamma (ranked 95 p4p, 154 weight class). Ramazanov comes to the cage accompanied by All The Things She Said - t.A.T.u. Both fighters look fresh as a daisy as they make their way towards the cage.
 |
|
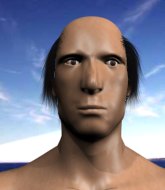 |
| 208 cm
21
300
5 - 1 - 0 |
|
200 cm
20
300
7 - 4 - 0 |
Good wrestling
Excellent boxer
Cardio machine |
|
Good wrestler
Counter fighter
Solid chin |
|
| |
|
Ladies and gentlemen. This fight is 3 rounds, in the super heavyweight division.
Introducing the fighter to my left, fighting out of the red corner.
With a record of 5 - 1 - 0, fighting out of London, Artem Ramazanov!
And introducing the fighter to my right, fighting out of the blue corner.
With a record of 7 - 4 - 0, fighting out of Rio de Janeiro, Din Mamma!
The judges for this bout are Ben Zyskovitsi, Roosa J�rvil�inen and Arvi Lind.
The bell rings for round one and we are underway!
Mamma ducks right into an uppercut from Ramazanov.
Ramazanov throws a leg kick but Mamma sees it coming and moves out of range.
Ramazanov loads up on a big right hand but Mamma slips the punch.
Mamma takes an uppercut right on the jaw but it doesn't phase him.
Mamma slips a jab from Ramazanov.
Ramazanov avoids a lazy jab quite easily.
Mamma throws a lazy uppercut
letting Ramazanov counter with a right hand.
Ramazanov thumps Mamma with a low kick.
Ramazanov throws a right and a left that both miss.
And an attempted straight right on the counter from Mamma! But no joy.
Ramazanov has been working on his boxing with his coaches at The Forge 👊 in the buildup to the fight.
Ramazanov fakes a head shot and lands one to the body.
A slow jab from Mamma misses its intended target.
Ramazanov dips down and scores with a jab to the body.
We've seen a great period of action over the last minute or so - credit to both fighters for going all out!
Mamma loses concentration momentarily and Ramazanov pounces with a three punch combo! Right, left, right! Mamma crashes face first to the mat, out cold! Ramazanov finishes this one with a fantastically precise combo! Great stuff.
Ladies and gentlemen, after 0:51 of round 1, we have a winner by way of KO (Punches). Artem Ramazanov!
Artem Ramazanov seemed lost for words in his post fight interview but he remembered to thank his fans and directed everyone to his website.
The defeated Din Mamma had this to say: 'Unfortunately i lost today, i’m going to come back stronger than ever, I will be champion one day.'.
|
|
|
|
|
|
|
|
|
|
|
|
|
|
|
|
|
|
|
|
|
|
|
| S |
C
A |
G |
S |
C
B |
G |
|
S |
C |
G |
|
energy
A | B |
|
hype
A | B |
|
pop
A | B |
|
mgr
A | B |
|
FIGHT
RATING
82% |
|
|
|
|
|
|
|
|
|
|
