 |
BANZAI COMBAT 56 PBP Commentary |
Undercard bout
|
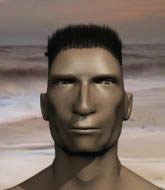
Coming up we have a bantamweight MMA rules bout between Kawi Lewis (ranked 25337 p4p, 25659 weight class) and Nikolas Conner (ranked 312 p4p, 324 weight class). Nikolas Conner is the more experienced fighter, so let's see if that makes a difference tonight.
 |
|
 |
| 178 cm
23
135
0 - 3 - 0 |
|
175 cm
23
144
1 - 3 - 0 |
BJJ White Belt
Solid boxing
Self confident |
|
BJJ White Belt
Good kicks
Granite chin |
|
| |
|
Ladies and gentlemen. This fight is 3 rounds, in the bantamweight division.
Introducing the fighter to my left, fighting out of the red corner.
With a record of 0 - 3 - 0, fighting out of Tokyo, Kawi Lewis!
And introducing the fighter to my right, fighting out of the blue corner.
With a record of 1 - 3 - 0, fighting out of Tokyo, Nikolas Conner!
The judges for this bout are Yukihiro Yamamoto, Hirohito Nitta and Yasuomi Hirokawa.

The bell rings for round one and we are underway!
Conner tries to clinch up against the cage, rushing in to close the distance. Lewis manages to break the clinch and circles back to the middle of the mat.

Lewis shoots in looking for a single leg takedown. Conner is trying to defend but Lewis finishes it well and ends up in half guard. Let's see if he can advance position further.
Conner is trying to defend against the ground and pound but Lewis scores with a couple of nice shots.
Conner is trying to maintain the position but Lewis is very close to passing his half guard.
Lewis controlling the action here.
We've had a slow start to the round here - hopefully the action picks up.

Lewis seems like he's working for an arm triangle here. He's freed his trapped foot and he's rotating nicely. Conner is in big trouble! He's tapping out! This one is aaaaaaaaaaaall over!
Ladies and gentlemen, after 1:58 of round 1, we have a winner by way of Submission (Arm Triangle). Kawi Lewis!
|
|
|
|
|
|
|
|
|
|
|
|
|
|
|
|
|
|
|
|
|
|
|
| S |
C
A |
G |
S |
C
B |
G |
|
S |
C |
G |
|
energy
A | B |
|
hype
A | B |
|
pop
A | B |
|
mgr
A | B |
|
FIGHT
RATING
67% |
|
|
|
|
|
|
|
Undercard bout
|
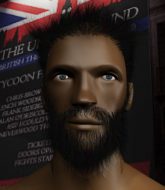
Coming up we have a bantamweight MMA rules bout between Yip Man (ranked 25571 p4p, 5605 weight class) and Georgs Elmars (ranked 316 p4p, 294 weight class). Elmars has chosen Warrior's Anthem by Skyforger as his entrance music. Rumors backstage are that the fighters have been paid to keep it standing but we know that would never happen in MMA!
 |
|
 |
| 164 cm
19
135
0 - 1 - 0 |
|
155 cm
20
135
0 - 1 - 0 |
BJJ Purple Belt
Basic striking
KO power |
|
Powerful takedowns
Good elbows
Powerful |
|
| |
|
Ladies and gentlemen. This fight is 3 rounds, in the bantamweight division.
Introducing the fighter to my left, fighting out of the red corner.
With a record of 0 - 1 - 0, fighting out of Tokyo, Yip Man!
And introducing the fighter to my right, fighting out of the blue corner.
With a record of 0 - 1 - 0, fighting out of Los Angeles, Georgs Elmars!
The judges for this bout are Shirou Masuda, Yasuomi Hirokawa and Sosuke Kotani.
The bell rings for round one and we are underway!
Man misses with a hook

and Elmars counters with a nice double leg into side control. Man won't be happy with that.
Man is looking to regain half guard here but Elmars keeps moving and retains side control.
You can see the frustration on Man's face, being in this tough position on the bottom.
Man looks to move to half guard but instead Elmars has passed into mount! Damn!
Man is writhing around trying to get back to his feet.
Elmars looking to control and managing it successfully.
We've had a slow start to the round here - hopefully the action picks up.

Elmars throws some shoulder strikes here and then postures up. Oh, he's gone for an armbar! Man has his hands clasped together but Elmars breaks the hold and Man is forced to tap! This one is aaaaaaaaaaall over! That was lightning fast by Elmars!
Ladies and gentlemen, after 1:55 of round 1, we have a winner by way of Submission (Armbar). Georgs Elmars!
Georgs Elmars thanked the fans post fight for their support.
|
|
|
|
|
|
|
|
|
|
|
|
|
|
|
|
|
|
|
|
|
|
|
| S |
C
A |
G |
S |
C
B |
G |
|
S |
C |
G |
|
energy
A | B |
|
hype
A | B |
|
pop
A | B |
|
mgr
A | B |
|
FIGHT
RATING
75% |
|
|
|
|
|
|
|
Undercard bout
|
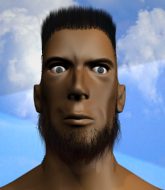
Coming up we have a light heavyweight MMA rules bout between Yuujirou Hanma (ranked 5256 p4p, 2979 weight class) and Quinton St Pierre (ranked 505 p4p, 339 weight class). St Pierre has chosen 3 6 Mafia - Move B!tch as his entrance music. Buckle up people - heeeeeeeeeere we go!
 |
|
 |
| 190 cm
26
215
1 - 1 - 0 |
|
185 cm
25
205
1 - 1 - 0 |
BJJ Blue Belt
Solid Muay Thai
Good chin |
|
Decent wrestler
Decent boxing
Tends to cut |
|
| |
|
Ladies and gentlemen. This fight is 3 rounds, in the light heavyweight division.
Introducing the fighter to my left, fighting out of the red corner.
With a record of 1 - 1 - 0, fighting out of Tokyo, Yuujirou Hanma!
And introducing the fighter to my right, fighting out of the blue corner.
With a record of 1 - 1 - 0, fighting out of Los Angeles, Quinton St Pierre!
The judges for this bout are Shigeki Fujiwara, Hirohito Nitta and Yuuki Gou.
The bell rings for round one and we are underway!
Hanma catches St Pierre with a nice straight right. He seems pissed - ooooh, it's on now! On like donkey kong!
No luck with that takedown attempt from St Pierre.
Hanma catches St Pierre with a nice straight right. He seems pissed - ooooh, it's on now! On like donkey kong!
A decent looking cross lands there for Hanma.
St Pierre drives through with a takedown into guard.

Hanma scrambles and gets back to his feet.
St Pierre moves in looking to clinch but Hanma pushes him off.
And Hanma counters with a quick kick to the body but St Pierre blocks it.
The crowd are loving this. Great action here.
Hanma throws a hook to the side of St Pierre's head but St Pierre sees it coming and ducks under it beautifully.
St Pierre with the counter takedown but Hanma avoids it easily.
Hanma stuffs a takedown. It's all about dictating where the fight takes place and Hanma wants it to stay on the feet.

Hanma clinches.
Hanma misses with a body punch.
Hanma lands with a light punch inside.
Hanma is pressed up against the cage. St Pierre has hold of a leg and is looking to drag Hanma down to the mat. Hanma avoids the attempt though and has circled away. We're back to striking at a distance.
Yuujirou Hanma has stuffed three takedown attempts in the round now. That's going to take a lot out of Quinton St Pierre.
St Pierre uses good head movement to avoid the hook from Hanma.
Hanma swings wildly with a right hand that was never going to find it's target.
Jab, jab by Hanma - just one landing.
St Pierre gets his takedown attempt stuffed easily
and Hanma counters with a leg kick.

That's one minute gone in the round.
Hanma lands a pitter patter jab to the forehead of his opponent.
St Pierre blocks a head kick by Hanma.
St Pierre drops down looking to force a counter takedown but Hanma defends it well.
Hanma lands a lovely overhand right.

The fight moves into the clinch position.
Hanma working aggressively here.
Hanma tries to throw a body punch but St Pierre avoids it by throwing Hanma back against the cage.
Hanma lands a knee to the body.
Hanma lands a right hand.
St Pierre works for the underhooks and manages to get a trip takedown into guard.
Hanma wants to stand up but St Pierre is controlling him.
Hanma uses the cage to get back to his feet.
The fans in attendance giving it up for the two fighters, who have really let it all hang out in the last minute or so!
Hanma throws a head kick but St Pierre moves out of range.

That's two minutes gone in the round.
Hanma misses with a wild body shot.
St Pierre pushes Hanma up against the cage in a clinch.
St Pierre blocks a couple of punches on the inside.
St Pierre managing to block the knees to the body from Hanma.
St Pierre is working for takedown but Hanma is calmly controlling the position for now.
St Pierre tries to pull guard but Hanma forces him back to his feet, against the cage.
Hanma tries to land knees in the clinch but St Pierre avoids the damage to the body.
St Pierre lands a nice trip takedown into half guard.
Hanma is trying to stand back up but St Pierre is controlling him
Hanma has managed to escape just enough to sneak back to his feet but St Pierre is on him like a limpet, forcing Hanma back against the cage.
Hanma misses with some punches.
St Pierre has Hanma pressed up against the cage. He's trying to work for a single leg takedown. St Pierre pulls back from the cage and twists to the side, sending Hanma tumbling to the mat - St Pierre dives into Hanma's guard.
St Pierre must be cautious of submissions here, given that his opponent has the superior Jiu Jitsu.
Hanma is trying to stand up but he's not managed so far.
Hanma manages to escape and get back to his feet.

That's three minutes gone in the round.
Hanma throws a nice head kick!
It looks like Hanma has been trying to sharpen up his punching technique, as it looks crisper than last time we saw him.
Hanma misses with a looping left.
Hanma looks to land a left hand but St Pierre moved out of range nicely.
Hanma stooping low to avoid any incoming strikes and then lunges in with an uppercut come cross that lands flush.
Yuujirou Hanma is looking to keep the fight on the feet at all costs.
St Pierre shoots in looking for a takedown but Hanma manages to keep the fight standing, pushing St Pierre's face into the canvas for good measure before circling away.
St Pierre looking to score a takedown here. Hanma is defending well but St Pierre drives through and ends up in Hanma's guard.
St Pierre is sitting in guard, working some ground and pound.
The ref warns both fighters not to hold the cage as they work up against the meshing.
St Pierre stops Hanma from standing up.
St Pierre throws a big right hand that misses.
Hanma kicks St Pierre off and gets to his feet.
A decent looking body kick lands there for Hanma.
St Pierre is looking to take this fight into the clinch.

That's four minutes gone in the round.
The fans in attendance giving it up for the two fighters, who have really let it all hang out in the last minute or so!
St Pierre shoots in for a double leg but Hanma sprawls well. That's going to sap some energy.
St Pierre shoots in for a takedown. "I don't think so" says Hanma as he avoids it easily.
St Pierre closes the distance but Hanma moves to the side
and Hanma connects with a straight left hand counter down the middle.
St Pierre takes a body kick right on the floating rib. Ouchie.
Hanma rushes St Pierre and presses him up against the cage.
St Pierre ties up his opponent against the cage and manages to drag the fight down to the ground. St Pierre no doubt will be looking to work submissions from his guard.
The fighters are pressed up against the cage, both looking to find a bit of space to work.
St Pierre is looking for a guillotine. You can't force these things though and Hanma defends well.
St Pierre looking for a sweep. Not yet St Pierre, not yet.
The crowd applaud the fighters' efforts here as the round comes to an end.

Hanma decides he's had enough of playing guard and decides to stand. Come on St Pierre, up you get!
Hanma connects with an inside leg kick.
Hanma leaves St Pierre with his face pressed against the mat as he sprawls beautifully, defending against a solid takedown attempt.
Hanma half committed to a counter leg kick.
And that is the end of the round. The fighters go back to their corners.
Yuujirou Hanma dominated that round.
That's the end of the round. The referee orders the cornermen out of the cage so we can get back down to business.

A chopping leg kick lands by Hanma.
A swing and a miss from Hanma.
St Pierre has tried to improve his agility in the runup to this fight.
Hanma clinches with his opponent.
St Pierre is trying to pull guard but Hanma has him pressed against the cage.
An uppercut on the inside fails to land for Hanma.
Hanma trying to land knees to the body.
St Pierre jumps guard but Hanma turns him against the cage and keeps the fight standing.
St Pierre is trying to trip Hanma. He has hold of a leg but Hanma is hopping around, keeping his balance for the moment. St Pierre persists though and gets the takedown into guard.
St Pierre prevents Hanma from getting back to his feet.
Hanma is looking to stand back up... there's a bit of a scramble and St Pierre dives into side control.
Hanma is looking to work his way out of this bad position but St Pierre is controlling him well.
We've had a slow start to the round here - hopefully the action picks up.
An elbow from St Pierre crashes against the mat.
Hanma is looking to work his way out of this bad position but St Pierre is controlling him well.
That's one minute gone in the round.
Hanma tries to wriggle free to get back to his feet but he's given up his back! Oops.
Hanma trying to get back to his feet but St Pierre is in full control for now.
St Pierre softening up his opponent with strikes here.
Hanma is taking damage to the body and head.
Hanma wants to get back to his feet.
Hanma covers up after that shot from St Pierre.
St Pierre scores with punches and elbows.
St Pierre has his opponent's back and is working for the choke.
St Pierre is looking cool and calm here, just waiting for a good opportunity to attack and finish the fight from this dominant position.
That's two minutes gone in the round.
St Pierre tightening his grip on Hanma, looking for the choke.
Hanma is trying to get back to his feet but St Pierre has full control of the position and if anything, Hanma has just worked his way into a worse spot.
St Pierre lands a punch that was close to the back of the head but the ref thinks it's OK.
Hanma is trying to stand back up.
This has been an exciting period of action!
That's three minutes gone in the round.
A bit of a pause in the action here. St Pierre controlling the positon.
St Pierre has his hand under the chin of his opponent looking for the choke. He's nearly got it! This one could be all over! But no, Hanma has freed his hand and lives to survive another
well, another couple of seconds at least!
Hanma is trying to stand back up.
St Pierre lands a shot to the body.
Hanma is really dominating this fight. Is there anything that St Pierre can do to turn this around?
What can Hanma do to escape this position? He's going to have to figure it out pretty quick if he wants to stay in the fight!
Hanma is trying to get back to his feet but St Pierre has full control of the position and if anything, Hanma has just worked his way into a worse spot.
That's four minutes gone in the round.
St Pierre is controlling his opponent, waiting for an opportunity to finish.
Hanma is trying to get back to his feet but he's not managed it yet.
St Pierre is working for the rear naked choke. He has one arm under the chin but Hanma has hold of the other arm. A bit of a stalemate here.
Hanma trying to get back to his feet but St Pierre is in full control for now.
St Pierre has the hooks sunk in and you can see the will to fight slowly draining out of Hanma's body.
Hanma manages to escape to his feet.
The fight moves into the clinch position.
Hanma makes some space for himself and lands an uppercut.
And that is the end of the round. The fighters go back to their corners.
Quinton St Pierre showed his class in that round. I'd imagine he'll take it on all the scorecards.
That's the end of the interval. I'm sure that seemed a lot quicker than a minute for our two fighters! Back to the action. This is the final round!

A nice inside leg kick there by Hanma. That's going to slow St Pierre down.
Hanma thuds his right hand into St Pierre's forehead from close range. That could be painful for both fighters.
St Pierre clinches up against the cage.
St Pierre blocks a knee to the body. He'll have a nicely bruised forearm in the morning.
St Pierre has managed to pull guard. Let's see whether he can work an aggressive guard. It will also be interesting to see what tactics Hanma uses from the top position.
St Pierre working a defensive guard here.
St Pierre has a closed guard, preventing Hanma from standing up.
Hanma decides to stand up and beckons his opponent to follow.
A telegraphed takedown attempt from St Pierre is defended easily by Hanma.
We've had a slow start to the round here - hopefully the action picks up.
St Pierre fails miserably with a takedown attempt.
St Pierre tries to check a leg kick but that clearly hurt him.
That's one minute gone in the round.
St Pierre shoots in for a takedown but Hanma shows good takedown defense there and keeps this one on the feet.
Hanma throws a counter high kick but St Pierre was just alert enough to avoid it.
Yuujirou Hanma has stuffed three takedown attempts in the round now. That's going to take a lot out of Quinton St Pierre.
Hanma clinches.
St Pierre has managed to pull guard. Let's see whether he can work an aggressive guard. It will also be interesting to see what tactics Hanma uses from the top position.
St Pierre has a closed guard, preventing Hanma from standing up.
We get told so often about how wrestlers don't like to be on their backs. Let's see if St Pierre can do anything to dispel that myth.
St Pierre is working actively off his back, looking to secure an arm or perhaps work for a triangle.
Hanma gets to his feet - St Pierre follows without any prompting.
Hanma throws the left hand but St Pierre avoids the punch easily.
That's two minutes gone in the round.
St Pierre moves out of range as Hanma throws a body kick.
St Pierre looks frustrated there after his takedown attempt is stuffed easily.
Hanma lands a really nice looking cross but St Pierre seems unphased.
St Pierre staying out of range there.
St Pierre tries to counter by closing the distance.
St Pierre on the wrong end of a kick to the body.
Hanma looks to land a right hand but St Pierre moved out of range.
St Pierre defending well as Hanma loads up on a big left hand.
Hanma throws a low kick but St Pierre avoids it.
St Pierre scores with a takedown into Hanma's guard.
St Pierre takes a big intake of breath there - he's definitely tired.
Wooooo! Give it up for these two warriors! They are putting on a show!
Hanma is looking to stand up but St Pierre isn't so interested in that idea.
That's three minutes gone in the round.
Hanma being controlled here, momentarily.
Hanma pushes St Pierre off and scrambles back to his feet.
Hanma throws a jab when St Pierre was well out of range.
Hanma throws a body shot but no joy.
The fight moves into the clinch position.
St Pierre managing to block the knees to the body from Hanma.
St Pierre lands a takedown into guard.
Hanma wants to get back to his feet but St Pierre is in a dominant position and won't allow it.
That's four minutes gone in the round.
St Pierre not doing a lot at the moment. He'll have to show some more aggression or the fight will get stood up.
St Pierre works over Hanma with some ground and pound from guard.
St Pierre engaging in some classic timewasting tactics.
Hanma kicks St Pierre off and gets to his feet.
We've seen a great period of action over the last minute or so - credit to both fighters for going all out!
St Pierre moves out of range of the strikes.
A left lands for Hanma.
Hanma scores with a slapping inside leg kick.
Hanma just misses with a punch to the body.
St Pierre tries to clinch but is not successful on this occasion.
Hanma tried to counter with a leg kick but St Pierre avoided it.
St Pierre blocks a head kick by Hanma.
And that's the end of the fight!
Yuujirou Hanma showed his dominance in that final round.
I think Hanma has won this one but let's see what the judges have to say. Over to the ring announcer for the scorecards.
Ladies and gentlemen, after 3 rounds of action, we go to the scorecards for a decision.
Judge Shigeki Fujiwara scores the fight 29:28
Judge Hirohito Nitta scores the fight 29:28
Judge Yuuki Gou scores the fight 29:28
In favor of your winner, by unanimous decision... Yuujirou Hanma!
|
|
|
|
|
|
|
|
|
|
|
|
|
|
|
|
|
|
|
|
|
|
|
| S |
C
A |
G |
S |
C
B |
G |
|
S |
C |
G |
|
energy
A | B |
|
hype
A | B |
|
pop
A | B |
|
mgr
A | B |
|
FIGHT
RATING
58% |
|
|
|
|
|
|
|
Undercard bout
|
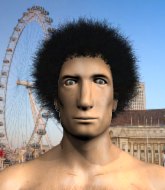
Coming up we have a bantamweight MMA rules bout between Aarav Gordon (ranked 3345 p4p, 3555 weight class) and Lil Jon Jones Ii (ranked 219 p4p, 231 weight class). Aarav Gordon had a look across the cage there at his opponent. He definitely means business
 |
|
 |
| 174 cm
25
144
1 - 0 - 0 |
|
178 cm
24
141
2 - 2 - 0 |
BJJ Brown Belt
Basic striking
Cuts easily |
|
BJJ Brown Belt
Basic striking
Determined |
|
| |
|
Ladies and gentlemen. This fight is 3 rounds, in the bantamweight division.
Introducing the fighter to my left, fighting out of the red corner.
With a record of 1 - 0 - 0, fighting out of Montreal, Aarav Gordon!
And introducing the fighter to my right, fighting out of the blue corner.
With a record of 2 - 2 - 0, fighting out of Las Vegas, Lil Jon Jones Ii!
The judges for this bout are Shirou Masuda, Shigeki Sano and Yukihiro Shimada.
The bell rings for round one and we are underway!
Jones Ii clinches with his opponent.
Jones Ii has a body lock and is looking for a takedown. Gordon is bouncing around trying to prevent the takedown and somehow he has indeed managed to stay on his feet.
Gordon tightens his grip and picks Jones Ii up, before dumping him to the ground. Jones Ii manages to land in guard.
Jones Ii is active off his back here, looking for submissions.
Jones Ii can't keep his opponent in guard - Gordon advances to half guard, no doubt looking to mount.
Gordon missing with some ground and pound from the half guard.
Jones Ii wants to improve his position but Gordon is controlling well.
Gordon is trying a forearm choke
I don't think that's going to do much at this level of the game.
Gordon wants to pass the guard but Jones Ii is defending well.
We've had a slow start to the round here - hopefully the action picks up.
Gordon is looking for a kimura but he's never going to get it from there.
Jones Ii tries to roll over but Gordon keeps him under control.
That's one minute gone in the round.
Jones Ii looking for submissions off his back.
Gordon is stalling here. Jones Ii is in no mood to hang around though. He's locked up a kimura from the bottom! Gordon seems to be keeping calm but he's forced to roll out of the hold and Jones Ii has ended up in side control on the top. Nice work.
Jones Ii tries to land with some ground and pound but misses.
Gordon isn't going anywhere.
The ref warns both fighters not to hold the cage as they work up against the meshing.
Jones Ii working the ground and pound.
Gordon stops Jones Ii from passing to mount.
Jones Ii is a painfully thin specimen of a man. You do wonder whether a good body kick would snap him clean in two.
Jones Ii working the strikes but Gordon uses the opportunity to regain half guard.
That's two minutes gone in the round.
Jones Ii is working for submissions here but there's nothing on.
Jones Ii looking for a kimura but he'll have to free his other leg if he wants to finish that. Perhaps he's just using it as a distraction technique.
Jones Ii trying to control the action but Gordon is working from the bottom.
Gordon regains full guard, whilst avoiding punches from Jones Ii.
That's three minutes gone in the round.
Gordon is working an open guard here, looking to improve his position. No doubt that will leave him open to counters but at least he's being more offensive.
Gordon pulls Jones Ii in to control the position.
Jones Ii trying to control the position from guard on top but Gordon is wriggling around, looking for whatever he can.
Jones Ii tries to free his leg and advance position but Gordon is retaining full guard.
Jones Ii in full guard, throwing the ground and pound. No damage this time.
Jones Ii content to stall in guard here.
Jones Ii trying to control but Gordon is working from the bottom.
That's four minutes gone in the round.
Well. There's a bit of a lull in the action here and the crowd are starting to get restless.

The referee decides to stand the fighters back up.
Gordon looks to be in better condition than last time we saw him fight. Obviously he's been working hard on his cardio.
Gordon defending well as Jones Ii loads up on a big left hand.
Gordon half commits to a counter takedown before pushing away, out of range.
Jones Ii shoots in looking for a takedown. Gordon tries to sprawl out of it but Jones Ii keeps driving through. The fighters are pinned against the cage. Gordon manages to get underhooks and after a bit of a struggle, circles away and we're back to standing.
Gordon tries to clinch but Jones Ii moves out of range.
Jones Ii is definitely looking for the counter takedowns here.
Jones Ii gets to the clinch - let's see what his plan is here.
Jones Ii is trying to pull guard but Gordon turns him against the cage and we stay in the clinch.
Aarav Gordon has stuffed three takedown attempts in the round now. That's going to take a lot out of Lil Jon Jones Ii.
Gordon tries for a takedown but Jones Ii manages to get underhooks.
Gordon gets double underhooks and manages to take the fight to the ground.
The crowd thankful this round is nearly over.
Jones Ii trying to control the position.
Jones Ii looking for a sweep. Not yet Jones Ii, not yet.
Gordon engaging in some classic timewasting tactics.
And that is the end of the round. The fighters go back to their corners.
That was a close round but I would say that Aarav Gordon will probably get the nod.
The minute break is over - no more time for sponges and pep talks - back to the action!
Jones Ii misses with a right hand
and Gordon moves into the clinch.
Gordon has double underhooks and is working for a body lock takedown. He's got it. The fighters land in half guard but Jones Ii regains guard immediately.
The fighters are pressed up against the cage, both looking to find a bit of space to work.
Jones Ii trying to strike from the bottom but really, it's not the best position to be doing that from!
Gordon controls from within his opponent's guard.
Jones Ii has the superior BJJ but he's also working some ground strikes into his gameplan.
Gordon tries to free his leg and advance position but Jones Ii is retaining full guard.
Jones Ii is looking to sweep but instead, Gordon has passed into half guard.
Jones Ii tries to get to full guard but Gordon has control of the leg.
Gordon trying to control the action but Jones Ii is working from the bottom.
We've had a slow start to the round here - hopefully the action picks up.
Jones Ii wants to get back to full guard.
Jones Ii works his way to full guard. Good work.
Jones Ii is trying to keep Gordon in close.
That's one minute gone in the round.
Gordon slips effortlessly into side control - very nice.
Gordon is moving around in side control but his primary objective seems to be to maintain the position.
Jones Ii tries to get back to half guard but can't.
Gordon controlling from side mount.
Jones Ii tries to get back to half guard but can't.
Jones Ii is still trying to improve position.
That's two minutes gone in the round.
Gordon trying to control the position but Jones Ii is working away.
Jones Ii struggling a bit here.
Jones Ii is trying to improve his position.
Gordon is looking to take a break and control but Jones Ii is keeping him honest, looking to work from the bottom.
Gordon swings around for an armbar but Jones Ii sees it coming a mile off and turns beautifully into Gordon's guard.
Gordon is trying to control the position but Jones Ii postures up.
Jones Ii wants to control from the top but Gordon keeps moving.
That's three minutes gone in the round.
Jones Ii looking to pass the guard.
Gordon is working from a closed guard but he's struggling to control his opponent.
Jones Ii preventing the sweep.
Gordon utilising some decent striking defenses from the guard, preventing the ground and pound.
Jones Ii wants to control from the top but Gordon keeps moving.
Aarav Gordon overall seems to be getting the better of the ground position in the fight so far.
Jones Ii wants to pass the guard but Gordon is keeping the position.
That's four minutes gone in the round.
My god... these two guys really need to pick up the pace or everyone will leave to go get a beer.
Gordon not looking particularly offensive just at the moment.
The referee wants the fighters to be more active or he's going to reset them on the feet.
Jones Ii drops back for a leg but he's not going to get it - he lets go and Gordon dives on top into guard.

Gordon trying to control but Jones Ii is working from the bottom.
Gordon sitting in guard, not really doing much.
Jones Ii looking to sweep here. No luck so far.
Boooooooooooooooooooo!!! God, this has been a terrible round. Come on you two, sort yourselves out!
Gordon postures up.
Jones Ii has a loose triangle. He'll be looking to tighten that up but Gordon can see exactly what he's planning and manages to posture up and free himself.
And that is the end of the round. The fighters go back to their corners.
Aarav Gordon dominated that second round.
The referee calls time. The cornermen exit stage left and we're back to business. This is the final round!
Gordon shoots in looking for a takedown but Jones Ii manages to keep the fight standing, pushing Gordon's face into the canvas for good measure before circling away.
Gordon gets tackled into the cage by Jones Ii. Jones Ii maintains the clinch.
Gordon is looking to take this one to the mat.
The pace really dropping off here, momentarily.
We've been informed that Jones Ii has been working hard on his conditioning in the buildup to the fight.
Jones Ii prevents a takedown attempt there.
That's three failed takedown attempts in the round for Aarav Gordon. That's going to take a lot out of him.
Jones Ii has a body lock and is looking for a takedown. Gordon is bouncing around trying to prevent the takedown and somehow he has indeed managed to stay on his feet.
Jones Ii is fighting off a takedown attempt but Gordon is just too persistent for him and manages to trip Jones Ii to the mat. Jones Ii regains guard as soon as the fighters hit the mat.
Gordon slips effortlessly into side control - very nice.
Jones Ii is trying to get back to half guard. He's pushing on Gordon's leg. He's managed it. Nice work.
We've had a slow start to the round here - hopefully the action picks up.
Jones Ii actively working from the bottom here.
Gordon seems very keen to just sit and control from half guard but Jones Ii does not like that idea so much and is remaining active off his back.
Both fighters are breathing heavily.
That's one minute gone in the round.
Jones Ii works his way to full guard. Good work.
Jones Ii looking to sweep here. No luck so far.
Jones Ii lands a beautiful sweep and he's now moved into his opponent's guard.

Jones Ii working some ground and pound from guard but it's not doing any damage.
Gordon is adopting a defensive guard.
Jones Ii trying to land body shots but he keeps hitting the mat.
Gordon keeping moving, preventing Jones Ii from controlling successfully.
Lil Jon Jones Ii has stepped it up - he knows he needs a finish here!
Gordon wants to improve his position but instead Jones Ii has moved into half guard.
That's two minutes gone in the round.
Jones Ii throwing shots but Gordon is blocking nicely.
Jones Ii is looking for a kimura but Gordon is holding onto that half guard position, so it's hard for Jones Ii to get the leverage.
Jones Ii missing with some ground and pound from the half guard.
Gordon trying to control from the bottom.
Gordon is not content to let Jones Ii control the position.
Gordon is looking to regain full guard. Not this time though.
Jones Ii is looking to take a break and control but Gordon is keeping him honest, looking to work from the bottom.
That's three minutes gone in the round.
Jones Ii wants to free his trapped foot but Gordon is holding on for dear life with his legs.
The referee has decided to stand the fighters back up, so we'll restart on the feet.
Aarav Gordon seems to be the more aggressive standup fighter in this bout.
Jones Ii misses with a few strikes there.
Jones Ii attempts a low kick but it misses it's target.
Gordon throws the overhand right but ducks down into a quick takedown attempt. Jones Ii was covering up waiting for the punch and Gordon finishes the takedown easily into guard.
Gordon slows down the pace of the fight, as he sits in guard.
Jones Ii working from the bottom, still in full guard. He's managed to get a loose triangle. Gordon doesn't seem to be doing much to defend here, obviously he feels comfortable in the position. Gordon manages to throw the legs off his shoulder and he's back into guard - no problem.
That's four minutes gone in the round.
Jones Ii controlling the position.
Jones Ii is working actively off his back, looking to secure an arm or perhaps work for a triangle.
Gordon pressing down on his opponent's thigh, looking to pass guard. Jones Ii is keeping the position for now.
Gordon stopping the sweep attempt from Jones Ii.
Jones Ii keeping full guard, as Gordon tries to pass.
Gordon avoids a guillotine attempt easily.
Boooooooooooooooooooo!!! God, this has been a terrible round. Come on you two, sort yourselves out!
Gordon trying to control but Jones Ii is working from the bottom.
And that's the end of the fight!
Lil Jon Jones Ii comfortably won the final round on my scorecard.
I think Gordon has won this one but let's see what the judges have to say. Over to the ring announcer for the scorecards.
Ladies and gentlemen, after 3 rounds of action, we go to the scorecards for a decision.
Judge Shirou Masuda scores the fight 29:28
Judge Shigeki Sano scores the fight 29:29
Judge Yukihiro Shimada scores the fight 29:28
In favor of your winner, by majority decision... Aarav Gordon!
After the fight, Aarav Gordon was humble in paying tribute to his opponent but made it clear he wants to go on to bigger and better things. It seemed to go down well with the crowd who cheered him loudly.
|
|
|
|
|
|
|
|
|
|
|
|
|
|
|
|
|
|
|
|
|
|
|
| S |
C
A |
G |
S |
C
B |
G |
|
S |
C |
G |
|
energy
A | B |
|
hype
A | B |
|
pop
A | B |
|
mgr
A | B |
|
FIGHT
RATING
27% |
|
|
|
|
|
|
|
Undercard bout
|
Coming up we have a middleweight MMA rules bout between Ugrapurod Makagziadan (ranked 2988 p4p, 3844 weight class) and MewChoo Free (ranked 341 p4p, 408 weight class). Makagziadan comes into the arena with FIGHT FIGHT blaring out of the sound system. These two fighters really are very evenly matched on the feet - it will be fascinating to see who can assert themselves in that aspect of the fight.
 |
|
 |
| 188 cm
20
185
3 - 4 - 0 |
|
185 cm
20
185
3 - 3 - 0 |
BJJ Blue Belt
Excellent boxer
Granite chin |
|
BJJ Blue Belt
Excellent MT
Granite chin |
|
| |
|
Ladies and gentlemen. This fight is 3 rounds, in the middleweight division.
Introducing the fighter to my left, fighting out of the red corner.
With a record of 3 - 4 - 0, fighting out of Tokyo, Ugrapurod Makagziadan!
And introducing the fighter to my right, fighting out of the blue corner.
With a record of 3 - 3 - 0, fighting out of Los Angeles, MewChoo Free!
The judges for this bout are Sosuke Kotani, Yukihiro Yamamoto and Shirou Masuda.
The bell rings for round one and we are underway!
Makagziadan checks a leg kick nicely.
Free looks to land a combination. Makagziadan sees it coming but can only parry a couple of the shots.
 It looks like Ugrapurod Makagziadan has been cut. It looks like Ugrapurod Makagziadan has been cut.
Free fakes a jab and scores with a low kick.
Free uses good footwork to get in and out, landing a nice hook.
Free misses with a hook
and Makagziadan counters with a nice uppercut.
Free looks more muscular than last time we saw him. He must have been on the weights.
Makagziadan ducks under a wild hook from Free.
MewChoo Free seems to be the more aggressive standup fighter in this bout.
Nice defenses there by Free.
Makagziadan checks a low kick from Free.
Free looking to land some kicks to the body here.
Free misses with an uppercut
letting Makagziadan counter with a right hand.
Free throws a sloppy head kick and Makagziadan moves out of range easily.
Makagziadan catches Free with a nice straight right. He seems pissed - ooooh, it's on now! On like donkey kong!
We've seen a great period of action over the last minute or so - credit to both fighters for going all out!
Free goes for a spinning back kick but it misses.
Free swings away with a leg kick that misses.
Makagziadan throws an ugly left hook that misses
and Makagziadan takes a counter punch right on the button for his troubles.
Free thows a leg kick but Makagziadan checks it
and Makagziadan counters with a lovely shot to the body.
Makagziadan misses with a straight left.
Free jabbing away but nothing is landing.
That's one minute gone in the round.
Makagziadan misses the jab.
Free looked like he wanted to counter with a punch but didn't throw it.
Free throws an uppercut from half a mile away. Makagziadan sees it coming and avoids it easily.
Free throws the left hand but Makagziadan avoids the punch easily.
Free slips under a jab.
Free delivers a nice body kick.
Free lands with a head kick! That's gotta hurt.
Free showing good head movement there, avoiding the strikes from Makagziadan.
Makagziadan loads up on a big right hand but Free slips the punch.
Free scores with a nice body kick.
Free takes a body punch that cleary hurt but he's trying not to show any weakness.
Free swings and misses with a hook to the body.
A good leg kick by Free.
A big left from Free misses.
Free staying out of range there.
Free throws out a counter right but Makagziadan avoids it with no problem.
Makagziadan throws a hook but Free blocks it.
That's two minutes gone in the round.
This has been an exciting period of action!
Makagziadan connects with a looping left hand that seems like it dazed Free momentarily.
Free throws a decent looking leg kick but it doesn't land clean.
A jab from Free misses.
Makagziadan throws a monster uppercut resembling something out of street fighter but it doesn't land.
Makagziadan bobs and weaves well there to avoid the strikes.
Makagziadan scores with the left hand. Free knows he should have avoided that one.
 It looks like MewChoo Free has been cut. It looks like MewChoo Free has been cut.
Makagziadan misses with a straight left.
Free thows a left - swing and a miss!
Makagziadan throws a big shot that misses.
Free tries to score with a leg kick but it misses it's target.
Free pushes forward with a 1-2 combination that forces Makagziadan back to the cage. Free follows up with a solid lead hook to the liver.
Free throws a head kick that Makagziadan semi-blocks.
Free uses good footwork to avoid the strikes from Makagziadan.
Makagziadan ducks right into an uppercut from Free.
Free lands with a nice low kick. That'll leave a bruise.
Free misses with an uppercut. Makagziadan saw that one coming.
That's three minutes gone in the round.
A combination from Makagziadan does no damage.
Free throws a poor cross that misses
and Makagziadan counters with a quick right hand to the jaw.
Makagziadan is really head hunting here, hardly looking to strike to the body at all.
Free misses with a hook. Makagziadan ducked under it nicely.
Makagziadan swings widly with a right hand
and Free counters with a quick right hand to the jaw.
Makagziadan throws a hook to the body but it doesn't connect.
Makagziadan throws a right and a left that Free avoids nicely.
And an attempted straight right on the counter from Free! But no joy.
Free lands a nice looking kick to the body. Makagziadan takes a step back to recover.
Makagziadan slips under a jab.
Free throws the kick towards the body but Makagziadan avoids it.
Makagziadan looks to land a right hand but Free moved out of range.
Free is looking for the big counter here.
Free throws out a leg kick but Makagziadan moves out of range and Free only half commits.
Nice uppercut there from Makagziadan.
Free misses with a body shot. Nice footwork from Makagziadan.
Makagziadan thows a left - swing and a miss!
Makagziadan rushes forward with a series of wild hooks but Free moves out of range and avoids them all easily.
This is a great period of action - very entertaining stuff!
Makagziadan throws an uppercut from half a mile away. Free sees it coming and avoids it easily.
That's four minutes gone in the round.
Free missing with a left hand there. Makagziadan was out of range so wasted energy throwing that one.
Makagziadan cracks Free with a good shot that sees him stumbling back into the cage.
Makagziadan doesn't react quick enough there as he takes a shot to the body.
Makagziadan throws a wild combination but nothing lands.
Makagziadan misses with a hook.
Makagziadan throws a right and a left that Free avoids nicely.
Makagziadan misses with a wild combination.
Nice shot lands for Free.
Makagziadan misses with a hook.
Makagziadan on the wrong end of a nice low kick. He's acting like it's no big deal but he doesn't want to take many more of those.
The crowd applaud the fighters' efforts here as the round comes to an end.
Nice defenses there by Free.
Makagziadan ducks under a wild hook from Free.
Makagziadan went nuts there looking for a big combo counter but none of the flurry connected.
A good leg kick by Free.
A lazy left from Makagziadan finds it's target.
And that is the end of the round. The fighters go back to their corners.
A close round but MewChoo Free will probably get the nod.
Both fighters have cut men working on them during the interval.
The referee calls time. The cornermen exit stage left and we're back to business.
A telegraphed right hand from Makagziadan misses the target.
Crunch! Free slams his shin into Makagziadan's torso.
Free thuds a left hand into Makagziadan's body.
Free connects with a solid leg kick.
Free throws out a token jab with nothing on it.
A decent looking cross lands there for Makagziadan.
Free walks straight into an uppercut. Luckily it didn't land flush.
Free blocks a jab.
Makagziadan loads up on a big right hand but Free slips the punch.
Makagziadan misses with a hook
and Free counters with a straight right hand.
Free misses with an uppercut. Makagziadan saw that one coming.
Makagziadan getting the better of the striking in that exchange.
Free throws a leg kick
and Makagziadan counters with a quick right hand to the jaw.
The crowd cheering loudly, showing their appreciation for the quality fight we're seeing here.
A big right from Free misses.
Free lands with a nice body kick.
A swing and a miss from Free.
Makagziadan swung with a counter right hand that didn't connect.
That's one minute gone in the round.
Some wild striking there from Makagziadan.
The sound of bone on bone echoes around the arena as Makagziadan checks a leg kick.
Makagziadan takes one to the side of the head.
Free slips under a jab.
Makagziadan misses with a lunging right hand
and Free cracks him with a counter punch right on the button.
Free misses with a hook. Makagziadan ducked under it nicely.
Free tried to score with a low kick but Makagziadan checks it.
Free uses good footwork to get in and out and land a nice right hand before Makagziadan has time to react.
Free fails to land with the punch combination there - jab, cross, hook, miss, miss, miss.
Makagziadan throws a shot from downtown. Free moves away and avoids it.
It seemed like Free was going to counter with the hook but didn't fully commit to it.
Makagziadan slips under a jab.
Makagziadan throws a nice looking combination but Free bobs and weaves to avoid any damage.
Free throws out a counter right but Makagziadan avoids it with no problem.
Makagziadan throws an overhand right that lands on Free's shoulder, as Free tries to avoid the shot.
Free looks like he wants to counter punch here.
Makagziadan moves out of range of the strikes.
Free scores with a leg kick.
That's two minutes gone in the round.
Free swings wildly with a right hand that was never going to find it's target.
The crowd are loving this. Great action here.
Makagziadan throws a hook but Free blocks it.
Makagziadan gets cracked there but stands up to it.
Free staying out of range there.
Free raises up his leg as if looking to counter with a high kick.
Free misses with a hook
and Makagziadan connects with a straight left hand counter down the middle.
Makagziadan uses decent footwork to sidestep a right hand from Free.
Makagziadan throws an overhand right that lands on Free's shoulder, as Free tries to avoid the shot.
Free pushes Makagziadan away with a front kick.
A big right from Makagziadan misses.
Free throws a lazy right hand but Makagziadan sees it coming a mile off and sidesteps it easily.
Free throws an overhand right that lands on Makagziadan's shoulder, as Makagziadan tries to avoid the shot.
Makagziadan swung with a counter right hand that didn't connect.
Free scores with a body shot.
Makagziadan throws a combination but it was largely blocked by Free.
Free throws a sloppy body shot
and Makagziadan counters with a lovely straight right hand!
Free throws a looping overhand right but Makagziadan ducks down to avoid it.
That's three minutes gone in the round.
Makagziadan drops his hands and takes a jab to the jaw for his troubles.
Makagziadan throws an ugly left hook that misses
and Free cracks him with a counter punch right on the button.
Makagziadan rushes forward with a series of wild hooks but Free moves out of range and avoids them all easily.
Free pushing out the jab but it's not landing.
Free feints a straight left to the body, then turns around with a flashy move and hits Makagziadans jaw with a dramatic spinning back fist!
This fight brought to you by 5M nutrition - it's mmmmm tasty. Nice jab by Free.
Free misses with a lunging right hand
and Makagziadan counters with a lovely straight right hand!
Makagziadan throws a wild combination but nothing lands.
Makagziadan doesn't react quick enough there as he takes a shot to the body.
Makagziadan will be looking to protect his midsection after taking some solid kicks to the body.
Makagziadan throws a good cross that connects.
Free connects with a looping right hand.
Wooooo! Give it up for these two warriors! They are putting on a show!
Makagziadan misses with a straight right.
Free flicks out a counter leg kick but Makagziadan steps away.
Free throws a front kick that sends Makagziadan stumbling back into the cage.
MewChoo Free seems to be getting the better of the standup.
Free bobs and weaves and unloads with a good uppercut.
Free lands with a thumping leg kick.
That's four minutes gone in the round.
Free scores with a sloppy punch to the body. Not much technique there but it did the business.
Free jabbing away but nothing is landing.
Free moves into range and lands a nice leg kick.
Makagziadan drops his hands momentarily and Free takes advantage with a crisp shot to the head.
Makagziadan stumbles momentarily as he takes a strong leg kick from Free.
Free keeping his hands up high there, blocking the jab from Makagziadan.
Free lunges at Makagziadan with a hook that half lands and is half blocked by Makagziadan's hand.
Free misses with a hook. Makagziadan ducked under it nicely.
An attempted straight right counter from Makagziadan misses the target.
Makagziadan lands the left hand.
Makagziadan takes a shot to the eye socket. That's gotta hurt.
Free has been the more effective fighter overall so far.
Free throws a leg kick which misses Makagziadan's front leg but catches the back leg as Makagziadan tries to avoid it.
The crowd applaud the fighters' efforts here as the round comes to an end.
Free misses with a body shot.
Makagziadan tests Free's chin there with a solid looking shot.
Makagziadan looks like he's developed a pretty tasty lump over his left eye. He'll need to avoid taking much more damage to that.
Makagziadan lands a powerful looking uppercut that connected with his opponent's jaw.
And that is the end of the round. The fighters go back to their corners.
MewChoo Free showed his class in that round. I'd imagine he'll take it on all the scorecards.
Both fighters have cut men working on them during the interval.
That's time! Makagziadan's corner gives him a slap on the ass as he gets ready to fight. This is the final round!
Makagziadan swings for the body but Free moves out of range.
Free throws a right hand that misses
and Makagziadan counters with a one-two to the body.
 Free is rocked! Free is rocked!
Makagziadan drops Free with a big left hand! Free is injured, injured bad! Makagziadan jumps in and finished him with strikes! The fight is over!
Ladies and gentlemen, after 0:13 of round 3, we have a winner by way of TKO (Strikes). Ugrapurod Makagziadan!
|
|
|
|
|
|
|
|
|
|
|
|
|
|
|
|
|
|
|
|
|
|
|
| S |
C
A |
G |
S |
C
B |
G |
|
S |
C |
G |
|
energy
A | B |
|
hype
A | B |
|
pop
A | B |
|
mgr
A | B |
|
FIGHT
RATING
88% |
|
|
|
|
|
|
|
Undercard bout
|
Coming up we have a featherweight MMA rules bout between Duke Nukem (ranked 2770 p4p, 3336 weight class) and Sun Tzu (ranked 227 p4p, 257 weight class). Tzu comes into a darkened arena with his song building. The HU - Wolf Totem feat. Jacoby Shaddix of Papa Roach kicks in, the lights come on and the crowd goes wild! What a showman! Over to our ring announcer for the fighter introductions!
 |
|
 |
| 172 cm
19
147
3 - 0 - 0 |
|
176 cm
25
145
2 - 0 - 0 |
Good takedowns
Solid Muay Thai
Big heart |
|
Good takedowns
Basic striking
Determined |
|
| |
|
Ladies and gentlemen. This fight is 3 rounds, in the featherweight division.
Introducing the fighter to my left, fighting out of the red corner.
With a record of 3 - 0 - 0, fighting out of Helsinki, Duke Nukem!
And introducing the fighter to my right, fighting out of the blue corner.
With a record of 2 - 0 - 0, fighting out of Los Angeles, Sun Tzu!
The judges for this bout are Hirohito Nitta, Yukihiro Yamamoto and Sosuke Kotani.
The bell rings for round one and we are underway!
Decent striking displayed by Nukem there.
Nukem scores with a jab. Tzu acknowledges it with a nod of the head.
Tzu shoots in and bounces Nukem off the cage to secure the takedown into guard.
Nukem is working the butterfly guard. He manages to land a nice scissor sweep and is now in half guard on the top. Nice move.
Tzu wants to control but Nukem is keeping busy and won't allow it.
Nukem is scoring with some nice ground and pound from the dominant position.
Well, if Nukem is going to just lie there, perhaps we should talk about what we're having for dinner tonight
I'm having a ham and pineapple pizza
Yum. Can't wait.
Nukem is looking to take a break and control but Tzu is keeping him honest, looking to work from the bottom.
Nukem scoring with strikes to the body and head.
Nukem working the head and body with strikes.
That's one minute gone in the round.
Nukem lands with a punch from half guard.
Tzu works his way to full guard. Good work.
Nukem wants to pass the guard but Tzu is keeping the position.
Tzu is looking for a guillotine. You can't force these things though and Nukem defends well.
Nukem slows down the pace of the fight for a moment. He'll need to remain active if he doesn't want to see the fight stood back up.
Tzu tries to land a sweep but no joy.
Nukem is taking a break and basically stalling. The referee will not allow him to do that for long.
Nukem passes into half guard.
Well, if Nukem is going to just lie there, perhaps we should talk about what we're having for dinner tonight
I'm having a ham and pineapple pizza
Yum. Can't wait.
That's two minutes gone in the round.
Tzu is refusing to be controlled, as Nukem sits in half guard.
Tzu tries to get to full guard but Nukem has control of the leg.
The fighters are starting to get a bit slippery now, which will make submissions a bit more difficult.
Nukem trying to pass the guard but Tzu defending well.
Tzu wants to improve his position but Nukem is controlling well.
Tzu actively working from the bottom here.
Tzu wants to improve his position but Nukem is controlling well.
Nukem slows the pace down in half guard.
That's three minutes gone in the round.
The referee claps his hands together and tells the fighters to work.
Nukem is thwarting Tzu's attempts to control the position.
The referee has decided to stand the fighters back up, so we'll restart on the feet.
Nukem looks to have improved his striking defense since last time we saw him fight.
Sun Tzu seems to be the more aggressive standup fighter in this bout.
Tzu closes the distance and clinches.
Tzu drops down for a takedown but doesn't get it.
A shot in the inside from Nukem.
That's four minutes gone in the round.
Tzu is trying to work for a single leg takedown but Nukem pulls him back up using the underhooks.
Nukem effectively controlling the action here.
Nukem scores with a shot to the side of Tzu's head.
Nukem tries to throw a body punch but Tzu avoids it by throwing Nukem back against the cage.
Nukem lands a right hand.
Nukem manages to get underhooks and slows down the pace for a moment.
Tzu drops down looking for an ankle pick but Nukem pulls his leg out and moves away.
Duke Nukem has stuffed three takedown attempts in the round now. That's going to take a lot out of Sun Tzu.
The crowd thankful this round is nearly over.
Nukem lands with a cross to side of his opponent's head.
And that is the end of the round. The fighters go back to their corners.
Duke Nukem dominated that round.
OK. That's time! The bell goes and we're back to the action.
Nukem getting the better of the striking in that exchange.
Tzu shoots in for a double leg but Nukem sprawls well. That's going to sap some energy.
Nice sprawl there from Nukem as Tzu shoots in.
Nukem is looking to counter punch.
Sun Tzu is looking to throw some combinations by the looks of things.
Tzu shoots in looking for a double leg takedown. Nukem defends it nicely.
Duke Nukem has stuffed three takedown attempts in the round now. That's going to take a lot out of Sun Tzu.
Nukem keeps the fight standing with a nice sprawl.
Tzu misses with a takedown
letting Nukem counter with a right hand.
We've had a slow start to the round here - hopefully the action picks up.
Tzu darts in looking for a takedown but Nukem gets double underhooks and turns Tzu into the cage.
Nukem uses good footwork to get in and out and land a nice right hand before Tzu has time to react.
Tzu is rocked!
Tzu shoots in looking for a takedown. Nukem tries to sprawl out of it but Tzu keeps driving through. The fighters are pinned against the cage. Nukem manages to get underhooks and after a bit of a struggle, circles away and we're back to standing.
A quick step to the side and Nukem tries to counter with a shot to the body but it doesn't connect.
Tzu is still on wobbly legs! Can Nukem finish him?
That's one minute gone in the round.
A really sloppy takedown attempt there from Tzu.
Nukem is looking to counter punch.
Tzu seems to have recovered his senses.
Tzu shoots in for a takedown but Nukem shows good takedown defense.
Tzu is breathing heavily.
A telegraphed takedown attempt from Tzu is defended easily by Nukem.

Nukem lands a big shot that drops Tzu! Can he finish him?
Our spies down at at Banzai Combat Academy LA inform us that Tzu has really been working on his submissions in the buildup to this fight. Will it pay off?
Nukem postures up and lands a big shot to Tzu's brow.
Nukem seems content to control from guard here. He's going to have to remain active though if he doesn't want to get stood back up.
Nukem's ground tactics aren't going to win him many fans. Let's hope he's got fireworks for us if he gets back to his feet because he's not doing much on the ground.
That's two minutes gone in the round.
Nukem tries to free his leg and advance position but Tzu is retaining full guard.
This has been an exciting period of action!
Tzu is throwing his legs up, looking for submissions. Nukem is aware though and is defending well.
Tzu tries to land a sweep but no joy.
Nukem stays in close to Tzu's body and controls the position.
That's three minutes gone in the round.
Nukem wants to pass the guard but Tzu is keeping the position.
Nukem seems content to control from guard here. He's going to have to remain active though if he doesn't want to get stood back up.
The referee looks like he's ready to step in and stand the fighters back up.
Nukem pushing down on Tzu's thigh, trying to pass to half guard. He's managed it... Nice work.
Tzu trying to hold on to Nukem's head to control him but Nukem postures up.
Nukem is pressing down on Tzu's thigh, looking to free his foot. Tzu is holding on for now.
That's four minutes gone in the round.
There's not a lot going on here and the crowd are letting the fighters know they're not willing to tolerate a lack of action.
Tzu is looking for a sweep. Nukem is wise to his cunning plan and keeps the top position.
Nukem seems content to maintain position for now, rather than mounting any offense.
Tzu gets full guard.
Nukem with a nice head shot there.
The fighters are pressed up against the cage, both looking to find a bit of space to work.
Tzu working from the bottom, still in full guard. He's managed to get a loose triangle. Nukem doesn't seem to be doing much to defend here, obviously he feels comfortable in the position. Nukem manages to throw the legs off his shoulder and he's back into guard - no problem.
Duke Nukem overall seems to be getting the better of the ground position in the fight so far.
Tzu keeping moving, preventing Nukem from controlling successfully.
The crowd thankful this round is nearly over.
Nukem stands up and looks to throw the legs aside to pass to side control. Tzu swivels though and keeps the full guard.
And that is the end of the round. The fighters go back to their corners.
Duke Nukem dominated that second round.
The minute break is over - no more time for sponges and pep talks - back to the action! This is the final round!
Nukem connects nicely with a jab. Noted by the judges no doubt.
Nukem is really dominating this fight. Is there anything that Tzu can do to turn this around?
Tzu gets his takedown attempt stuffed easily
and Nukem makes him pay by landing a nice hook to the body before moving out of range.
Tzu bobs and weaves into range and then changes levels and scores with a nice takedown into side control.
Nukem sneaks back into half guard.
Tzu is working for a submission of some sort.
Nukem keeping control of the position.
Nukem on his back here. We all know that wrestlers don't like being on their back so let's see if Nukem tries to get out of the position.
We've had a slow start to the round here - hopefully the action picks up.
Tzu is trying to work for a kimura but Nukem is defending well.
That's one minute gone in the round.
Nukem has no desire to be mounted, so is trying to control. Tzu is working away from the top position though.
Tzu is working for a kimura but Nukem is defending it quite comfortably.
Tzu is looking for a kimura here.
Tzu takes a big intake of breath there - he's definitely tired.
Tzu is looking for a kimura. It's going to be difficult to finish that from half guard though and Nukem defends it well.
That's two minutes gone in the round.
My god... these two guys really need to pick up the pace or everyone will leave to go get a beer.
Nukem is doing well to control the position and prevent Tzu from advancing to side control.
Nukem is looking for a sweep. Tzu is wise to his cunning plan and keeps the top position.
Tzu is working for a kimura but Nukem is defending it quite comfortably.
Nukem tries to get to full guard but Tzu has control of the leg.
Nukem is pressing down on Tzu's left leg trying to get back to full guard. He's managed it.
Nukem wants to sweep here but Tzu controlling him for the moment.
That's three minutes gone in the round.
Tzu drops back looking for a heel hook - he quickly realises he's not going to get it but Nukem manages to dive on top of him before he can escape and now Tzu has Nukem in his guard.
Nukem trying to control the position from guard on top but Tzu is wriggling around, looking for whatever he can.
Duke Nukem is fighting for a decision here - he's started to take the cautious approach.
Nukem's corner is telling him to maintain position.
Nukem avoids a guillotine attempt easily.
Nukem tries to free his leg and advance position but Tzu is retaining full guard.
Nukem controls the pace of the fight for a moment.
That's four minutes gone in the round.
The crowd are getting on the fighters' backs, as the pace has dropped off in the last minute or so.
Tzu is trying to control the position but Nukem postures up.
Nukem controlling from the top position.
The referee has motioned to the fighters to stand back up.
Duke Nukem is winning the standup battle so far.
Nukem throws a lazy right hand but Tzu sees it coming a mile off and sidesteps it easily.
Tzu shoots in for a takedown. "I don't think so" says Nukem as he avoids it easily.
Boooooooooooooooooooo!!! God, this has been a terrible round. Come on you two, sort yourselves out!
Tzu misses with a series of wild punches.
Sun Tzu has stepped it up - he knows he needs a finish here!
Tzu with a lazy takedown attempt
and Nukem counters with a straight right hand.
And that's the end of the fight!
That was a close round. You could make an argument for either fighter but I would give it to Duke Nukem.
Well Nukem has outscored his opponent in every aspect of the fight today. Only a scarily incompetent judge or two will keep him from a well deserved win... Over to the ring announcer for the scorecards.
Ladies and gentlemen, after 3 rounds of action, we go to the scorecards for a decision.
Judge Hirohito Nitta scores the fight 30:26
Judge Yukihiro Yamamoto scores the fight 30:27
Judge Sosuke Kotani scores the fight 30:26
In favor of your winner, by unanimous decision... Duke Nukem!
|
|
|
|
|
|
|
|
|
|
|
|
|
|
|
|
|
|
|
|
|
|
|
| S |
C
A |
G |
S |
C
B |
G |
|
S |
C |
G |
|
energy
A | B |
|
hype
A | B |
|
pop
A | B |
|
mgr
A | B |
|
FIGHT
RATING
30% |
|
|
|
|
|
|
|
Undercard bout
|
Coming up we have a lightweight MMA rules bout between Nyongesa Chidike (ranked 3063 p4p, 4399 weight class) and Gavyn Mcintyre (ranked 305 p4p, 420 weight class). Over to our ring announcer for the fighter introductions!
 |
|
 |
| 183 cm
26
165
3 - 1 - 0 |
|
175 cm
26
160
5 - 1 - 0 |
Good wrestling
Basic striking
Cardio machine |
|
Good wrestler
Counter fighter
Powerful |
|
| |
|
Ladies and gentlemen. This fight is 3 rounds, in the lightweight division.
Introducing the fighter to my left, fighting out of the red corner.
With a record of 3 - 1 - 0, fighting out of Los Angeles, Nyongesa Chidike!
And introducing the fighter to my right, fighting out of the blue corner.
With a record of 5 - 1 - 0, fighting out of London, Gavyn Mcintyre!
The judges for this bout are Hirohito Nitta, Yasuomi Hirokawa and Taro Takaoka.
The bell rings for round one and we are underway!
A momentary lapse in concentration from Mcintyre enables Chidike to shoot in and score with a neat double leg. Mcintyre manages to secure a closed guard as the fighters hit the mat.
Chidike is sitting in guard, working some ground and pound.
Mcintyre is looking for a guillotine. You can't force these things though and Chidike defends well.
Mcintyre working a defensive guard here.
Chidike knows he needs to get back to his feet asap. He's simply no match for Mcintyre on the ground.
Mcintyre is active off his back here, looking for submissions.
Mcintyre throwing his legs up looking for a triangle.
Mcintyre is looking for a triangle but Chidike pushes his legs off easily.
Mcintyre working from the bottom, still in full guard. He's managed to get a loose triangle. Chidike doesn't seem to be doing much to defend here, obviously he feels comfortable in the position. Chidike manages to throw the legs off his shoulder and he's back into guard - no problem.
We've had a slow start to the round here - hopefully the action picks up.
Mcintyre can't keep his opponent in guard - Chidike advances to half guard, no doubt looking to mount.
Chidike takes advantage of the dominant position to land a couple of big hammer fists.
Both fighters have adopted an aggressive gameplan on the ground!
That's one minute gone in the round.
Chidike looks towards his corner to check for any instructions. The corner give him nothing to work with, so he cracks Mcintyre with a short hammerfist. I guess that's as good as any advice he could get in this position.
Mcintyre is staying active underneath Chidike, who seems content to just control the action from this position.
Chidike performing his best blanket impression for a moment.
Mcintyre won't allow Chidike to pass to mount.
Chidike lands strikes from half guard.
Chidike is keeping good posture, landing some ground and pound.
The referee walks around the fighters to get a better view of the action. Chidike lands a nice short elbow.
Chidike trying to control the pace.
We get told so often about how wrestlers don't like to be on their backs. Let's see if Mcintyre can do anything to dispel that myth.
Mcintyre taking some punishment here, with Chidike in his half guard.
Mcintyre is rocked!
Mcintyre on the receiving end of some nice ground and pound.
Mcintyre is still in real trouble! Can Chidike finish him?
Mcintyre is refusing to be controlled, as Chidike sits in half guard.
Mcintyre seems to have recovered his senses.
Mcintyre trying to hold on to Chidike's head to control him but Chidike postures up.
Chidike has improved his flexibility recently so we will have to see if he can use that to his advantage.
That's two minutes gone in the round.
Chidike scores with a couple of good hammerfists.
Mcintyre tries to strike from the bottom but it doesn't land.
Chidike looks towards his corner to check for any instructions. The corner give him nothing to work with, so he cracks Mcintyre with a short hammerfist. I guess that's as good as any advice he could get in this position.
Chidike keeping composed on the top, looking to control the action.
Chidike working some ground and pound from close in. He's looking to maintain this position and strike for a while by the looks of things... although he'll probably advance to full mount in a minute now I've said that.
Chidike drops an elbow to the side of Mcintyre's head.
Mcintyre looking for submissions off his back.
The two fighters exchange a few words. I couldn't hear what they were saying but maybe it's more fun if you make it up yourself. Chidike connects with a nice short shot to Mcintyre's temple.
Mcintyre looks winded!
We've seen a great period of action over the last minute or so - credit to both fighters for going all out!
Mcintyre is looking to sinch up a guillotine here but Chidike pulls his head out easily.
Chidike slows the pace down in half guard.
Chidike drops an elbow to the side of Mcintyre's head.
Chidike lands strikes from half guard.
That's three minutes gone in the round.
Chidike is keen to just control but Mcintyre is a slippery customer.
Chidike looks towards his corner to check for any instructions. The corner give him nothing to work with, so he cracks Mcintyre with a short hammerfist. I guess that's as good as any advice he could get in this position.
Chidike scoring with strikes to the body and head.
Chidike is scoring with some nice ground and pound from the dominant position.
The ref warns both fighters not to hold the cage as they work up against the meshing.
Still in half guard, Chidike seems content to control.
The fighters are pressed up against the cage, both looking to find a bit of space to work.
Mcintyre trying to control from the bottom.
Chidike winds up and cracks Mcintyre with a swinging punch to the side of the head.
Mcintyre looking for submissions from an awkward position here.
Chidike is keeping good posture, landing some ground and pound.
Chidike is looking to advance position but Mcintyre won't allow it.
Mcintyre taking some punishment here, with Chidike in his half guard.
Mcintyre is looking to improve his position.
Chidike is looking to advance position but Mcintyre won't allow it.
That's four minutes gone in the round.
Chidike is scoring with some nice ground and pound from the dominant position.
Mcintyre is trying to defend against the ground and pound but Chidike scores with a couple of nice shots.
Mcintyre is looking to improve his position.
The two fighters exchange a few words. I couldn't hear what they were saying but maybe it's more fun if you make it up yourself. Chidike connects with a nice short shot to Mcintyre's temple.
Chidike seems to be taking a bit of a break to think of his next move. He lands a short punch in the meantime.
Ground and pound from Chidike.
It looks like Gavyn Mcintyre has been cut.
The fans in attendance giving it up for the two fighters, who have really let it all hang out in the last minute or so!
Mcintyre makes his way to full guard. A much better position for Mcintyre.
Chidike lands a nice shot whilst sitting in his opponent's guard.
Chidike working in close now, lands a nice elbow to the side of Mcintyre's head.
Chidike postures up and lands some nice ground and pound.
Chidike gets to his feet and stands over Mcintyre, holding his ankles. He dives in with a big left hand that connects! Mcintyre felt that one! Chidike unloads more punches and elbows and this one is over! The ref has dived in to save Mcintyre from any more punishment!
Ladies and gentlemen, after 4:57 of round 1, we have a winner by way of TKO (Strikes). Nyongesa Chidike!
A very excited looking Nyongesa Chidike rambled incoherently for about 5 minutes post fight about how awesome he is. It was kinda funny for a while but then everyone got annoyed.
|
|
|
|
|
|
|
|
|
|
|
|
|
|
|
|
|
|
|
|
|
|
|
| S |
C
A |
G |
S |
C
B |
G |
|
S |
C |
G |
|
energy
A | B |
|
hype
A | B |
|
pop
A | B |
|
mgr
A | B |
|
FIGHT
RATING
43% |
|
|
|
|
|
|
|
Undercard bout
|
Coming up we have a featherweight MMA rules bout between Mason Lesnar (ranked 2878 p4p, 2617 weight class) and Denise Kormier (ranked 231 p4p, 215 weight class). I don't know about you partner, but I'm pumped for this one!
 |
|
 |
| 175 cm
25
152
3 - 2 - 0 |
|
160 cm
23
145
4 - 1 - 0 |
Good wrestling
Counter fighter
KO power |
|
BJJ Purple Belt
Brawler
Granite chin |
|
| |
|
Ladies and gentlemen. This fight is 3 rounds, in the featherweight division.
Introducing the fighter to my left, fighting out of the red corner.
With a record of 3 - 2 - 0, fighting out of Helsinki, Mason Lesnar!
And introducing the fighter to my right, fighting out of the blue corner.
With a record of 4 - 1 - 0, fighting out of St Petersburg, Denise Kormier!
The judges for this bout are Shirou Masuda, Shigeki Sano and Yukihiro Shimada.
The bell rings for round one and we are underway!
Kormier has taken the fight to the clinch.
Kormier working on landing some head shots here - that one got through nicely.
Lesnar has dropped down and is looking to force the takedown but it's defended by Kormier after a bit of a struggle.
Lesnar is trying to work for a single leg takedown but Kormier pulls him back up using the underhooks.
Kormier has hold of a leg and is looking for a trip takedown. Lesnar avoids it nicely though and we remain in the clinch.
Lesnar gets a nice trip takedown into half guard.
We could do with one of the fighters taking the initiative a bit more on the ground - they're both waiting to capitalize on a mistake.
Kormier looking for submissions off his back.
Kormier keeping hold of Lesnar's head, controlling as best he can.
Lesnar drops an elbow to the side of Kormier's head.
Kormier is pressing down on Lesnar's left leg trying to get back to full guard. He's managed it.
Lesnar has to be careful here, sitting in the guard of a superior BJJ player.
Lesnar throws an elbow that misses. Kormier uses the momentum to reverse the position. He's now in Lesnar's guard. Nice move by Kormier!
Lesnar on his back here. We all know that wrestlers don't like being on their back so let's see if Lesnar tries to get out of the position.
That's one minute gone in the round.
Lesnar tries to land a sweep but no joy.
Kormier has decided he wants to stand but the closed guard of Lesnar is proving hard to escape from.
Lesnar is working from a closed guard but he's struggling to control his opponent.
Lesnar looking to sweep using the butterfly guard but Kormier puts pay to that idea as he passes nicely into half guard.
Lesnar definitely looks more muscular than last time we saw him fight.
Kormier wants to lay and pray for a moment but Lesnar keeps working.
Lesnar trying to hold on to Kormier's head to control him but Kormier postures up.
Kormier wants to take a breather but Lesnar is having none of it.
That's two minutes gone in the round.
Well. There's a bit of a lull in the action here and the crowd are starting to get restless.
Lesnar is looking to improve his position.
Lesnar is not content to let Kormier control the position.
Lesnar won't allow Kormier to pass to mount.
That's three minutes gone in the round.
Lesnar is looking to regain full guard. Not this time though.
The referee has decided to stand the fighters back up, so we'll restart on the feet.
Lesnar misses with a jab and misses with a cross straight after too.
Lesnar avoids the head kick by Kormier.
Lesnar dodges the punch combination from Kormier.
Lesnar circles away from the clinch attempt.
We've been informed that Kormier has been working hard on his conditioning in the buildup to the fight.
Kormier misses with a takedown attempt. He shot from a bit too far out.
Kormier pushes Lesnar up against the cage in a clinch.
That's four minutes gone in the round.
Kormier pulls guard.
The fighters are starting to perspire pretty heavily.
Lesnar connects with a couple of short punches.
Kormier manages to sweep nicely, so he's now on top. Lesnar manages to get himself to full guard.
Lesnar pulls Kormier in close to prevent any damage.
The ref warns both fighters not to hold the cage as they work up against the meshing.
Kormier has decided he wants to stand but the closed guard of Lesnar is proving hard to escape from.
The crowd thankful this round is nearly over.
Kormier content to stall in guard here.
Kormier wants to control from the top but Lesnar keeps moving.
And that is the end of the round. The fighters go back to their corners.
Denise Kormier dominated that round.
That's the end of the interval. I'm sure that seemed a lot quicker than a minute for our two fighters! Back to the action.
Kormier looks for a takedown here. Will he get it? Lesnar is fending him off so far but Kormier persists. Nope, Lesnar circles away and we're back to standing.
Lesnar seem to be loading up, looking for a big counter.
Kormier looks to score with a jab to the body but Lesnar is just out of range.
Lesnar leaves Kormier with his face pressed against the mat as he sprawls beautifully, defending against a solid takedown attempt.
Kormier tries to clinch but is not successful on this occasion.
Horrible takedown attempt by Kormier or perhaps it was just good defense by Lesnar, which made it look bad.
Lesnar tries to counter by moving into the clinch but Kormier manages to circle out of the way.
Mason Lesnar has stuffed three takedown attempts in the round now. That's going to take a lot out of Denise Kormier.
We've had a slow start to the round here - hopefully the action picks up.
Lesnar throws a wild combination but nothing lands.
Kormier doesn't manage to clinch there - Lesnar circles away.
Lesnar throws a big counter combination but Kormier scrambles out of danger and avoids any damage.
Kormier drives through with a takedown into guard.
Kormier pressing down on his opponent's thigh, looking to pass guard. Lesnar is keeping the position for now.
Lesnar knows he needs to get back to his feet asap. He's simply no match for Kormier on the ground.
That's one minute gone in the round.
Lesnar has a butterfly guard looking to sweep but Kormier has passed into side control.
Kormier trying to control the position but Lesnar is working away.
Lesnar tries to get back to half guard but can't.
Kormier trying to control the position but Lesnar is working away.
That's two minutes gone in the round.
The crowd are getting on the fighters' backs, as the pace has dropped off in the last minute or so.
Lesnar managing to avoid any damage from the strikes thrown by Kormier.
Lesnar tries to work a leg under to get back to half guard but Kormier wriggles his own leg back out and remains in side control.
The fighters are pressed up against the cage, both looking to find a bit of space to work.
Lesnar defending against the ground and pound.
Lesnar tries to improve position but can't.
Kormier sitting in side control, looking to soften his opponent up with elbows and hammerfists but Lesnar is avoiding damage well and looking to escape the position.
Kormier in side control, throwing shots but Lesnar defends.
Kormier is looking to take a break and control but Lesnar is keeping him honest, looking to work from the bottom.
Denise Kormier has got the better of the ground game so far.
That's three minutes gone in the round.
Kormier is working to tighten his grip on Lesnar's neck. He's isolated an arm and is working for an arm triangle. Lesnar has recognised the danger and is trying to turn with the submission but Kormier is really squeezing tight and eventually Lesnar passes out! Kormier breaks the hold and jumps onto the cage to celebrate! Submission of the night, I'd say!
Ladies and gentlemen, after 3:23 of round 2, we have a winner by way of Submission (Arm Triangle). Denise Kormier!
Mason Lesnar was interviewed post fight and said 'I might have lost the fight tonight, but damn with a mullet like this how could I ever lose in life.'.
|
|
|
|
|
|
|
|
|
|
|
|
|
|
|
|
|
|
|
|
|
|
|
| S |
C
A |
G |
S |
C
B |
G |
|
S |
C |
G |
|
energy
A | B |
|
hype
A | B |
|
pop
A | B |
|
mgr
A | B |
|
FIGHT
RATING
31% |
|
|
|
|
|
|
|
Co-main event
|
Coming up we have a middleweight MMA rules bout between Martin Nejc (ranked 2215 p4p, 2297 weight class) and Dustin Knight (ranked 267 p4p, 272 weight class). Over to our ring announcer for the fighter introductions!
 |
|
 |
| 188 cm
26
195
3 - 1 - 0 |
|
187 cm
25
195
3 - 1 - 0 |
BJJ White Belt
Excellent boxer
Self confident |
|
BJJ White Belt
Decent boxing
Intelligent |
|
| |
|
Ladies and gentlemen. This fight is 3 rounds, in the middleweight division.
Introducing the fighter to my left, fighting out of the red corner.
With a record of 3 - 1 - 0, fighting out of Los Angeles, Martin Nejc!
And introducing the fighter to my right, fighting out of the blue corner.
With a record of 3 - 1 - 0, fighting out of Sydney, Dustin Knight!
The judges for this bout are Shigeki Fujiwara, Shirou Masuda and Yuuki Gou.
The bell rings for round one and we are underway!
Knight scores with a nice head shot.
Decent striking displayed by Nejc there.
Knight throws a hook to the body but it doesn't connect.
A punch combination from Knight misses.
Knight takes a body punch but keeps moving.
Nejc scores with a sloppy right hand. Knight should have avoided that one.
Nejc stalks Knight and leaps in with a furious combination of punches. Uppercuts and crosses smash into Knight's face. Knight staggers backwards, shaken.
Knight swings away with a body shot that misses
letting Nejc counter with a right hand.
Wooooo! Give it up for these two warriors! They are putting on a show!
Knight misses with a lunging right hand
and Nejc counters with a nice right hand that sends Knight toppling to the canvas! Knight scrambles and gets back to his feet - can Nejc finish him?!
Knight is rocked!
Knight swings widly with a right hand
and Nejc counters with a powerful cross that connects right on the chin and the lights go out! A massive one punch knock out!
Ladies and gentlemen, after 0:36 of round 1, we have a winner by way of KO (Punch). Martin Nejc!
Martin Nejc bigged himself up after the win. The crowd seemed to love it.
|
|
|
|
|
|
|
|
|
|
|
|
|
|
|
|
|
|
|
|
|
|
|
| S |
C
A |
G |
S |
C
B |
G |
|
S |
C |
G |
|
energy
A | B |
|
hype
A | B |
|
pop
A | B |
|
mgr
A | B |
|
FIGHT
RATING
100% |
|
|
|
|
|
|
|
Main event
|
Coming up we have a heavyweight MMA rules bout between Zaid Silva (ranked 1631 p4p, 2350 weight class) and Wong Fei Hung (ranked 201 p4p, 284 weight class). Both these guys have solid standup skills and neither is particularly fantastic on the ground, so let's hope for a nice standup war!
 |
|
 |
| 190 cm
27
270
5 - 2 - 0 |
|
197 cm
19
265
3 - 0 - 0 |
BJJ White Belt
Excellent boxer
Very strong |
|
BJJ White Belt
Excellent boxer
Heavy handed |
|
| |
|
Ladies and gentlemen. This fight is 3 rounds, in the heavyweight division.
Introducing the fighter to my left, fighting out of the red corner.
With a record of 5 - 2 - 0, fighting out of London, Zaid Silva!
And introducing the fighter to my right, fighting out of the blue corner.
With a record of 3 - 0 - 0, fighting out of Sydney, Wong Fei Hung!
The judges for this bout are Ren Mimura, Shigeki Sano and Hirohito Nitta.
The bell rings for round one and we are underway!
Fei Hung has his head slapped from side to side by a 3 punch combination. That must have hurt him.
Fei Hung misses with the combination.
Fei Hung misses with a double jab
and Silva counters with a good right hand that lands right on the jaw.
Fei Hung displaying good standup as he scores with a three punch combination.
It looks like Zaid Silva has been cut.
Fei Hung displaying good standup as he scores with a three punch combination.
Silva cracks Fei Hung with a nice right hand that draws applause from the crowd.
We've seen a great period of action over the last minute or so - credit to both fighters for going all out!
Fei Hung keeping his hands up high there, blocking the jab from Silva.
Silva slips a straight right by Fei Hung.
Silva's hands are dropping dangerously low here and Fei Hung connects clean with a right hook that sends him down to one knee! Silva scrambles back to his feet.
Zaid Silva's cut is getting worse.
A combination from Silva does no damage.
Silva lands a jab to the head.
Silva misses with a hook. Fei Hung ducked under it nicely.
Silva looks to throw the jab but Fei Hung is out of range.
Silva misses with an uppercut. Fei Hung saw that one coming.
That's one minute gone in the round.
Silva misses the body punch
and Fei Hung counters with a nice body shot.
Fei Hung lands a pitter patter jab to the forehead of his opponent.
Silva looks to score with a jab to the body but Fei Hung is just out of range.
Silva defending well as Fei Hung loads up on a big left hand.
Fei Hung steps to the side to avoid the strikes from Silva.
Wong Fei Hung seems to be the more aggressive standup fighter in this bout.
Silva pushing out the jab but it's not landing.
A jab from Fei Hung misses.
Silva lands with an uppercut that bounces Fei Hung off the cage and back into range.
Fei Hung avoids a lazy jab quite easily.
Silva misses with a body shot. Nice footwork from Fei Hung.
Fei Hung slips a straight right by Silva.
Fei Hung misses with a jab, cross combination.
Silva swung with a counter right hand that didn't connect.
Silva misses with a hook.
Fei Hung misses with a hook
and Silva counters with a right hand to the body.
Silva throws a right hand that misses
and Fei Hung counters with a left to the body.
That's two minutes gone in the round.
Good shot there by Fei Hung.
Zaid Silva's cut is bleeding quite badly. He's got to try and protect it.
Wooooo! Give it up for these two warriors! They are putting on a show!
Silva throws a right and a left that both miss.
Silva avoids a lazy jab quite easily.
A big left from Fei Hung misses.
A big right from Fei Hung misses.
Fei Hung looks to score with a jab to the body but Silva is just out of range.
Silva was looking to counter that move with a punch but didn't quite pull the trigger.
Silva looks to be in better condition than last time we saw him fight. Obviously he's been working hard on his cardio.
Fei Hung fakes a head punch and goes low to the body. Nicely done.
Silva avoids a punch combination nicely.
Silva rushes in with a sloppy looking punch

and Fei Hung counters with a crisp one two that drops Silva! Fei Hung thinks about following him to the mat for a moment but instead steps back and waves Silva to his feet! Silva is in big trouble!
 Silva is rocked! Silva is rocked!
Fei Hung finds Silva's off switch, with a big overhand right that connects perfectly to the side of the head! Silva flops back against the cage, eyes gazing into the distance. Fei Hung lands an unnecessary shot before the referee has time to step in and end the fight. Brutal stuff but I'm sure Silva will be OK.
Ladies and gentlemen, after 2:51 of round 1, we have a winner by way of KO (Punch). Wong Fei Hung!
|
|
|
|
|
|
|
|
|
|
|
|
|
|
|
|
|
|
|
|
|
|
|
| S |
C
A |
G |
S |
C
B |
G |
|
S |
C |
G |
|
energy
A | B |
|
hype
A | B |
|
pop
A | B |
|
mgr
A | B |
|
FIGHT
RATING
63% |
|
|
|
|
|
|
|
|
|
|
