|
TWGC 42 (185lbs, D2): Las Vegas Qualifier - Round 2 PBP Commentary |
Co-main event
|
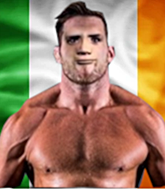
This TWGC bout is 1 fifteen minute round in the middleweight division. Introducing today's competitors. In the red corner, competing out of Montreal, with a TWGC record of 2 wins and 2 losses; Cathal Doherty! And in the blue corner, fighting out of Las Vegas, with a TWGC record of 1 wins and 0 losses; Seamus O Brien!
The judges for this bout are Daniel Franklin, Alan Glass and Tiny Johnson.
The official calls the fighters to the middle and the contest is under way.
A telegraphed takedown attempt from Doherty is defended easily by O Brien.
Doherty fails with a takedown attempt from distance.
O Brien tries to counter by closing the distance.
Doherty fails with a takedown attempt.
O Brien steps in looking to clinch after the strikes miss from Doherty.
That's three failed takedown attempts in the round for Cathal Doherty. That's going to take a lot out of him.
Doherty has his takedown stuffed#CL2#
and O Brien counters by clinching up.
O Brien is looking for a takedown up against the cage. Doherty gets underhooks though and prevents the takedown attempt.
O Brien drops down for a takedown but doesn't get it.
We've had a slow start to the round here - hopefully the action picks up.
O Brien drops to a knee looking for a takedown but Doherty gets the underhooks and prevents it.
O Brien looking for a takedown. #T1#
Doherty stops a takedown attempt from O Brien.
Doherty is trying to work for a single leg takedown but O Brien pulls him back up using the underhooks.
O Brien tries for a takedown but Doherty manages to get underhooks.
O Brien goes for a takedown attempt but Doherty pushes him away and we're back to fighting at a distance.
Doherty misses with a takedown attempt. He shot from a bit too far out.
Doherty will have to do better than that with his takedown attempts.
Doherty fakes high and shoots in for a takedown but O Brien avoids it really well and circles away.
Doherty sets himself, and O Brien steps forward looking for the clinch! Doherty avoids it this time.#CL2#
O Brien moves into the clinch.
Doherty has dropped down and is looking to force the takedown but it's defended by O Brien after a bit of a struggle.
O Brien goes for a takedown attempt but Doherty pushes him away and we're back to fighting at a distance.
#T2##CL2#
O Brien clinches up with Doherty and pushes him back against the cage.
O Brien stops a takedown attempt from Doherty.
Doherty drops down looking for an ankle pick but O Brien pulls his leg out and moves away.
Nice sprawl there from O Brien as Doherty shoots in.#CL2#
O Brien clinches up against the cage.
Doherty can't get the takedown.
O Brien drops down for a takedown but doesn't get it.
Doherty wants a takedown but no success here.
Doherty drops down looking for an ankle pick but O Brien pulls his leg out and moves away.
Doherty changes levels and looks for a double leg takedown. O Brien tries to avoid it but Doherty manages to keep hold of a leg and drag O Brien to the ground. O Brien escapes though and pops straight back up to his feet. #CL2#
O Brien takes the fight into the clinch.
O Brien wants a takedown but no success here.
#T3#
Doherty is working for takedown but O Brien is calmly controlling the position for now.
Doherty stops a takedown attempt from O Brien.
O Brien is working on a leg, looking for a takedown but Doherty is defending well.
Doherty is working for takedown but O Brien is calmly controlling the position for now.
O Brien has hold of a leg and is looking for a trip takedown. Doherty avoids it nicely though and we remain in the clinch.
Doherty is looking for a takedown.
O Brien wants a takedown but no success here.
O Brien prevents a takedown attempt there.
O Brien changes levels and goes for a takedown here. Doherty fights it off and pushes away nicely.
Doherty will have to do better than that with his takedown attempts.
Doherty shoots in but O Brien avoids the takedown attempt easily.
Doherty is breathing heavily.
Doherty fails with a takedown attempt.#T4#
Doherty tries to score a power double leg takedown but O Brien sees that one coming and sprawls well. That will dishearten Doherty somewhat.#CL2#
O Brien has managed to clinch.
Doherty drops down for a takedown but doesn't get it.
Doherty drops down for a takedown but doesn't get it.
Doherty is looking to take this one to the mat.
O Brien has a body lock and is looking for a takedown. Doherty is bouncing around trying to prevent the takedown and somehow he has indeed managed to stay on his feet.
O Brien is defending well against a takedown attempt.#T5#
O Brien drops to a knee looking for a takedown but Doherty gets the underhooks and prevents it.
O Brien stops a takedown attempt from Doherty.
O Brien is looking to take this one to the mat.
O Brien gets double underhooks to prevent a takedown attempt from Doherty.
O Brien tries for a takedown but Doherty manages to get underhooks.
O Brien drops to a knee looking for a takedown but Doherty gets the underhooks and prevents it.
O Brien is trying to work for a single leg takedown but Doherty pulls him back up using the underhooks.
O Brien has hold of a leg and is looking for a trip takedown. Doherty avoids it nicely though and we remain in the clinch.
O Brien is looking for a takedown.
O Brien gets double underhooks to prevent a takedown attempt from Doherty.
O Brien gets double underhooks to prevent a takedown attempt from Doherty.
#T6#
O Brien drops down looking for an ankle pick but Doherty pulls his leg out and moves away.
Doherty shoots in for a takedown. "I don't think so" says O Brien as he avoids it easily.
O Brien wants to counter with a clinch but Doherty pushes him away.
Doherty gets his takedown attempt stuffed easily #CL2#
and O Brien counters into the clinch. Nicely done.
O Brien is working for takedown but Doherty is calmly controlling the position for now.
O Brien is trying to work for a single leg takedown but Doherty pulls him back up using the underhooks.
O Brien looking for a takedown.
Doherty has a body lock and is looking for a takedown. O Brien is bouncing around trying to prevent the takedown and somehow he has indeed managed to stay on his feet.
Doherty is pressed up against the cage. O Brien has hold of a leg and is looking to drag Doherty down to the mat. Doherty avoids the attempt though and has circled away. We're back to striking at a distance.
Doherty throws a looping left and ducks down for a takedown. He's got his arms around O Brien's waist but O Brien gets an underhook and avoids the takedown by throwing Doherty off to one side. #CL2#
Doherty tries to keep at a distance but O Brien has taken the fight into the clinch.
Doherty has O Brien pressed up against the cage and is working for takedown. O Brien manages to improve position though and keeps the fight standing. #T7#
O Brien prevents a takedown attempt there.
O Brien has Doherty pressed up against the cage and is working for takedown. Doherty manages to improve position though and keeps the fight standing.
O Brien prevents a takedown attempt there.
O Brien has a body lock and is looking for a takedown. Doherty is bouncing around trying to prevent the takedown and somehow he has indeed managed to stay on his feet.
O Brien has a body lock and is looking for a takedown. Doherty is bouncing around trying to prevent the takedown and somehow he has indeed managed to stay on his feet.
O Brien is trying to work for a single leg takedown but Doherty pulls him back up using the underhooks.
Doherty tries for a takedown. No joy.
O Brien has hold of a leg and is looking for a trip takedown. Doherty avoids it nicely though and we remain in the clinch.
O Brien looking for a takedown.
O Brien drops down looking for an ankle pick but Doherty pulls his leg out and moves away.
Doherty shoots in for a takedown - he's clinched up with O Brien but O Brien pushes him off and we're back to square one.
Doherty with a poor takedown #CL2#
and O Brien counters by moving into the clinch. Good anticipation by O Brien. #T8#
Doherty goes for a takedown attempt but O Brien pushes him away and we're back to fighting at a distance.
O Brien stuffs the takedown attempt from Doherty. Doherty gets slowly back to his feet.
Doherty shoots in for a takedown - he's clinched up with O Brien but O Brien pushes him off and we're back to square one.#CL2#
O Brien clinches up with Doherty and pushes him back against the cage.
O Brien has hold of a leg and is looking for a trip takedown. Doherty avoids it nicely though and we remain in the clinch.
O Brien has dropped down and is looking to force the takedown but it's defended by Doherty after a bit of a struggle.
Doherty is working on a leg, looking for a takedown but O Brien is defending well.
O Brien drops to a knee looking for a takedown but Doherty gets the underhooks and prevents it.
O Brien prevents the takedown attempt.
#T9#
Doherty gets double underhooks to prevent a takedown attempt from O Brien.
O Brien drops to a knee looking for a takedown but Doherty gets the underhooks and prevents it.
Doherty goes for a takedown attempt but O Brien pushes him away and we're back to fighting at a distance.
#CL2#
O Brien rushes Doherty and pushes him back against the cage in a clinch.
Doherty is working for takedown but O Brien is calmly controlling the position for now.
O Brien drops to a knee looking for a takedown but Doherty gets the underhooks and prevents it.
O Brien wants a takedown.
Doherty drops down looking for an ankle pick but O Brien pulls his leg out and moves away.
#T10#
Doherty throws a looping left and ducks down for a takedown. He's got his arms around O Brien's waist but O Brien gets an underhook and avoids the takedown by throwing Doherty off to one side.
Doherty changes levels and looks for a double leg takedown. O Brien tries to avoid it but Doherty manages to keep hold of a leg and drag O Brien to the ground. O Brien escapes though and pops straight back up to his feet. #CL2#
O Brien clinches up against the cage.
O Brien is working for takedown but Doherty is calmly controlling the position for now.
O Brien gets underhooks to prevent Doherty's takedown attempt.
O Brien tries for a takedown but Doherty manages to get underhooks.
O Brien drops down for a takedown but doesn't get it.
O Brien wants to take the fight to the mat but Doherty manages to get underhooks and keep the fight in the clinch.
Doherty has hold of a leg and is looking for a trip takedown. O Brien avoids it nicely though and we remain in the clinch.
O Brien is working for a takedown up against the cage. He can't get it on this occasion though.
O Brien wants to take the fight to the mat but Doherty manages to get underhooks and keep the fight in the clinch.
Doherty prevents the takedown attempt.
Doherty changes levels and goes for a takedown here. O Brien fights it off and pushes away nicely.
#T11#
O Brien tries to clinch there but Doherty circles away.
O Brien defends well against a solid takedown attempt from Doherty.
Doherty looks for a takedown but O Brien sprawls well.
Doherty fails to land the takedown.
Doherty tries to shoot in for a takedown. He's got hold of a leg but O Brien swivels and escapes.
O Brien keeps the fight standing with a nice sprawl.#CL2#
The fight moves into the clinch position.
O Brien is looking to take this one to the mat.#T12#
O Brien is pressed up against the cage. Doherty has hold of a leg and is looking to drag O Brien down to the mat. O Brien avoids the attempt though and has circled away. We're back to striking at a distance.
Doherty closes this distance looking for a takedown but O Brien circles away.
O Brien wants to counter with a clinch but Doherty pushes him away.#CL2#
O Brien closes the distance and clinches.
O Brien wants to take the fight to the mat but Doherty manages to get underhooks and keep the fight in the clinch.
O Brien has hold of a leg and is looking for a trip takedown. Doherty avoids it nicely though and we remain in the clinch.
O Brien is trying to work for a single leg takedown but Doherty pulls him back up using the underhooks.
O Brien stops a takedown attempt from Doherty.
Doherty is looking for a takedown.
O Brien wants to take the fight to the mat but Doherty manages to get underhooks and keep the fight in the clinch.
O Brien is working for takedown but Doherty is calmly controlling the position for now.
O Brien wants a takedown but no success here.
O Brien is looking for a takedown.
O Brien prevents a takedown attempt there.
Doherty is looking to take this one to the mat.#T13#
Doherty has O Brien pressed up against the cage and is working for takedown. O Brien manages to improve position though and keeps the fight standing.
O Brien goes for a takedown in the clinch but Doherty prevents it.
O Brien tries for a takedown but Doherty manages to get underhooks.
Doherty drops down looking for an ankle pick but O Brien pulls his leg out and moves away.
Doherty shoots in for a takedown but O Brien shows good takedown defense there and keeps this one on the feet.#CL2#
O Brien closes the distance and presses his opponent up against the cage.
O Brien looking for a takedown.
Doherty changes levels and goes for a takedown here. O Brien fights it off and pushes away nicely.
O Brien stuffs the takedown.
O Brien is trying to avoid his opponent's strikes and get into the clinch.#CL2#
O Brien moves into the clinch.
Doherty goes for a takedown attempt but O Brien pushes him away and we're back to fighting at a distance.
Doherty looks for a takedown but O Brien sprawls well.#T14##CL2#
O Brien closes the distance and presses his opponent up against the cage.
O Brien drops to a knee looking for a takedown but Doherty gets the underhooks and prevents it.
Doherty is working for takedown but O Brien is calmly controlling the position for now.
O Brien gets double underhooks to prevent a takedown attempt from Doherty.
Doherty is pressed up against the cage. O Brien has hold of a leg and is looking to drag Doherty down to the mat. Doherty avoids the attempt though and has circled away. We're back to striking at a distance.
The crowd thankful this round is nearly over.
Doherty tries to shoot in for a takedown. He's got hold of a leg but O Brien swivels and escapes.
Doherty misses with a takedown attempt - O Brien sprawls well and throws a nice strike on the way out which just misses.
And that's the end of the fight!
As we have tied on points and both fighters attempted the same number of subs, we will decide the bout based on the toss of a coin! Doherty is heads and O Brien is tails.
The coin is in the air and it lands... heads!
Doherty takes the fight on points by 1 to 0.
A relieved looking Cathal Doherty thanked the fans for their support and gave the usual line about them being amazing. They seemed to believe that he actually meant it. |
|
|
|
Main event
|
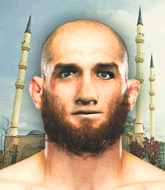
This TWGC bout is 1 fifteen minute round in the middleweight division. Introducing today's competitors. In the red corner, competing out of Montreal, with a TWGC record of 2 wins and 4 losses; Leg Humpa! And in the blue corner, fighting out of Rio de Janeiro, with a TWGC record of 1 wins and 0 losses; Akhmed Dudayev!
The judges for this bout are Gwen Towbar, George Francis and Wesley Smith.
The fighters connect hands in the middle of the mat and we are under way.#CL2#
Dudayev gets in close and instigates a clinch. #TD2#
Dudayev is trying to trip Humpa. He has hold of a leg but Humpa is hopping around, keeping his balance for the moment. Dudayev persists though and gets the takedown into guard. Score +2 for takedown into guard / half guard: Humpa (0) vs (2) Dudayev#SUB#
Humpa has a loose triangle. He'll be looking to tighten that up but Dudayev can see exactly what he's planning and manages to posture up and free himself.
Dudayev's corner is telling him to maintain position.
Dudayev stopping the sweep attempt from Humpa.
Dudayev must be cautious of submissions here, given that his opponent has the superior Jiu Jitsu.
Dudayev is frustrating his opponent with some stalling tactics from top position.
We've had a slow start to the round here - hopefully the action picks up.
Dudayev preventing the sweep.
Humpa being controlled here, momentarily. #T1#
Humpa can't keep his opponent in guard - Dudayev advances to half guard, no doubt looking to mount.
Dudayev takes a deep breath and rests his weight momentarily on top of his opponent, to control the position.
Humpa tries to get to full guard but Dudayev has control of the leg.
Dudayev tries to pass the half guard into mount. Humpa knows what he's doing though and prevents the attempt.
The ref warns both fighters not to hold the cage as they work up against the meshing.
Dudayev trying to control the pace.
Humpa is looking to improve his position.
#T2#
Dudayev stalling.
Humpa is looking to regain full guard. Not this time though.
Humpa is working hard here to advance position.
Dudayev is controlling the pace.
#T3#
Dudayev is thwarting Humpa's attempts to control the position.
Still in half guard, Dudayev seems content to control.
Humpa wants to get back to full guard.
Dudayev controlling the action here.
Dudayev is continuing to stall.#T4#
Humpa trying to hold on to Dudayev's head to control him but Dudayev postures up.
Humpa manages to get to full guard.
Dudayev not doing a lot at the moment. He'll have to show some more aggression or the fight will get stood up. #T5#
The fighters are pressed up against the cage, both looking to find a bit of space to work.
Humpa tries to land a sweep but no joy.
There's a bit of a scramble here and now Humpa is on top in guard.
Score +2 for sweep to guard / half guard: Humpa (2) vs (2) Dudayev
Dudayev controlling Humpa's posture.
Humpa preventing the sweep. #T6#
Dudayev keeping moving, preventing Humpa from controlling successfully.
Humpa tries to free his leg and advance position but Dudayev is retaining full guard.
Dudayev trying to control the position here.
Humpa looking to pass the guard. #T7#
Humpa works a leg free and moves into half guard.
Dudayev is not content to let Humpa control the position.#SUB#
Humpa is looking for a kimura but he's never going to get it from there.
Dudayev felt the need to train up his defensive grappling in the buildup to the fight. Presumably he was expecting to be in a difficult position like this, so let's see if he can get out of it.
Humpa with a momentary lay and pray from half guard.
Dudayev wants to improve his position but Humpa is controlling well.
#T8#
Humpa stalling away here and it's allowed Dudayev to slip out his trapped foot and regain full guard.
Dudayev keeping full guard, as Humpa tries to pass.
Dudayev managing to control the position. #T9#
Humpa trying to pass the guard but can't manage it just yet.
Dudayev has control of Humpa's left arm, preventing Humpa from doing any damage.
Humpa trying to pass the guard but can't manage it just yet.
Humpa passes Dudayev's right leg, so he's now in half guard.
Humpa trying to control from half guard but Dudayev is working away. #T10##SUB#
Humpa is trying a forearm choke� I don't think that's going to do much at this level of the game.
#SUB#
Humpa is looking for an arm triangle, whilst trying to pass to side control. Dudayev doesn't seem that keen to cooperate though. No luck this time Humpa.
Dudayev has his hands clasped together around Humpa's back. He's all about the action.#T11#
Humpa works his way into full mount! Score +3 for passing guard: Humpa (5) vs (2) Dudayev
Dudayev is working to get back to half guard.
Humpa trying to control but he's not successful this time. #T12#
Dudayev is trying desperately to improve position.#SUB#
Humpa goes for an armbar but he's fallen flat on his backside there and now Dudayev is on top in guard.
Score +2 for sweep to guard / half guard: Humpa (5) vs (4) Dudayev
Dudayev slows down the pace of the fight, as he sits in guard. #SUB#
Humpa is throwing his legs up, looking for submissions. Dudayev is aware though and is defending well.
Dudayev not doing a lot at the moment. He'll have to show some more aggression or the fight will get stood up. #T13#
Humpa trying to control the position.
Humpa is really struggling to control Dudayev but he's trying to hold on to the position.
Dudayev showing good wrestling skills to control the position.
Humpa tries to land a sweep but no joy.
Dudayev is intent on slowing down the pace of the fight, simply looking to control.#T14#
Humpa wants to sweep here but Dudayev controlling him for the moment.
Humpa trying to control the position.
Boooooooooooooooooooo!!! God, this has been a terrible round. Come on you two, sort yourselves out!
Dudayev showing good wrestling skills to control the position.
And that's the end of the fight!
Humpa takes the fight on points by 5 to 4. |
|
|
|
|
|
|