|
|
PBP Commentary |
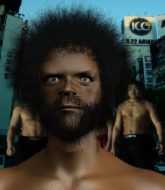
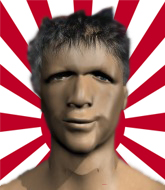
Coming up we have a welterweight MMA rules bout between Conor Butcher (ranked 486 p4p, 672 weight class) and Keisuke Matsuzaka (ranked 75 p4p, 106 weight class). Chooooooooon! I think Butcher might be my favorite fighter, now he's come out to Eaten by Bloodbath. Both these guys have really solid chins. Will we see a standup war or will they both decide that a knockout is unlikely and try to win the fight elsewhere?
 |
|
 |
| 173 cm
21
169
8 - 1 - 0 |
|
179 cm
21
181
7 - 0 - 0 |
Good wrestling
Solid boxing
Granite chin |
|
BJJ Purple Belt
Great elbows
Good gas tank |
|
| |
|
Ladies and gentlemen. This fight is 5 rounds, for the welterweight championship of the world!
Introducing the champion to my left, fighting out of the red corner.
With a record of 8 - 1 - 0, fighting out of London, Conor Butcher!
And introducing the challenger to my right, fighting out of the blue corner.
With a record of 7 - 0 - 0, fighting out of Montreal, Keisuke Matsuzaka!
The judges for this bout are Emerson Jorge, Felipe Paraventi and Leandro Rodrigues.

The bell rings for round one and we are underway!
The bell rings for round one and we are underway!
Butcher slips in close and lands a nice hook before moving back out of range.

Butcher clinches.
A right hand to the body from Butcher.
Butcher tried to land a shot to the body but connects with Matsuzaka's elbow.
Butcher tries a shoulder strike but it doesn't do any damage.
Butcher digs a right hand into Matsuzaka's ribs. Those have got to be taking their toll on Matsuzaka's gas tank.
Matsuzaka prevents a body shot from Butcher.

Matsuzaka pushes off and circles away, back to the middle of the mat.
Matsuzaka takes a shot to the nose. Hopefully that hasn't broken it.
Butcher drops his hands momentarily and Matsuzaka takes advantage with a crisp shot to the head.

It looks like Conor Butcher has been cut.
Matsuzaka cracks Butcher with a right hand to the side of the head.
A lazy left from Butcher finds it's target.
Decent striking displayed by Matsuzaka there.
The crowd are loving this. Great action here.
Matsuzaka looks to land a right hand but Butcher moved out of range.
Butcher scores with a jab to the head.
Butcher uses good head movement to avoid the hook from Matsuzaka.
Matsuzaka uses good footwork to get in and out, landing a nice hook.
Butcher seems to be moving with more speed, compared to his last bout. He must have been working on that in the gym.
Butcher pushes Matsuzaka up against the cage in a clinch.

Butcher has picked Matsuzaka up - he's going for a ride! Butcher dumps his opponent to the mat with a thud and settles into half guard.
Matsuzaka regains full guard, whilst avoiding punches from Butcher.

That's one minute gone in the round.
Butcher throwing shots from guard but he's hitting more mat than opponent.
Butcher throwing elbows and punches but not connecting, as Matsuzaka works some decent striking defense from the bottom.
A big thud reverberates around the arena there as Butcher accidentally thumps the mat. Hopefully he's not broken his hand.
Matsuzaka utilising some decent striking defenses from the guard, preventing the ground and pound.
Butcher trying to control the position from guard on top but Matsuzaka is wriggling around, looking for whatever he can.
Butcher chips away with some ground and pound.
Butcher makes a bit of distance and scores with some ground and pound, still in guard.
Butcher throwing strikes from guard but Matsuzaka blocks nicely.
Butcher works a leg free and moves into half guard.
Butcher is controlling the pace.
Butcher thows a wild elbow that connects with the canvas.

That's two minutes gone in the round.
Butcher trying to mount his opponent but Matsuzaka defends it.
Butcher sitting in half guard, looking to land shots. Matsuzaka defending well though.
Butcher is keen to just control but Matsuzaka is a slippery customer.
We get told so often about how wrestlers don't like to be on their backs. Let's see if Matsuzaka can do anything to dispel that myth.
Butcher not throwing his punches with enough precision this time.
Butcher not throwing his punches with enough precision this time.
The ref warns both fighters not to hold the cage as they work up against the meshing.
Butcher thows a wild elbow that connects with the canvas.
Butcher lands strikes from half guard.
Butcher winds up and cracks Matsuzaka with a swinging punch to the side of the head.
Butcher throwing shots but Matsuzaka is blocking nicely.

That's three minutes gone in the round.
Matsuzaka taking some punishment here, with Butcher in his half guard.
The fighters are pressed up against the cage, both looking to find a bit of space to work.
Matsuzaka blocking the ground and pound attempt from Butcher.
Butcher is looking to take a break and control but Matsuzaka is keeping him honest, looking to work from the bottom.
Butcher has been looking to land a fair amount of strikes on the ground. He might be looking to soften his opponent up in order to work for a submission.
Butcher thows a huge punch but Matsuzaka dodges it nicely.
Matsuzaka felt the need to train up his defensive grappling in the buildup to the fight. Presumably he was expecting to be in a difficult position like this, so let's see if he can get out of it.
Matsuzaka keeping his head moving to avoid the ground and pound.
Matsuzaka is trying to control but can't.
Butcher throws a strike but Matsuzaka avoids it easily and moves to full guard.
Butcher with a flurry of punches that miss.
Butcher stays in close to Matsuzaka's body and controls the position.
Matsuzaka working the defensive guard well to avoid strikes from Butcher.
Butcher slips nicely into half guard.
Butcher takes advantage of the dominant position to land a couple of big hammer fists.

That's four minutes gone in the round.
Butcher throwing shots but Matsuzaka is blocking nicely.
Matsuzaka avoiding damage under a succession of punches from Butcher.
Butcher trying to control from half guard but Matsuzaka is working away.
Butcher missing with the ground and pound from half guard.
Butcher is looking to pass the guard... He's managed it - he's now in full mount!
Butcher landing shots from mount.
Butcher lands a couple of good shots and Matsuzaka has given up his back, trying to escape the position!
The crowd are loving this. Great action here.
Butcher misses with punches from the back.
Matsuzaka takes a big shot to the side of the head.
Butcher throwing strikes from the back - he gets a warning from the referee for striking the back of the head but all these shots are hurting Matsuzaka!
Butcher punches the canvas rather than the man.
And that�s the end of the round � the fighters go back to their corners.
Conor Butcher dominated that round.
The cut man is working on Conor Butcher's cut.
Well, the break between rounds is over. Let's get back to the scrappin!

Matsuzaka leaves Butcher with his face pressed against the mat as he sprawls beautifully, defending against a solid takedown attempt.
Butcher has taken the fight to the clinch.
Butcher is looking to take this one to the mat.
Matsuzaka goes for a body shot but it's blocked.
Matsuzaka breaks the clinch and we return to the middle of the mat.
A telegraphed takedown attempt from Butcher is defended easily by Matsuzaka.
That's three failed takedown attempts in the round for Conor Butcher. That's going to take a lot out of him.
Matsuzaka steps to the side to avoid the strikes from Butcher.
Matsuzaka throws an uppercut from half a mile away. Butcher sees it coming and avoids it easily.
Conor Butcher seems to be the more aggressive standup fighter in this bout.
We've had a slow start to the round here - hopefully the action picks up.
Butcher tries to close the distance and clinch up against the cage but Matsuzaka paws at him with a jab and circles away.
Matsuzaka throws out a token jab with nothing on it.
Matsuzaka looks to land a left hand but Butcher moved out of range nicely.
Matsuzaka misses the body punch
and Butcher counters into the clinch. Nicely done.
Butcher goes for a body shot but it's blocked.
That's one minute gone in the round.
Matsuzaka struggles to land a body shot inside as Butcher controls his hands.
Butcher tries to take the fight to the ground by pulling guard but can't manage it.
Butcher dodges an elbow strike from Matsuzaka.
Matsuzaka wants to break free but Butcher has control.
Matsuzaka's head jolts backwards as he takes an uppercut right on the button!
Butcher misses with some punches.
Butcher misses with a punch to the body.
Butcher works for underhooks and lands a body shot in the process.
Butcher tries to pull guard but Matsuzaka forces him back to his feet, against the cage.
A quick uppercut on the inside from Butcher.
Matsuzaka throws an elbow that misses.
Butcher can't get the takedown.
Butcher is looking for a takedown up against the cage. Matsuzaka gets underhooks though and prevents the takedown attempt.
Butcher pulls guard effortlessly.

Butcher looking for submissions off his back, moving his hips, looking for an opening.
Butcher wants to sweep but no luck.
That's two minutes gone in the round.
Butcher working a defensive guard but Matsuzaka manages to pass into side control anyway.
Butcher is trying to improve his position.
Butcher looks to move to half guard but instead Matsuzaka has passed into mount! Damn!
Matsuzaka sitting in mount, just looking to control for the moment.
Butcher really trying hard to get back to half guard here.
That's three minutes gone in the round.
Butcher is working hard here to advance position.
Butcher wants to hold on but Matsuzaka pushes him away.
Butcher is working to get back to half guard.
That's four minutes gone in the round.
Butcher wants to control but Matsuzaka is having none of it.
Butcher is trying to reverse the position but instead Matsuzaka has taken his back - oops!
Matsuzaka tries to get the hooks in deep but Butcher pushed the leg off.
Butcher tries to escape the position - he's now mounted. Is that better or worse? Hard to tell!
Butcher tries to reverse the position but Matsuzaka maintains control.
Butcher is really dominating this fight. Is there anything that Matsuzaka can do to turn this around?
Conor Butcher overall seems to be getting the better of the ground position in the fight so far.
The crowd thankful this round is nearly over.
Butcher regains half guard.
Butcher is looking to regain full guard. Not this time though.
And that�s the end of the round � the fighters go back to their corners.
A close second round but Keisuke Matsuzaka will probably get the nod - 10:9.
The cut man is working on Conor Butcher's cut.
That's the end of the interval. I'm sure that seemed a lot quicker than a minute for our two fighters! Back to the action.

Matsuzaka throws a big shot that misses.
Butcher looks for a takedown but Matsuzaka sprawls well.
Matsuzaka misses the jab.
Matsuzaka misses the jab.
Matsuzaka lands a nice looking body shot.
Butcher with poor footwork there. He got himself in a bit of a tangle, enabling Matsuzaka to score with a decent uppercut.
A swing and a miss from Matsuzaka.
Butcher tries to counter with a takedown but Matsuzaka is quick to defend against it.
Matsuzaka throws a combination but comes up with nothing but fresh air.
Butcher gets his takedown attempt stuffed easily
and Matsuzaka counters nicely by changing levels and landing a hook to the body.
We've had a slow start to the round here - hopefully the action picks up.
Matsuzaka scores with a punch to the gut of his opponent.
Matsuzaka dips to his left and cracks Butcher with an uppercut!
Matsuzaka circles away from the clinch attempt.
Matsuzaka slips under a jab from Butcher.
Decent striking displayed by Butcher there.
That's one minute gone in the round.
Butcher tries to clinch but Matsuzaka moves out of range.
Butcher has his head snapped back a nice jab. A little nod from Butcher there as he acknowledges the shot.
Matsuzaka misses the shot to the body.
Butcher takes the fight into the clinch.
Butcher tries a shoulder strike but it doesn't do any damage.
Butcher gets control of Matsuzaka's arms and successfully pulls guard. Butcher will no doubt be looking for submissions off his back.
Butcher is trying to control the position from the bottom.
There's a bit of a scramble here and now Butcher is on top in guard.

Butcher trying to pass the guard. He's being very persistent here but Matsuzaka manages to land a sweep and now he's on top!

Butcher looking for a sweep. Not yet Butcher, not yet.
That's two minutes gone in the round.
Matsuzaka trying to control the position from guard on top but Butcher is wriggling around, looking for whatever he can.
Butcher bucks up whilst keeping hold of a body lock, managing to reverse the position. Now he's in top in Matsuzaka's guard.
Butcher missing there with some ground and pound from the guard.
Butcher with a couple of shots to the head there. Not particularly brutal.
This has been an exciting period of action!
Butcher trying to control the position from guard on top but Matsuzaka is wriggling around, looking for whatever he can.
Butcher with a flurry of punches that miss.
Matsuzaka working the defensive guard well to avoid strikes from Butcher.
Matsuzaka utilising some decent striking defenses from the guard, preventing the ground and pound.
Matsuzaka lands a beautiful sweep and he's now moved into his opponent's guard.
Butcher had isolated an arm as going for a kimura. Matsuzaka defends it easily.
That's three minutes gone in the round.
Butcher not looking particularly offensive just at the moment.
Butcher looking to hit a scissor sweep but Matsuzaka is one step ahead there.
Butcher controls Matsuzaka momentarily but Matsuzaka frees himself.
Matsuzaka is fighting to break Butcher's control of his arms but Butcher is doing a good job of controlling the position at the moment.
Butcher wants to sweep but no luck.
Matsuzaka trying to control but Butcher is working from the bottom.
That's four minutes gone in the round.
Neither fighter has done anything of merit for a good minute or two here and the crowd are not happy about it.
Matsuzaka stopping the sweep attempt from Butcher.
Matsuzaka really doesn't want to stay on the ground with Butcher. If he can't get it back to his feet, it's only a matter of time before he'll be tapping out.

The referee has decided to stand the fighters back up, so we'll restart on the feet.
Butcher takes a solid shot to the body. That one hurt him but he's trying not to show it.
Matsuzaka tests Butcher's chin there with a solid looking shot.
Matsuzaka connects with a right hand. Butcher shakes it off.
A big left from Butcher misses.
Butcher blocks a jab.
Butcher is trying to close the distance and clinch up, after that failed offence from Matsuzaka.
Butcher tries to clinch but Matsuzaka moves away
and Matsuzaka counters with a nice uppercut.
Keisuke Matsuzaka is looking to keep the fight on the feet at all costs.
Matsuzaka swings for the body but Butcher moves out of range.
And that�s the end of the round � the fighters go back to their corners.
Keisuke Matsuzaka really dominated that round.
The cut man is working on Conor Butcher's cut.
The fighters' corners scream their final instructions, as the referee calls time. Here we go, back to the action!

Matsuzaka gets tackled into the cage by Butcher. Butcher maintains the clinch.
A short right from Butcher on the inside.
Matsuzaka is trying to break free.
Matsuzaka lands an elbow inside.
Matsuzaka tries to circle away but Butcher has him pinned against the cage.
Butcher takes an elbow to the forehead.
Matsuzaka blocks an uppercut.
Butcher tries to pull guard but Matsuzaka won't allow it.
Butcher throws a blind hook that connects with the side of Matsuzakas head.
Butcher misses with a hook from the clinch.
Matsuzaka's corner calls for him to break the clinch, which he does.
Matsuzaka misses with a wild body shot.
We've had a slow start to the round here - hopefully the action picks up.
Butcher jabbing away but nothing is landing.
A lazy left from Matsuzaka finds it's target.
Butcher closes the distance and presses his opponent up against the cage.
Butcher blocking some punches.
Butcher jumps guard and drags Matsuzaka to the mat. He's obviously going to be looking for submissions off his back.
That's one minute gone in the round.
Matsuzaka got a little sloppy there for a moment and Butcher has worked his way into a loose triangle - can he finish it?! No, Matsuzaka has managed to get both his arms back between Butcher's legs - danger averted.
Butcher working for a triangle but Matsuzaka defends it easily.
Butcher looking to sweep here. No luck so far.
Matsuzaka looking to pass the guard.
Butcher bucks up whilst keeping hold of a body lock, managing to reverse the position. Now he's in top in Matsuzaka's guard.
Matsuzaka is working an open guard here, looking to improve his position. No doubt that will leave him open to counters but at least he's being more offensive.
A big thud reverberates around the arena there as Butcher accidentally thumps the mat. Hopefully he's not broken his hand.
That's two minutes gone in the round.
Butcher postures up in Matsuzaka's guard and throws a big left but Matsuzaka blocks it.
Butcher is in close to Matsuzaka's body, working some short punches and elbows.
Matsuzaka lands a beautiful sweep and he's now moved into his opponent's guard.
Butcher looking to hit a scissor sweep but Matsuzaka is one step ahead there.
Butcher wants to hit a sweep here but Matsuzaka passes into full mount! Oh no, disaster for Butcher there!
Butcher is wriggling around trying to escape.
That's three minutes gone in the round.
Butcher sneaks a leg back under and regains half guard and is working straight away to try and get back to guard. He hasn't managed just yet though.
Butcher is not content to let Matsuzaka control the position.
Butcher tries to get to full guard but Matsuzaka has control of the leg.
Butcher wants to control the action here but instead Matsuzaka manages to pass to full mount!
Butcher is looking to improve his position but Matsuzaka isn't that keen on the idea.
Butcher sneaks a leg under to get to half guard.
Butcher wants to get back to full guard.
That's four minutes gone in the round.
Butcher wants to sweep but Matsuzaka has passed to side control!
Butcher is trying to get back to half guard.
You can see the frustration on Butcher's face, being in this tough position on the bottom.
Butcher is looking to regain half guard here but Matsuzaka keeps moving and retains side control.
The crowd thankful this round is nearly over.
And that�s the end of the round � the fighters go back to their corners.
That was a close fourth round but I would say that Conor Butcher will probably get the nod.
The cut man is working on Conor Butcher's cut.
The minute break is over - no more time for sponges and pep talks - back to the action! Ladies and gentlemen, this is the final round!

Matsuzaka misses with a straight left.
Matsuzaka lands with a right hand.
Butcher fails with the takedown.
Matsuzaka throws a poor cross that misses
and Butcher decides to take the opportunity to score a takedown. He's landed in Matsuzaka's guard.
Matsuzaka pulls Butcher in close to his closed guard and prevents Butcher from doing any damage or advancing position.
A big thud reverberates around the arena there as Butcher accidentally thumps the mat. Hopefully he's not broken his hand.
We've had a slow start to the round here - hopefully the action picks up.
Matsuzaka is trying to keep Butcher in close.

Matsuzaka is working actively off his back, looking to secure an arm or perhaps work for a triangle.
Butcher looking to pass the guard.
That's one minute gone in the round.
Matsuzaka working a defensive guard here.
Butcher trying to land body shots but he keeps hitting the mat.
Butcher throws a strike but Matsuzaka rolls with it and manages to sweep. Now he's in guard on top.
Butcher is trying to control the position from the bottom.
Butcher is working the butterfly guard. He manages to land a nice scissor sweep and is now in half guard on the top. Nice move.
Butcher throwing shots but Matsuzaka is blocking nicely.
Butcher tries to pass to full mount but Matsuzaka defends it.
That's two minutes gone in the round.
Butcher is trying to control the action in half guard but Matsuzaka is working away on the bottom, looking perhaps to get back to full guard.
Matsuzaka is trying to defend against the ground and pound but Butcher scores with a couple of nice shots.
Butcher not throwing his punches with enough precision this time.
Butcher passes to side control.
Butcher misses with the ground and pound.
The referee tells the fighters to keep busy.
Matsuzaka tries to control but Butcher manages to take his back.
Matsuzaka avoids the strikes from Butcher.
Butcher punishes Matsuzaka with strikes from the back mount.
Butcher misses with an elbow to the head.
That's three minutes gone in the round.
Matsuzaka staying busy and making it hard for Butcher to control.
Matsuzaka covering up well under a series of strikes from Butcher.
Butcher thows a huge left but connects with the canvas and not his opponent.
Butcher throwing sloppy strikes.
Butcher connects with a series of strikes and the referee is calling for Matsuzaka to escape the position.
Butcher missing with punches from the back.
Butcher connects with a big shot to the side of Matsuzaka's head.
Butcher biding his time, controlling Matsuzaka.
Butcher controlling well, preventing Matsuzaka from escaping the position.
That's four minutes gone in the round.
Can Matsuzaka hold on?! Butcher is landing more strikes to his hapless foe.
Butcher is landing with strikes. Matsuzaka can't take much more of this.
Matsuzaka is trying to remain composed but Butcher is hammering down strikes to the side of his head.
Butcher thows a huge left but connects with the canvas and not his opponent.
Matsuzaka has his hands over his head blocking the strikes from Butcher.
Butcher has Matsuzaka flattened out and is raining down punches.
The crowd are loving this. Great action here.
Matsuzaka covering up well and avoiding damage.
Butcher throwing sloppy strikes.
Matsuzaka covering up well under a series of strikes from Butcher.
Butcher wants to control the position but Matsuzaka frees himself and scrambles - Butcher manages to regain control in side control.
And that's the end of the fight!
Conor Butcher showed his dominance in that final round.
I think Butcher has won this one but let's see what the judges have to say. Over to the ring announcer for the scorecards.
Ladies and gentlemen, after 5 rounds of action, we go to the scorecards for a decision.
Judge Emerson Jorge scores the fight 47:48
Judge Felipe Paraventi scores the fight 48:47
Judge Leandro Rodrigues scores the fight 48:48
The fight is ruled a draw!
Conor Butcher retains his title. It's always disappointing when a championship fight ends as a draw but that's what happens when you leave the fight in the judges hands!
|
|
|
|
|
|
|
|
|
|
|
|
|
|
|
|
|
|
|
|
|
|
|
| S |
C
A |
G |
S |
C
B |
G |
|
S |
C |
G |
|
energy
A | B |
|
hype
A | B |
|
pop
A | B |
|
mgr
A | B |
|
FIGHT
RATING
47% |
|
|
|
|
|
|
