|
|
PBP Commentary |
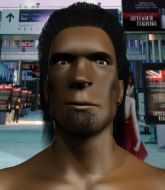
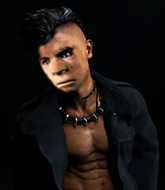
Coming up we have a lightweight MMA rules bout between Tyler Wrexham (ranked 164 p4p, 355 weight class) and Mark Boma (ranked 24 p4p, 51 weight class). Both fighters look fresh as a daisy as they make their way towards the cage.
 |
|
 |
| 178 cm
38
163
43 - 19 - 2 |
|
171 cm
35
155
14 - 7 - 3 |
Abu Dhabi Champ
World class boxer
Insanely flexible |
|
Olympic wrestler
World class MT
Good gas tank |
|
| |
|
Ladies and gentlemen. This fight is 3 rounds, in the lightweight division.
Introducing the fighter to my left, fighting out of the red corner.
With a record of 43 - 19 - 2, fighting out of Los Angeles, Tyler Wrexham !
And introducing the fighter to my right, fighting out of the blue corner.
With a record of 14 - 7 - 3, fighting out of Las Vegas, Mark Boma!
The judges for this bout are Donald Grub, James Ackerman and Phil Schofield.

The bell rings for round one and we are underway!
Wrexham ducks under a wild hook from Boma.
Boma misses with a looping right.
Wrexham swings away but doesn't land with a series of punches.
Wrexham moves out of range of the strikes.
A big left from Wrexham misses.
Boma throws a nice outside leg kick.
Boma jabbing away but nothing is landing.
Wrexham throwing a counter right hand but Boma manages to avoid it.
Wrexham fakes high and swings low for a body shot but Boma manages to avoid it.
Wrexham blocks a leg kick.
A kick lands to the mid section there for Wrexham .
Wrexham lands with a shot to the body.
Wrexham misses with a low kick.
Boma flicks out a counter leg kick but Wrexham steps away.
Boma fakes a couple of low kicks, before throwing one on the third attempt. It connects and Wrexham has to reset his feet before getting ready to engage.
Wrexham misses with a body kick.
Wrexham swings wildly with a right hand that was never going to find it's target.
Wrexham throws a push kick but Boma slaps the foot to one side.
Boma jabbing away but nothing is landing.
It looked like Wrexham wanted to counter with a hook but didn't fully commit.
Wrexham has been working on his boxing with his coaches at Crapollas Gym in the buildup to the fight.
Boma pulls out of a head kick attempt.
Boma keeping his hands up high there, blocking the jab from Wrexham .
Wrexham misses with an attempted mid kick.

That's one minute gone in the round.
Wrexham digs a good body shot into Boma's ribs.
Boma throws a hard body shot but it just misses.
Well, he's not going to score with shots like that. A lazy body kick attempt from Wrexham .
A little jabbing left from Boma on the counter but it doesn't find it's target.
Boma moves out of range as Wrexham throws a body kick.
Wrexham throws a right hand that misses
and Boma counters with a lovely straight right hand!
Boma lands a leg kick and bounces back out of range.
Wrexham swings and misses with a shot to the body
and Boma counters with a low kick, right behind Wrexham 's knee.
Wrexham throws a hook to the side of Boma's head but Boma sees it coming and ducks under it beautifully.
Wrexham connects with a looping left hand that seems like it dazed Boma momentarily.
Wrexham uses some good footwork to avoid the body shot by Boma.
Boma loads up on a big right hand but Wrexham slips the punch.
Boma pulls out of a head kick attempt.
Wrexham loads up on a big right hand but Boma slips the punch.
Boma is the aggressor but that punch slipped nicely by Wrexham .
Boma has been spending a lot of time sparring his boxing in the run up to the fight, trying to sharpen up those hands and look for a knockout.
Wrexham throws a monster uppercut resembling something out of street fighter but it doesn't land.
Boma looks like he wants to counter punch here.
Boma throws a right hand that misses
and Wrexham counters with a good right hand that lands right on the jaw.
Wrexham scores with a big left there. The judges will like that one.
The crowd are loving this. Great action here.

Wrexham moves into the clinch.
Wrexham struggles to land a body shot inside as Boma controls his hands.
Wrexham lands a nice looking hook to the body, against the cage.

That's two minutes gone in the round.
Boma misses with a body punch.
Wrexham lands a body shot in the clinch.
Wrexham blocks a body shot from Boma.
A short right from Wrexham on the inside.
Wrexham tries to land a shot to the body but it's blocked.
Wrexham throws a blind hook that connects with the side of Bomas head.
Boma is trying to break the clinch but Wrexham has him pressed against the cage.
Wrexham misses with a hook from the clinch.
Boma throws a head punch that misses.
Wrexham digs a right hand into Boma's ribs. Those have got to be taking their toll on Boma's gas tank.
Boma pushes Wrexham back against the cage and lands a hook to the side of the head.

Boma's corner calls for him to break the clinch, which he does.
Boma throws a lazy right hand but Wrexham sees it coming a mile off and sidesteps it easily.
Boma is pinned up against the cage taking some big shots here. The referee is looking closely deciding whether he should stop the fight.
A big left from Boma misses.
Boma looks to land a left hand but Wrexham moved out of range nicely.
Wrexham takes a step towards his opponent and connects with a left hand, before circling away.
Tyler Wrexham seems to be the more aggressive standup fighter in this bout.
Boma does a little shimmy and throws a leg kick. The leg kick missed by a considerable margin though, making him look a little bit silly for doing the shimmy.
Wrexham moves into range and throws a lovely three punch combination.
Wrexham digs a good hook to Boma's body.

That's three minutes gone in the round.
Boma misses with a straight right.
Wrexham ducks under a wild hook from Boma.
An attempted straight right counter from Wrexham misses the target.
Wrexham just misses with a punch to the body.
Boma uses some good footwork to avoid the body shot by Wrexham .
Wrexham lands a front kick.
Wrexham checks a low kick. Bone on bone - not my idea of a good time.
Wrexham steps to the side to avoid the strikes from Boma.
Wrexham ducks under a wild hook from Boma.
Wrexham is looking to clinch but Boma is avoiding it.
Boma sizes up Wrexham with a pawing jab and scores with a straight right down the middle.
Wrexham moves into range and clinches up with Boma.
Wrexham prevents Boma from breaking the clinch.
Boma scores with a nice hook to the head.
Boma tries to break free but Wrexham pushes him back against the cage.
Boma scores with an uppercut up the middle.
Boma breaks from the clinch.
Wrexham slips under a jab from Boma.
Wrexham pivots as if he's going to throw a leg kick but stops half way.

That's four minutes gone in the round.
Boma misses with a hook.
Wrexham takes a jab right on the nose. That must have hurt but he shrugs his shoulders and looks to return the favor.
We've seen a great period of action over the last minute or so - credit to both fighters for going all out!
Wrexham misses with a wild body shot.
Wrexham cracks Boma with a good shot that sees him stumbling back into the cage.
Wrexham connects with a lovely jab that went straight through the gap between Boma's hands.
Boma avoids a lazy jab quite easily.
Wrexham pushes Boma up against the cage in a clinch.
Boma blocking some punches.
Boma goes for a body shot but it's blocked.
Boma breaks the clinch and we're back to striking at distance.
Wrexham throws a leg kick that misses.
Wrexham with a nice looking leg kick. You could hear that one land in a back row.
Wrexham tries to clinch up but Boma circles away and keeps his distance.
Boma avoids a kick to the body.
The crowd applaud the fighters' efforts here as the round comes to an end.
Wrexham throws a hook to the body but it doesn't connect.
Boma throws a leg kick that is checked
letting Wrexham counter with a right hand.
Wrexham displaying good standup as he scores with a three punch combination.
Boma lands a nice leg kick that just misses Wrexham 's sensitive parts.
Boma is the aggressor but that punch slipped nicely by Wrexham .
And that is the end of the round. The fighters go back to their corners.
Tyler Wrexham dominated that round.
That's the end of the interval. I'm sure that seemed a lot quicker than a minute for our two fighters! Back to the action.

Boma misses with a looping right.
Boma is really struggling to land any decent head shots against his taller opponent.
Boma attempts a low kick but it misses it's target.
It looked like Wrexham wanted to counter with a hook but didn't fully commit.
A clash of legs there as Wrexham blocks the low kick.
Boma moves out of range as Wrexham throws a body kick.
Wrexham closes the distance and presses his opponent up against the cage.
Boma breaks the clinch and we're back to striking at distance.
A nice leg kick from Wrexham , right into the meat of the thigh.
A telegraphed right hand from Wrexham misses the target.
Wrexham ducks down and throws a hook to the body but Boma moves away.
Boma feints a counter leg kick.
Boma tries to land a leg kick but Wrexham saw it coming and moves away.
Wrexham thows a left - swing and a miss!
Wrexham throws a hook but Boma blocks it.
Boma takes a body punch but keeps moving.
We've had a slow start to the round here - hopefully the action picks up.
Boma shapes like he's going to throw a leg kick but settles back down.
Boma jabbing away but nothing is landing.
Wrexham forces Boma back against the cage and clinches.
Good body shot from Wrexham .
Boma lands a body punch.
Wrexham misses with a hook from the clinch.
Wrexham lands a short shot on the inside that snaps the head of Boma backwards.
That's one minute gone in the round.
Wrexham swings wildly with an uppercut but Boma uses good head movement to avoid it.
Boma takes a shot to the head.
The fighters are going at a pretty good pace and they're both starting to sweat now.
Boma makes some space for himself and lands an uppercut.
Wrexham struggles to land a body shot inside as Boma controls his hands.
Wrexham has Boma pressed against the cage, preventing Boma from circling away and getting back to striking at range.
Boma's corner calls for him to break the clinch, which he does.
Boma is looking to slow Wrexham down with leg kicks.
Boma has his head slapped from side to side by a 3 punch combination. That must have hurt him.
Boma takes a really solid shot there but just smiles back and shrugs his shoulders.
Boma throws a shot from downtown. Wrexham moves away and avoids it.
Wrexham has managed to clinch.
Tyler Wrexham has scored more points in the clinch so far.
Boma misses with a punch on the inside.
Boma has had enough of the clinch but Wrexham keeps him there for the moment.
Boma working aggressively here.
Boma breaks from the clinch.
Wrexham misses with a telegraphed body shot
and Boma counters with a thumping low kick.
Fantastic stuff here - a very entertaining period of action, which has drawn cheers from the crowd.
Boma throws out a loose jab but Wrexham uses good head movement to avoid it.
Wrexham scores with a shot to the body.
That's two minutes gone in the round.
Wrexham throws a shot from downtown. Boma moves away and avoids it.
Boma was about to counter that last move with a leg kick but changes his mind.
Wrexham misses with a hook
and Boma counters with a nice uppercut.
The sound of bone on bone echoes around the arena as Wrexham checks a leg kick.
The sound of bone on bone echoes around the arena as Wrexham checks a leg kick.
It looked like Wrexham wanted to counter with a hook but didn't fully commit.
Wrexham lands with a good body shot.
Boma ducks under a wild hook from Wrexham .
Boma only half commits to the counter leg kick.
Wrexham throws a big shot that misses.
Boma throws a combination but comes up with nothing but fresh air.
Wrexham slips a straight right by Boma.
Wrexham misses with a jab and misses with a cross straight after too.
Boma throws a hook but Wrexham blocks it.
Boma misses with a low kick.
Boma avoids a punch combination nicely.
Boma steps to the side to avoid the strikes from Wrexham .
A swing and a miss from Boma.
Tyler Wrexham is winning the standup battle so far.
Wrexham throws a monster uppercut resembling something out of street fighter but it doesn't land.
Wrexham checks a low kick from Boma.
That's three minutes gone in the round.
Boma throws a leg kick but Wrexham moved away.
Wrexham avoids a low kick by using good footwork.
Wrexham lands a jab to Boma's midsection.
Boma takes a step back and watches a body kick go sailing past his mid section.
A little jabbing left from Boma on the counter but it doesn't find it's target.
Boma avoids a punch combination nicely.
Wrexham throws a hook but Boma blocks it.
Wrexham uses good head movement to avoid the hook from Boma.
Boma wants to slow Wrexham down by chopping away at his legs.
Boma showing good head movement there, avoiding the strikes from Wrexham .
Boma uses some good footwork to avoid the body shot by Wrexham .
Boma throws a leg kick which misses Wrexham 's front leg but catches the back leg as Wrexham tries to avoid it.
Boma cracks Wrexham with a right hand to the side of the head.
A low kick lands for Boma.
Wrexham throws a poor cross that misses
and Boma counters with a good right hand that lands right on the jaw.
Boma slips a jab from Wrexham .
Boma thumps Wrexham with a low kick.
That's four minutes gone in the round.
Wrexham throws a leg kick but Boma sees it coming and checks it nicely.
Wrexham checks the leg kick.
Wrexham scores with a push kick.
The fans in attendance giving it up for the two fighters, who have really let it all hang out in the last minute or so!
Wrexham waving his hands out in front of him, looking to distract Boma.
Wrexham on the wrong end of a decent looking cross there.
Wrexham misses with a kick to the body.
It seemed like Boma was going to counter with the hook but didn't fully commit to it.
Wrexham scores with a hook to the body. Boma takes a step back and tries to catch his breath.
A slapping leg kick lands for Boma.
Wrexham misses with a low kick.
Boma doesn't fully commit to the body shot counter.
Wrexham misses with a hook. Boma ducked under it nicely.
The fighters circling - Boma throws out the jab but it was never going to land.
Wrexham avoids a low kick by using good footwork.
Boma stuns Wrexham with a nice body shot, before stepping back out of range.
The sound of bone on bone echoes around the arena as Wrexham checks a leg kick.
Boma scores with a hook to the body. Wrexham takes a step back and tries to catch his breath.
Wrexham misses with a hook to the body
and Boma cracks him with a counter punch right on the button.
We are yet to see a takedown attempt from Boma in the fight. On paper you would think he is the more dominant ground fighter so let's see if these unusual tactics pay off.
Boma avoids the clinch attempt nicely.
And that is the end of the round. The fighters go back to their corners.
That was a close second round but I would say that Tyler Wrexham will probably get the nod.
That's time! Back to the action! This is the final round!

Wrexham jabbing away but nothing is landing.
Boma drops his hands and takes a jab to the jaw for his troubles.
Boma blocks the body kick.
Boma scoring well with a low kick there.
Wrexham ducks under a wild hook from Boma.
Wrexham throws a looping overhand right but Boma ducks down to avoid it.
Wrexham swings away but doesn't land with a series of punches.
Boma avoids a lazy jab quite easily.
Wrexham throws out a token jab with nothing on it.
Wrexham misses with the combination.
Wrexham is hobbling a little on that front leg after taking quite a few leg kicks so far in this fight.
Wrexham misses the body punch
and Boma counters with a good right hand that lands right on the jaw.
We've had a slow start to the round here - hopefully the action picks up.
Wrexham looks to land a right hand but Boma moved out of range.
Boma misses with a straight right.
Wrexham throws a jab, cross combination which is slipped
and Boma counters with an outside leg kick.
Wrexham moves out of range as Boma strikes.
Wrexham tries to land a body kick
and Boma connects with a straight left hand counter down the middle.
Boma bobs and weaves well there to avoid the strikes.
That's one minute gone in the round.
Boma is looking to score with low kicks.
Boma tries to score with a leg kick but it misses it's target.
Wrexham takes a nice looking leg kick right on the meat of his thigh there.
Boma pushing out the jab but it's not landing.
Wrexham misses the jab.
Wrexham thuds a left hand into Boma's body.
Wrexham lands a nice leg kick that just misses Boma's sensitive parts.
Boma needs to keep his hands up - Wrexham had a free shot at his head there.
A nice leg kick from Wrexham , right into the meat of the thigh.
Wrexham throws a hook to the body but it doesn't connect.
Boma misses with a wild body shot.
Wrexham lunges in with an uppercut that skims his opponent's chin.
Boma misses with a low kick as Wrexham jumps back.
Wrexham throws a quick counter kick to the body but Boma avoids it.
Boma takes a body punch but keeps moving.
Boma throws a right hand that misses
enabling Wrexham to counter with a crisp jab.
Boma throws a lazy uppercut
and Wrexham cracks him with a counter punch right on the button.
The crowd are loving this. Great action here.
Wrexham checks the leg kick.
Wrexham fakes high and swings low for a body shot but Boma manages to avoid it.
Boma appeared to try and counter that last move with a leg kick.
Mark Boma has stepped it up - he knows he needs a finish here!
That's two minutes gone in the round.
Wrexham avoids the body shot from Boma.
Wrexham lands a beauty of a right hand that gets the crowd cheering.
Boma tries a head kick but it misses.
Wrexham tries to score with a low kick but Boma moves his leg out of the way.
Wrexham misses the shot to the body.
Wrexham jabs. That one connects to the head of his opponent.
Boma lands with a nice body punch.
Wrexham connects with a leg kick. He turned his hip over nicely there.
Boma throws a looping overhand right but Wrexham ducks down to avoid it.
Wrexham displaying good standup as he scores with a three punch combination.
Wrexham darts in and out, connecting with a jab.
Well, he's not going to score with shots like that. A lazy body kick attempt from Wrexham .
Wrexham lands a nice leg kick that just misses Boma's sensitive parts.
Wrexham thows a left - swing and a miss!
Wrexham is really dominating this fight. Is there anything that Boma can do to turn this around?
Boma showing good head movement there, avoiding the strikes from Wrexham .
Wrexham wings a very wild body shot but it does the job and lands to the midsection.
That's three minutes gone in the round.
Boma attempts a low kick but it misses it's target.
Boma has a pretty nasty looking mouse under his right eye.
Boma throws an overhand right that lands on Wrexham 's shoulder, as Wrexham tries to avoid the shot.
Wrexham scores with a straight right hand, right through his opponent's guard.
Boma throws a lazy uppercut
and Wrexham counters with a leg kick.
Wrexham bobbing and weaving, closes the distance and lands a hook to the side of Boma's head.
Boma lands a nice leg kick that just misses Wrexham 's sensitive parts.
Wrexham ducks down and throws a hook to the body but Boma moves away.
Tyler Wrexham is fighting for a decision here - he's started to take the cautious approach.
Boma is looking to chop away at Wrexham 's legs.
Boma throws a low kick but his opponent is out of range.
Donk. Boma catches Wrexham right on the button with a cross.
Wrexham catches Boma with a nice straight right. He seems pissed - ooooh, it's on now! On like donkey kong!
Boma looks to land a left hand but Wrexham moved out of range nicely.
Wrexham moves into the clinch successfully.
Wrexham doesn't land with the attempted body shot.
A head punch on the inside from Wrexham fails to land.
A head punch on the inside from Wrexham fails to land.
That's four minutes gone in the round.
Wrexham misses with some punches.
Wooooo! Give it up for these two warriors! They are putting on a show!
A short right hand to the side of the head by Boma.
Wrexham misses with a shot to the kidneys.
Boma scores with an uppercut up the middle.
Wrexham throws a blind hook that connects with the side of Bomas head.
Boma tries a shoulder strike but it doesn't do any damage.
Wrexham lands with a short punch from the clinch.
Boma can't find room to land a body shot as Wrexham controls the action.
Wrexham has a couple of punches blocked by Boma.
Good body shot from Boma.
Wrexham blocking some punches.
Boma lands a nice shot to the body.
A head punch on the inside from Boma fails to land.
Boma doesn't land with the attempted body shot.
Wrexham can't find room to land a body shot as Boma controls the action.
Boma misses with a punch on the inside.
The crowd applaud the fighters' efforts here as the round comes to an end.
Wrexham tried to land a shot to the body but connects with Boma's elbow.
Boma lands a left hand that snaps the head of Wrexham backwards.
And that's the end of the fight!
Tyler Wrexham showed his dominance in that final round.
Well Wrexham has outscored his opponent in every aspect of the fight today. Only a scarily incompetent judge or two will keep him from a well deserved win... Over to the ring announcer for the scorecards.
Ladies and gentlemen, after 3 rounds of action, we go to the scorecards for a decision.
Judge Donald Grub scores the fight 29:28
Judge James Ackerman scores the fight 29:28
Judge Phil Schofield scores the fight 30:27
In favor of your winner, by unanimous decision... Tyler Wrexham !
|
|
|
|
|
|
|
|
|
|
|
|
|
|
|
|
|
|
|
|
|
|
|
| S |
C
A |
G |
S |
C
B |
G |
|
S |
C |
G |
|
energy
A | B |
|
hype
A | B |
|
pop
A | B |
|
mgr
A | B |
|
FIGHT
RATING
78% |
|
|
|
|
|
|
