|
|
PBP Commentary |
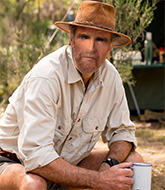
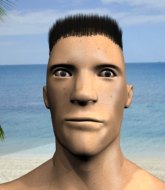
Coming up we have a middleweight MMA rules bout between Macca Outback (ranked 70 p4p, 158 weight class) and Ansis Kaupens (ranked 8 p4p, 23 weight class). These two fighters really are very evenly matched on the feet - it will be fascinating to see who can assert themselves in that aspect of the fight.
 |
|
 |
| 188 cm
26
193
14 - 2 - 0 |
|
200 cm
25
190
14 - 3 - 1 |
Good wrestling
World class boxer
Insanely flexible |
|
Good wrestler
Excellent MT
Granite chin |
|
| |
|
Ladies and gentlemen. This fight is 5 rounds, for the middleweight championship of the world!
Introducing the champion to my left, fighting out of the red corner.
With a record of 14 - 2 - 0, fighting out of Montreal, Macca Outback!
And introducing the challenger to my right, fighting out of the blue corner.
With a record of 14 - 3 - 1, fighting out of Helsinki, Ansis Kaupens!
The judges for this bout are James Glass, Daniel Bishop and James Atkins.

The bell rings for round one and we are underway!

Outback fakes with an overhand right and moves in to clinch with Kaupens, pushing him back against the cage.
Kaupens is leaning against Outback and scores with a nice uppercut to the body.

Kaupens escapes the clinch and we're back to striking.
Kaupens throws a body punch but Outback moves out of range.
Outback has been working on his boxing with his coaches at GWad's Playpen in the buildup to the fight.
Outback slips under a jab.
Ansis Kaupens seems to be the more aggressive standup fighter in this bout.
Outback throws a jab but it's blocked by Kaupens.
Despite the aggression on Kaupens's face he doesn't fully commit to the counter.
Kaupens misses with a series of wild punches.
Kaupens cracks a nice hook into Outback's ribs.
Outback ducks right into an uppercut from Kaupens.
Outback tries to clinch up.
Kaupens throws a hook to the body but it doesn't connect.
Kaupens keeping a good distance there, avoiding the body shot.
We've had a slow start to the round here - hopefully the action picks up.
Kaupens throws a lazy right hand but Outback sees it coming a mile off and sidesteps it easily.
Outback takes a big uppercut there. He seems a bit wobbly but no, he's OK.
Kaupens has been working on his striking defense in training and it's paying off as Outback is landing a low percentage of strikes.
Outback displays some good footwork, moving neatly out of range as Kaupens throws out the jab.
It looked like Outback wanted to counter with a hook but didn't fully commit.
Outback moves out of range as Kaupens strikes.
Kaupens lands a nice looking body shot.
The fans in attendance giving it up for the two fighters, who have really let it all hang out in the last minute or so!
Outback avoids a punch combination nicely.

That's one minute gone in the round.
Outback dodges the punch combination from Kaupens.
Outback throws an overhand right that lands on Kaupens's shoulder, as Kaupens tries to avoid the shot.
Kaupens looked like he wanted to counter with a punch but didn't throw it.
Kaupens ducks under a wild hook from Outback.
Outback is on the wrong end of a nice combination from Kaupens.
Outback scores with a reasonable looking shot to the body. Kaupens doesn't seem bothered though.
Kaupens misses with a hook
and Outback counters with a straight punch to the midsection.
Outback uses decent footwork to sidestep a right hand from Kaupens.
Outback closes the distance and clinches.
Outback scores with a hook to the body.
Kaupens wants to strike at distance but he can't break free of the clinch.
Kaupens pushes off and circles away, back to the middle of the mat.
Kaupens misses with a straight right.
Outback just misses with a punch to the body.
Kaupens misses with an uppercut. Outback saw that one coming.
Kaupens throws a wild combination but nothing lands.

That's two minutes gone in the round.
Fantastic stuff here - a very entertaining period of action, which has drawn cheers from the crowd.
Kaupens swats away the attempt to clinch by Outback.
Outback moves out of range as Kaupens strikes.
Kaupens throws a jab when Outback was well out of range.
A punch combination from Kaupens misses.
Outback was looking to counter that last move with a shot to the body but he didn't commit.
A swing and a miss from Kaupens.
Kaupens moves into range and throws a combination. A nice jab followed by a hook to the body.
Kaupens swings away but doesn't land with a series of punches.
Outback connects with a body shot.
Outback is looking to wear down Kaupens with body shots, infact he's throwing more body shots than head shots at the moment.
Outback lands with a thumping leg kick.
Kaupens throws a monster uppercut resembling something out of street fighter but it doesn't land.
Kaupens throws out a loose jab but Outback uses good head movement to avoid it.
Outback is looking to score with low kicks.
Outback showing good head movement there, avoiding the strikes from Kaupens.
Kaupens is a painfully thin specimen of a man. You do wonder whether a good body kick would snap him clean in two.
A jab from Kaupens finds it's way through Outback's defenses.
Kaupens misses with a shot to the body
and Outback counters with a nice uppercut.

That's three minutes gone in the round.
Outback uses some good footwork to avoid the body shot by Kaupens.
Outback displays some good footwork, moving neatly out of range as Kaupens throws out the jab.
Kaupens throws a shot to the body.
Kaupens staying out of range there.
Kaupens tries to land with a swinging hook to the body but Outback was well out of range. Poor timing from Kaupens.
Kaupens takes a step back and watches a body kick go sailing past his mid section.
Kaupens avoids the clinch attempt nicely.
Outback misses with a wild body shot.
Kaupens will need to tighten up his combinations if he doesn't want to gas himself out, swinging at thin air.
Outback throws a half hearted mid kick.
Kaupens throws a shot to the body.
Kaupens throws a combination but it was largely blocked by Outback.
Outback fakes a jab and then connects with a hook.
Outback drives through and clinches with Kaupens against the cage.
Kaupens's corner calls for him to break the clinch, which he does.
Kaupens moves out of range as Outback strikes.

That's four minutes gone in the round.
Kaupens fakes a jab and then connects with a hook.
The fans in attendance giving it up for the two fighters, who have really let it all hang out in the last minute or so!
Kaupens jabbing away but nothing is landing.
Kaupens tries to land with a swinging hook to the body but Outback was well out of range. Poor timing from Kaupens.
Outback lunges at Kaupens with a hook that half lands and is half blocked by Kaupens's hand.
Outback slips a jab from Kaupens.
Kaupens throws a right hand that Outback ducks under and follows up with a left that Outback also avoids with ease.
Kaupens connects with a good right hand that stumbles Outback. Outback circles away out of range and recomposes himself.
Kaupens throws a combination but it was largely blocked by Outback.
Outback uses good footwork to avoid the strikes from Kaupens.
Kaupens chopped to the floor by a nice leg kick but he springs right back up before Outback can pounce on him.
Kaupens misses the shot to the body.
It looked like Outback was looking amped, ready to throw a big counter but didn't commit.
Kaupens throws a shot to the body.
Kaupens on the wrong end of an overhand right that came out of nowhere.
The crowd applaud the fighters' efforts here as the round comes to an end.
A jab from Outback misses.
Kaupens throws a series of punches but Outback avoids them all with ease.
Kaupens thows a left - swing and a miss!
Kaupens pushing out the jab but it's not landing.
And that is the end of the round. The fighters go back to their corners.
Ansis Kaupens dominated that round.
The fighters get back to their feet, the hooter sounds and we're back to the action!

Kaupens throws an off balance right hand
and Outback counters with a quick right hand to the jaw.
Outback misses with a body shot.
Outback connects with a solid leg kick.
Outback stuns Kaupens with a nice body shot, before stepping back out of range.
Kaupens misses the body punch
and Outback counters with a flying knee. Nice.
A cross from Kaupens lands.
Kaupens moves into range and connects with a jab.
Outback tests Kaupens's chin there with a solid looking shot.
Kaupens throws a good cross that connects.
Kaupens throws a lazy right hand but Outback sees it coming a mile off and sidesteps it easily.
Outback lands the left hand.
We've seen a great period of action over the last minute or so - credit to both fighters for going all out!
Outback closes the distance and pushes Kaupens back into the cage.
Outback swings wildly with an uppercut but Kaupens uses good head movement to avoid it.
Kaupens has been the more effective fighter overall so far.
Kaupens wants to push off and get back to the center of the mat but Outback has him pressed against the cage.
Outback lands punches inside but they're not really causing much damage.
Outback goes for a body shot but it's blocked.
That's one minute gone in the round.
Outback lands with a short shot to the head.
Outback struggles to land a body shot inside as Kaupens controls his hands.
Outback lands with a right to the head.
Kaupens is trying to push Outback away but Outback has him pressed against the cage, so he's going nowhere.
A short right hand to the side of the head by Outback.
Outback throws a blind hook that connects with the side of Kaupenss head.
Kaupens misses with a shot to the kidneys.
Kaupens tries to land a shot to the body but it's blocked.
Kaupens tries to break free but Outback pushes him back against the cage.
A short right hand to the side of the head by Outback.
Kaupens misses with a shot to the kidneys.
Kaupens is trying to break free.
Outback throws a hook to the body. More of an arm punch but it's all scoring with the judges.
Outback misses with some punches.
Outback lands with a short shot to the head.
Kaupens wants to break free. God knows he wants to breaaaak freeee.
A nice left hand lands by Outback.
Kaupens blocks a punch to the side of the head.
Outback lands a hook to the side of the head.
The fans in attendance giving it up for the two fighters, who have really let it all hang out in the last minute or so!
Kaupens is trying to break the clinch but Outback is controlling him.
That's two minutes gone in the round.
Kaupens blocks a body shot from Outback.
Kaupens tries to circle away but Outback has him pinned against the cage.
A head punch blocked on the inside by Kaupens.
Kaupens struggles to land a body shot inside as Outback controls his hands.
Kaupens's head jolts backwards as he takes an uppercut right on the button!
A nice right hand lands inside from Outback.
Kaupens misses with a punch on the inside.
Kaupens working hard to break the clinch.
Kaupens tries to circle away but Outback has him pinned against the cage.
Kaupens doesn't land with the attempted body shot.
Kaupens breaks the clinch and we return to the middle of the mat.
Outback uses good footwork to avoid the strikes from Kaupens.
Outback showing good head movement there, avoiding the strikes from Kaupens.
Kaupens keeping a good distance there, avoiding the body shot.
Outback fakes low and throws an overhand right that catches Kaupens on the side of the head.
Outback connects with a solid leg kick.
A slapping leg kick lands for Outback.
A decent looking body kick lands there for Outback.
That's three minutes gone in the round.
Outback forces Kaupens back against the cage and clinches.
An uppercut on the inside fails to land for Outback.
Outback lands with a quick shot inside that doesn't really do much damage.
Outback doesn't land with the attempted body shot.
Kaupens breaks from the clinch.
Kaupens swings for the body but Outback moves out of range.
A slow jab from Kaupens misses its intended target.
Outback looks to score with a jab to the body but Kaupens is just out of range.
Outback misses with a looping right.
Outback throws an overhand right that lands on Kaupens's shoulder, as Kaupens tries to avoid the shot.
Kaupens avoids a low kick by using good footwork.
Kaupens throws out a counter right but Outback avoids it with no problem.
Kaupens lands with a right hand.
Outback throws a hook but Kaupens avoids it easily.
Outback connects with a solid leg kick.
Outback cracks Kaupens with an open hand slap.
Kaupens throws a big shot that misses.
Outback thumps Kaupens with a low kick.
That's four minutes gone in the round.
Outback scores with a punch to the gut of his opponent.
The crowd are loving this. Great action here.
Outback throws the left hand but Kaupens avoids the punch easily.
Kaupens throws a wild combination but nothing lands.
Outback misses with a straight left.
Outback throws a hook to the side of Kaupens's head but Kaupens sees it coming and ducks under it beautifully.
Kaupens takes an uppercut right on the button but keeps his composure.
Outback moves out of range of the strikes.
Outback rushes Kaupens and pushes him back against the cage in a clinch.
Kaupens is trying to break the clinch but Outback has him pressed against the cage.
Kaupens escapes the clinch and we're back to striking.
Outback tries to clinch up.
Kaupens throws a hook to the body but it doesn't connect.
Outback appeared to be looking to counter that last move with a leg kick.
Outback jabs Kaupens right on the nose. Kaupens blinks but takes it well.
The crowd applaud the fighters' efforts here as the round comes to an end.
Outback tries to land with a swinging hook to the body but Kaupens was well out of range. Poor timing from Outback.
Outback doesn't manage to clinch there - Kaupens circles away.
Kaupens throws an uppercut from half a mile away. Outback sees it coming and avoids it easily.
The fighters circling - Kaupens throws out the jab but it was never going to land.
And that is the end of the round. The fighters go back to their corners.
Macca Outback dominated that second round.
OK. That's time! The bell goes and we're back to the action.

Kaupens throws a hook but Outback avoids it easily.
Kaupens throws a hook but Outback avoids it easily.
Kaupens stooping low to avoid any incoming strikes and then lunges in with an uppercut come cross that lands flush.
Kaupens fakes and then throws a beautiful body shot. Outback looks a bit winded and takes a step backwards to take a breath.
Outback tries to bum rush Kaupens with a series of wild strikes but Kaupens uses good footwork to avoid the assault.
Outback misses with a hook.
Outback swings for the body but Kaupens moves out of range.
Outback lands a head kick!
Kaupens pushing out the jab but it's not landing.
Outback swings for the body but Kaupens moves out of range.
Kaupens doesn't fully commit to the body shot counter.
Kaupens swinging wildly here.
We've had a slow start to the round here - hopefully the action picks up.
Kaupens moves out of range of the strikes.
Outback takes a swing at Kaupens's ribcage but misses.
Kaupens misses with the combination.
Kaupens misses with a jab, cross combination.
That's one minute gone in the round.
Kaupens gets cracked with a nice right hand there by Outback.
Outback misses with a looping right.
Kaupens uses good head movement to avoid the hook from Outback.
Outback lands a right hook to the body.
Kaupens thuds a left hand into Outback's body.
Kaupens misses with a hook.
Kaupens keeping a good distance there, avoiding the body shot.
Outback works Kaupens's body with a nice hook.
Kaupens throws out a loose jab but Outback uses good head movement to avoid it.
Kaupens's corner calls for a 1-2. Kaupens obliges with the 1 part as he scores the single shot and moves back out of range.
Kaupens throws out a token jab with nothing on it.
Ansis Kaupens seems to be getting the better of the standup.
Outback jabbing away but nothing is landing.
Outback scores with a jab to the jaw of his opponent.
Kaupens avoids the body shot from Outback.
Kaupens misses the shot to the body.
Kaupens looks to land a left hand but Outback moved out of range nicely.
Outback was looking to counter that last move with a shot to the body but he didn't commit.
That's two minutes gone in the round.
Outback chopping away at his opponent's legs.
We've seen a great period of action over the last minute or so - credit to both fighters for going all out!
Outback misses with a looping right.
Kaupens is loading up here, looking for a big counter of his own.
A nice leg kick lands there from Outback.
Outback throws a low kick but Kaupens avoids it.
Kaupens is the aggressor but that punch slipped nicely by Outback.
Kaupens avoids the body shot from Outback.
A countering left hand to the body from Kaupens misses.
Outback takes a swing at Kaupens's ribcage but misses.
Outback's hands are dropping dangerously low here and Kaupens connects clean with a right hook that sends him down to one knee! Outback scrambles back to his feet.
Kaupens takes a swing at Outback's ribcage but misses.
Kaupens swings away but doesn't land with a series of punches.
Kaupens misses with a straight right.
Kaupens keeping a good distance there, avoiding the body shot.
Outback lands a leg kick and bounces back out of range.
Kaupens slips a jab from Outback.
Kaupens waving his hands out in front of him, looking to distract Outback.
Outback just misses with a punch to the body.
That's three minutes gone in the round.
Outback throws a leg kick but Kaupens moved away.
Kaupens's leg has a nasty welt from taking a succession of leg kicks. That must be slowing him down.
Outback clinches up with Kaupens and pushes him back against the cage.
Kaupens is trying to break the clinch but Outback is controlling him.
Outback blocks a body shot from Kaupens.
Outback misses with a hook to the ribs.
Kaupens blocks a punch to the side of the head.
Kaupens wants to break the clinch but can't.
Kaupens lands a body shot in the clinch.
Outback tried to land a shot to the body but connects with Kaupens's elbow.
Kaupens tries to land a shot to the body but it's blocked.
Kaupens working hard to break the clinch.
Outback prevents a body shot from Kaupens.
Kaupens is trying to work out of this bad position, with his back against the cage.
Outback prevents Kaupens from breaking the clinch.
Kaupens is trying to push Outback away but Outback has him pressed against the cage, so he's going nowhere.
Kaupens swings away with an uppercut that misses.
Kaupens pushes off and circles away, back to the middle of the mat.
Outback looks shocked there as he takes a right hand to the temple.
That's four minutes gone in the round.
Boom, another hit is landed. "You're gunna get knocked out" taunts Kaupens, as that shot connected.
Kaupens swings away but doesn't land with a series of punches.
Kaupens tries to keep at a distance but Outback has taken the fight into the clinch.
Kaupens breaks from the clinch.
Kaupens tries to bum rush Outback with a series of wild strikes but Outback uses good footwork to avoid the assault.
Outback throws a leg kick but he was too far away and it doesn't land.
Kaupens misses with a straight left.
Outback uses good footwork to avoid the strikes from Kaupens.
Outback tries a low kick but Kaupens avoids it.
The crowd are loving this. Great action here.
Jab, jab by Outback - just one landing.
Outback fails in his attempt to clinch.
Kaupens lands a slapping body shot.
Kaupens throws a wild combination but nothing lands.
Kaupens connects with a body shot.
Outback catches Kaupens with a nice straight right. He seems pissed - ooooh, it's on now! On like donkey kong!
And that is the end of the round. The fighters go back to their corners.
A close third round but Ansis Kaupens just about did enough to take it.
OK. That's time! The bell goes and we're back to the action.

Kaupens uses good footwork to avoid the strikes from Outback.
Outback throws a low kick but Kaupens avoids it.
Kaupens tries to land with a swinging hook to the body but Outback was well out of range. Poor timing from Kaupens.
Kaupens looks to land a combination but Outback avoids it well.
Outback is looking to clinch.
Kaupens swings wildly with a couple of big hooks
and Outback counters with a nice uppercut.
Kaupens throws a shot from downtown. Outback moves away and avoids it.
Kaupens throws an off balance right hand
and Outback makes him pay by landing a nice hook to the body before moving out of range.
Outback throws a leg kick but Kaupens checks it.
A little jabbing left from Kaupens on the counter but it doesn't find it's target.
Outback cracks Kaupens with a right hand to the side of the head.
Outback throws a nice inside leg kick.
We've had a slow start to the round here - hopefully the action picks up.
Kaupens misses with an uppercut. Outback saw that one coming.
Kaupens cracks a nice hook into Outback's ribs.
A right-left combo lands from Kaupens.
Kaupens throws a hook to the side of Outback's head but Outback sees it coming and ducks under it beautifully.
The fans in attendance giving it up for the two fighters, who have really let it all hang out in the last minute or so!
Outback avoids a lazy jab quite easily.
That's one minute gone in the round.
Kaupens waving his hands out in front of him, looking to distract Outback.
Kaupens misses with a hook
and Outback connects with a straight left hand counter down the middle.
Outback misses with a hook. Kaupens ducked under it nicely.
It seemed like Kaupens was going to counter with the hook but didn't fully commit to it.
Outback slips a jab from Kaupens.
Kaupens lets the fists fly and connects with a left straight followed by a right hook.
A big right from Kaupens misses.
Kaupens misses with a looping left.
Kaupens jabbing away but nothing is landing.
Outback tries to clinch up.
Outback pulls out of a head kick attempt.
A low kick from Outback is predictable there
and Outback takes a counter punch right on the button for his troubles.
A combination from Kaupens does no damage.
As Kaupens tries to get set, Outback tries to push him back and clinch up but Kaupens manages to avoid the attempt.
Outback scores with a nice body kick.
Kaupens staying out of range there.
A nice side step and Kaupens releases a counter shot to the body, but it doesn't find it's home.
Kaupens misses with a left hand
and Kaupens takes a counter punch right on the button for his troubles.
Wooooo! Give it up for these two warriors! They are putting on a show!
Kaupens jabs Outback to the body, keeping him at a distance.
That's two minutes gone in the round.
Kaupens takes one on the chin but keeps coming.
Outback throws a body kick but he was well out of range there.
Outback lands a leg kick that knocks Kaupens off balance momentarily.
Kaupens throws a hook to the body but it doesn't connect.
Outback lands a pitter patter jab to the forehead of his opponent.
Kaupens scores with a jab to the head.
Kaupens fakes a head punch and goes low to the body. Nicely done.
Outback defending well as Kaupens loads up on a big left hand.
Outback lands with a nice body punch.
Outback misses with a straight left.
Outback takes a shot to the body in his stride.
Kaupens is the aggressor but that punch slipped nicely by Outback.
Kaupens cracks a nice hook into Outback's ribs.
Outback misses with a shot to the body
and Kaupens counters with a stiff right hand.
Outback throws a couple of head shots and lands with the final one - a decent hook, which struck Kaupens on the side of the head.
That's three minutes gone in the round.
Outback misses with an uppercut
and Kaupens counters with a straight right hand.
Outback looks to throw a body kick
and Outback takes a counter punch right on the button for his troubles.
Nice straight punches there by Outback. You know Roy Jones Jr respects the hands of Outback.
Outback closes the distance and takes a jab right on the nose as he does so.
Kaupens misses with a looping left.
Outback ducks right into an uppercut from Kaupens.
Kaupens avoids a lazy jab quite easily.
Outback ducks under an overhand right and circles away with a smile on his face.
Outback misses with a hook. Kaupens ducked under it nicely.
Kaupens connects with a single shot there.
Kaupens swings and misses with a shot to the body
and Outback counters with a lovely straight right hand!
Outback tries to clinch up but Kaupens circles away and keeps his distance.
Kaupens takes a big uppercut there. He seems a bit wobbly but no, he's OK.
This has been an exciting period of action!
Kaupens sizes up Outback with a pawing jab and scores with a straight right down the middle.
Kaupens throws a looping overhand right but Outback ducks down to avoid it.
That's four minutes gone in the round.
Outback moves away from the strike by Kaupens.
Kaupens moves out of range of the strikes.
A lazy left from Kaupens finds it's target.
A swing and a miss from Outback.
Kaupens misses with an uppercut.
Outback moves into range and connects with a jab.
Outback misses with a looping right.
Outback throws out a token jab with nothing on it.
Kaupens misses the shot to the body.
A nice inside leg kick there by Outback. That's going to slow Kaupens down.
A looping hook to the body misses from Outback. Kaupens does a little dance to reset his feet.
Kaupens is clearly trying to counter these attacks from Outback with a body shot.
Kaupens works the jab nicely.
The crowd applaud the fighters' efforts here as the round comes to an end.
Outback instigates a clinch.
Kaupens pushes off and circles away, back to the middle of the mat.
Outback tries to land a front kick but Kaupens steps back. That was a bit too telegraphed.
And that is the end of the round. The fighters go back to their corners.
A close fourth round but Ansis Kaupens will probably get the nod - 10:9.
The corners get their ten second warning. Both fighters stand from their stools and stare each other down, ready to get back to the action. Ladies and gentlemen, this is the final round!

Outback wants to clinch up but Kaupens keeps it at a distance.
Kaupens swinging wildly here.
Kaupens misses with a jab to the body
and Outback counters with a good right hand that lands right on the jaw.
Kaupens takes a shot to the eye socket. That's gotta hurt.
Nice defenses there by Outback.
Kaupens moves away from the strike by Outback.
Outback misses with a body shot. Nice footwork from Kaupens.
Outback throws a low kick but his opponent is out of range.
Outback moves out of range of the strikes.
Outback lands with a nice body punch.
We've had a slow start to the round here - hopefully the action picks up.
Outback ducks under an overhand right and circles away with a smile on his face.
Kaupens swings and misses with a hook to the body.
Outback rushes Kaupens and presses him up against the cage.
Kaupens is trying to break free.
Kaupens tries to throw a body punch but Outback avoids it by throwing Kaupens back against the cage.
That's one minute gone in the round.
Kaupens breaks the clinch and we're back to striking at distance.
Outback is looking to clinch but Kaupens is avoiding it.
Kaupens takes an uppercut right on the jaw but it doesn't phase him.
Outback fails in his attempt to clinch.
Outback fakes a head punch and goes low to the body. Nicely done.
Outback looks to throw a body kick
and Kaupens counters with a quick right hand to the jaw.
Kaupens scores with a sloppy right hand. Outback should have avoided that one.
No joy there for Kaupens, who threw a few shots but didn't land.
Kaupens missing with a left hand there. Outback was out of range so wasted energy throwing that one.
Outback tries to close the distance and clinch up against the cage but Kaupens paws at him with a jab and circles away.
Outback throws a body kick but he wasn't in range.
Outback ducks under a wild hook from Kaupens.
Kaupens ducks down and throws a hook to the body but Outback moves away.
Kaupens throws out a token jab with nothing on it.
Kaupens throws a jab but it's blocked by Outback.
That's two minutes gone in the round.
Kaupens walks into a left hand.
A looping hook to the body misses from Outback. Kaupens does a little dance to reset his feet.
Outback throws a push kick but Kaupens slaps the foot to one side.
Kaupens looks like he wants to counter punch here.
Outback misses the jab.
This is a great period of action - very entertaining stuff!
Outback moves away from the strike by Kaupens.
Kaupens misses with the combination.
Kaupens moves into range and connects with a jab.
Macca Outback has stepped it up - he knows he needs a finish here!
Kaupens just misses with a punch to the body.
Outback tries to close the distance and clinch up but Kaupens swats him away and circles back towards the center.
Kaupens swings away with a counter right hand but no contact made.
Kaupens looks to score with a jab to the body but Outback is just out of range.
Kaupens cracks Outback with a good jab.
Kaupens scores with a reasonable looking shot to the body. Outback doesn't seem bothered though.
Kaupens throws a hook but Outback blocks it.
That's three minutes gone in the round.
Outback swings away with a body shot that misses
and Kaupens counters with a good right hand that lands right on the jaw.
A looping hook to the body misses from Outback. Kaupens does a little dance to reset his feet.
Outback tries to clinch but is not successful on this occasion.
Kaupens gets tackled into the cage by Outback. Outback maintains the clinch.
Kaupens is trying to work out of this bad position, with his back against the cage.
Outback struggles to land a body shot inside as Kaupens controls his hands.
Outback keeps control of Kaupens as he tries to wriggle out of the double underhooks.
Outback has a couple of punches blocked by Kaupens.
Kaupens manages to break the clinch.
Kaupens connects with a lovely right hand, straight down the pipe.
Outback tries to clinch but Kaupens is having none of it.
Kaupens misses with a straight left.
Kaupens stooping low to avoid any incoming strikes and then lunges in with an uppercut come cross that lands flush.
Outback misses the shot to the body.
It seemed like Kaupens was going to counter with the hook but didn't fully commit to it.
Outback showing good head movement there, avoiding the strikes from Kaupens.
That's four minutes gone in the round.
Outback misses with a body kick.
Kaupens ducks under a wild hook from Outback.
Outback takes a shot to the body in his stride.
Outback gets a clinch.
This has been an exciting period of action!
Kaupens lands with a left to the head.
Kaupens breaks the clinch and we're back to striking at distance.
Outback slips a straight right by Kaupens.
Outback throws a quick counter kick to the body but Kaupens avoids it.
Kaupens missing with a left hand there. Outback was out of range so wasted energy throwing that one.
Kaupens dips down and scores with a jab to the body.
Kaupens throws the left hand but Outback avoids the punch easily.
Kaupens swings away with a body shot that misses
and Outback counters with a body kick that brings a smile to the face of both fighters.
Outback scores with a reasonable looking shot to the body. Kaupens doesn't seem bothered though.
Kaupens is wobbling all over the place through exhaustion. Will he make it to the final bell?
Kaupens clobbers Outback with an overhand right that has the crowd gasping. That made a horrendous noise.
Kaupens throws a hook to the body but it doesn't connect.
Ansis Kaupens is fighting for a decision - hopefully he's judged it right and he's actually winning the fight.
Kaupens uses good head movement to avoid the hook from Outback.
And that's the end of the fight!
Ansis Kaupens comfortably won the final round on my scorecard.
I think Kaupens has won this one but let's see whether the judges agree with me. Over to the ring announcer for the scorecards.
Ladies and gentlemen, after 5 rounds of action, we go to the scorecards for a decision.
Judge James Glass scores the fight 47:49
Judge Daniel Bishop scores the fight 46:49
Judge James Atkins scores the fight 46:49
In favor of your winner, by unanimous decision... Ansis Kaupens!
Ansis Kaupens is the new middleweight champion!
A victorious Ansis Kaupens thanked his army of followers in his post fight interview, telling people to make sure they follow him on Twitter.
|
|
|
|
|
|
|
|
|
|
|
|
|
|
|
|
|
|
|
|
|
|
|
| S |
C
A |
G |
S |
C
B |
G |
|
S |
C |
G |
|
energy
A | B |
|
hype
A | B |
|
pop
A | B |
|
mgr
A | B |
|
FIGHT
RATING
77% |
|
|
|
|
|
|
