|
|
PBP Commentary |
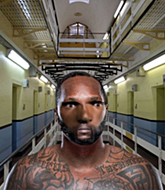
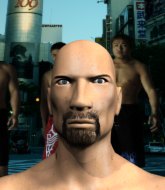
Coming up we have a lightweight MMA rules bout between Paddy Dimblett (ranked 1829 p4p, 4247 weight class) and Ronald Durall (ranked 229 p4p, 432 weight class). Paddy Dimblett has the edge in experience - let's see if he can make that count tonight.
 |
|
 |
| 178 cm
21
167
7 - 1 - 0 |
|
175 cm
20
155
2 - 3 - 0 |
Abu Dhabi Champ
Counter fighter
Granite chin |
|
BJJ Purple Belt
Good kicks
Good gas tank |
|
| |
|
Ladies and gentlemen. This fight is 3 rounds, in the lightweight division.
Introducing the fighter to my left, fighting out of the red corner.
With a record of 7 - 1 - 0, fighting out of Las Vegas, Paddy Dimblett!
And introducing the fighter to my right, fighting out of the blue corner.
With a record of 2 - 3 - 0, fighting out of New York, Ronald Durall!
The judges for this bout are Russell Pearce, Chad Campbell and Eddie Farnsworth.

The bell rings for round one and we are underway!
Dimblett with a poor takedown
and Durall counters with a lovely shot to the body.
Durall looks more muscular than last time we saw him. He must have been on the weights.

Dimblett drives through with a takedown into Durall's guard. Let's see what he can do from the top position.
Durall wants to stand up but Dimblett is controlling him.
Durall looking to sweep here. No luck so far.

Dimblett is trying to work a guillotine from the top, or something like that? Don't know how he thinks he's going to get a finish from there.
Durall looking to hit a scissor sweep but Dimblett is one step ahead there.
Durall wants to stand but Dimblett is controlling the position.
We've had a slow start to the round here - hopefully the action picks up.
Durall wants to sweep here but Dimblett controlling him for the moment.
Dimblett tries to free his leg and advance position but Durall is retaining full guard.
Durall is looking to sweep but instead, Dimblett has passed into half guard.
Durall is trying to escape back to his feet but Dimblett uses the scramble to pass into side control.

That's one minute gone in the round.
Durall is not content to let Dimblett control the position.
Durall is trying to buck Dimblett off.
Durall is looking to reverse the position.
Durall really doesn't want to stay on the ground with Dimblett. If he can't get it back to his feet, it's only a matter of time before he'll be tapping out.
Dimblett working hard here to secure a kimura but he's not really in the right position for it.
Dimblett slows the pace down.
Dimblett prevents Durall from escaping the position.
Dimblett is looking to finish here, going for an Americana. Durall knows the correct defense though, so he's OK.
Dimblett is looking for a kimura. He might have it! No, Durall has escaped the position, nice work there.

That's two minutes gone in the round.
Dimblett is trying to get an arm triangle but Durall is defending well.
Durall is looking for a sweep.
We've been hearing that Dimblett has been drilling a lot of ground and pound in training, so let's see if he get the finish.

Durall explodes and escapes back to his feet! Nice escape there!
Durall lands a jab.
Durall throws a series of strikes that have Dimblett backpedaling.
Wooooo! Give it up for these two warriors! They are putting on a show!
Durall misses with a lunging right hand
and Dimblett counters with a nice shoot takedown that brings the fighters to the ground.
Durall is looking to stand back up but Dimblett counters by passing into half guard. Oops... bit sloppy there by Durall.
Durall is looking to escape.
The ref warns both fighters not to hold the cage as they work up against the meshing.

That's three minutes gone in the round.
Dimblett is looking for a kimura but Durall is holding onto that half guard position, so it's hard for Dimblett to get the leverage.
Dimblett has freed up his trapped foot and advances to mount.
Dimblett wants to control the pace but Durall is squirming around nicely.
Dimblett controlling the pace for now.
Durall is trying to escape the mount.
Durall is trying to get back to his feet but can't.
Durall is trying desperately to improve position.

That's four minutes gone in the round.
Durall keeps trying to improve his position.
Dimblett looking for an armbar but decides to keep the dominant position instead.
Dimblett prevents Durall from getting the reversal.
Dimblett controlling his opponent.
The fighters are pressed up against the cage, both looking to find a bit of space to work.
Dimblett trying to control but Durall is having none of it.
Durall working to try and regain half guard.
Durall sneaks a leg back under and regains half guard and is working straight away to try and get back to guard. He hasn't managed just yet though.
Dimblett stops Durall from getting back to his feet.
Dimblett trying to control from half guard but Durall is working away.
Dimblett is working for a kimura but Durall is defending it quite comfortably.
And that is the end of the round. The fighters go back to their corners.
Paddy Dimblett dominated that round.
OK. That's time! The bell goes and we're back to the action.

Dimblett shoots for a takedown but Durall saw that one coming a mile off and avoided it easily.
Decent striking displayed by Durall there.
Dimblett staying out of range there.
Durall comes forward and lands a shot to the body, then darts back out of range.
Durall keeps the fight standing with a nice sprawl.
Durall scores with a nice head shot.
The crowd cheers as Durall lands an impressive looking overhand right. Dimblett doesn't seem phased though.
We've had a slow start to the round here - hopefully the action picks up.
Durall lunges in with an uppercut that skims his opponent's chin.
Ronald Durall seems to be getting the better of the standup.
Nice body punch from Durall.
Dimblett needs to keep his hands up - Durall had a free shot at his head there.
This has been an exciting period of action!
Durall uses good footwork to get in and out and land a nice right hand before Dimblett has time to react.
That's one minute gone in the round.
Nice uppercut there from Durall.
The crowd cheers as Durall lands an impressive looking overhand right. Dimblett doesn't seem phased though.
A swing and a miss from Durall.
Dimblett drops down looking for a counter takedown but Durall sprawls and moves away.
Durall uses good footwork to get in and out, landing a nice hook.
A jab from Durall finds it's way through Dimblett's defenses.
Dimblett looks frustrated there after his takedown attempt is stuffed easily.
That's three failed takedown attempts in the round for Paddy Dimblett. That's going to take a lot out of him.
Good shot there by Durall.
Durall connects with a nice looking jab.
Durall fakes and then throws a beautiful body shot. Dimblett looks a bit winded and takes a step backwards to take a breath.
That's two minutes gone in the round.
Dimblett takes a shot right to the liver - Bas would have been proud of that punch.
Wooooo! Give it up for these two warriors! They are putting on a show!
Durall misses with a left hand
and Dimblett counters with a driving takedown into guard. Nice work there by Dimblett.
Paddy Dimblett overall seems to be getting the better of the ground position in the fight so far.
Durall wants to get back to his feet but Dimblett is in a dominant position and won't allow it.
Durall is using up a lot of energy trying to get back to his feet. Perhaps he should improve his position first.
Durall is looking to stand back up but Dimblett counters by passing into half guard. Oops... bit sloppy there by Durall.
Dimblett is looking to take a break and control but Durall is keeping him honest, looking to work from the bottom.
Durall is looking to escape.
Still in half guard, Dimblett seems content to control.
Dimblett tries to pass the half guard into mount. Durall knows what he's doing though and prevents the attempt.
That's three minutes gone in the round.
Durall is not content to let Dimblett control the position.
Dimblett is looking for an arm triangle, whilst trying to pass to side control. Durall doesn't seem that keen to cooperate though. No luck this time Dimblett.
Durall tries to get to full guard but Dimblett has control of the leg.
Dimblett not doing much here.
Dimblett is working for submissions here but there's nothing on.
That's four minutes gone in the round.
The crowd are starting to boo a lack of action.
Dimblett prevents Durall from standing back up.

The referee has decided to stand the fighters back up, so we'll restart on the feet.
Ronald Durall seems to be the more aggressive standup fighter in this bout.
Dimblett tries for a takedown but Durall circles away easily
and Durall counters nicely by changing levels and landing a hook to the body.
Nice uppercut lands for Durall. That snapped Dimblett's head back.
Ronald Durall is looking to keep the fight on the feet at all costs.
Dimblett uses good footwork to avoid the strikes from Durall.
Dimblett attempts a counter takedown but Durall avoids it well and moves away.
Durall with a body punch. A glancing blow.
Durall listening to his corner there, landing a nice uppercut.
Decent striking displayed by Durall there.
Durall throws a nice hook to the body that draws an oooh from the crowd.
Dimblett shoots in for a takedown. "I don't think so" says Durall as he avoids it easily.
And that is the end of the round. The fighters go back to their corners.
Ronald Durall showed his class in that round. I'd imagine he'll take it on all the scorecards.
Well, the break between rounds is over. Let's get back to the scrappin! Let's get this one finished - here comes the final round!

Dimblett showing good head movement there, avoiding the strikes from Durall.
Dimblett changes levels looking for a counter takedown but doesn't commit.
Durall misses the jab.
Dimblett shoots in for a takedown. He's persisting with it as Durall sprawls well. Durall wins this battle and keeps the fight standing. Dimblett gets slowly back to his feet.
Dimblett avoids the body shot from Durall.
Durall stuns Dimblett with a nice body shot, before stepping back out of range.
We've had a slow start to the round here - hopefully the action picks up.
Nice shot lands for Durall.
Dimblett closes the distance and takes a jab right on the nose as he does so.
Dimblett takes a shot right to the liver - Bas would have been proud of that punch.
Durall connects with a jab.
That's one minute gone in the round.
Dimblett with a lazy takedown attempt
and Durall counters with a nice body shot.
Both fighters are breathing heavily.
Dimblett tries to check a leg kick but that clearly hurt him.
Durall with a hook.
Dimblett takes a punch to the jaw and another one to the bread basket.
Durall throws a big shot that misses.
Dimblett gets a takedown into half guard.

Durall manages to create a bit of space in order to work his way back to his feet. Dimblett keeps hold of his opponent and drives him back against the cage.
The crowd are loving this. Great action here.
Durall wants to break the clinch but can't.
Durall wants to break the clinch but can't.
Dimblett looking for a takedown.
That's three failed takedown attempts in the round for Paddy Dimblett. That's going to take a lot out of him.

Durall manages to break the clinch.
Dimblett takes a body punch but keeps moving.
That's two minutes gone in the round.
Donk. Durall catches Dimblett right on the button with a cross.
Dimblett needs to keep his hands up - Durall had a free shot at his head there.
A big right from Durall misses.
Dimblett on the wrong end of a vicious looking body shot.
Durall throws a series of punches but Dimblett moves out of range.
Durall throws a two punch combo that lands nicely.
Dimblett scores a trip takedown into side control. Nice.
Durall is putting a lot of effort into getting back to his feet here.
That's three minutes gone in the round.
Dimblett wants to control but Durall is keeping him busy.
Dimblett tries for a kimura but Durall is defending well.
Durall wants to escape from the position here - easier said than done!
Dimblett is looking to finish here, going for an Americana. Durall knows the correct defense though, so he's OK.
Durall tries to improve position but can't.
Dimblett is trying to land an Americana. He has the arm isolated but Durall is keeping cool and he's avoided the danger for now.
Durall is moving his hips around well on the bottom and has managed to get back to half guard.
That's four minutes gone in the round.
Durall is looking for a sweep. Dimblett is wise to his cunning plan and keeps the top position.
Durall has been the more effective fighter overall so far.
Dimblett wants to control but Durall is keeping him busy.
Dimblett prevents Durall from standing back up.
Dimblett is looking to take a break and control but Durall is keeping him honest, looking to work from the bottom.
Dimblett sitting and controlling from the half guard.
Dimblett is looking for a kimura but Durall is holding onto that half guard position, so it's hard for Dimblett to get the leverage.
Durall is trying to stand.
Durall is looking to get back to is feet but Dimblett passes into side control.
Dimblett is looking for a kimura. He might have it! No, Durall has escaped the position, nice work there.
And that's the end of the fight!
Ronald Durall comfortably won the final round on my scorecard.
I think Durall has won this one but let's see whether the judges agree with me. Over to the ring announcer for the scorecards.
Ladies and gentlemen, after 3 rounds of action, we go to the scorecards for a decision.
Judge Russell Pearce scores the fight 28:29
Judge Chad Campbell scores the fight 28:29
Judge Eddie Farnsworth scores the fight 28:29
In favor of your winner, by unanimous decision... Ronald Durall!
Ronald Durall bigged himself up after the win. The crowd seemed to love it.
|
|
|
|
|
|
|
|
|
|
|
|
|
|
|
|
|
|
|
|
|
|
|
| S |
C
A |
G |
S |
C
B |
G |
|
S |
C |
G |
|
energy
A | B |
|
hype
A | B |
|
pop
A | B |
|
mgr
A | B |
|
FIGHT
RATING
52% |
|
|
|
|
|
|
