|
|
PBP Commentary |
Coming up we have a welterweight MMA rules bout between Keisuke Matsuzaka (ranked 155 p4p, 381 weight class) and A. Mere Con (ranked 19 p4p, 48 weight class). Keisuke Matsuzaka had a look across the cage there at his opponent. He definitely means business
 |
|
 |
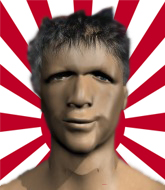
| 179 cm
32
181
30 - 12 - 1 |
|
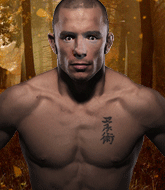
184 cm
35
171
23 - 11 - 1 |
Great wrestler
World class boxer
Insanely flexible |
|
Good wrestler
World class MT
Granite chin |
|
| |
|
Ladies and gentlemen. This fight is 3 rounds, in the welterweight division.
Introducing the fighter to my left, fighting out of the red corner.
With a record of 30 - 12 - 1, fighting out of Montreal, Keisuke Matsuzaka!
And introducing the fighter to my right, fighting out of the blue corner.
With a record of 23 - 11 - 1, fighting out of Montreal, A. Mere Con!
The judges for this bout are Percy O'Donnell, Frank Antenori and Timothy Bukovac.

The bell rings for round one and we are underway!
Con looks to score with a jab to the body but Matsuzaka is just out of range.
Matsuzaka connects with a looping right hand.
Con swings and misses with a hook to the body.
Con moves out of range of the strikes.
Matsuzaka uses some good footwork to avoid the body shot by Con.
Matsuzaka fakes a jab and then connects with a hook.
Con fakes high and swings low for a body shot but Matsuzaka manages to avoid it.
Matsuzaka throws an ugly left hook that misses
and Con counters with a nice body shot.
Matsuzaka lands an overhand left. A wild punch that just about connected.
Matsuzaka uses some good footwork to avoid the body shot by Con.
Con misses with a straight right.
Matsuzaka slips under a jab from Con.
Matsuzaka throws a shot from downtown. Con moves away and avoids it.
Con slips a jab from Matsuzaka.
Con misses with a jab to the body
and Matsuzaka counters with a nice uppercut.
Nice uppercut lands for Matsuzaka. That snapped Con's head back.
This is a great period of action - very entertaining stuff!
Matsuzaka scores with a jab to the head.
Con is throwing a lot of body shots here, looking to wear down Matsuzaka rather than just go for the knockout.

That's one minute gone in the round.
Matsuzaka misses with a looping left.
Con now looks to counter with a shot at the body.
Con slips in close and lands a nice hook before moving back out of range.
Matsuzaka just misses with a punch to the body.
Con ducks under a wild hook from Matsuzaka.
Con looks to score with a combo but nothing lands.
Matsuzaka uses some good footwork to avoid the body shot by Con.
Con tries to land with a swinging hook to the body but Matsuzaka was well out of range. Poor timing from Con.
Matsuzaka misses with a body shot. Nice footwork from Con.
A swing and a miss from Con.
Con displays some good footwork, moving neatly out of range as Matsuzaka throws out the jab.
Con throws out a counter right but Matsuzaka avoids it with no problem.
Matsuzaka misses with an uppercut.
Con misses with a wild body shot.
Matsuzaka misses with an uppercut. Con saw that one coming.
Con slips under a jab from Matsuzaka.
Matsuzaka throws a hook to the side of Con's head but Con sees it coming and ducks under it beautifully.
Matsuzaka swings away with a body shot that misses
and Con counters with a quick right hand to the jaw.

That's two minutes gone in the round.
Matsuzaka just misses with a punch to the body.
Matsuzaka is really head hunting here, hardly looking to strike to the body at all.
Con throws a big shot that misses.
Matsuzaka throws a looping overhand right but Con ducks down to avoid it.
Con throws a hard body shot but it just misses.
Con misses with a looping left.
Matsuzaka takes a swing at Con's ribcage but misses.
Matsuzaka has his hands up protecting his head but a hook from Con finds it's way round the side to connect with Matsuzaka's head.
We've seen a great period of action over the last minute or so - credit to both fighters for going all out!
Matsuzaka slips under a jab.
Matsuzaka feinted there with a counter leg kick.
Matsuzaka throws a right hand that misses
and Con counters with a good right hand that lands right on the jaw.
Matsuzaka displays some good footwork, moving neatly out of range as Con throws out the jab.
Con throws a hook to the side of Matsuzaka's head but Matsuzaka sees it coming and ducks under it beautifully.

Matsuzaka gets a clinch.
Con struggles to land a body shot inside as Matsuzaka controls his hands.
Matsuzaka lands an elbow inside.
Matsuzaka lands punches inside but they're not really causing much damage.
Matsuzaka lands a nice shot to the body.
Con doesn't land with the attempted body shot.
Con will no doubt start fighting again in a minute but for now he's just having a little rest, leaning Matsuzaka up against the cage.

That's three minutes gone in the round.
Matsuzaka struggles to land a body shot inside as Con controls his hands.
Con trying to stall but Matsuzaka improves his position.
Matsuzaka lands an elbow inside.

It looks like A. Mere Con has been cut.
Matsuzaka tries to throw a body punch but Con avoids it by throwing Matsuzaka back against the cage.
Con scores with a nice hook to the head.
Con's head jolts backwards as he takes an uppercut right on the button!
Con working aggressively here.
Con blocking some punches.
Good body shot from Matsuzaka.
Matsuzaka misses with an elbow strike.
Matsuzaka lands a hook to the side of the head.
Con blocks an elbow strike from Matsuzaka.
Con throws a punch but it's blocked by Matsuzaka.
Matsuzaka swings wildly with an uppercut but Con uses good head movement to avoid it.
Matsuzaka throws an elbow but it's blocked.
Matsuzaka throws a blind hook that connects with the side of Cons head.
Matsuzaka swings wildly with an uppercut but Con uses good head movement to avoid it.

That's four minutes gone in the round.
Matsuzaka lands a right uppercut that snaps the head of Con backwards.
This is a great period of action - very entertaining stuff!
Con's head jolts backwards as he takes an uppercut right on the button!
A head punch blocked on the inside by Matsuzaka.
Matsuzaka is trying to slow down the pace in the clinch, to catch his breath.
An uppercut to the body lands inside from Matsuzaka.
Con struggles to land a body shot inside as Matsuzaka controls his hands.
Matsuzaka blocks a punch to the side of the head.
Con blocks an uppercut.
Matsuzaka can't find room to land a body shot as Con controls the action.
Con blocking some punches.
Matsuzaka tries a shoulder strike but it doesn't do any damage.
A head punch on the inside from Con fails to land.
Con has been looking to improve his clinch game in recent weeks. Matsuzaka seems to have the measure of him in the clinch so far, so let's see if Con can turn it around.
Matsuzaka misses with some punches.
Matsuzaka doesn't land with the attempted body shot.
Matsuzaka blocks a body shot from Con.
Con throws a punch but it's blocked by Matsuzaka.
Matsuzaka misses with a hook from the clinch.
Matsuzaka lands a shot to the body.
And that is the end of the round. The fighters go back to their corners.
Keisuke Matsuzaka dominated that round.
The cut man is working on A. Mere Con's cut.
The fighters get back to their feet, the hooter sounds and we're back to the action!

Matsuzaka misses with a hook.
Matsuzaka looks to score with a jab to the body but Con is just out of range.
Con misses the jab.
Keisuke Matsuzaka is winning the standup battle so far.
Matsuzaka lands with a cross to side of his opponent's head.
Con jabs Matsuzaka to the body, keeping him at a distance.
Matsuzaka keeping his hands up high there, blocking the jab from Con.
Matsuzaka tries to land with a swinging hook to the body but Con was well out of range. Poor timing from Matsuzaka.
Matsuzaka digs a good hook to Con's body.
Matsuzaka ducks under an overhand right and circles away with a smile on his face.
Matsuzaka loads up on a big right hand but Con slips the punch.
Matsuzaka loads up on a big right hand but Con slips the punch.
We've had a slow start to the round here - hopefully the action picks up.
Con keeping a good distance there, avoiding the body shot.
Con throws an overhand right that lands on Matsuzaka's shoulder, as Matsuzaka tries to avoid the shot.
A. Mere Con seems to be the more aggressive standup fighter in this bout.
Matsuzaka waving his hands out in front of him, looking to distract Con.
Matsuzaka throws a body shot but no joy.
Con throws a lazy uppercut
and Matsuzaka connects with a straight left hand counter down the middle.
That's one minute gone in the round.
Matsuzaka misses with a looping right.
Con takes a big uppercut there. He seems a bit wobbly but no, he's OK.
Con looks to land a right hand but Matsuzaka moved out of range.
A little feinted left hand from Matsuzaka on the counter but he doesn't commit to it.
Con throws out a loose jab but Matsuzaka uses good head movement to avoid it.
A counter left hand to the body from Matsuzaka misses its target.
Matsuzaka takes a solid shot to the body. That one hurt him but he's trying not to show it.
Con throws a lazy right hand but Matsuzaka sees it coming a mile off and sidesteps it easily.
Matsuzaka throws an uppercut from half a mile away. Con sees it coming and avoids it easily.
Matsuzaka scores with a hook to the body. Con takes a step back and tries to catch his breath.
A looping hook to the body misses from Matsuzaka. Con does a little dance to reset his feet.
Matsuzaka misses with a combination
and Con counters with a straight right hand.
Matsuzaka swings for the body but Con moves out of range.
Matsuzaka misses with a hook
and Con counters with a lovely straight right hand!
Matsuzaka throws out a token jab with nothing on it.
A looping hook to the body misses from Con. Matsuzaka does a little dance to reset his feet.
Matsuzaka with poor footwork there. He got himself in a bit of a tangle, enabling Con to score with a decent uppercut.
Matsuzaka looks to have improved his striking defense since last time we saw him fight.
That's two minutes gone in the round.
Matsuzaka feints and then cracks Con's leading leg with a nice low kick. He's obviously looking to slow Con down.
The fans in attendance giving it up for the two fighters, who have really let it all hang out in the last minute or so!
Matsuzaka ducks under a wild hook from Con.
Matsuzaka uses good footwork to get in and out and land a nice right hand before Con has time to react.
Con misses with a straight left.
Matsuzaka throws out a loose jab but Con uses good head movement to avoid it.
Matsuzaka takes a swing at Con's ribcage but misses.
An inside leg kick from Matsuzaka misses.
Matsuzaka takes a swing at Con's ribcage but misses.
Matsuzaka fails in his attempt to clinch.
Matsuzaka scores with a sloppy punch to the body. Not much technique there but it did the business.
Matsuzaka misses the shot to the body.
Matsuzaka ducks under an overhand right and circles away with a smile on his face.
A telegraphed right hand from Matsuzaka misses the target.
A slow jab from Con misses its intended target.
Matsuzaka avoids the body shot from Con.
Matsuzaka swung with a counter punch to the body but it didn't connect.
That's three minutes gone in the round.
Con moves out of range of the strikes.
Con looks to land a right hand but Matsuzaka moved out of range.
Matsuzaka ducks right into an uppercut from Con.
Con rushes in with a sloppy looking punch
and Matsuzaka cracks him with a counter punch right on the button.
Matsuzaka throws a shot from downtown. Con moves away and avoids it.
The fighters circling - Matsuzaka throws out the jab but it was never going to land.
Con just misses with a punch to the body.
Con lands a really nice looking cross but Matsuzaka seems unphased.
Con steps to the side to avoid the strikes from Matsuzaka.
Con uses decent footwork to sidestep a right hand from Matsuzaka.
A slow jab from Con misses its intended target.
Matsuzaka feinted there with a counter leg kick.
Matsuzaka takes a swing at Con's ribcage but misses.
Matsuzaka wants to clinch.
A countering left hand to the body from Con misses.
That's four minutes gone in the round.
Matsuzaka lands a jab. Then a cross. Then finally a nice hook to the body. Good work there by Matsuzaka.
Con ducks low and lands a nice hook to the body of his opponent.
This has been an exciting period of action!
Matsuzaka tries to clinch there but Con circles away.
Matsuzaka darts in trying to clinch
and Con connects with a straight left hand counter down the middle.
Matsuzaka avoids the body shot from Con.
Matsuzaka throws a quick inside leg kick.
Matsuzaka throws a lazy right hand but Con sees it coming a mile off and sidesteps it easily.
Con let fly with a counter punch to the body but it didn't land.
Con throws a hook to the body but it doesn't connect.
Matsuzaka scores with a hook to the body. Con takes a step back and tries to catch his breath.
Con lands with a cross to side of his opponent's head.
Matsuzaka fakes with the hands and throws a leg kick but Con is out of range.
Con wants to counter the offense by Matsuzaka and move into the clinch position.
Con lands a lovely overhand right.
And that is the end of the round. The fighters go back to their corners.
That was a close second round but I would say that Keisuke Matsuzaka will probably get the nod.
The cut man is working on A. Mere Con's cut.
That's time! Back to the action! This is the final round!

Con swings widly with a right hand
and Matsuzaka counters with a nice leg kick.
Matsuzaka scoring well with a low kick there.
Matsuzaka closes the distance and clinches.
Con leaning his opponent against the cage.
A. Mere Con has stepped it up - he knows he needs a finish here!
Con can't find room to land a body shot as Matsuzaka controls the action.
Matsuzaka misses with a punch to the body.
Con tries to work over Matsuzaka's body with a swooping hook but it only glances the target.
Matsuzaka lands a nice shot to the body.
Con blocks an elbow strike.
Keisuke Matsuzaka has scored more points in the clinch so far.
A right handed body shot lands from Matsuzaka.
Con misses with a body punch.
We've had a slow start to the round here - hopefully the action picks up.
Con tries to land a shot to the body but it's blocked.
Matsuzaka lands a body punch - he's looking to wear down Con.
A head punch blocked on the inside by Con.
Con blocks an elbow strike.
Matsuzaka digs a right hand into Con's ribs. Those have got to be taking their toll on Con's gas tank.
Matsuzaka works for underhooks and lands a body shot in the process.
Con takes a big intake of breath there - he's definitely tired.
That's one minute gone in the round.
Matsuzaka cracks Con with a nice body shot.
Matsuzaka is really dominating this fight. Is there anything that Con can do to turn this around?
Con blocks a punch to the side of the head.
Matsuzaka blocks an uppercut.
Con goes for a body shot but it's blocked.
Con avoids a wild elbow strike from Matsuzaka.
Matsuzaka swings away with an uppercut that misses.
Matsuzaka pushes Con back against the cage and lands a hook to the side of the head.
Con misses with a shot to the kidneys.
Matsuzaka doesn't land with the attempted body shot.
Con tries to work over Matsuzaka's body with a swooping hook but it only glances the target.
Matsuzaka takes a shot to the head.
Con lands a short shot on the inside that snaps the head of Matsuzaka backwards.
Con blocks an elbow strike.
Con effectively controlling the action here.
Matsuzaka tries to throw a body punch but Con avoids it by throwing Matsuzaka back against the cage.
Matsuzaka lands a hook to the side of the head.
Matsuzaka creates a bit of space for himself and sneaks an elbow through Con's defenses.
Con throws a punch but it's blocked by Matsuzaka.
That's two minutes gone in the round.
Nice elbow from Matsuzaka.
The crowd cheering loudly, showing their appreciation for the quality fight we're seeing here.
Matsuzaka lands with a quick shot inside that doesn't really do much damage.
Matsuzaka struggles to land a body shot inside as Con controls his hands.
Matsuzaka misses with an elbow strike.
Matsuzaka lands a nice shot to the body.
Matsuzaka tries to land a shot to the body but it's blocked.
Matsuzaka lands a hook that snaps the head of Con backwards.
Matsuzaka lands a shoulder strike that jolts his opponent's head backwards.
A left hand lands to the body for Matsuzaka.
Con works for underhooks and lands a body shot in the process.
Matsuzaka swings wildly with an uppercut but Con uses good head movement to avoid it.
Matsuzaka works on Con's body with a couple of short punches.
Matsuzaka misses with an elbow over the top.
Matsuzaka leaning his opponent against the cage.
Matsuzaka blocks a punch to the side of the head.
Con misses with a hook to the ribs.
That's three minutes gone in the round.
Matsuzaka tries to land a shot to the body but it's blocked.
Con trying to stall but Matsuzaka improves his position.
Matsuzaka throws an elbow but it's blocked.
A head punch blocked on the inside by Con.
Matsuzaka blocks a punch to the side of the head.
Matsuzaka is working Con over against the cage.
A head punch blocked on the inside by Matsuzaka.
Matsuzaka lands a nice elbow from the clinch.
Matsuzaka misses with a punch on the inside.
Con tries to throw a body punch but Matsuzaka avoids it by throwing Con back against the cage.
Matsuzaka misses with a hook from the clinch.
Keisuke Matsuzaka is fighting for a decision here - he's started to take the cautious approach.
Matsuzaka blocks a punch to the side of the head.
Matsuzaka taking a break, stalling in the clinch.
An uppercut on the inside fails to land for Con.
Matsuzaka scores with an uppercut up the middle.
Con misses with a hook from the clinch.
Matsuzaka lands a short shot on the inside that snaps the head of Con backwards.
That's four minutes gone in the round.
Matsuzaka blocks an uppercut.
Matsuzaka blocks a couple of punches on the inside.
Matsuzaka softening up his opponent with strikes, against the cage.
Matsuzaka misses with the head strike.
Con blocks the elbow strike.
Matsuzaka blocks an uppercut.
The crowd cheering loudly, showing their appreciation for the quality fight we're seeing here.
Con misses with a hook from the clinch.
Con stalling in the clinch but Matsuzaka improves position.
Matsuzaka blocks a punch to the side of the head.
Con tried to land a shot to the body but connects with Matsuzaka's elbow.
Matsuzaka lands a nice elbow from the clinch.
Matsuzaka blocks an uppercut.
Matsuzaka blocks a couple of punches on the inside.
Matsuzaka blocking some punches.
And that's the end of the fight!
Keisuke Matsuzaka showed his dominance in that final round.
Well Matsuzaka has outscored his opponent in every aspect of the fight today. Only a scarily incompetent judge or two will keep him from a well deserved win... Over to the ring announcer for the scorecards.
Ladies and gentlemen, after 3 rounds of action, we go to the scorecards for a decision.
Judge Percy O'Donnell scores the fight 30:27
Judge Frank Antenori scores the fight 30:27
Judge Timothy Bukovac scores the fight 30:27
In favor of your winner, by unanimous decision... Keisuke Matsuzaka!
Keisuke Matsuzaka decided to hype himself up post fight. It was going well but he went on about it a bit too long and the crowd turned on him a little.
|
|
|
|
|
|
|
|
|
|
|
|
|
|
|
|
|
|
|
|
|
|
|
| S |
C
A |
G |
S |
C
B |
G |
|
S |
C |
G |
|
energy
A | B |
|
hype
A | B |
|
pop
A | B |
|
mgr
A | B |
|
FIGHT
RATING
62% |
|
|
|
|
|
|
