|
|
PBP Commentary |
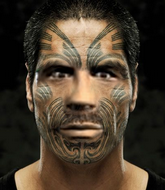
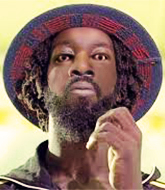
Coming up we have a middleweight MMA rules bout between Bruce Kiwi (ranked 612 p4p, 910 weight class) and Macka Briggs (ranked 87 p4p, 120 weight class). Kiwi comes to the cage accompanied by Reaper. Briggs comes into a darkened arena with his song building. Stepping Razor by Peter Tosh kicks in, the lights come on and the crowd goes wild! What a showman! Macka Briggs has the better chin. Will he look to stand and bang today?
 |
|
 |
| 185 cm
28
186
14 - 4 - 0 |
|
187 cm
26
195
11 - 8 - 0 |
Good wrestling
World class boxer
KO power |
|
Good wrestler
World class boxer
Good gas tank |
|
| |
|
Ladies and gentlemen. This fight is 3 rounds, in the middleweight division.
Introducing the fighter to my left, fighting out of the red corner.
With a record of 14 - 4 - 0, fighting out of Sydney, Bruce Kiwi!
And introducing the fighter to my right, fighting out of the blue corner.
With a record of 11 - 8 - 0, fighting out of Montreal, Macka Briggs!
The judges for this bout are Steve Montenegro, Dean Styles and Eddie Farnsworth.

The bell rings for round one and we are underway!
Kiwi throws a shot from downtown. Briggs moves away and avoids it.
Kiwi lands an overhand right.
Briggs shoots in for a takedown but Kiwi shows good takedown defense there and keeps this one on the feet.
Kiwi rushes in with a sloppy looking punch
and Briggs counters with a stiff right hand.
Kiwi lands a leg kick that knocks Briggs off balance momentarily.
Kiwi lands a jab to Briggs's midsection.
Kiwi ducks down and throws a hook to the body but Briggs moves away.
Briggs takes a jab right on the kisser.
Briggs wants to clinch.
We've had a slow start to the round here - hopefully the action picks up.
Kiwi lands with a nice low kick. That'll leave a bruise.
Kiwi swings away with a leg kick that misses.
Briggs fakes a head shot and lands one to the body.

That's one minute gone in the round.
Kiwi swings widly with a right hand
and Briggs counters with a straight punch to the midsection.
Briggs fakes and then throws a beautiful body shot. Kiwi looks a bit winded and takes a step backwards to take a breath.
That kick from Kiwi tenderised Briggs's leg. Briggs is trying to keep his angry face on.
Bruce Kiwi is looking to keep the fight on the feet at all costs.
Kiwi's corner calls for a 1-2. Kiwi obliges with the 1 part as he scores the single shot and moves back out of range.
Briggs walks forward and throws out a flicking leg kick. Kiwi checks it nicely though, as he moves to the side.
A jab lands there for Kiwi.
Kiwi misses the shot to the body.
A cross from Kiwi lands.
Kiwi cracks Briggs with a good shot that sees him stumbling back into the cage.
Kiwi swings and misses with a hook to the body.

Briggs drives through with a really nice takedown into side control.

Kiwi bucks up and manages to escape back to his feet!
This has been an exciting period of action!

Kiwi moves into range and clinches up with Briggs.

That's two minutes gone in the round.
Kiwi's head jolts backwards as he takes an uppercut right on the button!
Kiwi misses with a hook to the ribs.
Kiwi lands with a quick shot inside that doesn't really do much damage.
Briggs blocks a punch to the side of the head.
Briggs is working for a takedown up against the cage. He can't get it on this occasion though.
Briggs lands with a short shot to the head.
Kiwi tries to pull guard but Briggs holds him up against the cage and eventually Kiwi drops back down to his feet.

Kiwi jumps guard and drags Briggs to the mat. He's obviously going to be looking for submissions off his back.

Kiwi is throwing his legs up, looking for submissions. Briggs is aware though and is defending well.
Kiwi working for a triangle but Briggs defends it easily.
Briggs must be cautious of submissions here, given that his opponent has the superior Jiu Jitsu.

Briggs stands up from guard. Let's bang!

That's three minutes gone in the round.
Kiwi lands a jab to the nose.
Kiwi throws an overhand right that lands on Briggs's shoulder, as Briggs tries to avoid the shot.
Nice takedown defense from Kiwi. No joy for Briggs on that attempt.
Bruce Kiwi has stuffed three takedown attempts in the round now. That's going to take a lot out of Macka Briggs.
Kiwi clinches up against the cage.
Briggs goes for a body shot but it's blocked.
Kiwi tries to pull guard but Briggs forces him back to his feet, against the cage.
Kiwi is trying to pull guard but Briggs turns him against the cage and we stay in the clinch.
Briggs turns his back and goes for a hip toss. It's a bit messy but it gets the job done and Briggs manages to end up in side control.
Briggs works a knee to the body and follows up with a nice elbow to the head.
Briggs tries to move to mount but Kiwi blocks the move with his legs.
Briggs scoring with punches from side control.
Briggs lands some shots froms side control.
The ref warns both fighters not to hold the cage as they work up against the meshing.
Briggs creates some space and throws a big elbow, but Kiwi sees it coming and moves his head just enough to avoid the strike.

That's four minutes gone in the round.
Check out the look on Briggs's face as he threw that strike - that's one determined fighter!
Kiwi is positioning himself to get back to half guard.
Fantastic stuff here - a very entertaining period of action, which has drawn cheers from the crowd.
Kiwi gets back to half guard.
Kiwi wants to control but Briggs is keeping busy.
Nice strikes from Briggs there.
Kiwi is working for an escape here. He's hooked one of Briggs's legs and he's managed to sneak out and take Briggs's back!
Briggs staying busy and making it hard for Kiwi to control.
Kiwi is remaining active here, looking for the choke. The more discerning members of the crowd will appreciate his efforts.
And that is the end of the round. The fighters go back to their corners.
Bruce Kiwi dominated that round.
That's the end of the round. The referee orders the cornermen out of the cage so we can get back down to business.

Kiwi moves into range and clinches up with Briggs.
Macka Briggs has stepped it up - he knows he needs a finish here!
Kiwi misses with the head strike.
Briggs makes some space for himself and lands an uppercut.

Briggs breaks the clinch and we return to the middle of the mat.
Kiwi misses with an uppercut.
Briggs lands with a shot to the body.
Kiwi misses with an uppercut.

Briggs gets in close and instigates a clinch.
Kiwi is trying to pull guard but Briggs has him pressed against the cage.
We've had a slow start to the round here - hopefully the action picks up.
Briggs goes for a takedown attempt but Kiwi pushes him away and we're back to fighting at a distance.
Kiwi tries to clinch but Briggs moves out of range.
Briggs throws a combination but it was largely blocked by Kiwi.
Briggs fails with a takedown attempt.
That's one minute gone in the round.
Briggs fakes high and swings low for a body shot but Kiwi manages to avoid it.
Kiwi fakes a jab and then connects with a hook.
Briggs lands with a straight right. Kiwi didn't see that one coming.
Kiwi is really dominating this fight. Is there anything that Briggs can do to turn this around?
Kiwi dances in quickly and lands a nice inside leg kick on Briggs. That did some damage!
Kiwi misses with a hook.
A lazy left from Kiwi finds it's target.
Briggs looks more muscular than last time we saw him. He must have been on the weights.
Briggs moves away from the strike by Kiwi.
Briggs throws a hard body shot but it just misses.
Kiwi lands a head kick!
Briggs tries to close the distance and clinch up against the cage but Kiwi paws at him with a jab and circles away.
Kiwi lands with a shot to the body.
Briggs takes a shot to the body in his stride.
Briggs scores with a body shot.
That's two minutes gone in the round.
Wooooo! Give it up for these two warriors! They are putting on a show!
Kiwi misses with a hook. Briggs ducked under it nicely.
A countering left hand to the body from Briggs misses.
Briggs swings and misses with a shot to the body
and Kiwi counters with a nice uppercut.
Kiwi throws a leg kick but Briggs moved away.
Kiwi takes one to the chin there.
Kiwi throws a hook to the side of Briggs's head but Briggs sees it coming and ducks under it beautifully.
Good work by Briggs as he checks the leg kick.

Briggs moves into range and throws a big uppercut. OH! Kiwi goes down! Can Briggs finish him!?

Kiwi is rocked!
Kiwi is looking for a triangle but Briggs pushes his legs off easily.
Oh Kiwi is still in real trouble! Will he be able to recover?!!
Briggs is stalling in the full guard.
Briggs pressing down on his opponent's thigh, looking to pass guard. Kiwi is keeping the position for now.
Kiwi seems to have got his legs back now.
Briggs wants to control from the top but Kiwi keeps moving.
That's three minutes gone in the round.
Briggs wants to pass the guard but Kiwi is keeping the position.
The fighters are pressed up against the cage, both looking to find a bit of space to work.
Kiwi wants to sweep here but Briggs controlling him for the moment.
Briggs is looking to work some ground and pound but Kiwi has wrist control.
Briggs pressing down on his opponent's thigh, looking to pass guard. Kiwi is keeping the position for now.
That's four minutes gone in the round.
The crowd are hurling abuse towards the fighters... You can hardly blame them though because there isn't a lot going on in the fight.
Briggs trying to control but Kiwi is working from the bottom.

The ref stands the fighters back up due to a lack of activity.
Kiwi swings for the body but Briggs moves out of range.
Kiwi uses some good footwork to avoid the body shot by Briggs.
Kiwi uses good footwork to get in and out and land a nice right hand before Briggs has time to react.
Briggs is throwing a lot of body shots here, looking to wear down Kiwi rather than just go for the knockout.
Briggs scores with a nice head shot.
Bruce Kiwi is winning the standup battle so far.
Kiwi lands a beauty of a right hand that gets the crowd cheering.
Briggs throws a body shot but no joy.
Kiwi is looking to counter punch.
Kiwi digs a good body shot into Briggs's ribs.
Kiwi avoids the body shot from Briggs.
Briggs throws a jab to the body, straight down the pipe. Boom. That sent Kiwi stumbling backwards but he manages to regain his composure quickly.
Kiwi connects with the punch.
And that is the end of the round. The fighters go back to their corners.
A close second round but Macka Briggs will probably get the nod - 10:9.
The fighters' corners scream their final instructions, as the referee calls time. Here we go, back to the action! This is the final round!

Kiwi fakes and then throws a beautiful body shot. Briggs looks a bit winded and takes a step backwards to take a breath.
Briggs drops Kiwi with a big left hand and mounts him. Kiwi is in big trouble!
The crowd are loving this. Great action here.
Briggs trying to control but he's not successful this time.
Briggs cracks Kiwi with a big head shot that has him covering up instantly! He's rolled onto his side and the referee has seen enough - this one is aaaaaaaaaaall over!
Ladies and gentlemen, after 0:43 of round 3, we have a winner by way of TKO (Strikes). Macka Briggs!
A relieved looking Macka Briggs thanked the fans for their support and gave the usual line about them being amazing. They seemed to believe that he actually meant it.
|
|
|
|
|
|
|
|
|
|
|
|
|
|
|
|
|
|
|
|
|
|
|
| S |
C
A |
G |
S |
C
B |
G |
|
S |
C |
G |
|
energy
A | B |
|
hype
A | B |
|
pop
A | B |
|
mgr
A | B |
|
FIGHT
RATING
72% |
|
|
|
|
|
|
