|
|
PBP Commentary |
Coming up we have a middleweight MMA rules bout between Yossi Bissoma (ranked 2546 p4p, 2081 weight class) and Emelia Kooldfish (ranked 0 p4p, 0 weight class). Kooldfish has chosen Dirty Needle Project! by Tom MacDonald & Adam Calhoun as his entrance music. Emelia Kooldfish looks lathargic as he enters the arena. Wake up son, you're about to have a fight!
 |
|
 |
| 185 cm
23
190
4 - 1 - 0 |
|
189 cm
26
190
7 - 1 - 0 |
BJJ Purple Belt
Excellent MT
Cardio machine |
|
Good wrestler
World class boxer
Fast |
|
| |
|
Ladies and gentlemen. This fight is 3 rounds, in the middleweight division.
Introducing the fighter to my left, fighting out of the red corner.
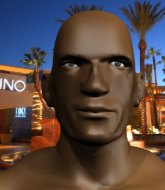
With a record of 4 - 1 - 0, fighting out of London, Yossi Bissoma!
And introducing the fighter to my right, fighting out of the blue corner.
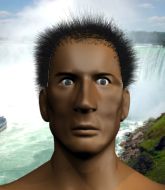
With a record of 7 - 1 - 0, fighting out of Las Vegas, Emelia Kooldfish!
The judges for this bout are Daniel Bishop, James Ackerman and Chris Edwards.

The bell rings for round one and we are underway!
Bissoma tries to clinch up
and Bissoma takes a counter punch right on the button for his troubles.

Bissoma darts in and clinches Kooldfish up against the cage.
A head punch on the inside from Kooldfish fails to land.
Bissoma throws a vicious knee straight up the middle but Kooldfish blocks it with crossed arms.
Kooldfish misses with a short punch on the inside.
Kooldfish throws a head punch that misses.
Kooldfish lands a nice elbow.

It looks like Yossi Bissoma has been cut.
Kooldfish scores with a nice hook to the head.
Bissoma misses with some punches.
A nice left hand lands by Bissoma.
We've had a slow start to the round here - hopefully the action picks up.
Kooldfish displaying some good clinch control by pressing Bissoma up against the cage.
Kooldfish lands a hook to the side of the head.
An uppercut on the inside fails to land for Bissoma.
A head punch blocked on the inside by Bissoma.
Kooldfish misses with a punch on the inside.

That's one minute gone in the round.
Kooldfish fails to land with a short punch on the inside.
Bissoma lands a left hand that snaps the head of Kooldfish backwards.
Bissoma avoiding damage.
Kooldfish has had enough of the clinch and is looking to separate.
Bissoma lands with a short shot to the head.
Bissoma throws a punch but it's blocked by Kooldfish.
Bissoma working on landing some head shots here - that one got through nicely.
A nice left hand lands by Kooldfish.
A battle for position here, against the cage.
Both fighters working to control the clinch.
Bissoma tries to land a knee to the head but misses.
Bissoma misses with a body punch.
Bissoma swings away with an uppercut that misses.

Kooldfish breaks the clinch.
We've been told by Bissoma's head coaches at Mentor Gym that he's been working on his takedown defense in preparation for this fight.
A telegraphed right hand from Bissoma misses the target.
And an attempted straight right on the counter from Kooldfish! But no joy.
Bissoma takes the fight into the clinch.
A real battle for position is taking place between these two warriors.

That's two minutes gone in the round.
Bissoma scores with a shot to the side of Kooldfish's head.
Bissoma misses with a punch to the body.
Kooldfish misses with a punch on the inside.
We've seen a great period of action over the last minute or so - credit to both fighters for going all out!
Bissoma lands a left hand that snaps the head of Kooldfish backwards.
Kooldfish lands with a quick shot inside that doesn't really do much damage.
Bissoma gets through Kooldfish's defenses to land a nice punch to the side of the head.
Bissoma tries a knee to the head but he's missed.
Bissoma tries to throw a body punch but Kooldfish avoids it by throwing Bissoma back against the cage.
Bissoma blocks a punch to the side of the head.
Kooldfish misses with a body punch.
Kooldfish blocks an uppercut.
A head punch on the inside from Kooldfish fails to land.
Bissoma goes for a body shot but it's blocked.
Bissoma slows down the pace here.
Bissoma scores with an uppercut up the middle.
Bissoma tries a shoulder strike but it doesn't do any damage.
Kooldfish blocking some punches.

That's three minutes gone in the round.
A head punch on the inside from Kooldfish fails to land.
Kooldfish trying to control the position but instead, Bissoma has worked for underhooks and has pushed Kooldfish into the cage.
Kooldfish has been looking to improve his clinch game in recent weeks. Bissoma seems to have the measure of him in the clinch so far, so let's see if Kooldfish can turn it around.
Bissoma misses with a short punch on the inside.
Bissoma misses with a shot to the kidneys.
Bissoma misses with a knee strike.
Bissoma blocks a couple of punches on the inside.
Kooldfish is trying to break the clinch but Bissoma is controlling him.
Bissoma scores with a shoulder strike.
Bissoma throws a head punch that misses.
Kooldfish throws a punch but it's blocked by Bissoma.
A right hand to the body from Bissoma.
Both fighters working to control the clinch.
Good anti-grappling being displayed by Kooldfish as Bissoma tries to tie him up.
Kooldfish throws a head punch that misses.
Bissoma taking a break, stalling in the clinch.
Kooldfish blocks an uppercut.
Kooldfish is trying to stall.

That's four minutes gone in the round.
Nice body punch from Bissoma.
Kooldfish looks winded!
Bissoma lands a right uppercut that snaps the head of Kooldfish backwards.
A nice right hand lands inside from Bissoma.
Bissoma lands with a short head shot on the inside.
Kooldfish throws a head punch that misses.
Bissoma swings wildly with an uppercut but Kooldfish uses good head movement to avoid it.
An uppercut on the inside fails to land for Bissoma.
The fans in attendance giving it up for the two fighters, who have really let it all hang out in the last minute or so!
Bissoma with an attempt at a knee that misses.
Bissoma makes some space for himself and lands an uppercut.
Bissoma stalling against the cage.
Kooldfish throws a nice elbow but it doesn't land.
Bissoma lands a hook to the body. It's hard to tell if that hurt Kooldfish or not.
Kooldfish being controlled against the cage.
Bissoma lands with a short head shot on the inside.
And that is the end of the round. The fighters go back to their corners.
Yossi Bissoma dominated that round.
The cut man is working on Yossi Bissoma's cut.
That's the end of the round. The referee orders the cornermen out of the cage so we can get back down to business.

Bissoma lands a powerful looking uppercut that connected with his opponent's jaw.
Kooldfish tries to keep at a distance but Bissoma has taken the fight into the clinch.
Kooldfish tries to break the clinch but Bissoma is controlling the position.
Kooldfish's head jolts backwards as he takes an uppercut right on the button!
Bissoma tries to stall but Kooldfish uses the opportunity to gain a better position.
Kooldfish letting Bissoma take a breather here.
Bissoma misses with a punch on the inside.
Kooldfish fails to land with a short punch on the inside.
Bissoma working aggressively here.
Bissoma lands a right hand.
We've had a slow start to the round here - hopefully the action picks up.
Both guys are working to get underhooks.
Bissoma swings wildly with an uppercut but Kooldfish uses good head movement to avoid it.
Kooldfish misses with an elbow strike.
A bit of stalling here from Bissoma.
Bissoma dictating the pace here, as the fighters clinch against the cage.
Bissoma misses with the head strike.
That's one minute gone in the round.
An uppercut on the inside fails to land for Bissoma.
Bissoma working on landing some head shots here - that one got through nicely.
Bissoma fails to land with a short punch on the inside.
Kooldfish blocks a couple of punches on the inside.
A head punch on the inside from Kooldfish fails to land.
Bissoma misses with some punches.
Bissoma throws a head punch that misses.
Kooldfish fails to land with a short punch on the inside.
With the two fighters working up against the cage, Kooldfish just misses with a elbow thrown towards Bissoma's brow.
Bissoma misses with a punch to the body.
Bissoma is really dominating this fight. Is there anything that Kooldfish can do to turn this around?
Bissoma pushes Kooldfish back against the cage and lands a hook to the side of the head.
Bissoma takes a shot to the head.
Kooldfish taking a break, stalling in the clinch.
Kooldfish misses with a hook from the clinch.
Kooldfish misses with an elbow over the top.
Bissoma swings away with an uppercut that misses.
Bissoma trying to stall but Kooldfish improves his position.
A real battle for position is taking place between these two warriors.
Bissoma can't seem to implement his control oriented gameplan at the moment. That's no bad thing of course, for those of us who want to see a good fight.
Bissoma stalling.
That's two minutes gone in the round.
A head punch on the inside from Kooldfish fails to land.
An uppercut on the inside fails to land for Kooldfish.
Bissoma is looking to control Kooldfish's arms but Kooldfish gets an underhook and turns him. Now Bissoma has his back to the cage.
Bissoma throws a head punch that misses.
A short right hand to the side of the head by Bissoma.
Kooldfish misses with a punch on the inside.
This is a great period of action - very entertaining stuff!
Bissoma misses with a short punch on the inside.
Bissoma taking a breather.
A short uppercut from Kooldfish.
Kooldfish stalling in the clinch but Bissoma improves position.
Bissoma looking to throw knees to the head but Kooldfish is blocking nicely.
The referee is keeping an eye on Kooldfish - much more stalling and he will separate the fighters.
Kooldfish is trying to break free.
A quick uppercut on the inside from Bissoma.
Bissoma has a couple of punches blocked by Kooldfish.
Bissoma scores with a nice hook to the head.
Kooldfish tries to circle away but Bissoma has him pinned against the cage.
Bissoma misses with a short punch on the inside.
That's three minutes gone in the round.
Kooldfish is trying to slow down the pace of the fight but Bissoma is keeping busy.
A short right from Bissoma.
Kooldfish blocks a body shot from Bissoma.
Kooldfish can't break the clinch.
Bissoma can't find room to land a body shot as Kooldfish controls the action.
Kooldfish has had enough of the clinch and is looking to separate.
A real battle for position is taking place between these two warriors.

Bissoma drops Kooldfish with a big knee straight up the middle! Kooldfish is covering up against the cage but manages to escape and gets back to his feet!

Kooldfish is rocked!

It looks like Emelia Kooldfish has been cut.
Kooldfish is breathing heavily.
Bissoma tries to clinch there but Kooldfish circles away.
Kooldfish is looking for the big counter here.
Kooldfish is still on wobbly legs! Can Bissoma finish him?
Kooldfish circles away from the clinch attempt.
Bissoma lands a brutal uppercut that launches Kooldfish off his feet! Kooldfish tumbles to the floor, barely conscious - the referee jumps in to save him from a beating! Wow, what an ending!
Ladies and gentlemen, after 3:44 of round 2, we have a winner by way of KO (Punch). Yossi Bissoma!
Yossi Bissoma spent the whole post fight interview bigging himself up. It didn't go down that well with the fans after a while as they thought it was a bit arrogant.
Emelia Kooldfish spoke after the fight, saying 'Im going to go home and take advantage of the large swarms of love (and money) people give me and indulge in cow stuff. I want a rematch and using the winnings to buy more farm stuff.'.
|
|
|
|
|
|
|
|
|
|
|
|
|
|
|
|
|
|
|
|
|
|
|
| S |
C
A |
G |
S |
C
B |
G |
|
S |
C |
G |
|
energy
A | B |
|
hype
A | B |
|
pop
A | B |
|
mgr
A | B |
|
FIGHT
RATING
57% |
|
|
|
|
|
|

