 |
SyFi 61 PBP Commentary |
Undercard bout
|
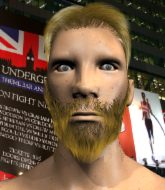
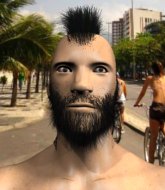
Coming up we have a heavyweight MMA rules bout between Rodolfo Sagat (ranked 23306 p4p, 706 weight class) and Yormomza Built (ranked 23483 p4p, 707 weight class). Sagat comes to the cage accompanied by Guerilla Radio-by RAGE AGAINST THE MACHINE. The atmosphere really building for this one as we go over to our ring announcer for the fighter introductions!
 |
|
 |
| 191 cm
21
255 lbs
0 - 1 - 0 |
|
193 cm
20
239 lbs
0 - 1 - 1 |
BJJ White Belt
Excellent MT
Very strong |
|
Decent wrestler
Excellent MT
Granite chin |
|
| |
|
Ladies and gentlemen. This fight is 3 rounds, in the heavyweight division.
Introducing the fighter to my left, fighting out of the red corner.
With a record of
0 - 1 - 0, fighting out of Hilo, Rodolfo Sagat!
And introducing the fighter to my right, fighting out of the blue corner.
With a record of
0 - 1 - 1, fighting out of Rio de Janeiro, Yormomza Built!
The judges for this bout are Donatello Bradman, Ron Honeybunn and Francis DeMontford.

The bell rings for round one and we are underway!
A nice inside leg kick there by Built. That's going to slow Sagat down.
Built throws a lazy right hand but Sagat sees it coming a mile off and sidesteps it easily.
Built bobbing and weaving, closes the distance and lands a hook to the side of Sagat's head.
Built fakes high and swings low for a body shot but Sagat manages to avoid it.
Built fakes high and swings low for a body shot but Sagat manages to avoid it.
Sagat quickly followed up with a counter body kick but doesn't connect.
Sagat connects with a leg kick. He turned his hip over nicely there.
A punch lands to the side of Sagat 's head but he takes it in his stride.

It looks like Rodolfo Sagat has been cut.
Good leg kick by Built there. It's the ones that make that thud noise that hurt and that was an almighty thud.
Sagat has been working on his boxing with his coaches at BigIsland BigGuns Warrior Training in the buildup to the fight.
Built looks to throw the jab but Sagat is out of range.
Sagat thinks about countering with a body kick.
Like a baseball bat into the meat of his leg there - nice leg kick by Sagat.
Built just misses with a punch to the body.
Built avoids the head kick by Sagat.
Sagat thows a body kick. Built tries to catch it but that hurt him.
This is a great period of action - very entertaining stuff!
Built scores with a sloppy right hand. Sagat should have avoided that one.
Sagat misses with a kick to the body
and Built counters with a huge left! Sagat is in big trouble! He's backing up but Built isn't giving him chance to recover. Under a barage of punches the ref has to step in to save Sagat from any more damage. A dominating finish by Built!
Ladies and gentlemen, after 0:52 of round 1, we have a winner by way of TKO (Strikes). Yormomza Built!
The defeated Rodolfo Sagat had this to say: 'I'll be back stronger them ever!!!'.
|
|
|
|
|
|
|
|
|
|
|
|
|
|
|
|
|
|
|
|
|
|
|
| S |
C
A |
G |
S |
C
B |
G |
|
S |
C |
G |
|
energy
A | B |
|
hype
A | B |
|
pop
A | B |
|
mgr
A | B |
|
FIGHT
RATING
88% |
|
|
|
|
|
|
|
Undercard bout
|
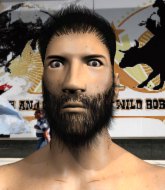
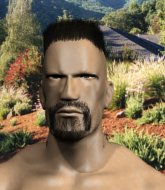
Coming up we have a light heavyweight MMA rules bout between King Yelats (ranked 24239 p4p, 786 weight class) and Stan Dup (ranked 24442 p4p, 817 weight class). Stan Dup will no doubt be trying to keep this one on the feet, where he has a distinct advantage.
 |
|
 |
| 182 cm
23
205 lbs
0 - 3 - 0 |
|
192 cm
26
205 lbs
0 - 2 - 0 |
Decent wrestler
Solid boxing
Cuts easily |
|
BJJ White Belt
Excellent MT
Heavy handed |
|
| |
|
Ladies and gentlemen. This fight is 3 rounds, in the light heavyweight division.
Introducing the fighter to my left, fighting out of the red corner.
With a record of
0 - 3 - 0, fighting out of Las Vegas, King Yelats!
And introducing the fighter to my right, fighting out of the blue corner.
With a record of
0 - 2 - 0, fighting out of Montreal, Stan Dup!
The judges for this bout are Ben Hemmingworth, Francis DeMontford and Ben Watson.
The bell rings for round one and we are underway!
Yelats tries to score a power double leg takedown but Dup sees that one coming and sprawls well. That will dishearten Yelats somewhat.

Yelats drives through with a takedown into Dup's guard. Let's see what he can do from the top position.
Dup looking for a sweep. Not yet Dup, not yet.
Yelats postures up to throw the ground and pound strikes but they don't connect.
Yelats chips away with some ground and pound.
Dup not looking particularly offensive just at the moment.
We've had a slow start to the round here - hopefully the action picks up.
Yelats content to strike from guard, landing some decent shots.
Yelats has been looking to land a fair amount of strikes on the ground. He might be looking to soften his opponent up in order to work for a submission.
Yelats stands up over Dup, holding his feet. He dives back in and lands a decent shot to the head.
Yelats throws a big right hand that misses.
The fighters are pressed up against the cage, both looking to find a bit of space to work.
Dup utilising some decent striking defenses from the guard, preventing the ground and pound.

That's one minute gone in the round.
Yelats working in close now, lands a nice elbow to the side of Dup's head.

Yelats gets to his feet - Dup follows without any prompting.
Dup swings for the body but Yelats moves out of range.
Yelats tries to clinch up but Dup circles away and keeps his distance.
Yelats throws a lazy body kick
and Dup cracks him with a counter punch right on the button.
It looks like King Yelats has been cut.
Jab, cross, leg kick. Nice combination by Dup!
Dup has been working on his striking defense in training and it's paying off as Yelats is landing a low percentage of strikes.
Yelats is looking to take this fight into the clinch.
Dup fails to land with a series of punches.
Yelats tries to counter with a takedown but Dup is quick to defend against it.

Dup fakes with an overhand right and moves in to clinch with Yelats, pushing him back against the cage.
Yelats is working on a leg, looking for a takedown but Dup is defending well.
A left hand lands to the body for Dup.
Dup gets underhooks to prevent Yelats's takedown attempt.
That's three failed takedown attempts in the round for King Yelats. That's going to take a lot out of him.
Dup digs a right hand into Yelats's ribs. Those have got to be taking their toll on Yelats's gas tank.
Yelats is breathing heavily.
Dup lands a body punch in the clinch.

That's two minutes gone in the round.
Dup presses Yelats against the cage and delivers a mid-strength body shot.
The crowd cheering loudly, showing their appreciation for the quality fight we're seeing here.
Dup scores with a hook to the body.
Dup lands a body punch in the clinch.
Dup scores with a nice hook to the head.
Dup using the Thai plumb to throw knees but Yelats has his back arched nicely, preventing the strike.
Dup misses the knee to the body. Nice hip positioning from Yelats.

Dup escapes the clinch and we're back to striking.
Yelats fails with a takedown attempt.
Dup tries a counter takedown but it's more of a dummy move, and he uses it to push himself away.
Yelats gets tackled into the cage by Dup. Dup maintains the clinch.
Dup lands a hook to the side of the head.
Dup lands a short shot on the inside that snaps the head of Yelats backwards.
A nice left hand lands by Dup.

That's three minutes gone in the round.
Dup breaks the clinch and we return to the middle of the mat.
Dup pushes Yelats up against the cage in a clinch.
Dup pushes Yelats back against the cage and unloads with a body punch.
Dup breaks the clinch.
Dup throws a combination but it was largely blocked by Yelats.
Yelats tries to clinch up
and Dup cracks him with a counter punch right on the button.
Dup closes the distance and clinches.
Dup lands with a short head shot on the inside.
Yelats avoiding damage as Dup throws knees to the body.
Dup scores with a hook to the body.
Dup escapes the clinch and we're back to striking.
Dup lands with a hook. Yelats tried to avoid it but it clipped the top of his head.

Yelats is rocked!
Dup connects with a body shot that sends Yelats's belly button to the back.
Oh Yelats is still all over the place! His legs are completely gone! Will he be able to recover?!!
The crowd cheering loudly, showing their appreciation for the quality fight we're seeing here.
Dup forces Yelats back against the cage and clinches.
Dup scores with a hook to the body.
Yelats seems to have got his legs back now.

That's four minutes gone in the round.
Dup lands a nice shot to the body.
A short body shot lands from Dup as the two fighters clinch.
Dup manages to break the clinch.
Dup clinches.
Dup lands a body punch.
Still in the clinch, Dup scores with a nice short uppercut.
Yelats blocks a knee to the body. He'll have a nicely bruised forearm in the morning.
Dup's corner calls for him to break the clinch, which he does.
Stan Dup seems to be the more aggressive standup fighter in this bout.
Dup looks to land a body kick but Yelats moved away.
Dup thuds a left hand into Yelats's body.
Dup moves into range and clinches up with Yelats.
Dup lands a right hand that snaps the head of Yelats backwards.
King Yelats's cut is getting worse.
Dup lands a body shot in the clinch.
Dup escapes the clinch and we're back to striking.
Yelats moves out of range of the body kick.
Dup throws out a powerful jab.
Dup takes the fight into the clinch.
And that�s the end of the round � the fighters go back to their corners.
Stan Dup dominated that round.
The cut man is working on King Yelats's cut.
That's time! Back to the action!

Dup looks to score with a combo but nothing lands.
The fight moves into the clinch position.
Dup has been the more effective fighter overall so far.
Dup lands a body punch.
Stan Dup seems to be working more effectively in the clinch in the fight so far.
Dup misses with a knee strike.
Dup breaks from the clinch.
Dup pushes Yelats up against the cage in a clinch.
An uppercut to the body lands inside from Dup.
Dup breaks the clinch and we return to the middle of the mat.
Dup has taken the fight to the clinch.
Dup is working Yelats over against the cage.
We've had a slow start to the round here - hopefully the action picks up.
Dup makes some space for himself and lands an uppercut.
Dup lands with a short head shot on the inside.
A nice right hand lands inside from Dup.
The fans in attendance giving it up for the two fighters, who have really let it all hang out in the last minute or so!
Dup breaks the clinch and we're back to striking at distance.
Both fighters are absolutely exhausted here.
Dup clinches up against the cage.
Dup tries a knee to the head but Yelats blocks it.
That's one minute gone in the round.
Still in the clinch, Dup scores with a nice short uppercut.
Dup breaks the clinch and we return to the middle of the mat.
Dup moves into the clinch.
Dup breaks the clinch and we're back to striking at distance.
Dup jabs at Yelats's body.
Dup clinches up with Yelats and pushes him back against the cage.
Yelats takes a shot to the head.
Good body shot from Dup.
Dup tries a knee to the head but Yelats blocks it.
Dup lands a hook to the body. It's hard to tell if that hurt Yelats or not.
Dup pushes Yelats back against the cage and unloads with a body punch.
With the fighters clinched against the cage, Dup creates a bit of distance for himself and scores with a nice uppercut.
Dup tries a knee to the head but Yelats blocks it.
A shot in the inside from Dup.
This has been an exciting period of action!
Dup lands a right hand that snaps the head of Yelats backwards.
Dup gets through Yelats's defenses to land a nice punch to the side of the head.
That's two minutes gone in the round.
Yelats managing to block the knees to the body from Dup.
Yelats has hold of a leg and is looking for a trip takedown. Dup avoids it nicely though and we remain in the clinch.
Dup throws a big uppercut that drops Yelats! More strikes from Dup and the referee jumps in to stop the fight! Yelats lies dazed against the cage as Dup celebrates with his cornermen!
Ladies and gentlemen, after 2:16 of round 2, we have a winner by way of TKO (Strikes). Stan Dup!
Stan Dup spent the whole post fight interview bigging himself up. It didn't go down that well with the fans after a while as they thought it was a bit arrogant.
|
|
|
|
|
|
|
|
|
|
|
|
|
|
|
|
|
|
|
|
|
|
|
| S |
C
A |
G |
S |
C
B |
G |
|
S |
C |
G |
|
energy
A | B |
|
hype
A | B |
|
pop
A | B |
|
mgr
A | B |
|
FIGHT
RATING
65% |
|
|
|
|
|
|
|
Undercard bout
|
Coming up we have a heavyweight MMA rules bout between Bald Bull (ranked 24045 p4p, 662 weight class) and Josh Heath (ranked 23814 p4p, 688 weight class). Heath comes into a darkened arena with his song building. Blaze all day -by KOTTONMOUTH KINGS kicks in, the lights come on and the crowd goes wild! What a showman! Rumors backstage are that the fighters have been paid to keep it standing but we know that would never happen in MMA!
 |
|
 |
| 186 cm
19
280 lbs
2 - 2 - 0 |
|
197 cm
27
250 lbs
2 - 5 - 0 |
BJJ White Belt
Excellent MT
Cuts easily |
|
Good wrestler
Basic striking
Knockout power |
|
| |
|
Ladies and gentlemen. This fight is 3 rounds, in the heavyweight division.
Introducing the fighter to my left, fighting out of the red corner.
With a record of
2 - 2 - 0, fighting out of Sydney, Bald Bull!
And introducing the fighter to my right, fighting out of the blue corner.
With a record of
2 - 5 - 0, fighting out of Sydney, Josh Heath !
The judges for this bout are Hugh Johnson, Darius Henderson and Ben Watson.
The bell rings for round one and we are underway!

Heath gets a takedown into half guard.
Heath is controlling the pace.

Heath seems to be working for a kimura but Bull defends the submission attempt.
We've had a slow start to the round here - hopefully the action picks up.
Heath is controlling the pace.
That's one minute gone in the round.
Bull wants to improve his position but Heath is controlling well.
Heath has hold of the far side arm. He's working for the Kimura, can Bull defend it? Heath steps over the head and cranks it - Bull is tapping out! That was textbook stuff right there - nice submission victory for Heath !
Ladies and gentlemen, after 1:29 of round 1, we have a winner by way of Submission (Kimura). Josh Heath !
Our winner, Josh Heath , made sure he spent some time buttering up the crowd during his post fight interview, which will no doubt bring him a few more fans.
|
|
|
|
|
|
|
|
|
|
|
|
|
|
|
|
|
|
|
|
|
|
|
| S |
C
A |
G |
S |
C
B |
G |
|
S |
C |
G |
|
energy
A | B |
|
hype
A | B |
|
pop
A | B |
|
mgr
A | B |
|
FIGHT
RATING
42% |
|
|
|
|
|
|
|
Undercard bout
|
Coming up we have a heavyweight MMA rules bout between Jackson Avery (ranked 5230 p4p, 494 weight class) and Tony Parks (ranked 3520 p4p, 359 weight class). Over to our ring announcer for the fighter introductions!
 |
|
 |
| 200 cm
21
264 lbs
1 - 1 - 0 |
|
196 cm
19
265 lbs
2 - 2 - 0 |
BJJ Brown Belt
Solid boxing
Granite chin |
|
BJJ Blue Belt
Excellent MT
Powerful |
|
| |
|
Ladies and gentlemen. This fight is 3 rounds, in the heavyweight division.
Introducing the fighter to my left, fighting out of the red corner.
With a record of
1 - 1 - 0, fighting out of Las Vegas, Jackson Avery!
And introducing the fighter to my right, fighting out of the blue corner.
With a record of
2 - 2 - 0, fighting out of Montreal, Tony Parks!
The judges for this bout are Chris Dean, Bruno Hogan and Eliza Hachem.
The bell rings for round one and we are underway!
Parks gets in close and instigates a clinch.
Avery tries to work over Parks's body with a swooping hook but it only glances the target.
Parks digs a right hand into Avery's ribs. Those have got to be taking their toll on Avery's gas tank.
Avery tries to pull guard but Parks won't allow it.
Parks lands with a left to the head.
Parks lands with a good tight uppercut to the head.
Avery lands a left hand that snaps the head of Parks backwards.
Parks tries a shoulder strike but it doesn't do any damage.
Parks misses with a short punch on the inside.
Parks blocking some punches.
Avery misses with a body punch.
Avery pushes Parks back against the cage and lands a hook to the side of the head.
Parks tried to land a shot to the body but connects with Avery's elbow.
Parks lands an uppercut.
Parks softening up his opponent with strikes, against the cage.
Wooooo! Give it up for these two warriors! They are putting on a show!
Parks swings wildly with an uppercut but Avery uses good head movement to avoid it.
Parks looks more muscular than last time we saw him. He must have been on the weights.
Parks scores with an uppercut up the middle.
It looks like Jackson Avery has been cut.
Parks lands a short shot on the inside that snaps the head of Avery backwards.
Avery blocks a body shot from Parks.
Avery misses with a punch on the inside.
A short right from Parks on the inside.
Avery blocking some punches.
We've been hearing reports that Avery has been drilling takedowns in recent sessions so let's see if that has an impact on the result of this fight.
Parks fails to land with a short punch on the inside.
Avery throws a punch but it's blocked by Parks.
That's one minute gone in the round.
Parks blocks an uppercut.
Parks prevents a body shot from Avery.
Parks works on Avery's body with a couple of short punches.
A nice left hand lands by Avery.
Parks lands a body punch in the clinch.
Avery tried to land a shot to the body but connects with Parks's elbow.
Parks pushes Avery back against the cage and lands a hook to the side of the head.
Avery blocks a couple of punches on the inside.
Avery blocks an uppercut.
Avery misses with a short punch on the inside.
Parks tries a shoulder strike but it doesn't do any damage.
Parks misses with a hook from the clinch.
Parks misses with a body punch.
Avery is working for takedown but Parks is calmly controlling the position for now.
Parks lands punches inside but they're not really causing much damage.
Avery fails to pull guard.
That's three failed takedown attempts in the round for Jackson Avery. That's going to take a lot out of him.
Parks lands with a short punch from the clinch.
Avery drops down looking for an ankle pick but Parks pulls his leg out and moves away.
A big right from Parks misses.
Parks fails with an attempt to clinch.
Parks clinches.
That's two minutes gone in the round.
The fans in attendance giving it up for the two fighters, who have really let it all hang out in the last minute or so!
Avery is working for takedown but Parks is calmly controlling the position for now.
A short body shot lands from Parks as the two fighters clinch.
Avery is breathing heavily.
Parks lands with a short shot to the head.
Avery fails to land with a short punch on the inside.
Good body shot from Parks.
Parks working aggressively here.
Parks is clearly stalling here... Pick up the pace son.
Parks stays in close to his opponent and throws a right hand to the body.
Parks lands a right hand.
A short left from Parks.
Parks prevents a takedown attempt there.
Nice body punch from Parks.
Parks scores with a shot to the side of Avery's head.
Parks lands on the inside with an uppercut.
Parks gets through Avery's defenses to land a nice punch to the side of the head.
Parks makes some space for himself and lands an uppercut.
Parks lands with a right to the head.
A shot in the inside from Parks.
Parks lands with a right to the head.
That's three minutes gone in the round.
Avery's head jolts backwards as he takes an uppercut right on the button!
Parks digs a right hand underneath Avery's ribcage. Avery let out a lung full of air as it connected.
A short right from Parks on the inside.
Parks lands a left hand.
Parks lands a body shot.
Parks gets through Avery's defenses to land a nice punch to the side of the head.
Parks lands with a light punch inside.
Parks working some nice short punches in the clinch.
Parks makes some space for himself and lands an uppercut.
A head punch blocked on the inside by Parks.
Parks content to slow the pace in the clinch.
Parks lands a shoulder strike.
This has been an exciting period of action!
Parks lands an uppercut.
Parks scores with a shot to the side of Avery's head.
Parks swings wildly with an uppercut but Avery uses good head movement to avoid it.
Parks lands with a short punch from the clinch.
Avery swings away with an uppercut that misses.
Parks working some nice short punches in the clinch.
Parks lands a body punch.
Parks working some nice short punches in the clinch.
Avery is rocked!
Parks misses with a punch on the inside.
That's four minutes gone in the round.

Parks drops Avery onto one knee with a big uppercut from the clinch! Avery is propped up by the cage and works his way back to his feet!
Oh Avery is still all over the place! His legs are completely gone! Will he be able to recover?!!
Parks creates some distance for himself and unleashes a massive uppercut that sends Avery's eyes rolling into the back of his head! Avery drops to his knees and Parks pours it on with more strikes until the referee steps in to end the bout!
Ladies and gentlemen, after 4:14 of round 1, we have a winner by way of TKO (Strikes). Tony Parks!
Tony Parks bigged himself up after the win. The crowd seemed to love it.
|
|
|
|
|
|
|
|
|
|
|
|
|
|
|
|
|
|
|
|
|
|
|
| S |
C
A |
G |
S |
C
B |
G |
|
S |
C |
G |
|
energy
A | B |
|
hype
A | B |
|
pop
A | B |
|
mgr
A | B |
|
FIGHT
RATING
76% |
|
|
|
|
|
|
|
Undercard bout
|
Coming up we have a heavyweight MMA rules bout between Cj Morrison (ranked 7633 p4p, 594 weight class) and Sam Sung (ranked 4164 p4p, 407 weight class). The key to victory for Cj Morrison has got to be keeping the fight on the feet.
 |
|
 |
| 192 cm
26
265 lbs
2 - 4 - 0 |
|
196 cm
19
278 lbs
3 - 0 - 0 |
BJJ White Belt
Excellent MT
Experienced |
|
BJJ Purple Belt
Basic striking
Intelligent |
|
| |
|
Ladies and gentlemen. This fight is 3 rounds, in the heavyweight division.
Introducing the fighter to my left, fighting out of the red corner.
With a record of
2 - 4 - 0, fighting out of Las Vegas, Cj Morrison!
And introducing the fighter to my right, fighting out of the blue corner.
With a record of
3 - 0 - 0, fighting out of Amsterdam, Sam Sung!
The judges for this bout are John Mangel, Hugh Johnson and Chris Dean.
The bell rings for round one and we are underway!
Morrison moves in looking to clinch but Sung pushes him off.
A really sloppy takedown attempt there from Sung.
Morrison tries to close the distance and clinch but Sung swats him to one side with an open hand palm strike and circles away.
Sung drives through with a takedown into guard.

Morrison has his feet on Sung's hips. He pushes off and gets to his feet. Nice work.
Wow, both these guys are really going for it!
Morrison fails with an attempt to clinch.
Morrison tries to clinch but Sung moves out of range.
Sung shoots in for a takedown! He's got it and he's managed to land in side control! That's better than Sung was expecting from the takedown attempt, I'm sure!
Wooooo! Give it up for these two warriors! They are putting on a show!
Sung advances to mount.
Sung is going oldschool here, as he tries to force Morrison to tap using a forearm choke. This isn't 1993 though, so Morrison shrugs it off.
Morrison working to try and regain half guard.
Sung moves to back control.
Sung working from the back looking to end the fight with a rear naked choke. Morrison is doing well to defend. Sung seems to have got his hand under the chin though and he's sunk the choke in! Morrison is forced to tap and this one is over!
Ladies and gentlemen, after 1:57 of round 1, we have a winner by way of Submission (RNC). Sam Sung!
In his post fight interview, Sam Sung started talking himself up. Luckily his charisma kept the crowd on side and gave him a good reception.
|
|
|
|
|
|
|
|
|
|
|
|
|
|
|
|
|
|
|
|
|
|
|
| S |
C
A |
G |
S |
C
B |
G |
|
S |
C |
G |
|
energy
A | B |
|
hype
A | B |
|
pop
A | B |
|
mgr
A | B |
|
FIGHT
RATING
97% |
|
|
|
|
|
|
|
Undercard bout
|
Coming up we have a featherweight MMA rules bout between Silvio Dante (ranked 3008 p4p, 263 weight class) and Half Life (ranked 4260 p4p, 340 weight class). Half Life is staring across the cage at his opponent, tweaking his nipples.
 |
|
 |
| 175 cm
27
156 lbs
4 - 3 - 0 |
|
173 cm
20
145 lbs
3 - 3 - 1 |
BJJ Blue Belt
Excellent boxer
Experienced |
|
BJJ Brown Belt
Excellent MT
Granite chin |
|
| |
|
Ladies and gentlemen. This fight is 3 rounds, in the featherweight division.
Introducing the fighter to my left, fighting out of the red corner.
With a record of
4 - 3 - 0, fighting out of Hilo, Silvio Dante!
And introducing the fighter to my right, fighting out of the blue corner.
With a record of
3 - 3 - 1, fighting out of Sydney, Half Life!
The judges for this bout are Ron Honeybunn, Skip Squint and Francis DeMontford.
The bell rings for round one and we are underway!
Dante lands an overhand right.
Half Life seems to be the more aggressive standup fighter in this bout.
Life moves into the clinch.
A frustrated look appears on Dante's face as he tries to break the clinch.
Dante wants to push off and get back to the center of the mat but Life has him pressed against the cage.
Life is trying to drag Dante to the mat but Dante just about manages to keep his footing. He used the cage to his advantage there.
Dante wants to get back to striking at distance but Life won't allow it.
Dante has had enough of the clinch but Life keeps him there for the moment.
Life is looking for a takedown.
Life fails to pull guard.
Silvio Dante has stuffed three takedown attempts in the round now. That's going to take a lot out of Half Life.
Dante is looking to break free of the clinch but Life has double underhooks.
Dante wants to break free. God knows he wants to breaaaak freeee.
Life has dropped down and is looking to force the takedown but it's defended by Dante after a bit of a struggle.
Dante tries a shoulder strike but it doesn't do any damage.
Still in the clinch, Dante scores with a nice short uppercut.
We've had a slow start to the round here - hopefully the action picks up.
Dante fails to land with a short punch on the inside.
Life tries to pull guard but Dante holds him up against the cage and eventually Life drops back down to his feet.
Dante scores with a shoulder strike.
Life has Dante pressed against the cage, preventing Dante from circling away and getting back to striking at range.
Life is looking to take this one to the mat.
Life has Dante pressed up against the cage and is working for takedown. Dante manages to improve position though and keeps the fight standing.
Life goes for a takedown in the clinch but Dante prevents it.
That's one minute gone in the round.
Dante throws a head punch that misses.
Dante wants to strike at distance but he can't break free of the clinch.
Dante lands with a short shot to the head.
Dante lands a nice uppercut.
Life has Dante pressed up against the cage and is working for takedown. Dante manages to improve position though and keeps the fight standing.
Life is trying to pull guard but Dante has him pressed against the cage.
Dante makes some space for himself and lands an uppercut.
Life misses with a shot to the kidneys.
Dante lands with a right to the head.
Life is looking for a takedown up against the cage. Dante gets underhooks though and prevents the takedown attempt.
Life keeps control of Dante as he tries to wriggle out of the double underhooks.
Dante pushes Life back against the cage and lands a hook to the side of the head.
Life lands a right hand.
Dante prevents the takedown attempt.
Life can't get the takedown.
Life goes for a takedown in the clinch but Dante prevents it.
I was talking to Dante's coach per-fight and he was telling me that they'd been working on the clinch in the runup to this fight.
Life prevents Dante from breaking the clinch.
Life wants a takedown but no success here.
Life pulls guard successfully.
Life looks more muscular than last time we saw him. He must have been on the weights.
That's two minutes gone in the round.
Life keeping full guard, as Dante tries to pass.
Wooooo! Give it up for these two warriors! They are putting on a show!
Life keeping moving, preventing Dante from controlling successfully.
Dante prevents Life from getting back to his feet.
Dante gets to his feet. Life looking to butt scoot but the ref puts an end to that. On your feet son!
Life wants to clinch up but Dante keeps it at a distance.
It looked like Dante wanted to counter with a hook but didn't fully commit.
Silvio Dante is looking to keep the fight on the feet at all costs.
Life gets his takedown attempt stuffed easily
and Dante connects with a straight left hand counter down the middle.
The fight stays on the outside here - Life looks like he's thinking about clinching though.
Dante darts in and out, connecting with a jab.
Dante takes a swing at Life's ribcage but misses.
Life on the wrong end of a nice jab.
A swing and a miss from Dante.
That's three minutes gone in the round.
Dante scores with a jab. Life acknowledges it with a nod of the head.
Life shoots in with a takedown attempt and he has Dante pinned against the cage. Dante gets the underhooks and manages to circle away.
Dante swung with a counter punch to the body but it didn't connect.
Life looks frustrated there after his takedown attempt is stuffed easily.
Life tries to close the distance and clinch up against the cage but Dante paws at him with a jab and circles away.
The fighters circling - Dante throws out the jab but it was never going to land.
Dante pushing out the jab but it's not landing.
Life tries to clinch there but Dante circles away.
Life tries a switch kick but it misses it's target.
Life looks for a takedown here. Will he get it? Dante is fending him off so far but Life persists. Nope, Dante circles away and we're back to standing.
Life ducks under a wild hook from Dante.
Life darts in looking for a takedown but Dante gets double underhooks and turns Life into the cage.
Dante connects with a looping left hand that seems like it dazed Life momentarily.
Dante is the aggressor but that punch slipped nicely by Life.
That's four minutes gone in the round.
Dante cracks Life with an open hand slap.
Dante lands the left hand.
Life's hands are dropping dangerously low here and Dante connects clean with a right hook that sends him down to one knee! Life scrambles back to his feet.
We've seen a great period of action over the last minute or so - credit to both fighters for going all out!
Dante scores with a jab to the body.
Life shoots in for a takedown but Dante shows good takedown defense there and keeps this one on the feet.
Life takes a shot right to the bread basket.
Life uses some good footwork to avoid the body shot by Dante.
Dante cracks Life with a nice right hand that draws applause from the crowd.
Dante throws out a loose jab but Life uses good head movement to avoid it.
Dante wings a very wild body shot but it does the job and lands to the midsection.
Life shoots for a double leg takedown but Dante sprawls well. He's pushed Life's face into the mat and manages to get back to his feet relatively easily.
A big left from Dante misses.
Life dives in for a single leg takedown but Dante sprawls and the fighters end up clinched against the cage.
Dante swung with a counter right hand that didn't connect.
Life drives through and clinches with Dante against the cage.
Dante throws a blind hook that connects with the side of Lifes head.
And that�s the end of the round � the fighters go back to their corners.
Silvio Dante dominated that round.
That's time! Back to the action!
Dante scores with a jab to the jaw of his opponent.
Dante misses with an uppercut.
Life uses good head movement to avoid the hook from Dante.
A slow jab from Dante misses its intended target.
Life tries to clinch but fails miserably
and Dante counters nicely by changing levels and landing a hook to the body.
Dante throws a body shot but no joy.
Nice takedown defense from Dante. No joy for Life on that attempt.
Life fails with the takedown
and Life takes a counter punch right on the button for his troubles.
Life slips a straight right by Dante.
Dante lunges in with an uppercut that skims his opponent's chin.
We've had a slow start to the round here - hopefully the action picks up.
Life fails with a rather predictable takedown attempt.
Silvio Dante has stuffed three takedown attempts in the round now. That's going to take a lot out of Half Life.
A decent looking cross lands there for Dante.
Dante throws a jab but it's blocked by Life.
That's one minute gone in the round.
Dante throws a lazy right hand but Life sees it coming a mile off and sidesteps it easily.
Life misses with a takedown attempt
and Dante connects with a straight left hand counter down the middle.
Life fails miserably with a takedown attempt.
The fighters are going at a pretty good pace and they're both starting to sweat now.
Life tries to clinch but Dante is having none of it.
Dante looks to land a left hand but Life moved out of range nicely.
Life walks into a straight right hand from Dante.
Life slips under a jab from Dante.
Nice shot lands for Dante.
Life shoots in for a takedown. "I don't think so" says Dante as he avoids it easily.
Dante clobbers Life with an overhand right that has the crowd gasping. That made a horrendous noise.
Dante loads up on a big right hand but Life slips the punch.
Dante is really head hunting here, hardly looking to strike to the body at all.
Dante throws a body shot but no joy.
Life doesn't succeed with the takedown
and Dante counters with a lovely shot to the body.
That's two minutes gone in the round.
A swing and a miss from Dante.
Dante misses with a looping left.
Life with a poor takedown
and Dante counters with a nice uppercut.
The crowd cheering loudly, showing their appreciation for the quality fight we're seeing here.
Nice sprawl there from Dante as Life shoots in.
Dante was looking to counter that move with a punch but didn't quite pull the trigger.
Life is breathing heavily.
Dante scores with a body shot.
Dante lunges at Life with a hook that half lands and is half blocked by Life's hand.
Good shot there by Dante.
Life's hands are dropping dangerously low here and Dante connects clean with a right hook that sends him down to one knee! Life scrambles back to his feet.
Dante tries to land with a swinging hook to the body but Life was well out of range. Poor timing from Dante.
Dante keeps the fight on the outside.
Dante misses with an uppercut.
Life fails with a rather predictable takedown attempt.
Life fails with a rather predictable takedown attempt.
Dante is really dominating this fight. Is there anything that Life can do to turn this around?
That's three minutes gone in the round.
Dante misses with a looping left.
Life changes levels for a counter takedown but doesn't follow through with his attempt.
A shot to the liver by Dante. Beautiful body shot.
Life closes the distance and clinches up with Dante, looking for a takedown. Life pushes Dante against the cage but Dante circles to the side and manages to break the clinch.
It looked like Dante wanted to counter with a hook but didn't fully commit.
Life gets his takedown attempt stuffed easily
letting Dante counter with a right hand.
Life displays some good footwork, moving neatly out of range as Dante throws out the jab.
Life shoots in for a takedown but doesn't get it.
Dante misses with a looping left.
Dante connects with a looping left hand that seems like it dazed Life momentarily.
Life avoids a lazy jab quite easily.
Dante misses with a straight right.
Life has a pretty nasty looking mouse under his right eye.
Life will have to do better than that with his takedown attempts.
Dante misses with a hook.
Silvio Dante is winning the standup battle so far.
Life fails with a takedown attempt from distance.
That's four minutes gone in the round.
Dante looks to throw the jab but Life is out of range.
Nice sprawl there from Dante as Life shoots in.
Donk. Dante catches Life right on the button with a cross.
Life is looking to clinch but Dante is avoiding it.
This is a great period of action - very entertaining stuff!
Dante sizes up Life with a pawing jab and scores with a straight right down the middle.
Life walks into a straight right hand from Dante.
Life walks into a left hand.
Life gets his takedown attempt stuffed easily
and Dante counters with a quick right hand to the jaw.

Life is rocked!
Life throws a sloppy head kick
and Life takes a counter punch right on the button for his troubles.
Life is still on wobbly legs! Can Dante finish him?
Life on the wrong end of a nice jab.
Life has his takedown stuffed
and Dante counters with a big right hand! Oh Life is in trouble here! Dante follows up with more strikes and that's it! The ref has stopped it!
Ladies and gentlemen, after 4:50 of round 2, we have a winner by way of TKO (Strikes). Silvio Dante!
Silvio Dante gave a mention to Knockdown Clothes in his post fight interview. That will please them (and hopefully generate some sales).
|
|
|
|
|
|
|
|
|
|
|
|
|
|
|
|
|
|
|
|
|
|
|
| S |
C
A |
G |
S |
C
B |
G |
|
S |
C |
G |
|
energy
A | B |
|
hype
A | B |
|
pop
A | B |
|
mgr
A | B |
|
FIGHT
RATING
65% |
|
|
|
|
|
|
|
Undercard bout
|
Coming up we have a heavyweight MMA rules bout between Rivo Riitta (ranked 3559 p4p, 365 weight class) and Marduk Amar Utu (ranked 4203 p4p, 413 weight class). Amar Utu has chosen Fly Like An Eagle-by SEAL as his entrance music. Over to our ring announcer for the fighter introductions!
 |
|
 |
| 191 cm
27
273 lbs
3 - 2 - 0 |
|
182 cm
28
265 lbs
6 - 1 - 0 |
BJJ Brown Belt
Counter fighter
Very quick |
|
Good wrestler
Basic striking
Granite chin |
|
| |
|
Ladies and gentlemen. This fight is 3 rounds, in the heavyweight division.
Introducing the fighter to my left, fighting out of the red corner.
With a record of
3 - 2 - 0, fighting out of Las Vegas, Rivo Riitta!
And introducing the fighter to my right, fighting out of the blue corner.
With a record of
6 - 1 - 0, fighting out of Las Vegas, Marduk Amar Utu!
The judges for this bout are Hugh Johnson, Ben Hemmingworth and Summer Carpenter.
The bell rings for round one and we are underway!
Amar Utu scores with a nice takedown into half guard. Let's see what he's got on the ground.

Riitta actively working from the bottom here.
Amar Utu sitting in half guard, looking to land shots. Riitta defending well though.
Amar Utu thumps the canvas. Not on purpose obviously - he just missed Riitta's head.
Riitta is trying to get back to full guard.
The fighters are pressed up against the cage, both looking to find a bit of space to work.
The two fighters exchange a few words. I couldn't hear what they were saying but maybe it's more fun if you make it up yourself. Amar Utu connects with a nice short shot to Riitta's temple.
Amar Utu landing with strikes to the body and head, softening up his opponent.
Amar Utu is just content to waste time from the top position. Riitta takes advantage of the situation and regains full guard.
Amar Utu with a flurry of punches that miss.
Amar Utu must be cautious of submissions here, given that his opponent has the superior Jiu Jitsu.
Amar Utu is sitting in guard, working some ground and pound.
We've had a slow start to the round here - hopefully the action picks up.
Amar Utu throws a strike but Riitta rolls with it and manages to sweep. Now he's in guard on top.

Amar Utu keeping moving, preventing Riitta from controlling successfully.
Amar Utu looking to control.
Amar Utu trying to strike from the bottom but really, it's not the best position to be doing that from!
Amar Utu really doesn't want to stay on the ground with Riitta. If he can't get it back to his feet, it's only a matter of time before he'll be tapping out.
That's one minute gone in the round.
Riitta passes easily into side control. Nice work.
Riitta trying to control the position but Amar Utu is working away.
Amar Utu is looking to regain half guard here but Riitta keeps moving and retains side control.
Riitta is trying to land an Americana. He has the arm isolated but Amar Utu is keeping cool and he's avoided the danger for now.
We get told so often about how wrestlers don't like to be on their backs. Let's see if Amar Utu can do anything to dispel that myth.
Riitta working the head and body with strikes.
Riitta gets to mount! Amar Utu was on the offensive and wasn't defending properly.
Riitta throwing strikes here but Amar Utu is writhing around nicely and avoiding any serious damage.
Amar Utu is looking to improve his position but Riitta isn't that keen on the idea.
Riitta controlling from the full mount.
That's two minutes gone in the round.
Riitta is controlling this nicely and is looking to make no mistakes. Amar Utu is trying to wiggle out of this horrible position. Amar Utu flips to his side and attempts to get a leg in for half guard. Riitta anticipates the leg and manages to get behind Amar Utu and secures both hooks! This could be bad! Riitta slips an arm under Amar Utu chin and tries to position for a rear naked choke. Riitta has worked the choke in now and it looks tight. Riitta is squeezing on Amar Utu like an anaconda would it's prey. Amar Utu fails to tap and has fallen unconscious! We've got ourselves a winner by way of a rear naked choke!
Ladies and gentlemen, after 2:20 of round 1, we have a winner by way of Submission (RNC). Rivo Riitta!
Marduk Amar Utu spoke after the fight, saying 'Zxvvxvbnmfgbnjhv!!!!###@#@@'.
|
|
|
|
|
|
|
|
|
|
|
|
|
|
|
|
|
|
|
|
|
|
|
| S |
C
A |
G |
S |
C
B |
G |
|
S |
C |
G |
|
energy
A | B |
|
hype
A | B |
|
pop
A | B |
|
mgr
A | B |
|
FIGHT
RATING
46% |
|
|
|
|
|
|
|
Undercard bout
|
Coming up we have a heavyweight MMA rules bout between Travis Dillon (ranked 1934 p4p, 212 weight class) and Mika Allu (ranked 1947 p4p, 213 weight class). Both these guys have solid standup skills and neither is particularly fantastic on the ground, so let's hope for a nice standup war!
 |
|
 |
| 191 cm
20
261 lbs
6 - 1 - 0 |
|
186 cm
20
229 lbs
3 - 0 - 0 |
BJJ Purple Belt
Excellent boxer
Cardio machine |
|
Good wrestler
Decent boxing
Heavy handed |
|
| |
|
Ladies and gentlemen. This fight is 3 rounds, in the heavyweight division.
Introducing the fighter to my left, fighting out of the red corner.
With a record of
6 - 1 - 0, fighting out of Las Vegas, Travis Dillon!
And introducing the fighter to my right, fighting out of the blue corner.
With a record of
3 - 0 - 0, fighting out of Los Angeles, Mika Allu!
The judges for this bout are Bruno Hogan, Summer Carpenter and Skip Squint.
The bell rings for round one and we are underway!
A left lands for Dillon.
Allu misses with a takedown attempt
letting Dillon counter with a right hand.
Allu's coach down at Death Valley Training Facility was telling us pre-fight that they have been working on Allu's balance. Obviously they view that as a key factor in the outcome of this fight.
Allu misses with a wild body shot.
A big right from Allu misses.
Dillon was looking to counter that move with a punch but didn't quite pull the trigger.
We've been told by Dillon's head coaches at Bedlam that he's been working on his takedown defense in preparation for this fight.
Allu looks to land a left hand but Dillon moved out of range nicely.
Allu misses with a series of wild punches.
A shot to the body from Allu misses
and Dillon counters with a nice jab to the body that keeps Allu thinking.
Dillon keeps the fight standing with a nice sprawl.
We've had a slow start to the round here - hopefully the action picks up.
Dillon uses decent footwork to sidestep a right hand from Allu.
Allu lands a slapping body shot.
Allu fakes a jab and then connects with a hook.
Nice takedown defense from Dillon. No joy for Allu on that attempt.
Travis Dillon has stuffed three takedown attempts in the round now. That's going to take a lot out of Mika Allu.
That's one minute gone in the round.
A looping hook to the body misses from Allu. Dillon does a little dance to reset his feet.
Dillon tries to counter by clinching up but Allu breaks away and moves out of range.
Allu throws an off balance right hand
and Dillon counters with a good right hand that lands right on the jaw.
Allu misses with a double jab.
Dillon tries to counter by moving into the clinch but Allu manages to circle out of the way.
Dillon moves into range and connects with a jab.
Dillon lands with a nice body punch.
Dillon throws the left hand but Allu avoids the punch easily.
Dillon moves out of range of the body kick from Allu.
Dillon lands a jab to the nose.
Allu walks into a straight right hand from Dillon.
Dillon throws a nice hook to the body that draws an oooh from the crowd.
Allu misses with an uppercut

and Dillon moves into the clinch.
Dillon has a couple of punches blocked by Allu.
We've seen a great period of action over the last minute or so - credit to both fighters for going all out!
Allu is trying to slow down the pace of the fight but Dillon is keeping busy.
That's two minutes gone in the round.
Allu scores with a nice hook to the head.
A short right from Dillon.
Allu scores with a shoulder strike.
Dillon throws a hook to the body. More of an arm punch but it's all scoring with the judges.
Allu looks winded!
Allu blocks a couple of punches on the inside.
Allu misses with the head strike.
Allu changes levels and goes for a takedown here. Dillon fights it off and pushes away nicely.
Allu gets clipped by a big right hand and goes down spinning to the canvas! Dillon gets the back mount and begins to drop bombs on his rocked foe! Allu is too out of it to defend against the strikes and the referee jumps in to save him from the beatdown!
Ladies and gentlemen, after 2:32 of round 1, we have a winner by way of TKO (Strikes). Travis Dillon!
During a confident post fight interview, Travis Dillon thanked all his fans. He seemed very genuine when describing how motivated his fans keep him.
|
|
|
|
|
|
|
|
|
|
|
|
|
|
|
|
|
|
|
|
|
|
|
| S |
C
A |
G |
S |
C
B |
G |
|
S |
C |
G |
|
energy
A | B |
|
hype
A | B |
|
pop
A | B |
|
mgr
A | B |
|
FIGHT
RATING
51% |
|
|
|
|
|
|
|
Co-main event
|
Coming up we have a featherweight MMA rules bout between Daichi Kishimoto (ranked 463 p4p, 56 weight class) and Илья Муромец (ranked 1491 p4p, 159 weight class). Over to our ring announcer for the fighter introductions!
 |
|
 |
| 170 cm
21
145 lbs
8 - 1 - 0 |
|
170 cm
21
145 lbs
8 - 1 - 0 |
Abu Dhabi Champ
Counter fighter
Cardio machine |
|
BJJ Purple Belt
Excellent MT
Good gas tank |
|
| |
|
Ladies and gentlemen. This fight is 3 rounds, for the featherweight championship of the world!
Introducing the champion to my left, fighting out of the red corner.
With a record of
8 - 1 - 0, fighting out of Los Angeles, Daichi Kishimoto!
And introducing the challenger to my right, fighting out of the blue corner.
With a record of
8 - 1 - 0, fighting out of Los Angeles, Илья Муромец!
The judges for this bout are Steve Erwin, Chris Dean and Skip Squint.
The bell rings for round one and we are underway!
Kishimoto fails with the takedown
and Муромец counters with a crisp hook to the side of the head.
Kishimoto fails with a takedown attempt.
Kishimoto gets his takedown attempt stuffed easily
and Муромец cracks him with a counter punch right on the button.
That's three failed takedown attempts in the round for Daichi Kishimoto. That's going to take a lot out of him.
We've had a slow start to the round here - hopefully the action picks up.
Kishimoto fails to land the takedown.
Kishimoto darts in and lands a nice takedown into half guard.
That's one minute gone in the round.
Муромец trying to control from the bottom.
Муромец is trying to avoid being dragged into an even worse position than he's already in but Kishimoto is staying active.
Kishimoto wants to pass the guard but Муромец is defending well.
Kishimoto definitely looks more muscular than last time we saw him fight.
Муромец is trying to control but can't.
Kishimoto looking for a kimura but he'll have to free his other leg if he wants to finish that. Perhaps he's just using it as a distraction technique.
Kishimoto is trying to work for a kimura but Муромец is defending well.
Муромец looks more muscular than last time we saw him. He must have been on the weights.
That's two minutes gone in the round.
Well. There's a bit of a lull in the action here and the crowd are starting to get restless.
Kishimoto is trying to work for a kimura. This could be trouble! No, Муромец has managed to free his arm - good work.
Kishimoto not throwing his punches with enough precision this time.
Kishimoto seems to be working for a kimura but Муромец defends the submission attempt.
Kishimoto is thinking about going for an arm triangle but he can't free his leg.
Kishimoto looking for a kimura but he'll have to free his other leg if he wants to finish that. Perhaps he's just using it as a distraction technique.
Kishimoto is trying to work for a kimura. This could be trouble! No, Муромец has managed to free his arm - good work.
That's three minutes gone in the round.
Муромец is trying to control but can't.
Муромец avoiding damage under a succession of punches from Kishimoto.
Kishimoto seems to be looking for submissions.
Муромец keeping control of the position.
Муромец wants to control but Kishimoto is keeping busy.
Kishimoto passes the half guard and he's now in mount! Big trouble for Муромец!
That's four minutes gone in the round.
Муромец defends a decent attempt at a guillotine from Kishimoto.
Kishimoto trying to control but Муромец is having none of it.
Муромец tries to hold on but Kishimoto pushes him away.
Kishimoto looking to secure an arm triangle but Муромец defends it well.
Kishimoto with some aggressive grappling here. He's looking for submissions here, rather than waiting for the opportunity to counter.
Boooooooooooooooooooo!!! God, this has been a terrible round. Come on you two, sort yourselves out!
Kishimoto moves into side control, trying to work for a kimura. That looks painful! Will he finish!!?? No, Муромец has worked his arm free - good work by Муромец!
The fighters are pressed up against the cage, both looking to find a bit of space to work.
Kishimoto working away.
And that�s the end of the round � the fighters go back to their corners.
Daichi Kishimoto dominated that round.
That's time! Back to the action!
Kishimoto avoids a lazy jab quite easily.
Илья Муромец has stepped it up - he knows he needs a finish here!
Kishimoto shoots and misses
and Муромец connects with a straight left hand counter down the middle.
Kishimoto walks straight into a jab right on the nose. That one stung - he's blinking and trying to clear his head.
Kishimoto misses with a takedown attempt
and Муромец counters with a nice uppercut.
Муромец throws an off balance right hand
and Kishimoto decides to take the opportunity to score a takedown. He's landed in Муромец's guard.
Kishimoto pressing down on his opponent's thigh, looking to pass guard. Муромец is keeping the position for now.
Kishimoto wants to control from the top but Муромец keeps moving.
Kishimoto is looking to work some ground and pound but Муромец has wrist control.
Kishimoto postures up in Муромец's guard and throws a big left but Муромец blocks it.
Муромец has Kishimoto pulled in close to control his posture.
That's one minute gone in the round.
Kishimoto pushes down on Муромец's leg and manages to get into half guard.
Daichi Kishimoto overall seems to be getting the better of the ground position in the fight so far.
Муромец trying to hold on to Kishimoto's head to control him but Kishimoto postures up.
Kishimoto seems very keen to just sit and control from half guard but Муромец does not like that idea so much and is remaining active off his back.
Kishimoto is trying to work for a kimura. This could be trouble! No, Муромец has managed to free his arm - good work.
Муромец blocking the ground and pound attempt from Kishimoto.
Муромец trying to control but Kishimoto postures up.
Kishimoto seems to be looking for submissions.
Муромец keeping hold of Kishimoto's head, controlling as best he can.
Kishimoto is looking for a kimura. It's going to be difficult to finish that from half guard though and Муромец defends it well.
That's two minutes gone in the round.
Муромец is positioning himself well to prevent Kishimoto advancing to mount.
Муромец really doesn't want to stay on the ground with Kishimoto. If he can't get it back to his feet, it's only a matter of time before he'll be tapping out.
Муромец is trying to control but can't.
Kishimoto is pressing down on Муромец's thigh, looking to free his foot. Муромец is holding on for now.
Муромец is positioning himself well to prevent Kishimoto advancing to mount.
Kishimoto is pressing down on Муромец's thigh, looking to free his foot. Муромец is holding on for now.
Kishimoto is thwarting Муромец's attempts to control the position.
We must be close to a standup if these guys don't pick up the pace.
The ref warns both fighters not to hold the cage as they work up against the meshing.
That's three minutes gone in the round.
Kishimoto is trying a forearm choke� I don't think that's going to do much at this level of the game.
Муромец is doing well to control the position and prevent Kishimoto from advancing to side control.
Kishimoto seems to be working for a kimura but Муромец defends the submission attempt.
Kishimoto is looking for a kimura but Муромец is holding onto that half guard position, so it's hard for Kishimoto to get the leverage.
Муромец is controlling Kishimoto's trapped leg to prevent Kishimoto from advancing to side control.
Kishimoto is trying to control. Муромец wants to improve his position but can't escape this time.
Муромец is holding on to half guard well.

The referee decides to stand the fighters back up.
Муромец throws a jab but it's blocked by Kishimoto.
Kishimoto drops down looking for a counter takedown but Муромец sprawls and moves away.
That's four minutes gone in the round.
Neither fighter has done anything of merit for a good minute or two here and the crowd are not happy about it.
Kishimoto fails with the takedown
letting Муромец counter with a right hand.
That's three failed takedown attempts in the round for Daichi Kishimoto. That's going to take a lot out of him.
Nice sprawl there from Муромец as Kishimoto shoots in.
Kishimoto doesn't succeed with the takedown
and Муромец counters with a quick right hand to the jaw.
Boooooooooooooooooooo!!! God, this has been a terrible round. Come on you two, sort yourselves out!
Муромец throws a right and a left that Kishimoto avoids nicely.
Kishimoto doesn't succeed with the takedown
and Муромец counters with a nice uppercut.
And that�s the end of the round � the fighters go back to their corners.
A close second round but Илья Муромец will probably get the nod - 10:9.
Well, the break between rounds is over. Let's get back to the scrappin! Let's hear some noise people - this is the final round!

Муромец throws a right hand that Kishimoto ducks under and follows up with a left that Kishimoto also avoids with ease.
Kishimoto closes the distance and clinches up, looking for a takedown. He shifts his weight and gets a nice trip into half guard.
Kishimoto is looking for a kimura. It's going to be difficult to finish that from half guard though and Муромец defends it well.
Kishimoto is sneakily working for an arm triangle but Муромец sees it coming and defends easily.
Муромец trying to hold on to Kishimoto's head to control him but Kishimoto postures up.
Kishimoto seems to be working for a kimura but Муромец defends the submission attempt.
We've had a slow start to the round here - hopefully the action picks up.
Kishimoto is trying for a guillotine from the top but the pressure isn't in the right place so Муромец is just riding it out for now. Kishimoto eventually gives up the hold.
Kishimoto controlling the action here.
That's one minute gone in the round.
Муромец is trying to control but can't.
Kishimoto wants to pass the guard but Муромец is defending well.
Муромец trying to control but Kishimoto postures up.
Kishimoto is looking to advance position but Муромец won't allow it.
Муромец is trying to control but can't.
Муромец is refusing to be controlled, as Kishimoto sits in half guard.
Муромец gets back to full guard.
That's two minutes gone in the round.
Well. There's a bit of a lull in the action here and the crowd are starting to get restless.
Kishimoto trying to control but Муромец is working from the bottom.
Kishimoto pressing down on his opponent's thigh, looking to pass guard. Муромец is keeping the position for now.
Kishimoto drops back for a leg! It's a sloppy attempt though and Kishimoto jumps back into guard quickly, to retain the dominant position.
Kishimoto in full guard, throwing the ground and pound. No damage this time.
Kishimoto is trying to work a guillotine from the top, or something like that? Don't know how he thinks he's going to get a finish from there.
Kishimoto postures up in Муромец's guard and throws a big left but Муромец blocks it.
Kishimoto wants to control from the top but Муромец keeps moving.
The referee has decided to stand the fighters back up, so we'll restart on the feet.
Kishimoto shoots and misses
and Муромец counters with a lovely straight right hand!
Муромец lands a straight punch to the body, keeping Kishimoto at a distance.
Kishimoto is really dominating this fight. Is there anything that Муромец can do to turn this around?
That's three minutes gone in the round.
Kishimoto shoots in but doesn't get the takedown
and Kishimoto takes a counter punch right on the button for his troubles.
Муромец might want to mix his strikes up a bit more. He's just going for head shots at the moment and that can become a bit predictable.
Муромец uses good footwork to get in and out and land a nice right hand before Kishimoto has time to react.
Kishimoto manages to get an easy takedown there - catching Муромец on his heels. He'll look to pass Муромец's guard now, I'm sure.
Kishimoto trying to control but Муромец is working from the bottom.
Муромец controlling Kishimoto's posture.
Kishimoto in full guard, throwing the ground and pound. No damage this time.
That's four minutes gone in the round.
Муромец looking to control the pace of the fight rather than finish it.
Kishimoto is trying to work a guillotine from the top, or something like that? Don't know how he thinks he's going to get a finish from there.
Kishimoto postures up.
Kishimoto wants to control from the top but Муромец keeps moving.
Муромец pulls Kishimoto in close to prevent any damage.
We've had a lack of effective grappling in the last minute or so, which could well see a referee standup.
Kishimoto throwing strikes from guard but Муромец blocks nicely.
Boooooooooooooooooooo!!! God, this has been a terrible round. Come on you two, sort yourselves out!
Kishimoto throwing strikes but missing.
Муромец utilising some decent striking defenses from the guard, preventing the ground and pound.
And that's the end of the fight!
Daichi Kishimoto showed his dominance in that final round.
I think Kishimoto has won this one but let's see what the judges have to say. Over to the ring announcer for the scorecards.
Ladies and gentlemen, after 3 rounds of action, we go to the scorecards for a decision.
Judge Steve Erwin scores the fight 29:28
Judge Chris Dean scores the fight 29:28
Judge Skip Squint scores the fight 29:28
In favor of your winner, by unanimous decision... Daichi Kishimoto!
Daichi Kishimoto retains his featherweight title!
During a confident post fight interview, Daichi Kishimoto thanked all his fans. He seemed very genuine when describing how motivated his fans keep him.
In defeat, Илья Муромец stepped up to the mic, saying 'I'll be seeing you again soon, sub spammer.'.
|
|
|
|
|
|
|
|
|
|
|
|
|
|
|
|
|
|
|
|
|
|
|
| S |
C
A |
G |
S |
C
B |
G |
|
S |
C |
G |
|
energy
A | B |
|
hype
A | B |
|
pop
A | B |
|
mgr
A | B |
|
FIGHT
RATING
26% |
|
|
|
|
|
|
|
Main event
|
Coming up we have a middleweight MMA rules bout between Big Asznee (ranked 834 p4p, 105 weight class) and Joey Hatton (ranked 1036 p4p, 130 weight class). Asznee comes into the arena with The Game blaring out of the sound system. The crowd seem to be enjoying Hatton's choice of entrance music: deadman. Well, I have no idea who's going to take this one!
 |
|
 |
| 150 cm
26
185 lbs
10 - 1 - 0 |
|
190 cm
27
190 lbs
11 - 2 - 0 |
Good takedowns
Basic striking
Granite chin |
|
Powerful takedowns
Brawler
Powerful |
|
| |
|
Ladies and gentlemen. This fight is 5 rounds, for the middleweight championship of the world!
Introducing the champion to my left, fighting out of the red corner.
With a record of
10 - 1 - 0, fighting out of London, Big Asznee!
And introducing the challenger to my right, fighting out of the blue corner.
With a record of
11 - 2 - 0, fighting out of New York, Joey Hatton!
The judges for this bout are Summer Carpenter, Ron Honeybunn and Donatello Bradman.
The bell rings for round one and we are underway!
Asznee shoots in for a double leg but Hatton sprawls well. That's going to sap some energy.
Excellent takedown into side control there by Asznee.
Asznee wants to work for a kimura but he's foiled early by Hatton, who protects the arm well.
Asznee scores with punches from side control.
Hatton wants to control but Asznee postures up.
Asznee trying to control the position but Hatton is working away.
Asznee tries to cartwheel into mount but he doesn't manage it.
We've had a slow start to the round here - hopefully the action picks up.
Asznee working hard here to secure a kimura but he's not really in the right position for it.
You can see the frustration on Hatton's face, being in this tough position on the bottom.
That's one minute gone in the round.
Hatton is looking to reverse the position.
Asznee lands a knee to the body and follows it up with some ground and pound to the head. That will wear Hatton down.
Asznee wants to control but Hatton is keeping him busy.
Asznee tries for an arm triangle. That looks pretty tight to me. Is this one over!?! Possibly, maybe, no Asznee has let go of the choke. Obviously it wasn't as tight as we thought!
Hatton is trying to control Asznee's posture but Asznee avoids it.
Asznee tries for a kimura. Not really close to a finish though.
That's two minutes gone in the round.
There's not a lot going on here and the crowd are letting the fighters know they're not willing to tolerate a lack of action.
Hatton tries to work a leg under to get back to half guard but Asznee wriggles his own leg back out and remains in side control.
We've been hearing good reports from Asznee's training camp. Apparently he has been rolling around with some good quality BJJ practitioners and has been sharpening his skills. Let's see if that has an impact on the fight today.
Asznee is looking for a kimura. He might have it! No, Hatton has escaped the position, nice work there.
Asznee slows the pace down.
Asznee tries to move into full mount but can't pass Hatton's legs.
Asznee wants to work for a kimura but he's foiled early by Hatton, who protects the arm well.
Hatton is trying to improve his position.
That's three minutes gone in the round.
Asznee wants to lay and pray for a moment but Hatton keeps working.
Asznee working away.
Hatton tries to get back to half guard but can't.
You can see the frustration on Hatton's face, being in this tough position on the bottom.
The ref warns both fighters not to hold the cage as they work up against the meshing.
Asznee tries for a kimura but Hatton is defending well.
Hatton struggling a bit here.
That's four minutes gone in the round.
Well. There's a bit of a lull in the action here and the crowd are starting to get restless.
Hatton manages to get one leg in to regain half guard.
Asznee is trying to control. Hatton wants to improve his position but can't escape this time.
Hatton is controlling Asznee's position as best he can from this difficult position.
Hatton actively working from the bottom here.
Asznee is looking to stall here but Hatton recovers full guard.
Asznee wants to pass the guard but Hatton is keeping the position.
Boooooooooooooooooooo!!! God, this has been a terrible round. Come on you two, sort yourselves out!
And that�s the end of the round � the fighters go back to their corners.
Big Asznee dominated that round.
OK. That's time! The bell goes and we're back to the action.
A telegraphed takedown attempt from Asznee is defended easily by Hatton.
And an attempted straight right on the counter from Hatton! But no joy.
Asznee shoots in for a takedown but Hatton shows good takedown defense there and keeps this one on the feet.
Asznee gets a double leg takedown into Hatton's guard.
Hatton has his foot on Asznee's thigh. He's trying to push off and get in position for a triangle, I think. Asznee works his way back into a safe position though.
Asznee might be looking to lock onto one of his opponent's long limbs for a submission, whilst we're on the ground.
Hatton preventing the ground and pound from doing any damage.
Asznee trying to control but Hatton is working from the bottom.
Asznee throwing elbows and punches but not connecting, as Hatton works some decent striking defense from the bottom.
Hatton is working actively off his back, looking to secure an arm or perhaps work for a triangle.
We've had a slow start to the round here - hopefully the action picks up.
Hatton has his foot on Asznee's thigh. He's trying to push off and get in position for a triangle, I think. Asznee works his way back into a safe position though.
Asznee has gone for a leg lock! Hatton slips out almost immediately though and dives into Asznee's guard.

That's one minute gone in the round.
Asznee has his foot on Hatton's thigh. He's trying to push off and get in position for a triangle, I think. Hatton works his way back into a safe position though.
Asznee bucks up whilst keeping hold of a body lock, managing to reverse the position. Now he's in top in Hatton's guard.
Asznee trying to control but Hatton is working from the bottom.
Asznee stands and throws Hatton's legs to the side, diving into side control.
Big Asznee overall seems to be getting the better of the ground position in the fight so far.
Hatton wants to control but Asznee postures up.
Asznee tries to move to mount but Hatton blocks the move with his legs.
Asznee is looking to take a break and control but Hatton is keeping him honest, looking to work from the bottom.
That's two minutes gone in the round.
Asznee working hard here to secure a kimura but he's not really in the right position for it.
Asznee is really dominating this fight. Is there anything that Hatton can do to turn this around?
Asznee wants to control but Hatton is keeping him busy.
Hatton sneaks back into half guard.
Asznee is trying a forearm choke� I don't think that's going to do much at this level of the game.
That's three minutes gone in the round.
Hatton wants to control but Asznee is keeping busy and won't allow it.
Hatton is trying to avoid being dragged into an even worse position than he's already in but Asznee is staying active.
Hatton tries to roll over but Asznee keeps him under control.
Hatton has found himself in a tricky position here. He's been working his transitions in training so let's see if he can work his way out of it.
That's four minutes gone in the round.
Well. There's a bit of a lull in the action here and the crowd are starting to get restless.
Asznee lands a big shot. The thud that echoes around the arena is like music to the fans' ears.
Asznee is trying to control. Hatton wants to improve his position but can't escape this time.
Asznee stalling away here and it's allowed Hatton to slip out his trapped foot and regain full guard.
Asznee advances to half guard.
Hatton wants to improve his position but Asznee is controlling well.
Asznee scoring with strikes to the body and head.
Boooooooooooooooooooo!!! God, this has been a terrible round. Come on you two, sort yourselves out!
Asznee is thwarting Hatton's attempts to control the position.
Hatton actively working from the bottom here.
And that�s the end of the round � the fighters go back to their corners.
Big Asznee dominated that second round.
Well, the break between rounds is over. Let's get back to the scrappin!
Hatton gets caught on his heels momentarily as he allows Asznee to score an easy takedown into full guard.
Hatton preventing the ground and pound from doing any damage.
Asznee trying to control but Hatton is working from the bottom.
Hatton working from the bottom, still in full guard. He's managed to get a loose triangle. Asznee doesn't seem to be doing much to defend here, obviously he feels comfortable in the position. Asznee manages to throw the legs off his shoulder and he's back into guard - no problem.
Asznee wants to control from the top but Hatton keeps moving.
We've had a slow start to the round here - hopefully the action picks up.
Asznee slows down the pace of the fight, as he sits in guard.
Hatton pulls Asznee in close to prevent any damage.
That's one minute gone in the round.
Hatton is trying to control the position from the bottom.
Hatton looking for a guillotine here but Asznee defends easily.
Asznee wants to control from the top but Hatton keeps moving.
The fighters are pressed up against the cage, both looking to find a bit of space to work.
Asznee avoids a guillotine attempt easily.
That's two minutes gone in the round.
Neither fighter has done anything of merit for a good minute or two here and the crowd are not happy about it.
Hatton is throwing his legs up, looking for submissions. Asznee is aware though and is defending well.
Asznee drops back, looking for a kneebar! Hatton looks panicked! The fighters roll across the mat, one looking to finish, one looking to escape. Hatton looks to have wriggled free... Yes, he's got his leg free and he's dived into side control! Good work there from Hatton!
Asznee tries to work a leg under to get back to half guard but Hatton wriggles his own leg back out and remains in side control.
Hatton remains in side control and seems content to stay there. It's a versatile position from which he can work both strikes and submissions, whilst maintaining that control, so maybe he'll sit here for a while.
Hatton gets to mount! Asznee was on the offensive and wasn't defending properly.
That's three minutes gone in the round.
Asznee really trying hard to get back to half guard here.
Asznee is working hard here to advance position.
Hatton looking to control but Asznee is working nicely, looking to advance position himself.
Asznee is wriggling around trying to escape.
Hatton wants to control the pace but Asznee is squirming around nicely.
That's four minutes gone in the round.
The crowd are starting to boo a lack of action.
Asznee really trying hard to get back to half guard here.
Asznee is squirming around, avoiding Hatton's attempts to control the action.
Hatton controlling the pace for now.
Asznee keeping his composure momentarily, calmly looking to get back to half guard.
Boooooooooooooooooooo!!! God, this has been a terrible round. Come on you two, sort yourselves out!
Asznee tries to lock up and control but Hatton gives him a forearm to the face and pushes him away.
And that�s the end of the round � the fighters go back to their corners.
Joey Hatton really dominated that round.
Well, the break between rounds is over. Let's get back to the scrappin!

Hatton connects with a good right hand that stumbles Asznee. Asznee circles away out of range and recomposes himself.
Hatton scores with a three punch combo!
Asznee shoots in and gets a takedown into Hatton's guard.
Asznee trying to control the position from guard on top but Hatton is wriggling around, looking for whatever he can.
Asznee postures up and lands some nice ground and pound.
Hatton keeping full guard, as Asznee tries to pass.
Asznee trying to control the position from guard on top but Hatton is wriggling around, looking for whatever he can.
We've had a slow start to the round here - hopefully the action picks up.
Hatton working for a triangle but Asznee defends it easily.
That's one minute gone in the round.
Asznee pressing down on his opponent's thigh, looking to pass guard. Hatton is keeping the position for now.
Hatton working for a triangle but Asznee defends it easily.
Asznee wants to pass the guard but Hatton is keeping the position.
Hatton keeping moving, preventing Asznee from controlling successfully.
That's two minutes gone in the round.
The crowd are starting to boo a lack of action.
Hatton working for submissions but it's allowed Asznee to get to half guard.
Asznee is sneakily working for an arm triangle but Hatton sees it coming and defends easily.
Asznee tries to pass the half guard into mount. Hatton knows what he's doing though and prevents the attempt.
Asznee is nestled in close to Hatton, controlling him well. He's worked in a nice elbow to the side of the head as well, for good measure.
Hatton is looking to sinch up a guillotine here but Asznee pulls his head out easily.
Asznee is working for a kimura but Hatton is defending it quite comfortably.
That's three minutes gone in the round.
Asznee is nestled in close to Hatton, controlling him well. He's worked in a nice elbow to the side of the head as well, for good measure.
Hatton wants to get back to full guard.
Hatton trying to control here.
Asznee content to control rather than advance.
Asznee lands a big shot. The thud that echoes around the arena is like music to the fans' ears.
That's four minutes gone in the round.
The crowd are hurling abuse towards the fighters... You can hardly blame them though because there isn't a lot going on in the fight.
Asznee moves into full mount! Hatton won't be happy about that!
Hatton is looking to improve his position but Asznee isn't that keen on the idea.
Asznee is working on an americana here. Ooh, that looks pretty nasty! Nope, Hatton has managed to escape the submission attempt.
Hatton is writhing around trying to get back to his feet.
Boooooooooooooooooooo!!! God, this has been a terrible round. Come on you two, sort yourselves out!
Asznee trying to control but he's not successful this time.
And that�s the end of the round � the fighters go back to their corners.
Big Asznee had his way with Joey Hatton in that round.
That's the end of the interval. I'm sure that seemed a lot quicker than a minute for our two fighters! Back to the action. This is the final round!

Asznee misses with a takedown attempt
and Hatton counters with a straight right hand.
Hatton moves into range and connects with a jab.
Hatton connects with a slap. Keep your fist closed son.
Hatton keeps his opponent at a distance with a nice jab.
Hatton is using his reach advantage to land shots from outside his opponent's range.
Hatton getting the better of the striking in that exchange.
Hatton getting the better of the striking in that exchange.
Hatton slips in close and lands a nice hook before moving back out of range.
Asznee has a takedown stuffed.
Asznee takes a jab on the nose. He smiles like he loves it and keeps coming.
Asznee shoots in from a long way out. He's driving through with the takedown attempt and he eventually gets it, landing in Hatton's guard.
The crowd are loving this. Great action here.
Asznee postures up as if he's going to throw some strikes but drops back for an ankle! Hatton is in big trouble! He looks ready to tap! But no, he's escaped and dives on top of Asznee, into his guard.
Both of our modern day gladiators look out of it here - a gruelling 5 rounds of action taking it's toll on them, no doubt.
Hatton pressing down on his opponent's thigh, looking to pass guard. Asznee is keeping the position for now.
That's one minute gone in the round.
Asznee is trying to keep Hatton in close.
Hatton preventing the sweep.
Asznee working for a triangle but Hatton defends it easily.
Hatton trying to control but Asznee is working from the bottom.
That's two minutes gone in the round.
The crowd are hurling abuse towards the fighters... You can hardly blame them though because there isn't a lot going on in the fight.
Asznee looking to sweep here. No luck so far.
Hatton wants to control from the top but Asznee keeps moving.
Hatton controls from within his opponent's guard.
Asznee looking to sweep here. No luck so far.
Asznee is working from a closed guard but he's struggling to control his opponent.
It looks like the ref is thinking about a standup.
Big Asznee is fighting for a decision here - he's started to take the cautious approach.
That's three minutes gone in the round.
Hatton pushes down on Asznee's leg and manages to get into half guard.
Hatton slows the pace down in half guard.
Hatton is pressing down on Asznee's thigh, looking to free his foot. Asznee is holding on for now.
Asznee has no desire to be mounted, so is trying to control. Hatton is working away from the top position though.
The referee has motioned to the fighters to stand back up. He just wasn't happy with the level of activity.
Asznee takes a shot right to the liver - Bas would have been proud of that punch.
That's four minutes gone in the round.
Neither fighter has done anything of merit for a good minute or two here and the crowd are not happy about it.
Asznee drives through with a really nice takedown into side control.
Hatton is looking to regain half guard here but Asznee keeps moving and retains side control.
Asznee is maintaining the dominant position - no doubt Hatton will start to get frustrated soon if he's not already.
Hatton can't do much from the bottom here.
Hatton is positioning himself to get back to half guard.
The crowd thankful this round is nearly over.
Hatton seems a little lost for a moment, as Asznee dominates the positioning.
And that's the end of the fight!
Joey Hatton comfortably won the final round on my scorecard.
I think Asznee has won this one but let's see what the judges have to say. Over to the ring announcer for the scorecards.
Ladies and gentlemen, after 5 rounds of action, we go to the scorecards for a decision.
Judge Summer Carpenter scores the fight 48:47
Judge Ron Honeybunn scores the fight 48:47
Judge Donatello Bradman scores the fight 48:47
In favor of your winner, by unanimous decision... Big Asznee!
Big Asznee retains his middleweight title!
Our winner, Big Asznee, made sure he spent some time buttering up the crowd during his post fight interview, which will no doubt bring him a few more fans.
|
|
|
|
|
|
|
|
|
|
|
|
|
|
|
|
|
|
|
|
|
|
|
| S |
C
A |
G |
S |
C
B |
G |
|
S |
C |
G |
|
energy
A | B |
|
hype
A | B |
|
pop
A | B |
|
mgr
A | B |
|
FIGHT
RATING
27% |
|
|
|
|
|
|
|
|
|
|
