 |
Sucker Punch 265# CSS Semis PBP Commentary |
Undercard bout
|
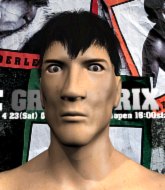
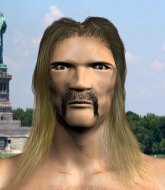
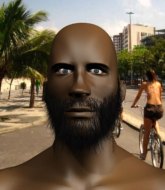
Coming up we have a super heavyweight MMA rules bout between Rokchai Sitsongrit (ranked 5906 p4p, 4823 weight class) and Repus Revorg (ranked 99 p4p, 84 weight class). We have two fighters making their debuts here, so let's see who comes out of this one with their first professional victory.
 |
|
 |
| 179 cm
18
157
0 - 0 - 0 |
|
179 cm
18
157
0 - 0 - 0 |
BJJ White Belt
Excellent MT
Granite chin |
|
BJJ White Belt
Excellent MT
Heavy handed |
|
| |
|
Ladies and gentlemen. This fight is 3 rounds, in the super heavyweight division.
Introducing the fighter to my left, fighting out of the red corner.
With a record of 0 - 0 - 0, fighting out of Rio de Janeiro, Rokchai Sitsongrit!
And introducing the fighter to my right, fighting out of the blue corner.
With a record of 0 - 0 - 0, fighting out of Amsterdam, Repus Revorg!
The judges for this bout are Ron Honeybunn, Ben Hemmingworth and Donatello Bradman.

The bell rings for round one and we are underway!
The bell rings for round one and we are underway!
Revorg tries to clinch but Sitsongrit is having none of it.
Revorg with poor footwork there. He got himself in a bit of a tangle, enabling Sitsongrit to score with a decent uppercut.
Revorg connects with a body shot that sends Sitsongrit's belly button to the back.
Decent striking displayed by Sitsongrit there.
Sitsongrit feints and then cracks Revorg's leading leg with a nice low kick. He's obviously looking to slow Revorg down.
Revorg cracks Sitsongrit with a right hand to the side of the head.
Sitsongrit connects with a nice looking jab.
Sitsongrit looks to score with a jab to the body but Revorg is just out of range.
Revorg is looking to clinch.
Sitsongrit connects with a looping right hand.
The crowd cheering loudly, showing their appreciation for the quality fight we're seeing here.
Sitsongrit measures up his opponent and throws a superman punch that connects to the jaw! Down goes Revorg! The ref steps in, and that's the ball game folks!
Ladies and gentlemen, after 1:57 of round 1, we have a winner by way of KO (Superman Punch). Rokchai Sitsongrit!
|
|
|
|
|
|
|
|
|
|
|
|
|
|
|
|
|
|
|
|
|
|
|
| S |
C
A |
G |
S |
C
B |
G |
|
S |
C |
G |
|
energy
A | B |
|
hype
A | B |
|
pop
A | B |
|
mgr
A | B |
|
FIGHT
RATING
72% |
|
|
|
|
|
|
|
Undercard bout
|
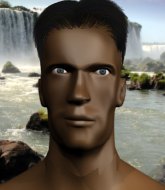
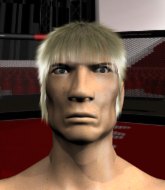
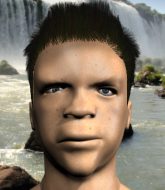
Coming up we have a heavyweight MMA rules bout between Andrejs Medvedevs (ranked 24833 p4p, 25378 weight class) and Dookie Shoes (ranked 593 p4p, 603 weight class). Dookie Shoes will no doubt be trying to keep this one on the feet, where he has a distinct advantage.
 |
|
 |
| 225 cm
20
280
2 - 6 - 0 |
|
195 cm
26
275
0 - 2 - 0 |
BJJ Blue Belt
Brawler
Experienced |
|
BJJ White Belt
Good kicks
Solid chin |
|
| |
|
Ladies and gentlemen. This fight is 3 rounds, in the heavyweight division.
Introducing the fighter to my left, fighting out of the red corner.
With a record of 2 - 6 - 0, fighting out of St Petersburg, Andrejs Medvedevs!
And introducing the fighter to my right, fighting out of the blue corner.
With a record of 0 - 2 - 0, fighting out of Las Vegas, Dookie Shoes!
The judges for this bout are Hugh Johnson, Topper Green and Damien Edna.
The bell rings for round one and we are underway!
The bell rings for round one and we are underway!
Medvedevs circles away from the clinch attempt

and Medvedevs counters with a nice double leg into guard.
Medvedevs showing good wrestling skills to control the position.

Shoes has an active guard here but Medvedevs has managed to pass into half guard.
Shoes is looking to regain full guard. Not this time though.
We've been hearing that Medvedevs has been drilling a lot of ground and pound in training, so let's see if he get the finish.
We've had a slow start to the round here - hopefully the action picks up.

Medvedevs is trying for a kimura here. Shoes looks like he's in a lot of pain... and he's tapping out! Medvedevs wins by kimura!
Ladies and gentlemen, after 1:59 of round 1, we have a winner by way of Submission (Kimura). Andrejs Medvedevs!
|
|
|
|
|
|
|
|
|
|
|
|
|
|
|
|
|
|
|
|
|
|
|
| S |
C
A |
G |
S |
C
B |
G |
|
S |
C |
G |
|
energy
A | B |
|
hype
A | B |
|
pop
A | B |
|
mgr
A | B |
|
FIGHT
RATING
55% |
|
|
|
|
|
|
|
Undercard bout
|
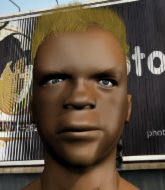
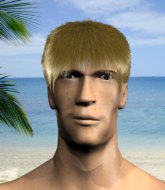
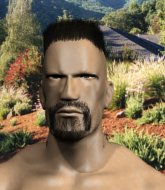
Coming up we have a heavyweight MMA rules bout between Emir Dervisevic (ranked 3731 p4p, 7134 weight class) and Tnt Winner (ranked 382 p4p, 558 weight class). Emir Dervisevic has the better chin. Will he look to stand and bang today?
 |
|
 |
| 185 cm
25
230
3 - 3 - 0 |
|
193 cm
24
276
4 - 1 - 0 |
BJJ Blue Belt
Excellent boxer
Big right hand |
|
BJJ Purple Belt
Brawler
Powerful |
|
| |
|
Ladies and gentlemen. This fight is 3 rounds, in the heavyweight division.
Introducing the fighter to my left, fighting out of the red corner.
With a record of 3 - 3 - 0, fighting out of Las Vegas, Emir Dervisevic!
And introducing the fighter to my right, fighting out of the blue corner.
With a record of 4 - 1 - 0, fighting out of Tokyo, Tnt Winner!
The judges for this bout are Summer Carpenter, Donatello Bradman and Ben Watson.
The bell rings for round one and we are underway!
The bell rings for round one and we are underway!

Winner gets the takedown into side control.
Winner is working for what looks like an arm triangle here. Dervisevic is trying to escape and Winner transitions quickly into an armbar! He's slapped it on tight and Dervisevic is forced to tap! Nice work there by Winner! Very nice indeed!
Ladies and gentlemen, after 0:18 of round 1, we have a winner by way of Submission (Armbar). Tnt Winner!
|
|
|
|
|
|
|
|
|
|
|
|
|
|
|
|
|
|
|
|
|
|
|
| S |
C
A |
G |
S |
C
B |
G |
|
S |
C |
G |
|
energy
A | B |
|
hype
A | B |
|
pop
A | B |
|
mgr
A | B |
|
FIGHT
RATING
100% |
|
|
|
|
|
|
|
Undercard bout
|
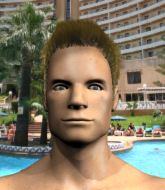
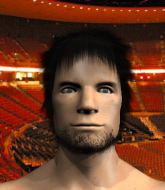
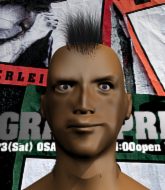
Coming up we have a heavyweight MMA rules bout between Sith Rebel (ranked 5979 p4p, 25588 weight class) and Donald The Donald (ranked 507 p4p, 606 weight class). Both fighters really staring each other down here, as Donald The Donald enters the cage!
 |
|
 |
| 191 cm
19
285
1 - 0 - 0 |
|
192 cm
18
245
0 - 2 - 0 |
Good wrestling
Counter fighter
Cardio machine |
|
BJJ White Belt
Decent boxing
Tends to cut |
|
| |
|
Ladies and gentlemen. This fight is 3 rounds, in the heavyweight division.
Introducing the fighter to my left, fighting out of the red corner.
With a record of 1 - 0 - 0, fighting out of Montreal, Sith Rebel!
And introducing the fighter to my right, fighting out of the blue corner.
With a record of 0 - 2 - 0, fighting out of London, Donald The Donald!
The judges for this bout are Skip Squint, Bruno Hogan and Ben Watson.
The bell rings for round one and we are underway!
The bell rings for round one and we are underway!

The Donald pushes Rebel up against the cage in a clinch.
The Donald gets double underhooks to prevent a takedown attempt from Rebel.
Rebel turns his back and goes for a hip toss. It's a bit messy but it gets the job done and Rebel manages to end up in side control.
Sloppy strikes there by Rebel.
Rebel lands an elbow.
 It looks like Donald The Donald has been cut. It looks like Donald The Donald has been cut.
Rebel working the ground and pound from side control.
The crowd goes nuts as Rebel knocks The Donald out cold with a massive hammerfist! Rebel Jumps to his feet and climbs on top of the cage to celebrate with the crowd!
Ladies and gentlemen, after 0:40 of round 1, we have a winner by way of KO (Strikes). Sith Rebel!
|
|
|
|
|
|
|
|
|
|
|
|
|
|
|
|
|
|
|
|
|
|
|
| S |
C
A |
G |
S |
C
B |
G |
|
S |
C |
G |
|
energy
A | B |
|
hype
A | B |
|
pop
A | B |
|
mgr
A | B |
|
FIGHT
RATING
100% |
|
|
|
|
|
|
|
Undercard bout
|
Coming up we have a heavyweight MMA rules bout between Victor Ballsawash (ranked 25262 p4p, 5974 weight class) and Rick Hatton (ranked 595 p4p, 506 weight class). Both fighters look fresh as a daisy as they make their way towards the cage.
 |
|
 |
| 183 cm
20
273
0 - 2 - 0 |
|
198 cm
17
261
1 - 3 - 0 |
BJJ Blue Belt
Counter fighter
Cardio machine |
|
BJJ Blue Belt
Excellent boxer
Solid chin |
|
| |
|
Ladies and gentlemen. This fight is 3 rounds, in the heavyweight division.
Introducing the fighter to my left, fighting out of the red corner.
With a record of 0 - 2 - 0, fighting out of St Petersburg, Victor Ballsawash!
And introducing the fighter to my right, fighting out of the blue corner.
With a record of 1 - 3 - 0, fighting out of Amsterdam, Rick Hatton!
The judges for this bout are Chris Dean, Ben Hemmingworth and Skip Squint.
The bell rings for round one and we are underway!
The bell rings for round one and we are underway!
Hatton swinging wildly here.
Hatton digs a good hook to Ballsawash's body.
Hatton uses good footwork to avoid the strikes from Ballsawash.
Hatton looks more muscular than last time we saw him. He must have been on the weights.
Hatton lands with a two punch combination before moving back out of range.
Hatton looks to land a left hand but Ballsawash moved out of range nicely.
It looked like Ballsawash was looking amped, ready to throw a big counter but didn't commit.
Nice sprawl there from Hatton as Ballsawash shoots in.
Hatton scores with a punch to the gut of his opponent.
Hatton checks a leg kick nicely.
We've had a slow start to the round here - hopefully the action picks up.
Hatton swings for the body but Ballsawash moves out of range.
Ballsawash seem to be loading up, looking for a big counter.
Hatton with a nice cross.
A left and a right from Ballsawash both land. Nice combination.
This has been an exciting period of action!
Hatton fakes a jab and then connects with a hook.
Ballsawash avoids a lazy jab quite easily.

That's one minute gone in the round.
Hatton fails to land with the punch combination there - jab, cross, hook, miss, miss, miss.
Sloppy strikes from Hatton. Those never looked like landing.
Ballsawash rushes forward with a series of wild hooks but Hatton moves out of range and avoids them all easily.
Ballsawash has his hands up protecting his head but a hook from Hatton finds it's way round the side to connect with Ballsawash's head.
Hatton swinging wildly here.
As Hatton looks to move away, Ballsawash throws a big counter combo but Hatton just gets out of the way.
Hatton is using his reach advantage to land shots from outside his opponent's range.
Ballsawash walks into a stiff left hand from Hatton.
Ballsawash throws a combination but comes up with nothing but fresh air.
Hatton feints a jab promting Ballsawash to slip. Hatton then demonstrates his capabilities by jabbing again. Ballsawash slips again and ducks right into an uppercut.
 It looks like Victor Ballsawash has been cut. It looks like Victor Ballsawash has been cut.
Ballsawash misses with a jab, cross combination.
A big right from Hatton misses.
Ballsawash went nuts there looking for a big combo counter but none of the flurry connected.
Hatton swings widly with a right hand
and Ballsawash counters with a left and a right that stings Hatton.
The fans in attendance giving it up for the two fighters, who have really let it all hang out in the last minute or so!
A jab from Hatton misses.

That's two minutes gone in the round.
Ballsawash scores with a takedown into Hatton's guard.
Hatton looking to hit a scissor sweep but Ballsawash is one step ahead there.
Ballsawash postures up to throw the ground and pound strikes but they don't connect.
Ballsawash stands up and looks to throw the legs aside to pass to side control. Hatton swivels though and keeps the full guard.
Ballsawash postures up in Hatton's guard and throws a big left but Hatton blocks it.
Ballsawash slips effortlessly into side control - very nice.
Ballsawash tries to cartwheel into mount but he doesn't manage it.
Ballsawash throws a strike aimed at the side of Hatton's head but Hatton avoids it well.
We've been hearing good reports from Ballsawash's training camp. Apparently he has been rolling around with some good quality BJJ practitioners and has been sharpening his skills. Let's see if that has an impact on the fight today.

That's three minutes gone in the round.
Ballsawash is trying to land an Americana. He has the arm isolated but Hatton is keeping cool and he's avoided the danger for now.
Hatton wants to control but Ballsawash postures up.
The ref warns both fighters not to hold the cage as they work up against the meshing.
Ballsawash postures up a little and throws a couple of hammerfists but they don't connect properly.
Hatton tries to improve position but can't.
Ballsawash taking a breather here.
Ballsawash tries for an arm triangle. That looks pretty tight to me. Is this one over!?! Possibly, maybe, no Ballsawash has let go of the choke. Obviously it wasn't as tight as we thought!
Hatton tries to get back to half guard but can't.

That's four minutes gone in the round.
Ballsawash tries to move to mount but Hatton blocks the move with his legs.
Hatton struggling a bit here.
Hatton really doesn't want to stay on the ground with Ballsawash. If he can't get it back to his feet, it's only a matter of time before he'll be tapping out.
Ballsawash slows the pace down.
Hatton is trying to control Ballsawash's posture but Ballsawash avoids it.
Hatton tries to buck Ballsawash off but Ballsawash is having none of it.
Ballsawash throwing shots but missing, from side control.
Hatton is positioning himself to get back to half guard.
And that�s the end of the round � the fighters go back to their corners.
A close round but Rick Hatton will probably get the nod.
The cut man is working on Victor Ballsawash's cut.
The corners get their ten second warning. Both fighters stand from their stools and stare eachother down, ready to get back to the action.

Ballsawash displays some good footwork, moving neatly out of range as Hatton throws out the jab.
Hatton looks to score with a jab to the body but Ballsawash is just out of range.
Ballsawash appears to be looking for a big counter.
Ballsawash shoots for a takedown but Hatton saw that one coming a mile off and avoided it easily.
Left hook, right uppercut from Ballsawash.
Ballsawash shoots in looking for a takedown. Hatton tries to sprawl out of it but Ballsawash keeps driving through. The fighters are pinned against the cage. Hatton manages to get underhooks and after a bit of a struggle, circles away and we're back to standing.
Ballsawash throws out a leg kick but Hatton moves out of range and Ballsawash only half commits.
Hatton rushes in with a sloppy looking punch
and Ballsawash counters with a two punch combo.
Ballsawash avoids a punch combination nicely.
We've had a slow start to the round here - hopefully the action picks up.
Hatton misses with a hook. Ballsawash ducked under it nicely.
Hatton throws a right and a left that both miss.
Hatton swings wildly with a right hand that was never going to find it's target.
That's one minute gone in the round.
Ballsawash shoots in with a takedown attempt and he has Hatton pinned against the cage. Hatton gets the underhooks and manages to circle away.
Hatton lets it all go there with a big combo counter but none of the punches connected.
That's three failed takedown attempts in the round for Victor Ballsawash. That's going to take a lot out of him.
Hatton throws a nice looking combination but Ballsawash bobs and weaves to avoid any damage.
Ballsawash went nuts there looking for a big combo counter but none of the flurry connected.
A slow jab from Hatton misses its intended target.
Rick Hatton seems to be the more aggressive standup fighter in this bout.
Hatton misses the shot to the body.
Hatton throws a nice looking combination but Ballsawash bobs and weaves to avoid any damage.
Hatton misses with an uppercut.
As Hatton looks to move away, Ballsawash throws a big counter combo but Hatton just gets out of the way.
Victor Ballsawash is looking to throw some combinations by the looks of things.
Ballsawash misses with the combination.
Donk. Hatton catches Ballsawash right on the button with a cross.
Hatton connects with a right hand. Ballsawash shakes it off.
Ballsawash swinging wildly here.
That's two minutes gone in the round.
Hatton fails to land with the punch combination there - jab, cross, hook, miss, miss, miss.
Ballsawash drops down looking for a counter takedown but Hatton sprawls and moves away.
Hatton thows a left - swing and a miss!
Hatton goes to the watering hole and comes back with a big thumbs up from the judges as he scores a three punch combo.
The crowd cheering loudly, showing their appreciation for the quality fight we're seeing here.
Boom, another hit is landed. "You're gunna get knocked out" taunts Hatton, as that shot connected.
Ballsawash showing good head movement there, avoiding the strikes from Hatton.
A combination from Hatton does no damage.
Ballsawash showing good head movement there, avoiding the strikes from Hatton.
Nice body punch from Hatton.
Ballsawash misses with a jab and misses with a cross straight after too.
A looping hook to the body misses from Hatton. Ballsawash does a little dance to reset his feet.
That's three minutes gone in the round.
Ballsawash looks for a takedown but Hatton sprawls well.
Hatton has been the more effective fighter overall so far.
Ballsawash misses with a takedown attempt - Hatton sprawls well and throws a nice strike on the way out which just misses.
Hatton misses with an uppercut. Ballsawash saw that one coming.
Ballsawash is looking for a counter combo.
A combination from Ballsawash does no damage.
Hatton just misses with a punch to the body.
As Hatton looks to move away, Ballsawash throws a big counter combo but Hatton just gets out of the way.
Hatton works his jab well there, keeping his opponent at a distance.
Ballsawash takes a shot to the body in his stride.
Ballsawash uses good head movement to avoid the hook from Hatton.
It looked like Ballsawash was looking amped, ready to throw a big counter but didn't commit.
Ballsawash tries to drive through with a takedown attempt but Hatton defends well and Ballsawash ends up having to push Hatton into the cage where they will battle it out in the clinch.
A decent looking cross lands there for Hatton.
Hatton misses with an uppercut.
That's four minutes gone in the round.
Hatton swings for the body but Ballsawash moves out of range.
Ballsawash dives in and grabs Hatton's left leg, looking for a takedown. Hatton pushes down on Ballsawash's head and hops out.
Ballsawash shoots in looking for a takedown but Hatton manages to keep the fight standing, pushing Ballsawash's face into the canvas for good measure before circling away.
Ballsawash misses with the combination.
Ballsawash slips a straight right by Hatton.
Ballsawash appears to be looking for a big counter.
A cross from Hatton lands.
The crowd are loving this. Great action here.
Ballsawash lands with a right hand.
Hatton throws a hook to the body but it doesn't connect.
Hatton dodges the punch combination from Ballsawash.
Hatton misses with a double jab.
Ballsawash fails with a takedown attempt.
And that�s the end of the round � the fighters go back to their corners.
Rick Hatton showed his class in that round. I'd imagine he'll take it on all the scorecards.
The cut man is working on Victor Ballsawash's cut.
That's the end of the round. The referee orders the cornermen out of the cage so we can get back down to business. This is the final round!

Hatton misses with a few strikes there.
Ballsawash swings and misses with a hook to the body.
Ballsawash shoots in but no luck this time.
Ballsawash tries to bum rush Hatton with a series of wild strikes but Hatton uses good footwork to avoid the assault.
Ballsawash takes one on the button.
Sloppy strikes from Hatton. Those never looked like landing.
Hatton showing good head movement there, avoiding the strikes from Ballsawash.
Hatton lands a glancing blow to the side of Ballsawash's head.
We've had a slow start to the round here - hopefully the action picks up.
Ballsawash goes for a double leg but Hatton avoids the attempt and the two fighters end up clinched against the cage as Hatton continues to drive forward.
Ballsawash throws a looping left and ducks down for a takedown. He's got his arms around Hatton's waist but Hatton gets an underhook and avoids the takedown by throwing Ballsawash off to one side.
That's three failed takedown attempts in the round for Victor Ballsawash. That's going to take a lot out of him.
Hatton throws a jab, cross combination which is slipped
letting Ballsawash counter with a right hand.
Hatton looks to score with a combo but nothing lands.
That's one minute gone in the round.
Ballsawash takes a really solid shot there but just smiles back and shrugs his shoulders.
A swing and a miss from Hatton.
Ballsawash shoots in for a takedown but doesn't get it.
Ballsawash is trying hard to land a takedown here. Hatton sprawls well and keeps this one on the feet.
A jab from Hatton does it's job there.
Hatton throws a nice looking combination but Ballsawash bobs and weaves to avoid any damage.
As Hatton looks to move away, Ballsawash throws a big counter combo but Hatton just gets out of the way.
Ballsawash moves out of range as Hatton strikes.
Hatton throws a body shot but no joy.
Hatton throws a right hand that Ballsawash ducks under and follows up with a left that Ballsawash also avoids with ease.
Hatton scores with a punch to the head.
Rick Hatton seems to be getting the better of the standup.
Hatton punishes Ballsawash's body with a nice straight punch.
Hatton throws a right and a left that Ballsawash avoids nicely.
That's two minutes gone in the round.
Hatton misses with a shot to the body
and Ballsawash counters with a three punch combo that has Hatton backing up. Hatton nods at Ballsawash to acknowledge the strikes.
This is a great period of action - very entertaining stuff!
Ballsawash keeping a good distance there, avoiding the body shot.
As Hatton looks to move away, Ballsawash throws a big counter combo but Hatton just gets out of the way.
Ballsawash shoots for a takedown but Hatton saw that one coming a mile off and avoided it easily.
Hatton misses with a looping left.
Ballsawash throws a wild combination but nothing lands.
Ballsawash ducks under a wild hook from Hatton.
Hatton scores with a jab to the head.
Ballsawash looks shocked there as he takes a right hand to the temple.
Ballsawash takes a solid shot to the body. That one hurt him but he's trying not to show it.
Hatton misses with a two punch combination.
Ballsawash changes levels and looks for a double leg takedown. Hatton tries to avoid it but Ballsawash manages to keep hold of a leg and drag Hatton to the ground. Hatton escapes though and pops straight back up to his feet.
Hatton looks like he wants to counter punch here.
Danga de danga de dang - Hatton scores with a four punch combination!
Hatton moving in and out of range nicely, whilst landing the scoring shot.
Victor Ballsawash has stepped it up - he knows he needs a finish here!
That's three minutes gone in the round.
Hatton looks to land a right hand but Ballsawash moved out of range.
No joy there for Hatton, who threw a few shots but didn't land.
Hatton takes a big intake of breath there - he's definitely tired.
Ballsawash displays some good footwork, moving neatly out of range as Hatton throws out the jab.
Ballsawash shoots in for a takedown - he's clinched up with Hatton but Hatton pushes him off and we're back to square one.
A nice side step and Hatton releases a counter shot to the body, but it doesn't find it's home.
Ballsawash shoots in with a takedown attempt and he has Hatton pinned against the cage. Hatton gets the underhooks and manages to circle away.
Rick Hatton is looking to keep the fight on the feet at all costs.
Hatton with a nice cross.
Hatton throws out a powerful jab.
That's four minutes gone in the round.
Hatton lands a jab to Ballsawash's midsection.
Ballsawash steps to the side to avoid the strikes from Hatton.
Ballsawash looks like he's developed a pretty tasty lump over his left eye. He'll need to avoid taking much more damage to that.
Hatton shuffles to his left behind two crisp jabs. Ballsawash eats them both and turns towards Hatton to reposition himself and eats a stinging right hand-left hook combo.
Hatton cracks Ballsawash with an open hand slap.
Ballsawash doesn't react quick enough there as he takes a shot to the body.
The fans in attendance giving it up for the two fighters, who have really let it all hang out in the last minute or so!
Hatton throws a right and a left that Ballsawash avoids nicely.
A punch combination from Ballsawash misses.
Ballsawash throws a right and a left that Hatton avoids nicely.
A punch lands to the side of Ballsawash 's head but he takes it in his stride.
Ballsawash on the wrong end of an overhand right that came out of nowhere.
Hatton displaying good standup as he scores with a three punch combination.
Rick Hatton is fighting for a decision - hopefully he's judged it right and he's actually winning the fight.

Ballsawash darts in and clinches Hatton up against the cage.
And that's the end of the fight!
Rick Hatton comfortably won the final round on my scorecard.
I've got Hatton winning every round here. Surely the decision will go his way and he'll pick up a well deserved decision victory. Over to the ring announcer for the scorecards.
Ladies and gentlemen, after 3 rounds of action, we go to the scorecards for a decision.
Judge Chris Dean scores the fight 27:30
Judge Ben Hemmingworth scores the fight 27:30
Judge Skip Squint scores the fight 27:30
In favor of your winner, by unanimous decision... Rick Hatton!
|
|
|
|
|
|
|
|
|
|
|
|
|
|
|
|
|
|
|
|
|
|
|
| S |
C
A |
G |
S |
C
B |
G |
|
S |
C |
G |
|
energy
A | B |
|
hype
A | B |
|
pop
A | B |
|
mgr
A | B |
|
FIGHT
RATING
59% |
|
|
|
|
|
|
|
Undercard bout
|
Coming up we have a heavyweight MMA rules bout between Rob Gaunce (ranked 3082 p4p, 6907 weight class) and Jack Ripper (ranked 334 p4p, 547 weight class). Gaunce's ring entrance music is that housewives' favourite, Special Ops. The key to victory for Rob Gaunce has got to be keeping the fight on the feet.
 |
|
 |
| 195 cm
21
230
3 - 0 - 0 |
|
198 cm
21
250
4 - 2 - 0 |
BJJ Blue Belt
Solid boxing
Likes comics |
|
Decent wrestler
Brawler
Enjoys gardening |
|
| |
|
Ladies and gentlemen. This fight is 3 rounds, in the heavyweight division.
Introducing the fighter to my left, fighting out of the red corner.
With a record of 3 - 0 - 0, fighting out of Montreal, Rob Gaunce!
And introducing the fighter to my right, fighting out of the blue corner.
With a record of 4 - 2 - 0, fighting out of London, Jack Ripper!
The judges for this bout are Ben Watson, Skip Squint and Ron Honeybunn.
The bell rings for round one and we are underway!
The bell rings for round one and we are underway!
Gaunce connects with a looping right hand.
Ripper shoots in for a double leg but Gaunce sprawls well. That's going to sap some energy.
Gaunce changes levels and looks for a double leg takedown. Ripper tries to avoid it but Gaunce manages to keep hold of a leg and drag Ripper to the ground. Ripper escapes though and pops straight back up to his feet.
Gaunce feints and as Ripper raises his hands in defense, Gaunce changes levels and drives through with a takedown into guard.
Ripper is looking for a guillotine. You can't force these things though and Gaunce defends well.
Ripper working from the bottom, still in full guard. He's managed to get a loose triangle. Gaunce doesn't seem to be doing much to defend here, obviously he feels comfortable in the position. Gaunce manages to throw the legs off his shoulder and he's back into guard - no problem.
Ripper keeping moving, preventing Gaunce from controlling successfully.
We get told so often about how wrestlers don't like to be on their backs. Let's see if Ripper can do anything to dispel that myth.
Ripper is working an open guard here, looking to improve his position. No doubt that will leave him open to counters but at least he's being more offensive.
We've had a slow start to the round here - hopefully the action picks up.
Gaunce is looking to work some ground and pound but Ripper has wrist control.

Gaunce gets to his feet. Ripper looking to butt scoot but the ref puts an end to that. On your feet son!
That's one minute gone in the round.
Ripper with a lazy takedown attempt
and Gaunce counters with a nice uppercut.
Ripper looks for a takedown here. Will he get it? Gaunce is fending him off so far but Ripper persists. Nope, Gaunce circles away and we're back to standing.
Rob Gaunce has stuffed three takedown attempts in the round now. That's going to take a lot out of Jack Ripper.

Gaunce drops Ripper with a beautiful combination! Ripper stares up at his opponent, who ushers him back to his feet - Gaunce is looking for the KO!
 Ripper is rocked! Ripper is rocked!
A nice leg kick from Gaunce, right into the meat of the thigh.
Ripper throws a wild combination but nothing lands.
Ripper shoots in but Gaunce avoids the takedown attempt easily.
Ripper looks winded!
This has been an exciting period of action!
Gaunce tries to score a power double leg takedown but Ripper sees that one coming and sprawls well. That will dishearten Gaunce somewhat.
Gaunce fails with the takedown.
Gaunce is trying hard to land a takedown here. Ripper sprawls well and keeps this one on the feet.
Gaunce looks frustrated there after his takedown attempt is stuffed easily.
Gaunce has been working on his boxing with his coaches at Hardcore Boxing & MT in the buildup to the fight.
Ripper will have to do better than that with his takedown attempts.
Gaunce closes the distance and clinches up with Ripper, looking for a takedown. Gaunce pushes Ripper against the cage but Ripper circles to the side and manages to break the clinch.
That's two minutes gone in the round.
Gaunce tries a switch kick but it misses it's target.
Ripper drives through with a really nice takedown into side control.
Ripper wants to work for a kimura but he's foiled early by Gaunce, who protects the arm well.
Gaunce gets one leg under and gets the fight to half guard.
Gaunce is trying to stand.
Ripper is working for a kimura but Gaunce is defending it quite comfortably.
Gaunce wants to control but Ripper is keeping busy.
That's three minutes gone in the round.
Ripper wants to free his trapped foot but Gaunce is holding on for dear life with his legs.
Gaunce is trying to stand back up but Ripper is controlling him
Ripper thumps the canvas. Not on purpose obviously - he just missed Gaunce's head.
Gaunce misses with some strikes from the bottom.
Ripper trying to pass the guard but Gaunce defending well.
Ripper wants to take a breather but Gaunce is having none of it.
The fighters are battling for position here. Gaunce manages to regain full guard. Nice work.
Ripper trying to control the position from guard on top but Gaunce is wriggling around, looking for whatever he can.
That's four minutes gone in the round.
The crowd are getting on the fighters' backs, as the pace has dropped off in the last minute or so.
Gaunce wants to stand but Ripper is controlling the position.
The ref warns both fighters not to hold the cage as they work up against the meshing.
Ripper preventing the sweep.

The ref stands the fighters back up due to a lack of activity.
Gaunce closes the distance and clinches up with Ripper, looking for a takedown. Gaunce pushes Ripper against the cage but Ripper circles to the side and manages to break the clinch.
Ripper takes a punch to the jaw and another one to the bread basket.
Gaunce gets his takedown attempt stuffed easily
and Ripper counters with a single leg into guard. Gaunce didn't expect that.
Gaunce wants to stand and escape but Ripper is having none of it.
Gaunce is looking for a triangle here but Ripper uses the submission attempt to pass into side control.
Ripper tries for a kimura but Gaunce is defending well.
Ripper tries for an arm triangle. That looks pretty tight to me. Is this one over!?! Possibly, maybe, no Ripper has let go of the choke. Obviously it wasn't as tight as we thought!
And that�s the end of the round � the fighters go back to their corners.
Rob Gaunce dominated that round.
The fighters' corners scream their final instructions, as the referee calls time. Here we go, back to the action!
Gaunce tries to close the distance and clinch up against the cage but Ripper paws at him with a jab and circles away.
Ripper instigates a clinch.

Gaunce pushes off and circles away, back to the middle of the mat.
Ripper with a lazy takedown attempt
and Ripper takes a counter punch right on the button for his troubles.
Ripper rushes Gaunce and presses him up against the cage.
Ripper tries to land knees in the clinch but Gaunce avoids the damage to the body.
Ripper has double underhooks and is working for a body lock takedown. He's got it. The fighters land in half guard but Gaunce regains guard immediately.
Ripper landing with the ground and pound.
Ripper tries to free his leg and advance position but Gaunce is retaining full guard.
Ripper is standing up over Gaunce. Gaunce looks to escape but Ripper dives into side control.
Gaunce is moving his hips around well on the bottom and has managed to get back to half guard.
Ripper wants to lay and pray for a moment but Gaunce keeps working.
Jack Ripper has got the better of the ground game so far.
That's one minute gone in the round.
Gaunce tries to strike from the bottom but it doesn't land.
Gaunce is trying to get back to full guard.
Ripper is trying to work for a kimura but Gaunce is defending well.
Gaunce knows he needs to get back to his feet asap. He's simply no match for Ripper on the ground.
Ripper sitting and controlling from the half guard.
Ripper seems to be working for a kimura but Gaunce defends the submission attempt.
Ripper trying to mount his opponent but Gaunce defends it.
That's two minutes gone in the round.
The crowd are starting to boo a lack of action.
The fighters are battling for position here. Gaunce manages to regain full guard. Nice work.
Gaunce has a closed guard, preventing Ripper from standing up.
Gaunce keeping busy, throwing shots from the bottom.
Ripper postures up.
Ripper postures up as if he's going to throw some strikes but drops back for an ankle! Gaunce is in big trouble! He looks ready to tap! But no, he's escaped and dives on top of Ripper, into his guard.

Gaunce is working Ripper over from the guard. He should look to pass the guard and do a little more damage with these strikes.
Ripper keeping full guard, as Gaunce tries to pass.
That's three minutes gone in the round.
Ripper has a closed guard, preventing Gaunce from standing up.
Gaunce drops back looking for a heel hook - he quickly realises he's not going to get it but Ripper manages to dive on top of him before he can escape and now Gaunce has Ripper in his guard.

Gaunce not looking particularly offensive just at the moment.
Gaunce wants to get back to his feet but Ripper is in a dominant position and won't allow it.
Ripper wanted to stand there but Gaunce had control of the position.
Ripper advances position into side control!
That's four minutes gone in the round.
Ripper is looking for a kimura. He might have it! No, Gaunce has escaped the position, nice work there.
Gaunce is looking for a sweep.
Ripper creates a bit of distance and throws down some hard shots.
Gaunce is not content to let Ripper control the position.
Ripper tries for a kimura but Gaunce is defending well.
Boooooooooooooooooooo!!! God, this has been a terrible round. Come on you two, sort yourselves out!
Ripper wants to lay and pray for a moment but Gaunce keeps working.
And that�s the end of the round � the fighters go back to their corners.
Jack Ripper showed his class in that round. I'd imagine he'll take it on all the scorecards.
That's time! Gaunce's corner gives him a slap on the ass as he gets ready to fight. This is the final round!
Ripper closes the distance and clinches.
Gaunce is working on a leg, looking for a takedown but Ripper is defending well.
Gaunce breaks the clinch and we're back to striking at distance.
Gaunce looks for a takedown here. Will he get it? Ripper is fending him off so far but Gaunce persists. Nope, Ripper circles away and we're back to standing.
Gaunce shuffles to his left behind two crisp jabs. Ripper eats them both and turns towards Gaunce to reposition himself and eats a stinging right hand-left hook combo.
Gaunce shoots in but no luck this time.
That's three failed takedown attempts in the round for Rob Gaunce. That's going to take a lot out of him.
Gaunce digs a good body shot into Ripper's ribs.
Ripper shoots in but no luck this time.
Ripper tries to sprawl but Gaunce drives through with a takedown into half guard.
This has been an exciting period of action!
Ripper trying to control here.
Gaunce takes a deep breath and rests his weight momentarily on top of his opponent, to control the position.
The fighters are pressed up against the cage, both looking to find a bit of space to work.
That's one minute gone in the round.
Ripper actively working from the bottom here.
Ripper takes a big intake of breath there - he's definitely tired.
Ripper wants to control but Gaunce is keeping busy and won't allow it.
Ripper looking to work for a kimura from the bottom.
Gaunce content to control rather than advance.
Gaunce is scoring with some nice ground and pound from the dominant position.
That's two minutes gone in the round.
There's not a lot going on here and the crowd are letting the fighters know they're not willing to tolerate a lack of action.
Gaunce tries to pass to full mount but Ripper defends it.
Gaunce content to control rather than advance.
Ripper looking for submissions from an awkward position here.
Gaunce stands up from half guard... He's had enough of that ground malarky for the time being.
Ripper moves into the clinch.
Ripper goes for a takedown attempt but Gaunce pushes him away and we're back to fighting at a distance.
Ripper throws a head kick that misses
and Gaunce counters with a series of strikes. Ripper will be more careful next time no doubt.
Gaunce looks frustrated there after his takedown attempt is stuffed easily.
That's three minutes gone in the round.
Ripper moves out of range as Gaunce throws a body kick.
Ripper is definitely looking for the counter takedowns here.
Ripper avoids the head kick by Gaunce.
Nice takedown defense from Gaunce. No joy for Ripper on that attempt.
Gaunce shoots in looking for a double leg takedown. Ripper defends it nicely.
Nice takedown defense from Gaunce. No joy for Ripper on that attempt.
Gaunce gets in close and instigates a clinch.
Gaunce can't get the takedown.
Gaunce lands punches inside but they're not really causing much damage.
Ripper prevents a takedown attempt there.
Gaunce breaks the clinch.
That's four minutes gone in the round.
Ripper tries to clinch but Gaunce is having none of it.
Ripper fails with an attempt to clinch.
Rob Gaunce is looking to throw some combinations by the looks of things.
Gaunce has managed to clinch.
Ripper holding his opponent close, against the cage.
Gaunce breaks from the clinch.
Jack Ripper seems to be the more aggressive standup fighter in this bout.
Gaunce tries to clinch but Ripper moves out of range.
Ripper closes the distance looking to clinch
and Gaunce counters with a series of strikes. Ripper will be more careful next time no doubt.
We've seen a great period of action over the last minute or so - credit to both fighters for going all out!
A really sloppy takedown attempt there from Gaunce.
Ripper misses with a body shot
and Gaunce counters with a two punch combo.
Ripper pushes Gaunce up against the cage in a clinch.
And that's the end of the fight!
Rob Gaunce showed his dominance in that final round.
I think Gaunce has won this one but let's see what the judges have to say. Over to the ring announcer for the scorecards.
Ladies and gentlemen, after 3 rounds of action, we go to the scorecards for a decision.
Judge Ben Watson scores the fight 29:28
Judge Skip Squint scores the fight 29:28
Judge Ron Honeybunn scores the fight 29:28
In favor of your winner, by unanimous decision... Rob Gaunce!
A very excited looking Rob Gaunce rambled incoherently for about 5 minutes post fight about how awesome he is. It was kinda funny for a while but then everyone got annoyed.
|
|
|
|
|
|
|
|
|
|
|
|
|
|
|
|
|
|
|
|
|
|
|
| S |
C
A |
G |
S |
C
B |
G |
|
S |
C |
G |
|
energy
A | B |
|
hype
A | B |
|
pop
A | B |
|
mgr
A | B |
|
FIGHT
RATING
43% |
|
|
|
|
|
|
|
Undercard bout
|
Coming up we have a heavyweight MMA rules bout between Brian Mcclean (ranked 6173 p4p, 7252 weight class) and Bomb Squad Lighting Hands (ranked 514 p4p, 561 weight class). Well, the cameraman is lingering on a pretty young lady for a bit too long there. Keep your eyes on the prize buddy or you'll miss the fighter intros!
 |
|
 |
| 194 cm
19
248
0 - 0 - 0 |
|
195 cm
19
245
1 - 3 - 0 |
Good wrestling
Brawler
Granite chin |
|
BJJ Blue Belt
Excellent boxer
Very confident |
|
| |
|
Ladies and gentlemen. This fight is 3 rounds, in the heavyweight division.
Introducing the fighter to my left, fighting out of the red corner.
With a record of 0 - 0 - 0, fighting out of London, Brian Mcclean!
And introducing the fighter to my right, fighting out of the blue corner.
With a record of 1 - 3 - 0, fighting out of London, Bomb Squad Lighting Hands!
The judges for this bout are John Mangel, Darius Henderson and Topper Green.
The bell rings for round one and we are underway!
The bell rings for round one and we are underway!
Sloppy strikes from Lighting Hands. Those never looked like landing.
Lighting Hands throws a wild combination but nothing lands.
As Lighting Hands tries to get set, Mcclean tries to push him back and clinch up but Lighting Hands manages to avoid the attempt.
Mcclean dodges the punch combination from Lighting Hands.
Bomb Squad Lighting Hands seems to be the more aggressive standup fighter in this bout.
Mcclean drives through and clinches with Lighting Hands against the cage.
Lighting Hands wants to break the clinch but can't.
Mcclean displaying some good clinch control by pressing Lighting Hands up against the cage.
Lighting Hands is stalling here. The referee will be looking to step in if he doesn't pick up the pace.
We've had a slow start to the round here - hopefully the action picks up.
Mcclean has Lighting Hands pressed against the cage, preventing Lighting Hands from circling away and getting back to striking at range.
Lighting Hands lands a short shot on the inside that snaps the head of Mcclean backwards.
Mcclean pushes off and circles away, back to the middle of the mat.
Mcclean takes the fight into the clinch.
That's one minute gone in the round.
Mcclean breaks the clinch.
Mcclean fakes with an overhand right and moves in to clinch with Lighting Hands, pushing him back against the cage.
Lighting Hands looking to stall.
Lighting Hands tries to break the clinch but Mcclean is controlling the position.
Mcclean stalling the fight.
Mcclean breaks the clinch and we're back to striking at distance.
Lighting Hands jabs Mcclean right on the nose. Mcclean blinks but takes it well.
Lighting Hands misses with a two punch combination.
Lighting Hands connects with a lovely right hand, straight down the pipe.
Mcclean tries to close the distance and clinch up but Lighting Hands swats him away and circles back towards the center.
Lighting Hands keeps the fight standing with a nice sprawl.
Mcclean wants to clinch
and Lighting Hands counters with a two punch combo.
That's two minutes gone in the round.
Lighting Hands lands a right hook to the body.
A left lands for Lighting Hands.
This has been an exciting period of action!
A combination from Lighting Hands does no damage.
Mcclean takes an uppercut right on the jaw but it doesn't phase him.
Lighting Hands throws a right and a left that both miss.
Bomb Squad Lighting Hands is looking to keep the fight on the feet at all costs.
Lighting Hands lands with a two punch combination before moving back out of range.
Lighting Hands smiles there as he lands a nice right hand right on the button.
Mcclean will have to do better than that with his takedown attempts.
Lighting Hands tries to bum rush Mcclean with a series of wild strikes but Mcclean uses good footwork to avoid the assault.
Lighting Hands scores with a jab to the jaw of his opponent.
Lighting Hands connects with a lovely jab that went straight through the gap between Mcclean's hands.
Lighting Hands keeps the fight on the outside.
No joy there for Mcclean, who threw a few shots but didn't land.
Lighting Hands looks like he wants to counter punch here.
That's three minutes gone in the round.
Lighting Hands swings wildly with a hook that is half blocked by Mcclean.
Lighting Hands is landing a lot of head punches in this opening round! Mcclean had better start moving his head a bit unless he wants his face to turn into p�t�.
Mcclean shoots in and drives through. Lighting Hands sprawls well.
That's three failed takedown attempts in the round for Brian Mcclean. That's going to take a lot out of him.
Lighting Hands lands with a two punch combination before moving back out of range.
Mcclean throws the overhand right but ducks down into a quick takedown attempt. Lighting Hands was covering up waiting for the punch and Mcclean finishes the takedown easily into guard.
A big thud reverberates around the arena there as Mcclean accidentally thumps the mat. Hopefully he's not broken his hand.
Mcclean advances to half guard.
Mcclean working over Lighting Hands with some ground and pound. Lighting Hands looks like he wants out of this position, which is understandable.
Mcclean lands with an elbow from half guard - that looked like it hurt.
Mcclean is thinking about going for an arm triangle but he can't free his leg.
That's four minutes gone in the round.
Neither fighter is being very active at the moment, with Mcclean in particular looking to stall.
The fans in attendance giving it up for the two fighters, who have really let it all hang out in the last minute or so!
The fighters are pressed up against the cage, both looking to find a bit of space to work.
Mcclean not landing any meaningful shots this time.
And that�s the end of the round � the fighters go back to their corners.
Bomb Squad Lighting Hands dominated that round.
The corners get their ten second warning. Both fighters stand from their stools and stare eachother down, ready to get back to the action.
Lighting Hands lands with a nice combination. Mcclean backs away looking to recover.
Lighting Hands connects with a jab.
Lighting Hands throws a combination that misses
and Mcclean decides to take the opportunity to score a takedown. He's landed in Lighting Hands's guard.
Lighting Hands is looking to stand back up... there's a bit of a scramble and Mcclean dives into side control.
Mcclean controls the position.
Lighting Hands has been the more effective fighter overall so far.
Mcclean tries for a kimura. Not really close to a finish though.
Mcclean controls the position.
That's one minute gone in the round.
Mcclean is in a dominant position here, looking for a kimura. Lighting Hands looks calm but he's in trouble here. Mcclean gets his leg over his opponent's head and yanks on the arm. Lighting Hands is tapping like a morse code operator on the titanic! SOS! SOS! Mcclean lets go of the hold and Lighting Hands can pop his arm back in it's socket.
Ladies and gentlemen, after 1:26 of round 2, we have a winner by way of Submission (Kimura). Brian Mcclean!
|
|
|
|
|
|
|
|
|
|
|
|
|
|
|
|
|
|
|
|
|
|
|
| S |
C
A |
G |
S |
C
B |
G |
|
S |
C |
G |
|
energy
A | B |
|
hype
A | B |
|
pop
A | B |
|
mgr
A | B |
|
FIGHT
RATING
49% |
|
|
|
|
|
|
|
Undercard bout
|
Coming up we have a heavyweight MMA rules bout between Aron Egomi (ranked 2780 p4p, 2653 weight class) and Thoth Chontamenti (ranked 302 p4p, 288 weight class). Egomi comes to the cage accompanied by Hand of doom by Manowar. Aron Egomi is staring across the cage at his opponent, tweaking his nipples... Tweaking his own nipples that is.
 |
|
 |
| 190 cm
19
250
3 - 4 - 0 |
|
204 cm
20
275
2 - 1 - 0 |
BJJ Blue Belt
Basic striking
Experienced |
|
BJJ Brown Belt
Excellent MT
Fast |
|
| |
|
Ladies and gentlemen. This fight is 3 rounds, in the heavyweight division.
Introducing the fighter to my left, fighting out of the red corner.
With a record of 3 - 4 - 0, fighting out of St Petersburg, Aron Egomi!
And introducing the fighter to my right, fighting out of the blue corner.
With a record of 2 - 1 - 0, fighting out of London, Thoth Chontamenti!
The judges for this bout are Damien Edna, Ben Watson and Bruno Hogan.
The bell rings for round one and we are underway!
The bell rings for round one and we are underway!
A low kick from Egomi is predictable there
and Chontamenti counters with a takedown into side control.
Chontamenti working hard here to secure a kimura but he's not really in the right position for it.
Egomi can't do much from the bottom here.
Chontamenti is trying to get an arm triangle but Egomi is defending well.
Chontamenti is looking for a kimura. He might have it! No, Egomi has escaped the position, nice work there.
The fighters are pressed up against the cage, both looking to find a bit of space to work.
Egomi can't do much from the bottom here.
We've had a slow start to the round here - hopefully the action picks up.
Egomi tries to buck Chontamenti off but Chontamenti is having none of it.
Chontamenti thinks about going for a far side armbar but bails out and retains the dominant position instead.
Egomi tries to bench press Chontamenti off him but Chontamenti keeps the position.
That's one minute gone in the round.
Egomi regains half guard.
Egomi wants to get back to full guard.
Egomi wants to control but Chontamenti is keeping busy.
Chontamenti seems to be working for a kimura but Egomi defends the submission attempt.
Egomi wants to improve his position but Chontamenti is controlling well.
Chontamenti is trying to work for a kimura. This could be trouble! No, Egomi has managed to free his arm - good work.
Egomi wants to improve his position but Chontamenti is controlling well.
Egomi looks to be in better condition than last time we saw him fight. Obviously he's been working hard on his cardio.
The ref warns both fighters not to hold the cage as they work up against the meshing.
Chontamenti seems very keen to just sit and control from half guard but Egomi does not like that idea so much and is remaining active off his back.
Chontamenti is trying a forearm choke� I don't think that's going to do much at this level of the game.
The fighters are starting to get a bit slippery now, which will make submissions a bit more difficult.
Chontamenti is looking for an arm triangle, whilst trying to pass to side control. Egomi doesn't seem that keen to cooperate though. No luck this time Chontamenti.
That's two minutes gone in the round.
Chontamenti is working for submissions here but there's nothing on.
Chontamenti is trying to work for a kimura but Egomi is defending well.
Egomi knows he needs to get back to his feet asap. He's simply no match for Chontamenti on the ground.
Chontamenti is working for a submission of some sort.
Chontamenti wants to work for an arm triangle but Egomi is really keeping half guard well and defending the submission attempt.
Egomi looking for submissions from an awkward position here.
That's three minutes gone in the round.
Egomi works his way to full guard. Good work.
Egomi working a defensive guard here.
Egomi is going to have to think about doing something other than just controlling because Chontamenti is managing to avoid having the position dictated to him.
Chontamenti drops back for a leg! It's a sloppy attempt though and Chontamenti jumps back into guard quickly, to retain the dominant position.
Chontamenti drops back for a leg! It's a sloppy attempt though and Chontamenti jumps back into guard quickly, to retain the dominant position.
Chontamenti slips effortlessly into side control - very nice.
Egomi misses with an elbow from the bottom.
Egomi is trying to improve his position.
Egomi is working hard here to advance position.
Chontamenti controls the position.
Chontamenti thinks about going for a far side armbar but bails out and retains the dominant position instead.
That's four minutes gone in the round.
Egomi tries to escape but Chontamenti is in control.
Chontamenti swings around for an armbar but Egomi sees it coming a mile off and turns beautifully into Chontamenti's guard.
Chontamenti is looking for a triangle but Egomi pushes his legs off easily.
Chontamenti looking for submissions off his back, moving his hips, looking for an opening.
Egomi wants to control from the top but Chontamenti keeps moving.
Chontamenti is active off his back here, looking for submissions.
Egomi pressing down on his opponent's thigh, looking to pass guard. Chontamenti is keeping the position for now.
The crowd thankful this round is nearly over.
Chontamenti working for submissions but it's allowed Egomi to get to half guard.
We've seen a great period of action over the last minute or so - credit to both fighters for going all out!
Ground and pound from Egomi.
And that�s the end of the round � the fighters go back to their corners.
Thoth Chontamenti dominated that round.
The fighters' corners scream their final instructions, as the referee calls time. Here we go, back to the action!
Egomi closes the distance and clinches.
Chontamenti has dropped down and is looking to force the takedown but it's defended by Egomi after a bit of a struggle.
Chontamenti blocks an uppercut.
Chontamenti has picked Egomi up - he's going for a ride! Chontamenti dumps his opponent to the mat with a thud and settles into half guard.
Egomi trying to hold on to Chontamenti's head to control him but Chontamenti postures up.
Chontamenti is looking for a kimura here.
Chontamenti wants to work for an arm triangle but Egomi is really keeping half guard well and defending the submission attempt.
Egomi tries to kick Chontamenti off but Chontamenti keeps his base steady and stays in half guard.
We've had a slow start to the round here - hopefully the action picks up.
Chontamenti looking for a kimura but he'll have to free his other leg if he wants to finish that. Perhaps he's just using it as a distraction technique.
Chontamenti stops Egomi from getting back to his feet.
That's one minute gone in the round.
Egomi slips a foot under and gets full guard. Nice work.
Egomi might be looking to lock onto one of his opponent's long limbs for a submission, whilst we're on the ground.
Chontamenti drops back for a leg! It's a sloppy attempt though and Chontamenti jumps back into guard quickly, to retain the dominant position.
Chontamenti drops back for a leg! It's a sloppy attempt though and Chontamenti jumps back into guard quickly, to retain the dominant position.
Egomi looking for a sweep. Not yet Egomi, not yet.
Chontamenti drops back looking for a leg! Egomi is in trouble here! The fighters roll with the hold and Egomi manages to kick Chontamenti off! Chontamenti jumps back into Egomi's guard.
Thoth Chontamenti has got the better of the ground game so far.
Chontamenti drops back looking for a leg! Egomi is in trouble here! The fighters roll with the hold and Egomi manages to kick Chontamenti off! Chontamenti jumps back into Egomi's guard.
Chontamenti is holding a leg here, probably looking for an ankle lock - he drops back and goes for it! Egomi is in trouble! Is it all over??? No! Egomi has escaped and now he's on top!
That's two minutes gone in the round.
Chontamenti is looking for a triangle but Egomi pushes his legs off easily.
Chontamenti is looking for a triangle but Egomi pushes his legs off easily.
Chontamenti is active off his back here, looking for submissions.
Chontamenti is active off his back here, looking for submissions.
Chontamenti has his foot on Egomi's thigh. He's trying to push off and get in position for a triangle, I think. Egomi works his way back into a safe position though.
Egomi has to be careful here, sitting in the guard of a superior BJJ player.
Egomi stands up over Chontamenti, holding his feet. He dives back in and lands a decent shot to the head.
Chontamenti is throwing his legs up, looking for submissions. Egomi is aware though and is defending well.
Chontamenti escapes his hips to the side and looks to be working for an armbar. Egomi gives him a little smile and shakes his head. No chance.
Egomi trying to stand up but can't free himself from Chontamenti's guard.
That's three minutes gone in the round.
Chontamenti is working an open guard so Egomi takes the opportunity to get back to his feet.
Chontamenti takes the fight into the clinch.
Egomi is pressed up against the cage. Chontamenti has hold of a leg and is looking to drag Egomi down to the mat. Egomi avoids the attempt though and has circled away. We're back to striking at a distance.
Egomi rushes Chontamenti and presses him up against the cage.
Egomi working aggressively here.
Chontamenti blocks a punch to the side of the head.
Chontamenti has been the more effective fighter overall so far.
Chontamenti is trying to work for a single leg takedown but Egomi pulls him back up using the underhooks.
Aron Egomi has stuffed three takedown attempts in the round now. That's going to take a lot out of Thoth Chontamenti.
Egomi throws a head punch that misses.
Chontamenti is working for takedown but Egomi is calmly controlling the position for now.
Egomi misses with a hook from the clinch.
Egomi can't find room to land a body shot as Chontamenti controls the action.
Chontamenti has dropped down and is working for a takedown. Egomi is trying to keep an underhook but Chontamenti manages to get the takedown into half guard.
Chontamenti is trying to work for a kimura but Egomi is defending well.
Chontamenti is breathing heavily.
Egomi wants to get back to his feet.
That's four minutes gone in the round.
Chontamenti seems to be working for a kimura but Egomi defends the submission attempt.
Chontamenti looking for a kimura but he'll have to free his other leg if he wants to finish that. Perhaps he's just using it as a distraction technique.
Chontamenti is looking for an arm triangle, whilst trying to pass to side control. Egomi doesn't seem that keen to cooperate though. No luck this time Chontamenti.
Egomi looking to work for a kimura from the bottom.
Chontamenti is looking for a kimura but Egomi is holding onto that half guard position, so it's hard for Chontamenti to get the leverage.
And that�s the end of the round � the fighters go back to their corners.
Thoth Chontamenti showed his class in that round. I'd imagine he'll take it on all the scorecards.
OK. That's time! The bell goes and we're back to the action. This is the final round!
Chontamenti drives through with a takedown into Egomi's guard. Let's see what he can do from the top position.
Egomi escapes his hips to the side and looks to be working for an armbar. Chontamenti gives him a little smile and shakes his head. No chance.
My spies in Pantheon of Paroxysm inform me that Chontamenti has been getting involved in the gym's BJJ sparring sessions. Let's see whether that pays dividends!
Egomi working a defensive guard here.
Chontamenti tries to free his leg and advance position but Egomi is retaining full guard.
Chontamenti looking to sit in guard and control but Egomi gets the butterfly guard and sweeps. He's now in the guard on the top.
Egomi trying to pass the guard but can't manage it just yet.
Chontamenti looking for submissions from the bottom here. Moving his hips around, possibly looking for an armbar.
Chontamenti is looking for a triangle here but Egomi uses the submission attempt to pass into side control.
We've had a slow start to the round here - hopefully the action picks up.
Egomi is looking to finish here, going for an Americana. Chontamenti knows the correct defense though, so he's OK.
Egomi tries for an arm triangle. That looks pretty tight to me. Is this one over!?! Possibly, maybe, no Egomi has let go of the choke. Obviously it wasn't as tight as we thought!
That's one minute gone in the round.
Chontamenti manages to work his way to half guard, despite Egomi's best efforts.
Chontamenti actively working from the bottom here.
Egomi trying to control the action but Chontamenti is working from the bottom.
Chontamenti looking for submissions from an awkward position here.
Egomi sitting in half guard, looking to land shots. Chontamenti defending well though.
Chontamenti actively working from the bottom here.
Chontamenti is looking to sinch up a guillotine here but Egomi pulls his head out easily.
That's two minutes gone in the round.
Egomi slows the pace down in half guard.
Egomi wants to pass to mount but Chontamenti is defending the position.
Chontamenti is looking to sinch up a guillotine here but Egomi pulls his head out easily.
Chontamenti looking for submissions off his back.
Chontamenti is staying active underneath Egomi, who seems content to just control the action from this position.
Chontamenti looking to work for a kimura from the bottom.
Chontamenti is looking to sinch up a guillotine here but Egomi pulls his head out easily.
Chontamenti takes a big intake of breath there - he's definitely tired.
Chontamenti looking for submissions from an awkward position here.
That's three minutes gone in the round.
Egomi trying to control the action but Chontamenti is working from the bottom.
Egomi is trying for a guillotine from the top but the pressure isn't in the right place so Chontamenti is just riding it out for now. Egomi eventually gives up the hold.
Chontamenti looking to work for a kimura from the bottom.
Egomi scoring with strikes to the body and head.
Chontamenti actively working from the bottom here.
Chontamenti slips a foot under and gets full guard. Nice work.
Thoth Chontamenti is fighting for a decision - hopefully he's judged it right and he's actually winning the fight.
That's four minutes gone in the round.
Well. There's a bit of a lull in the action here and the crowd are starting to get restless.
Egomi trying to control the position from guard on top but Chontamenti is wriggling around, looking for whatever he can.
Egomi wanted to stand there but Chontamenti had control of the position.
Egomi showing good wrestling skills to control the position.
Egomi lands a couple of digs.
Chontamenti trying to control the position.
Egomi looking to pass the guard.
Boooooooooooooooooooo!!! God, this has been a terrible round. Come on you two, sort yourselves out!
Chontamenti is throwing his legs up, looking for submissions. Egomi is aware though and is defending well.
Egomi got a little sloppy there for a moment and Chontamenti has worked his way into a loose triangle - can he finish it?! No, Egomi has managed to get both his arms back between Chontamenti's legs - danger averted.
Aron Egomi has stepped it up - he knows he needs a finish here!
Chontamenti looking to hit a scissor sweep but Egomi is one step ahead there.
And that's the end of the fight!
I would just about give that final round to Thoth Chontamenti.
I've got Chontamenti winning every round here. Surely the decision will go his way and he'll pick up a well deserved decision victory. Over to the ring announcer for the scorecards.
Ladies and gentlemen, after 3 rounds of action, we go to the scorecards for a decision.
Judge Damien Edna scores the fight 27:30
Judge Ben Watson scores the fight 27:30
Judge Bruno Hogan scores the fight 27:30
In favor of your winner, by unanimous decision... Thoth Chontamenti!
An out of breath and clearly excited Thoth Chontamenti thanked Conviction for their help and support (and free stuff they sent him).
|
|
|
|
|
|
|
|
|
|
|
|
|
|
|
|
|
|
|
|
|
|
|
| S |
C
A |
G |
S |
C
B |
G |
|
S |
C |
G |
|
energy
A | B |
|
hype
A | B |
|
pop
A | B |
|
mgr
A | B |
|
FIGHT
RATING
34% |
|
|
|
|
|
|
|
Co-main event
|
Coming up we have a heavyweight MMA rules bout between Rumble Johnson (ranked 2733 p4p, 2910 weight class) and Bigga Baddaboom (ranked 298 p4p, 313 weight class). Johnson comes into the arena with Where The Hood At? blaring out of the sound system. Bigga Baddaboom has the better chin. Will he look to stand and bang today?
 |
|
 |
| 190 cm
26
255
3 - 1 - 0 |
|
194 cm
26
263
2 - 0 - 0 |
BJJ Blue Belt
Solid boxing
Big heart |
|
Good wrestler
Basic striking
Good gas tank |
|
| |
|
Ladies and gentlemen. This fight is 3 rounds, in the heavyweight division.
Introducing the fighter to my left, fighting out of the red corner.
With a record of 3 - 1 - 0, fighting out of Hilo, Rumble Johnson!
And introducing the fighter to my right, fighting out of the blue corner.
With a record of 2 - 0 - 0, fighting out of Sydney, Bigga Baddaboom!
The judges for this bout are John Mangel, Steve Erwin and Damien Edna.
The bell rings for round one and we are underway!
The bell rings for round one and we are underway!
Baddaboom misses with an uppercut.
Baddaboom bobs and weaves well there to avoid the strikes.
Baddaboom takes a step towards his opponent and connects with a left hand, before circling away.
Baddaboom looks for the body kick but Johnson saw that one coming.
Johnson throwing a counter right hand but Baddaboom manages to avoid it.
Johnson lands with a nice body punch.
Johnson gets cracked with a nice right hand there by Baddaboom.
A looping hook to the body misses from Johnson. Baddaboom does a little dance to reset his feet.
Johnson gets tackled into the cage by Baddaboom. Baddaboom maintains the clinch.
Johnson jumps guard but his hands slip and he falls flat on his back. Well, he's made himself look a right mug there, as Baddaboom walks away with a smile on his face. Johnson gets slowly back to his feet and shakes his head.
Johnson with a hook.
Johnson misses with a body shot
enabling Baddaboom to counter with a crisp jab.
Johnson slips a straight right by Baddaboom.
Johnson shakes his hands off, looking to compose himself, but takes a jab to the jaw whilst he does it.
The crowd are loving this. Great action here.
Johnson throws a shot from downtown. Baddaboom moves away and avoids it.
Johnson avoids a punch combination nicely.
Johnson feinted with a counter takedown.
That's one minute gone in the round.
Baddaboom looks to score with a jab to the body but Johnson is just out of range.
Baddaboom pivots as if he's going to throw a leg kick but stops half way.
Johnson on the wrong end of a kick to the body.
Baddaboom throws a body shot but no joy.
Johnson rushes in with a sloppy looking punch
and Baddaboom counters with a crisp hook to the side of the head.
Baddaboom swings and misses with a hook to the body.
Johnson misses with a hook. Baddaboom ducked under it nicely.
Baddaboom looks more muscular than last time we saw him. He must have been on the weights.
Johnson swings and misses with a hook to the body.
Baddaboom rushes Johnson and pushes him back against the cage in a clinch.
Johnson jumps guard but Baddaboom stands there with Johnson around his waist. Johnson gives up and drops back to his feet. We remain in the clinch.
Good body shot from Baddaboom.
Johnson is breathing heavily.
Baddaboom digs a right hand underneath Johnson's ribcage. Johnson let out a lung full of air as it connected.
That's two minutes gone in the round.
Baddaboom lands with a short shot to the head.
Baddaboom lands on the inside with an uppercut.
Baddaboom presses Johnson against the cage and delivers a mid-strength body shot.
Johnson takes a shot to the head.
The crowd cheering loudly, showing their appreciation for the quality fight we're seeing here.
Baddaboom is working Johnson over against the cage.
Baddaboom works for underhooks and lands a body shot in the process.
A short right from Baddaboom.
A shot in the inside from Baddaboom.

Baddaboom drops Johnson onto one knee with a big uppercut from the clinch! Johnson is propped up by the cage and works his way back to his feet!
 Johnson is rocked! Johnson is rocked!
Baddaboom works for underhooks and lands a body shot in the process.
Oh Johnson is still all over the place! His legs are completely gone! Will he be able to recover?!!
Baddaboom lands a big right hand that drops Johnson! The killer instinct kicks in and Baddaboom finishes his opponent with a series of strikes from mount. A dominating finish by Baddaboom!
Ladies and gentlemen, after 2:45 of round 1, we have a winner by way of TKO (Strikes). Bigga Baddaboom!
During a confident post fight interview, Bigga Baddaboom thanked all his fans. He seemed very genuine when describing how motivated his fans keep him.
|
|
|
|
|
|
|
|
|
|
|
|
|
|
|
|
|
|
|
|
|
|
|
| S |
C
A |
G |
S |
C
B |
G |
|
S |
C |
G |
|
energy
A | B |
|
hype
A | B |
|
pop
A | B |
|
mgr
A | B |
|
FIGHT
RATING
59% |
|
|
|
|
|
|
|
Main event
|
Coming up we have a heavyweight MMA rules bout between ZaDarius Haden (ranked 2699 p4p, 2289 weight class) and Random Lik (ranked 295 p4p, 249 weight class). Haden's ring entrance music is that housewives' favourite, Mot�rhead - Orgasmatron. Both fighters look fresh as a daisy as they make their way towards the cage.
 |
|
 |
| 198 cm
20
249
2 - 0 - 0 |
|
190 cm
26
260
4 - 0 - 0 |
Good wrestling
Basic striking
Granite chin |
|
Decent wrestler
Brawler
Solid chin |
|
| |
|
Ladies and gentlemen. This fight is 3 rounds, in the heavyweight division.
Introducing the fighter to my left, fighting out of the red corner.
With a record of 2 - 0 - 0, fighting out of Helsinki, ZaDarius Haden!
And introducing the fighter to my right, fighting out of the blue corner.
With a record of 4 - 0 - 0, fighting out of Amsterdam, Random Lik!
The judges for this bout are Francis DeMontford, Chris Dean and Winston Howard.
The bell rings for round one and we are underway!
The bell rings for round one and we are underway!
Lik gets taken down but at least he's managed to land in guard.
Lik wants to get back to his feet but Haden passes into half guard.
Lik is looking to regain full guard. Not this time though.
Lik has hold of Haden's hands but Haden slips his arm to the side and lands an elbow.
The fighters are pressed up against the cage, both looking to find a bit of space to work.
Lik trying to control but Haden postures up.
Haden thumps the canvas. Not on purpose obviously - he just missed Lik's head.
Lik keeping his head moving to avoid the ground and pound.
We've had a slow start to the round here - hopefully the action picks up.
Lik gets back to full guard.
Haden stands up over Lik, holding his feet. He dives back in and lands a decent shot to the head.
Lik not looking particularly offensive just at the moment.
Haden has been looking to land a fair amount of strikes on the ground. He might be looking to soften his opponent up in order to work for a submission.
Haden won't allow Lik to get back to his feet.
We've been hearing good reports from Haden's training camp. Apparently he has been rolling around with some good quality BJJ practitioners and has been sharpening his skills. Let's see if that has an impact on the fight today.
That's one minute gone in the round.
Haden throwing strikes from guard but Lik blocks nicely.
Lik preventing the ground and pound from doing any damage.
Haden passes Lik's right leg, so he's now in half guard.
Haden landing with strikes to the body and head, softening up his opponent.
Lik moves into full guard.
Lik throwing strikes off his back to little effect.
Haden working from the guard for now, landing some ground and pound.
Haden working in close now, lands a nice elbow to the side of Lik's head.
Lik keeping full guard, as Haden tries to pass.
Haden with a nice head shot there.
Haden keeps in close for a moment and lands a decent shot to the side of Lik's head.
The ref warns both fighters not to hold the cage as they work up against the meshing.
That's two minutes gone in the round.
Haden postures up in Lik's guard and throws a big left but Lik blocks it.
Haden is frustrating his opponent with some stalling tactics from top position.
Haden scoring with punches to the head and body.
Haden chips away with some ground and pound.
Haden works a leg free and moves into half guard.
The fighters are starting to get a bit slippery now, which will make submissions a bit more difficult.
Haden lands a big shot. The thud that echoes around the arena is like music to the fans' ears.
Lik is trying to defend against the ground and pound but Haden scores with a couple of nice shots.
Haden lands with a punch from half guard.
We've seen a great period of action over the last minute or so - credit to both fighters for going all out!
The referee walks around the fighters to get a better view of the action. Haden lands a nice short elbow.
Haden landing with strikes to the body and head, softening up his opponent.
Haden is keeping good posture, landing some ground and pound.
That's three minutes gone in the round.
Lik is trying to get back to full guard.
Lik looks winded!
Haden is scoring with some nice ground and pound from the dominant position.
Haden moves into full mount! Lik won't be happy about that!
Haden looking to finish Lik with some ground and pound. This is bad for Lik!
It looks like Random Lik has been cut.
Oooh a big shot lands for Haden! Lik is out! The ref dives in to save him from more punishment!
Ladies and gentlemen, after 3:52 of round 1, we have a winner by way of KO (Strikes). ZaDarius Haden!
|
|
|
|
|
|
|
|
|
|
|
|
|
|
|
|
|
|
|
|
|
|
|
| S |
C
A |
G |
S |
C
B |
G |
|
S |
C |
G |
|
energy
A | B |
|
hype
A | B |
|
pop
A | B |
|
mgr
A | B |
|
FIGHT
RATING
42% |
|
|
|
|
|
|
|
|
|
|
