 |
CFC 583 PBP Commentary |
Undercard bout
|
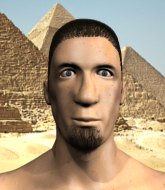
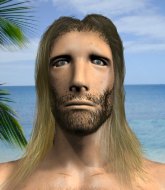
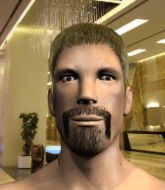
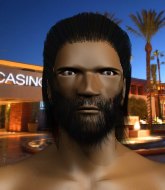
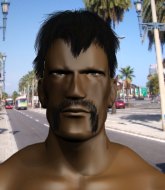
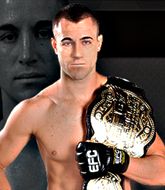
Coming up we have a welterweight MMA rules bout between Danny Bond (ranked 5307 p4p, 5793 weight class) and Mickey Munday (ranked 538 p4p, 563 weight class). We have two fighters making their debuts here, so let's see who comes out of this one with their first professional victory.
 |
|
 |
| 178 cm
20
170
0 - 0 - 0 |
|
182 cm
20
184
0 - 0 - 0 |
Decent wrestler
Excellent MT
Very quick |
|
Powerful takedowns
Decent boxing
Powerful |
|
| |
|
Ladies and gentlemen. This fight is 3 rounds, in the welterweight division.
Introducing the fighter to my left, fighting out of the red corner.
With a record of 0 - 0 - 0, fighting out of New York, Danny Bond!
And introducing the fighter to my right, fighting out of the blue corner.
With a record of 0 - 0 - 0, fighting out of Hilo, Mickey Munday!
The judges for this bout are William Peck, Dillan Fox and Gregory Folan.

The bell rings for round one and we are underway!
Some wild striking there from Bond.
Munday scores with a hook.
Munday throws out a powerful jab.
Mickey Munday seems to be the more aggressive standup fighter in this bout.
Munday takes a push kick to the midsection and stumbles backwards.
Nice shot by Munday.

Bond drives through and clinches with Munday against the cage.
Munday stops a takedown attempt from Bond.
Bond stalling here - the referee won't stand for too much of that.
Munday looking for a takedown.
Munday is trying to drag Bond to the mat but Bond just about manages to keep his footing. He used the cage to his advantage there.
Munday is looking to take this one to the mat.
Danny Bond has stuffed three takedown attempts in the round now. That's going to take a lot out of Mickey Munday.

That's one minute gone in the round.
Bond lands with a right to the head.
Munday wants to take the fight to the mat but Bond manages to get underhooks and keep the fight in the clinch.
Munday is defending well against a takedown attempt.
Munday wants a takedown but no success here.

Bond breaks the clinch and we return to the middle of the mat.

Bond gets caught napping as Munday dives in and scores a takedown. Bond manages to retain guard.
Bond keeping moving, preventing Munday from controlling successfully.
Munday is frustrating his opponent with some stalling tactics from top position.
The fighters are pressed up against the cage, both looking to find a bit of space to work.
Bond trying to control the position.

That's two minutes gone in the round.
Munday is fighting to break Bond's control of his arms but Bond is doing a good job of controlling the position at the moment.
Bond trying to control the position.
Munday trying to control but Bond is working from the bottom.
The referee claps his hands together and tells the fighters to work.
Munday is pushing down on Bond's leg trying to pass to half guard. Bond is fighting to maintain full guard but Munday has managed to sneak the leg through.

Munday is trying a forearm choke� I don't think that's going to do much at this level of the game.

That's three minutes gone in the round.
Bond is trying to control but can't.
Munday prevents Bond from improving his position.
Munday stops Bond from getting back to his feet.
Bond on his back here. We all know that wrestlers don't like being on their back so let's see if Bond tries to get out of the position.
Bond trying to control but Munday postures up.

The referee has stepped in and called for a break in the action. We'll restart on the feet.
Munday doesn't succeed with the takedown
enabling Bond to counter with a crisp jab.
Left hook, right uppercut from Bond.
Bond scores with a leg kick.
Bond ducks under a wild hook from Munday.

That's four minutes gone in the round.
Bond shoots in for a takedown but Munday shows good takedown defense.
Munday tries a counter takedown but it's more of a dummy move, and he uses it to push himself away.
Munday scores with a straight right hand, right through his opponent's guard.
Munday cracks a nice hook into Bond's ribs.
Munday connects with a crisp jab.
Munday closes the distance and clinches up, looking for a takedown. He shifts his weight and gets a nice trip into half guard.
The fans in attendance giving it up for the two fighters, who have really let it all hang out in the last minute or so!
Bond trying to control but Munday postures up.
Munday is trying a forearm choke� I don't think that's going to do much at this level of the game.
Munday is thinking about going for an arm triangle but he can't free his leg.
And that is the end of the round. The fighters go back to their corners.
Mickey Munday dominated that round.
The fighters get back to their feet, the hooter sounds and we're back to the action!

Bond throws a head kick that Munday semi-blocks.
Munday decides to change it up a bit and drives through with a nice takedown into half guard.

Bond has managed to escape just enough to sneak back to his feet but Munday is on him like a limpet, forcing Bond back against the cage.
Munday has picked Bond up - he's going for a ride! Munday dumps his opponent to the mat with a thud and settles into half guard.
This is a great period of action - very entertaining stuff!
Munday is trying to work for a kimura. This could be trouble! No, Bond has managed to free his arm - good work.
Munday seems very keen to just sit and control from half guard but Bond does not like that idea so much and is remaining active off his back.
Munday is working for a submission of some sort.
Munday seems content to maintain position for now, rather than mounting any offense.
That's one minute gone in the round.
Bond trying to control here.
Bond is looking to improve his position.
Munday is trying to work for a kimura. This could be trouble! No, Bond has managed to free his arm - good work.
Munday is working for submissions here but there's nothing on.
The ref warns both fighters not to hold the cage as they work up against the meshing.
That's two minutes gone in the round.
The crowd are showing their displeasure at the lack of action as loud boos ring out around the arena.
Bond tries to get to full guard but Munday has control of the leg.
Munday stops Bond from getting back to his feet.
Munday seems to be looking for submissions.
Munday is looking for a kimura but he's never going to get it from there.
Bond is refusing to be controlled, as Munday sits in half guard.
That's three minutes gone in the round.
Bond wants to improve his position but Munday is controlling well.
Bond is trying to maintain the position but Munday is very close to passing his half guard.
The referee is asking the fighters to pick up the pace.
The ref stands the fighters back up due to a lack of activity.
Munday keeps the fight standing with a nice sprawl.
Munday changes levels and drives through with a really nice takedown into side control. Bond looks really pissed at himself for not defending that better.
Bond is looking to regain half guard here but Munday keeps moving and retains side control.
That's four minutes gone in the round.
Munday is moving around in side control but his primary objective seems to be to maintain the position.
Munday working away.
Munday works to advance to full mount. Bond defends for a few seconds but eventually he succumbs.
Munday is working on an americana here. Ooh, that looks pretty nasty! Nope, Bond has managed to escape the submission attempt.
Munday tries to control but Bond wriggling away.
The crowd thankful this round is nearly over.
Munday is working on an americana here. Ooh, that looks pretty nasty! Nope, Bond has managed to escape the submission attempt.
And that is the end of the round. The fighters go back to their corners.
Mickey Munday showed his class in that round. I'd imagine he'll take it on all the scorecards.
The referee calls time. The cornermen exit stage left and we're back to business. Let's get this one finished - here comes the final round!

Munday getting the better of the striking in that exchange.
Munday throws an uppercut from half a mile away. Bond sees it coming and avoids it easily.
Bond tries for a takedown but Munday sees it coming a mile off and avoids it easily.
Munday throws out a powerful jab.
Munday swats away the attempt to clinch by Bond.
Bond walks into a straight right hand from Munday.
Mickey Munday seems to be getting the better of the standup.
We've had a slow start to the round here - hopefully the action picks up.
Horrible takedown attempt by Munday or perhaps it was just good defense by Bond, which made it look bad.
No luck for Bond with that takedown attempt.
That's one minute gone in the round.
Bond steps to the side to avoid the strikes from Munday.
It looked like Bond was looking amped, ready to throw a big counter but didn't commit.
Munday misses with a hook. Bond ducked under it nicely.
Bond takes a jab on the nose there. A little bit of blood seems to be coming out. Hopefully that won't affect his breathing.
Munday takes a thudding leg kick, right into the meat of the thigh.
Munday scores with a decent looking hook.
Bond tries to clinch up.
Bond rushes Munday and presses him up against the cage.
Munday blocks a body shot from Bond.
Munday drops down looking for an ankle pick but Bond pulls his leg out and moves away.
Munday darts in and lands a nice takedown into half guard.
Bond wants to control the action here but instead Munday manages to pass to full mount!
That's two minutes gone in the round.
We've seen a great period of action over the last minute or so - credit to both fighters for going all out!
Bond is writhing around trying to get back to his feet.
Munday working for a submission here. He's tucked his head under his opponent's arm, looking for an arm triangle. He's hopped off into side control, looking to tighten the submission... is it going to work? He's given up a good position looking for it. Bond looks OK. Oh, I spoke too soon, he's out! That must have been tighter than I thought! Excellent work there by Munday! Submission of the night perhaps?
Ladies and gentlemen, after 2:41 of round 3, we have a winner by way of Submission (Arm Triangle). Mickey Munday!
An out of breath Mickey Munday thanked his loyal fans in his post fight interview, giving them credit for his success over the course of his career.
|
|
|
|
|
|
|
|
|
|
|
|
|
|
|
|
|
|
|
|
|
|
|
| S |
C
A |
G |
S |
C
B |
G |
|
S |
C |
G |
|
energy
A | B |
|
hype
A | B |
|
pop
A | B |
|
mgr
A | B |
|
FIGHT
RATING
49% |
|
|
|
|
|
|
|
Undercard bout
|
Coming up we have a heavyweight MMA rules bout between Bahamut Parkkinen (ranked 3942 p4p, 5154 weight class) and Zulu Ingalu (ranked 421 p4p, 475 weight class). Zulu Ingalu acknowledges the crowd's support as he enters the cage.
 |
|
 |
| 204 cm
21
248
1 - 2 - 0 |
|
193 cm
20
240
0 - 0 - 0 |
Decent wrestler
Excellent MT
Cardio machine |
|
Decent wrestler
Excellent boxer
Experienced |
|
| |
|
Ladies and gentlemen. This fight is 3 rounds, in the heavyweight division.
Introducing the fighter to my left, fighting out of the red corner.
With a record of 1 - 2 - 0, fighting out of Amsterdam, Bahamut Parkkinen!
And introducing the fighter to my right, fighting out of the blue corner.
With a record of 0 - 0 - 0, fighting out of New York, Zulu Ingalu!
The judges for this bout are William Peck, Ian Loll and Gregory Folan.
The bell rings for round one and we are underway!
Ingalu doesn't succeed with the takedown
and Parkkinen counters nicely by changing levels and landing a hook to the body.
Parkkinen scores with a reasonable looking shot to the body. Ingalu doesn't seem bothered though.
We've been told by Parkkinen's head coaches at FF Forever that he's been working on his takedown defense in preparation for this fight.
Nice sprawl there from Parkkinen as Ingalu shoots in.
Ingalu fails with an attempt to clinch.
Parkkinen throws a big counter combination but Ingalu scrambles out of danger and avoids any damage.
Parkkinen misses with a body kick.
Ingalu doesn't succeed with the takedown
and Parkkinen counters with a crisp hook to the side of the head.
Bahamut Parkkinen has stuffed three takedown attempts in the round now. That's going to take a lot out of Zulu Ingalu.
We've had a slow start to the round here - hopefully the action picks up.
Parkkinen avoids the head kick by Ingalu.
Ingalu has his hands up protecting his head but a hook from Parkkinen finds it's way round the side to connect with Ingalu's head.
Nice takedown defense from Parkkinen. No joy for Ingalu on that attempt.
Parkkinen is looking to counter with a shot to the body.
Parkkinen stuffs the takedown.
That's one minute gone in the round.
Ingalu takes a solid shot to the body. That one hurt him but he's trying not to show it.
Ingalu shoots in looking for a takedown but Parkkinen manages to keep the fight standing, pushing Ingalu's face into the canvas for good measure before circling away.
Ingalu tries to clinch up.
Ingalu tries to clinch but Parkkinen moves away
and Parkkinen counters with a big right hand! Oh Ingalu is in trouble here! Parkkinen follows up with more strikes and that's it! The ref has stopped it!
Ladies and gentlemen, after 1:26 of round 1, we have a winner by way of TKO (Strikes). Bahamut Parkkinen!
During a confident post fight interview, Bahamut Parkkinen thanked all his fans. He seemed very genuine when describing how motivated his fans keep him.
|
|
|
|
|
|
|
|
|
|
|
|
|
|
|
|
|
|
|
|
|
|
|
| S |
C
A |
G |
S |
C
B |
G |
|
S |
C |
G |
|
energy
A | B |
|
hype
A | B |
|
pop
A | B |
|
mgr
A | B |
|
FIGHT
RATING
48% |
|
|
|
|
|
|
|
Undercard bout
|
Coming up we have a middleweight MMA rules bout between Bob Babcock (ranked 4030 p4p, 5803 weight class) and Makoto Toda (ranked 434 p4p, 533 weight class). There are an array of beautiful celebrities at ringside tonight! I wonder if any of them paid for their tickets.
 |
|
 |
| 185 cm
25
192
2 - 5 - 0 |
|
185 cm
20
200
2 - 3 - 0 |
BJJ Purple Belt
Counter fighter
Intelligent |
|
BJJ Purple Belt
Counter fighter
Tends to cut |
|
| |
|
Ladies and gentlemen. This fight is 3 rounds, in the middleweight division.
Introducing the fighter to my left, fighting out of the red corner.
With a record of 2 - 5 - 0, fighting out of Montreal, Bob Babcock!
And introducing the fighter to my right, fighting out of the blue corner.
With a record of 2 - 3 - 0, fighting out of Sydney, Makoto Toda!
The judges for this bout are Alec Ball, Elvis Blanc and Yves DeLean.
The bell rings for round one and we are underway!
Babcock looking to take his opponent's legs away with the low kicks.
Babcock circles away from the clinch attempt

and Babcock counters with a takedown into side control.
You can see the frustration on Toda's face as Babcock controls the position.

Babcock swings around for an armbar but Toda sees it coming a mile off and turns beautifully into Babcock's guard.
Toda landing some decent shots from guard.
Babcock is doing well to control the posture of his opponent and prevent any damage.
Toda is holding a leg here, probably looking for an ankle lock - he drops back and goes for it! Babcock is in trouble! Is it all over??? No! Babcock has escaped and now he's on top!

Toda looking to control.
That's one minute gone in the round.
Babcock drops back looking for a leg! Toda is in trouble here! The fighters roll with the hold and Toda manages to kick Babcock off! Babcock jumps back into Toda's guard.
Toda wants to sweep here but Babcock controlling him for the moment.
Toda controls Babcock momentarily but Babcock frees himself.
Toda looking for submissions off his back, moving his hips, looking for an opening.
Toda will have to put a bit more behind his punches if he's going to do any damage from this position.
That's two minutes gone in the round.
The crowd are starting to boo a lack of action.
Toda had isolated an arm as going for a kimura. Babcock defends it easily.
We've been hearing that Babcock has been drilling a lot of ground and pound in training, so let's see if he get the finish.
Babcock works over Toda with some ground and pound from guard.
Babcock trying to move into half guard but instead Toda has managed to sweep!

Toda tries to free his leg and advance position but Babcock is retaining full guard.
Toda loading up with the ground and pound but he's missing more than he's landing in this flurry.
Toda wants to control from the top but Babcock keeps moving.
Babcock trying to punch from his back but it's not doing any damage.
Toda trying to land body shots but he keeps hitting the mat.
Babcock is adopting a defensive guard.
Toda trying to control but Babcock is working from the bottom.
That's three minutes gone in the round.
There's a bit of a scramble here and now Babcock is on top in guard.
Babcock seems content to control from guard here. He's going to have to remain active though if he doesn't want to get stood back up.
Babcock lands a couple of elbows.
Toda has his hands on Babcock's head, controlling the position.
Babcock stays in close to Toda's body and controls the position.
The ref warns both fighters not to hold the cage as they work up against the meshing.
That's four minutes gone in the round.
Well. There's a bit of a lull in the action here and the crowd are starting to get restless.
Babcock trying to control the position from guard on top but Toda is wriggling around, looking for whatever he can.
Toda throwing strikes off his back to little effect.
Toda avoiding any damage from the ground and pound.
Toda has his foot on Babcock's thigh. He's trying to push off and get in position for a triangle, I think. Babcock works his way back into a safe position though.
Our spies down at at Canucks Combat Club inform us that Toda has really been working on his submissions in the buildup to this fight. Will it pay off?
Babcock scoring with punches to the head and body.
Toda not looking particularly offensive just at the moment.
Babcock scoring with some ground and pound.
The crowd thankful this round is nearly over.
Toda can't do much from the bottom at the moment, as Babcock controls the pace.
Babcock postures up and scores with a shot to the body and a follow up elbow to the head.
And that is the end of the round. The fighters go back to their corners.
Bob Babcock dominated that round.
The corners get their ten second warning. Both fighters stand from their stools and stare each other down, ready to get back to the action.

Toda moves into range and clinches up with Babcock.
Toda misses with a hook to the ribs.
Toda doesn't land with the attempted body shot.
Babcock breaks the clinch and we're back to striking at distance.
Left hook, right uppercut from Toda.
Toda just misses with a punch to the body.
As Toda tries to get set, Babcock tries to push him back and clinch up but Toda manages to avoid the attempt.
Babcock keeping his hands up high there, blocking the jab from Toda.
Toda throws a leg kick but Babcock checks it.
Babcock changes levels looking for a counter takedown but doesn't commit.
Toda lunges in with swinging rights and lefts but Babcock circles away quickly and effectively.
We've had a slow start to the round here - hopefully the action picks up.
Babcock moves into the clinch.
Babcock stalling.
Toda has Babcock pressed against the cage.
Toda stops a takedown attempt from Babcock.
That's one minute gone in the round.
Toda tries to land knees in the clinch but Babcock avoids the damage to the body.
Babcock blocks a body shot from Toda.
The two fighters are working to gain dominance in the clinch.
Babcock dictating the pace here, as the fighters clinch against the cage.
Babcock breaks the clinch and we return to the middle of the mat.
Babcock dodges the punch combination from Toda.
Toda darts in and clinches Babcock up against the cage.
Toda tries to land a shot to the body but it's blocked.
Babcock avoiding damage as Toda throws knees to the body.
That's two minutes gone in the round.
Toda is pressed up against the cage. Babcock has hold of a leg and is looking to drag Toda down to the mat. Toda avoids the attempt though and has circled away. We're back to striking at a distance.
Babcock shoots in for a takedown and gets it. Let's see what he's got on the mat.
Babcock advances to half guard.
Toda trying to control but Babcock postures up.
Babcock content to control rather than advance.
Babcock wants to take a breather but Toda is having none of it.
Babcock is looking to advance position but Toda won't allow it.
Babcock is trying for a guillotine from the top but the pressure isn't in the right place so Toda is just riding it out for now. Babcock eventually gives up the hold.
That's three minutes gone in the round.
Babcock scoring with strikes to the body and head.
Babcock passes into side control, despite Toda's attempt to control the position.
Toda is trying to get back to half guard. He's pushing on Babcock's leg. He's managed it. Nice work.
Toda is working for an escape here. He's hooked one of Babcock's legs and he's managed to sneak out and take Babcock's back!
Babcock has his hands over his head blocking the strikes from Toda.
That's four minutes gone in the round.
Babcock can't escape the position.
Babcock turns into Toda and is now in his guard.
Babcock lands a couple of digs.
Babcock trying to control the position from guard on top but Toda is wriggling around, looking for whatever he can.
Toda working for a triangle but Babcock defends it easily.
Toda trying to control the position.
The fighters are pressed up against the cage, both looking to find a bit of space to work.
The crowd thankful this round is nearly over.
Babcock trying to control the position from guard on top but Toda is wriggling around, looking for whatever he can.
And that is the end of the round. The fighters go back to their corners.
A close second round but Makoto Toda will probably get the nod - 10:9.
That's time! Babcock's corner gives him a slap on the ass as he gets ready to fight. This is the final round!
Babcock closes the distance and clinches up, looking for a takedown. He shifts his weight and gets a nice trip into half guard.
Toda trying to control from the bottom.
Babcock landing with strikes to the body and head, softening up his opponent.
Toda throws a strike from the bottom that misses.
Toda looking for submissions from an awkward position here.
Babcock looks towards his corner to check for any instructions. The corner give him nothing to work with, so he cracks Toda with a short hammerfist. I guess that's as good as any advice he could get in this position.
We've had a slow start to the round here - hopefully the action picks up.
Toda is refusing to be controlled, as Babcock sits in half guard.
Toda trying to hold on to Babcock's head to control him but Babcock postures up.
Toda is working for an escape here. He's hooked one of Babcock's legs and he's managed to sneak out and take Babcock's back!
That's one minute gone in the round.
Babcock just trying to survive but Toda is wriggling into a better position, looking to finish.
Toda struggling to land strikes to the head as Babcock covers up.
Toda misses with a punch to the head.
Toda working for a RNC but it's not happening just yet.
Toda throwing wild punches that miss their target.
Toda is throwing strikes but Babcock counters by rolling into a better position. After a scramble, Babcock regains half guard.
Babcock is refusing to be controlled, as Toda sits in half guard.
Bob Babcock overall seems to be getting the better of the ground position in the fight so far.
Babcock misses with some strikes from the bottom.
That's two minutes gone in the round.
Babcock wants to improve his position but Toda is controlling well.
Babcock regains full guard. Nicely done.
Babcock is controlling Toda's posture.
Toda drops back for a leg but he's not going to get it - he lets go and Babcock dives on top into guard.
Babcock pushes down on Toda's leg and manages to get into half guard.
Babcock is nestled in close to Toda, controlling him well. He's worked in a nice elbow to the side of the head as well, for good measure.
Babcock is trying a forearm choke� I don't think that's going to do much at this level of the game.
That's three minutes gone in the round.
Babcock working Toda over with strikes.
Toda is trying to maintain the position but Babcock is very close to passing his half guard.
Toda is trying to get back to full guard.
Babcock is thwarting Toda's attempts to control the position.
Babcock is looking for a kimura but he's never going to get it from there.
That's four minutes gone in the round.
There's not a lot going on here and the crowd are letting the fighters know they're not willing to tolerate a lack of action.
Toda slips a foot under and gets full guard. Nice work.
Toda had isolated an arm as going for a kimura. Babcock defends it easily.
Babcock wants to control from the top but Toda keeps moving.
Boooooooooooooooooooo!!! God, this has been a terrible round. Come on you two, sort yourselves out!
Toda trying to keep a closed guard but Babcock is proving a slippery customer.
Babcock cracks Toda with a solid left hand.
And that's the end of the fight!
Bob Babcock showed his dominance in that final round.
I think Babcock has won this one but let's see what the judges have to say. Over to the ring announcer for the scorecards.
Ladies and gentlemen, after 3 rounds of action, we go to the scorecards for a decision.
Judge Alec Ball scores the fight 29:28
Judge Elvis Blanc scores the fight 29:28
Judge Yves DeLean scores the fight 29:28
In favor of your winner, by unanimous decision... Bob Babcock!
Bob Babcock managed to slip a mention for his sponsors, HELLS BALLS RECOVERY , into his post fight interview.
|
|
|
|
|
|
|
|
|
|
|
|
|
|
|
|
|
|
|
|
|
|
|
| S |
C
A |
G |
S |
C
B |
G |
|
S |
C |
G |
|
energy
A | B |
|
hype
A | B |
|
pop
A | B |
|
mgr
A | B |
|
FIGHT
RATING
31% |
|
|
|
|
|
|
|
Undercard bout
|
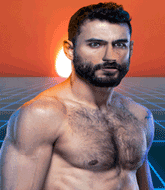
Coming up we have a lightweight MMA rules bout between Adrian Oyelowo (ranked 3854 p4p, 5341 weight class) and Hercules Hoost (ranked 408 p4p, 477 weight class). These two fighters really are very evenly matched on the feet - it will be fascinating to see who can assert themselves in that aspect of the fight.
 |
|
 |
| 184 cm
21
157
2 - 2 - 0 |
|
178 cm
20
170
0 - 0 - 0 |
BJJ Brown Belt
Excellent MT
Cardio machine |
|
Decent wrestler
Lethal high kicks
Good gas tank |
|
| |
|
Ladies and gentlemen. This fight is 3 rounds, in the lightweight division.
Introducing the fighter to my left, fighting out of the red corner.
With a record of 2 - 2 - 0, fighting out of Amsterdam, Adrian Oyelowo!
And introducing the fighter to my right, fighting out of the blue corner.
With a record of 0 - 0 - 0, fighting out of New York, Hercules Hoost!
The judges for this bout are Trevor Gratis, Elvis Blanc and Alec Ball.
The bell rings for round one and we are underway!
Oyelowo drives through with a takedown into Hoost's guard. Let's see what he can do from the top position.
We get told so often about how wrestlers don't like to be on their backs. Let's see if Hoost can do anything to dispel that myth.
Hoost is working an open guard here, looking to improve his position. No doubt that will leave him open to counters but at least he's being more offensive.
Hoost is persisting with the attempt to improve his position.
Hoost avoiding any damage from the ground and pound.
The ref warns both fighters not to hold the cage as they work up against the meshing.
Oyelowo tries to free his leg and advance position but Hoost is retaining full guard.
Oyelowo drops back for a leg! It's a sloppy attempt though and Oyelowo jumps back into guard quickly, to retain the dominant position.
Oyelowo has been looking to land a fair amount of strikes on the ground. He might be looking to soften his opponent up in order to work for a submission.
Oyelowo passes Hoost's right leg, so he's now in half guard.
Oyelowo looking to pass the half guard. Not this time.
Hoost is defending against the submission attempts here by Oyelowo.
We've had a slow start to the round here - hopefully the action picks up.
Oyelowo is trying a forearm choke� I don't think that's going to do much at this level of the game.
Oyelowo seems to be looking for submissions.
That's one minute gone in the round.
Hoost tries to kick Oyelowo off in order to stand up. Oyelowo Avoids the leg push though and dives into side control.
Oyelowo in side control, throwing shots but Hoost defends.
Oyelowo wants to control but Hoost is keeping him busy.
Oyelowo is trying to get an arm triangle but Hoost is defending well.
Oyelowo working hard here to secure a kimura but he's not really in the right position for it.
Hoost tries to improve position but can't.
That's two minutes gone in the round.
Oyelowo is working for what looks like an arm triangle here. Hoost is trying to escape and Oyelowo transitions quickly into an armbar! He's slapped it on tight and Hoost is forced to tap! Nice work there by Oyelowo! Very nice indeed!
Ladies and gentlemen, after 2:20 of round 1, we have a winner by way of Submission (Armbar). Adrian Oyelowo!
During a confident post fight interview, Adrian Oyelowo thanked all his fans. He seemed very genuine when describing how motivated his fans keep him.
|
|
|
|
|
|
|
|
|
|
|
|
|
|
|
|
|
|
|
|
|
|
|
| S |
C
A |
G |
S |
C
B |
G |
|
S |
C |
G |
|
energy
A | B |
|
hype
A | B |
|
pop
A | B |
|
mgr
A | B |
|
FIGHT
RATING
37% |
|
|
|
|
|
|
|
Undercard bout
|
Coming up we have a light heavyweight MMA rules bout between Lane Prilla (ranked 3534 p4p, 5750 weight class) and Sahil Warner (ranked 488 p4p, 624 weight class). Lane Prilla had a look across the cage there at his opponent. He definitely means business
 |
|
 |
| 192 cm
21
216
3 - 3 - 0 |
|
178 cm
20
212
3 - 4 - 0 |
BJJ Purple Belt
Excellent MT
Granite chin |
|
BJJ Purple Belt
Good kicks
Knockout power |
|
| |
|
Ladies and gentlemen. This fight is 3 rounds, in the light heavyweight division.
Introducing the fighter to my left, fighting out of the red corner.
With a record of 3 - 3 - 0, fighting out of Las Vegas, Lane Prilla!
And introducing the fighter to my right, fighting out of the blue corner.
With a record of 3 - 4 - 0, fighting out of Helsinki, Sahil Warner!
The judges for this bout are Gregory Folan, Elvis Blanc and Trevor Gratis.
The bell rings for round one and we are underway!
Prilla throws a nice inside leg kick.
Warner with a poor takedown
and Warner takes a counter punch right on the button for his troubles.

Prilla lands a big head kick that sends Warner tumbling to the mat! Prilla takes a step backwards and waves Warner back to his feet - he wants the finish!
Warner misses with a body punch
and Prilla counters by moving into the clinch.
The crowd are loving this. Great action here.
Prilla is working Warner over against the cage.
Prilla is working Warner over against the cage.
Prilla lands a right hand that snaps the head of Warner backwards.
Prilla lands with a short shot to the head.
 Warner is rocked! Warner is rocked!
Prilla misses with a hook from the clinch.
Prilla blocks a punch to the side of the head.
Warner tries to land a knee to the body but he is off balance and Prilla avoids it.
Prilla lands a right hand that snaps the head of Warner backwards.
Warner is still on wobbly legs! Can Prilla finish him?
Prilla throws a head punch that misses.
Warner blocks an uppercut.
Prilla working aggressively here.
Prilla throws a head punch that misses.
Prilla swings away with an uppercut that misses.
Prilla breaks the clinch and we return to the middle of the mat.
Prilla fakes the body blow, causing Warner to drop his hands! Left hook to the temple! Warner goes stiff, and falls face first into the mat. Goodnight!
Ladies and gentlemen, after 0:57 of round 1, we have a winner by way of KO (Punch). Lane Prilla!
|
|
|
|
|
|
|
|
|
|
|
|
|
|
|
|
|
|
|
|
|
|
|
| S |
C
A |
G |
S |
C
B |
G |
|
S |
C |
G |
|
energy
A | B |
|
hype
A | B |
|
pop
A | B |
|
mgr
A | B |
|
FIGHT
RATING
100% |
|
|
|
|
|
|
|
Undercard bout
|
Coming up we have a middleweight MMA rules bout between Chico Feijo (ranked 3714 p4p, 4037 weight class) and Maskar Flugamine (ranked 417 p4p, 436 weight class). Rumors backstage are that the fighters have been paid to keep it standing but we know that would never happen in MMA!
 |
|
 |
| 189 cm
25
195
1 - 0 - 0 |
|
188 cm
28
199
6 - 8 - 0 |
BJJ Brown Belt
Solid Muay Thai
Very quick |
|
Good wrestler
Brawler
Powerful |
|
| |
|
Ladies and gentlemen. This fight is 3 rounds, in the middleweight division.
Introducing the fighter to my left, fighting out of the red corner.
With a record of 1 - 0 - 0, fighting out of New York, Chico Feijo!
And introducing the fighter to my right, fighting out of the blue corner.
With a record of 6 - 8 - 0, fighting out of Rio de Janeiro, Maskar Flugamine!
The judges for this bout are Dillan Fox, Gregory Folan and Alec Ball.
The bell rings for round one and we are underway!
Flugamine throws a wild combination but nothing lands.
Flugamine looking to shoot here. He's gone for it and he's landed a takedown into side control! Oh, that's bad for Feijo!
Flugamine looks up at the clock and then as Feijo takes his cue and looks up at the clock too, Flugamine smacks him right in the chops with a big elbow! How rude!
Flugamine scoring with punches from side control.
Flugamine is trying to ground and pound but Feijo uses the momentary lack of control by Flugamine to regain half guard.
Flugamine trying to mount his opponent but Feijo defends it.
The fighters are pressed up against the cage, both looking to find a bit of space to work.
Flugamine landing with strikes to the body and head, softening up his opponent.
Feijo wants to control but Flugamine is keeping busy and won't allow it.
The ref warns both fighters not to hold the cage as they work up against the meshing.
Feijo is trying to get back to full guard.
Flugamine is trying to work for a kimura but Feijo is defending well.
Flugamine looks to score some points with some ground and pound.
That's one minute gone in the round.
Feijo wants to control but Flugamine is keeping busy.
The two fighters exchange a few words. I couldn't hear what they were saying but maybe it's more fun if you make it up yourself. Flugamine connects with a nice short shot to Feijo's temple.
Flugamine not landing any meaningful shots this time.
Feijo definitely looks more muscular than last time we saw him fight.
Flugamine working some ground and pound from close in. He's looking to maintain this position and strike for a while by the looks of things... although he'll probably advance to full mount in a minute now I've said that.
Flugamine really doesn't want to stay on the ground with Feijo. If he can't get it back to his feet, it's only a matter of time before he'll be tapping out.
Ground and pound from Flugamine.
Feijo is working for an escape here. He's hooked one of Flugamine's legs and he's managed to sneak out and take Flugamine's back!
Feijo is working hard for the rear naked choke here.
Flugamine is displaying good submission defense - not really looking in danger of submitting to the rear naked choke at the moment. That could change in an instant of course if Feijo gets his way!
Feijo is trying to stick to Flugamine's back but Flugamine is turning into Feijo. He's managed to reverse the position - now he's in Feijo's guard. Polite applause from the crowd in appreciation of some nice Jiu Jitsu by Flugamine.
That's two minutes gone in the round.
Flugamine landing with the ground and pound.
Feijo is working an open guard here, looking to improve his position. No doubt that will leave him open to counters but at least he's being more offensive.
Flugamine works over Feijo with some ground and pound from guard.
The fans in attendance giving it up for the two fighters, who have really let it all hang out in the last minute or so!
Hammerfist, elbow! yells Flugamine's corner. There ya go! There ya go!
Flugamine postures up and scores with a shot to the body and a follow up elbow to the head.
Flugamine is sitting in guard, working some ground and pound.
 Feijo is rocked! Feijo is rocked!
Flugamine trying to control but Feijo is working from the bottom.
Feijo is working actively off his back, looking to secure an arm or perhaps work for a triangle.
Flugamine stands up over Feijo, holding his feet. He dives back in and lands a decent shot to the head.
Oh Feijo is still in real trouble! Will he be able to recover?!!
Flugamine is working Feijo over from the guard. He should look to pass the guard and do a little more damage with these strikes.
Flugamine with a couple of shots to the head there. Not particularly brutal.
That's three minutes gone in the round.
Flugamine scoring with some ground and pound.
Flugamine stands up over Feijo, holding his feet. He dives back in and lands a decent shot to the head.
Flugamine wants to control from the top but Feijo keeps moving.
Flugamine connects with a couple of short punches.
Feijo looking for submissions off his back, moving his hips, looking for an opening.
Flugamine scoring with punches to the head and body.
Flugamine is in close to Feijo's body, working some short punches and elbows.
Flugamine works over Feijo with some ground and pound from guard.
Flugamine lands a nice shot whilst sitting in his opponent's guard.
Flugamine lands a couple of decent looking shots.
Flugamine postures up from his opponent's guard, before exploding into some vicious ground and pound! Feijo covers up, he's hurt! Flugamine keeps throwing the strikes, glancing at the referee... Will he stop it?? One more big shot from Flugamine and the ref steps in to end the fight! Flugamine can't hide his delight as he celebrates with his corner.
Ladies and gentlemen, after 4:58 of round 1, we have a winner by way of TKO (Strikes). Maskar Flugamine!
A very excited looking Maskar Flugamine made sure he remembered to thank all the fans both in the arena and on the internet. He said all the coolest people spend all day on MMA websites, which got a big reaction.
|
|
|
|
|
|
|
|
|
|
|
|
|
|
|
|
|
|
|
|
|
|
|
| S |
C
A |
G |
S |
C
B |
G |
|
S |
C |
G |
|
energy
A | B |
|
hype
A | B |
|
pop
A | B |
|
mgr
A | B |
|
FIGHT
RATING
47% |
|
|
|
|
|
|
|
Undercard bout
|
Coming up we have a lightweight MMA rules bout between Green Bastard (ranked 3529 p4p, 2381 weight class) and Yu Sei Songwong (ranked 381 p4p, 294 weight class). Green Bastard has the better chin. Will he look to stand and bang today?
 |
|
 |
| 177 cm
21
162
3 - 4 - 0 |
|
173 cm
20
159
5 - 3 - 0 |
Good wrestling
Brawler
Good chin |
|
Excellent grappler
Counter fighter
Knockout power |
|
| |
|
Ladies and gentlemen. This fight is 3 rounds, in the lightweight division.
Introducing the fighter to my left, fighting out of the red corner.
With a record of 3 - 4 - 0, fighting out of Sydney, Green Bastard!
And introducing the fighter to my right, fighting out of the blue corner.
With a record of 5 - 3 - 0, fighting out of Montreal, Yu Sei Songwong!
The judges for this bout are Alec Ball, Yves DeLean and Gregory Folan.
The bell rings for round one and we are underway!
Bastard feints and then dives in with a takedown. That was a long way out but the feint bought him enough time to close the distance and complete the takedown. Now we'll play guard for a bit and see who can get the better of that position.
Bastard got a little sloppy there for a moment and Songwong has worked his way into a loose triangle - can he finish it?! No, Bastard has managed to get both his arms back between Songwong's legs - danger averted.
Songwong has a loose triangle. He'll be looking to tighten that up but Bastard can see exactly what he's planning and manages to posture up and free himself.
Bastard not doing a lot at the moment. He'll have to show some more aggression or the fight will get stood up.
Songwong is looking for a guillotine. You can't force these things though and Bastard defends well.
Bastard got a little sloppy there for a moment and Songwong has worked his way into a loose triangle - can he finish it?! No, Bastard has managed to get both his arms back between Songwong's legs - danger averted.
We've had a slow start to the round here - hopefully the action picks up.
Songwong has his foot on Bastard's thigh. He's trying to push off and get in position for a triangle, I think. Bastard works his way back into a safe position though.
Bastard got a little sloppy there for a moment and Songwong has worked his way into a loose triangle - can he finish it?! No, Bastard has managed to get both his arms back between Songwong's legs - danger averted.
Songwong has his foot on Bastard's thigh. He's trying to push off and get in position for a triangle, I think. Bastard works his way back into a safe position though.
That's one minute gone in the round.
Songwong is throwing his legs up, looking for submissions. Bastard is aware though and is defending well.
Songwong keeping moving, preventing Bastard from controlling successfully.
The ref warns both fighters not to hold the cage as they work up against the meshing.
Bastard sitting in guard, not really doing much.
Bastard throwing strikes but missing.
Songwong has his foot on Bastard's thigh. He's trying to push off and get in position for a triangle, I think. Bastard works his way back into a safe position though.
Bastard throwing strikes but missing.
Bastard trying to control the position from guard on top but Songwong is wriggling around, looking for whatever he can.
Songwong is working actively from the bottom, looking for submissions. He's escaped his hips to the side and he's going for an armbar! Bastard has his hands clasped together but Songwong extends and breaks Bastard's desperate grasp, forcing a tap out due to armbar! Nice BJJ displayed there by Songwong.
Ladies and gentlemen, after 2:57 of round 1, we have a winner by way of Submission (Armbar). Yu Sei Songwong!
A loyal slave to those sponsorship dollars, Yu Sei Songwong made sure he mentioned Dangerous Nutrition, along with how happy he was to win his fight.
|
|
|
|
|
|
|
|
|
|
|
|
|
|
|
|
|
|
|
|
|
|
|
| S |
C
A |
G |
S |
C
B |
G |
|
S |
C |
G |
|
energy
A | B |
|
hype
A | B |
|
pop
A | B |
|
mgr
A | B |
|
FIGHT
RATING
46% |
|
|
|
|
|
|
|
Undercard bout
|
Coming up we have a featherweight MMA rules bout between Tommy Chang (ranked 3055 p4p, 1726 weight class) and Rafa Peziev (ranked 243 p4p, 145 weight class). Tommy Chang had a look across the cage there at his opponent. He definitely means business
 |
|
 |
| 175 cm
21
148
3 - 4 - 0 |
|
161 cm
21
146
4 - 1 - 0 |
Dangerous GnP
Lethal high kicks
Granite chin |
|
Excellent grappler
Basic striking
Good gas tank |
|
| |
|
Ladies and gentlemen. This fight is 3 rounds, in the featherweight division.
Introducing the fighter to my left, fighting out of the red corner.
With a record of 3 - 4 - 0, fighting out of Montreal, Tommy Chang!
And introducing the fighter to my right, fighting out of the blue corner.
With a record of 4 - 1 - 0, fighting out of Tokyo, Rafa Peziev!
The judges for this bout are Ian Loll, Dillan Fox and Alec Ball.
The bell rings for round one and we are underway!
Peziev closes the distance and clinches up, looking for a takedown. He shifts his weight and gets a nice trip into half guard.
Peziev trying to mount his opponent but Chang defends it.
Chang's coaches at The Quarry have been working on his defensive grappling in preparation for this fight so let's see if he can get out of this tricky position.
The fighters are pressed up against the cage, both looking to find a bit of space to work.
Peziev wants to control but Chang is keeping him busy.
Peziev is trying to work for a kimura but Chang is defending well.
Chang works his way to full guard. Good work.
Peziev tries to free his leg and advance position but Chang is retaining full guard.
Chang tries to land a sweep but no joy.
Chang avoiding any damage from the ground and pound.
Chang manages to sweep nicely, so he's now on top. Peziev manages to get himself to full guard.
We've had a slow start to the round here - hopefully the action picks up.
Peziev has his foot on Chang's thigh. He's trying to push off and get in position for a triangle, I think. Chang works his way back into a safe position though.
Peziev working for a triangle but Chang defends it easily.
Chang sneaks a leg through and gets to half guard. That was like a knife through butter how easily he passed Peziev's guard.
That's one minute gone in the round.
Peziev tries to roll over but Chang keeps him under control.
Peziev wants to get back to his feet.
The ref warns both fighters not to hold the cage as they work up against the meshing.
Ground and pound from Chang.
Chang stops Peziev from getting back to his feet.
Peziev is trying to maintain the position but Chang is very close to passing his half guard.
Chang prevents Peziev from standing back up.
Chang trying to control from half guard but Peziev is working away.
Peziev looking for submissions off his back.
Chang lands a big shot. The thud that echoes around the arena is like music to the fans' ears.
That's two minutes gone in the round.
The fighters are starting to perspire pretty heavily.
Peziev taking some punishment here, with Chang in his half guard.
Peziev is looking to sinch up a guillotine here but Chang pulls his head out easily.
Chang is looking to take a break and control but Peziev is keeping him honest, looking to work from the bottom.
Peziev looking to work for a kimura from the bottom.
Chang is nestled in close to Peziev, controlling him well. He's worked in a nice elbow to the side of the head as well, for good measure.
Chang drops an elbow to the side of Peziev's head.
Chang will need to keep those long limbs tucked in whilst he's on the ground, to prevent any submissions.
Peziev wants to get back to his feet.
Peziev looking for a kimura from the bottom but Chang passes into side control!
Peziev gets one leg under and gets the fight to half guard.
That's three minutes gone in the round.
Chang lands with a punch from half guard.
Chang is scoring with some nice ground and pound from the dominant position.
Peziev looking to work for a kimura from the bottom.
Peziev actively working from the bottom here.
Peziev trying to control here but he's found himself mounted! Oh no!
Peziev is really trying hard to get back to his feet.
Chang trying to control but he's not successful this time.
Peziev gets back to half guard.
That's four minutes gone in the round.
Chang looks towards his corner to check for any instructions. The corner give him nothing to work with, so he cracks Peziev with a short hammerfist. I guess that's as good as any advice he could get in this position.
Chang prevents Peziev from standing back up.
Peziev is trying to defend against the ground and pound but Chang scores with a couple of nice shots.
Peziev is looking to control Chang's leg but it's slowly edging free. Can Peziev avoid being mounted?
Peziev wants to get back to full guard.
Chang keeping composed on the top, looking to control the action.
Chang looks to score some points with some ground and pound.
Peziev moves into full guard.
Chang is working Peziev over from the guard. He should look to pass the guard and do a little more damage with these strikes.
Chang wants to control from the top but Peziev keeps moving.
The crowd thankful this round is nearly over.
Peziev looking for submissions from the bottom but instead Chang passes into half guard.
Peziev actively working from the bottom here.
And that is the end of the round. The fighters go back to their corners.
Tommy Chang dominated that round.
That's time! Back to the action!
Peziev takes a body punch that cleary hurt but he's trying not to show any weakness.
Rafa Peziev seems to be the more aggressive standup fighter in this bout.
Chang connects with a looping right hand.
Peziev gets a takedown into half guard.
Peziev seems to be looking for submissions.
Chang is pressing down on Peziev's left leg trying to get back to full guard. He's managed it.
Chang had isolated an arm as going for a kimura. Peziev defends it easily.
We've had a slow start to the round here - hopefully the action picks up.
Chang managing to control the position.
Peziev works a leg free and moves into half guard.
That's one minute gone in the round.
Peziev is working for submissions here but there's nothing on.
Peziev is keen to just control but Chang is a slippery customer.
Chang actively working from the bottom here.
Peziev is looking for a kimura but he's never going to get it from there.
Chang is looking for a sweep. Peziev is wise to his cunning plan and keeps the top position.
Peziev is sneakily working for an arm triangle but Chang sees it coming and defends easily.
Chang is looking for a sweep. Peziev is wise to his cunning plan and keeps the top position.
Peziev is working for a kimura but Chang is defending it quite comfortably.
Peziev passes to full mount!
That's two minutes gone in the round.
Chang is in all sorts of trouble here.
Chang gets back to half guard.
Peziev is sneakily working for an arm triangle but Chang sees it coming and defends easily.
Chang wants to control but Peziev is keeping busy and won't allow it.
Chang is defending against the submission attempts here by Peziev.
Chang looking for submissions off his back.
Chang slips a foot under and gets full guard. Nice work.
That's three minutes gone in the round.
Peziev wants to control from the top but Chang keeps moving.
Chang looking for submissions off his back, moving his hips, looking for an opening.
Chang not looking particularly offensive just at the moment.
Peziev passes easily into side control. Nice work.
Chang tries to get back to half guard but can't.
Peziev is trying to get an arm triangle but Chang is defending well.
Peziev tries for a kimura. Not really close to a finish though.
That's four minutes gone in the round.
Peziev is looking to finish here, going for an Americana. Chang knows the correct defense though, so he's OK.
Chang can't do much from the bottom here.
Chang tries to work a leg under to get back to half guard but Peziev wriggles his own leg back out and remains in side control.
Boooooooooooooooooooo!!! God, this has been a terrible round. Come on you two, sort yourselves out!
Chang gets back to half guard.
Chang keeping control of the leg, stopping his opponent passing to mount.
Peziev wants to work for an arm triangle but Chang is really keeping half guard well and defending the submission attempt.
And that is the end of the round. The fighters go back to their corners.
Rafa Peziev showed his class in that round. I'd imagine he'll take it on all the scorecards.
The minute break is over - no more time for sponges and pep talks - back to the action! This is the final round!
No luck with that takedown attempt from Peziev.
Chang throws a chopping leg kick but Peziev manages to avoid taking any serious damage.
Peziev fails with a takedown attempt.
Chang drops down looking for a counter takedown but Peziev sprawls and moves away.
Peziev dives in for a single leg takedown but Chang sprawls and the fighters end up clinched against the cage.
Tommy Chang has stuffed three takedown attempts in the round now. That's going to take a lot out of Rafa Peziev.
Chang drives through with a really nice takedown into side control.
Peziev is not content to let Chang control the position.
We've had a slow start to the round here - hopefully the action picks up.
Peziev pushes Chang away and creates a bit of space to escape. He's almost out here... but no, Chang gets a good hold of his legs and remains firmly in side control.
Chang is putting a hurting on Peziev here, landing some big shots from side control.
We've been informed that Peziev has been working hard on his conditioning in the buildup to the fight.
That's one minute gone in the round.
Peziev takes a big shot right to the temple there but he's taken it well.
Peziev tries to escape but Chang is in control.
Peziev gets one leg under and gets the fight to half guard.
Peziev is looking to improve his position.
Chang scoring with strikes to the body and head.
Chang takes advantage of the dominant position to land a couple of big hammer fists.
Peziev actively working from the bottom here.
Peziev looking for submissions from an awkward position here.
Peziev takes a big intake of breath there - he's definitely tired.
Peziev makes his way to full guard. A much better position for Peziev.
That's two minutes gone in the round.
Chang is stalling in the full guard.
Peziev working for a triangle but Chang defends it easily.
Peziev had isolated an arm as going for a kimura. Chang defends it easily.
That's three minutes gone in the round.
Chang got a little sloppy there for a moment and Peziev has worked his way into a loose triangle - can he finish it?! No, Chang has managed to get both his arms back between Peziev's legs - danger averted.
Peziev has his foot on Chang's thigh. He's trying to push off and get in position for a triangle, I think. Chang works his way back into a safe position though.
Chang lands a couple of decent looking shots.
Chang sitting in guard, not really doing much.
Chang's ground tactics aren't going to win him many fans. Let's hope he's got fireworks for us if he gets back to his feet because he's not doing much on the ground.
Peziev has a loose triangle. He'll be looking to tighten that up but Chang can see exactly what he's planning and manages to posture up and free himself.
Chang got a little sloppy there for a moment and Peziev has worked his way into a loose triangle - can he finish it?! No, Chang has managed to get both his arms back between Peziev's legs - danger averted.
Tommy Chang overall seems to be getting the better of the ground position in the fight so far.
That's four minutes gone in the round.
There's not a lot going on here and the crowd are letting the fighters know they're not willing to tolerate a lack of action.
Peziev is throwing his legs up, looking for submissions. Chang is aware though and is defending well.
Chang sitting in guard, not really doing much.
Peziev looking for submissions from the bottom here. Moving his hips around, possibly looking for an armbar.
Chang is working Peziev over from the guard. He should look to pass the guard and do a little more damage with these strikes.
Peziev working for a triangle but Chang defends it easily.
Chang working some strikes from top position.
Boooooooooooooooooooo!!! God, this has been a terrible round. Come on you two, sort yourselves out!
Chang lands a couple of decent looking shots.
And that's the end of the fight!
Tommy Chang showed his dominance in that final round.
Well Chang has outscored his opponent in every aspect of the fight today. Only a scarily incompetent judge or two will keep him from a well deserved win... Over to the ring announcer for the scorecards.
Ladies and gentlemen, after 3 rounds of action, we go to the scorecards for a decision.
Judge Ian Loll scores the fight 29:28
Judge Dillan Fox scores the fight 29:28
Judge Alec Ball scores the fight 29:28
In favor of your winner, by unanimous decision... Tommy Chang!
During a confident post fight interview, Tommy Chang thanked all his fans. He seemed very genuine when describing how motivated his fans keep him.
In defeat, Rafa Peziev stepped up to the mic, saying 'I be back, fuuuk the rucians!'.
|
|
|
|
|
|
|
|
|
|
|
|
|
|
|
|
|
|
|
|
|
|
|
| S |
C
A |
G |
S |
C
B |
G |
|
S |
C |
G |
|
energy
A | B |
|
hype
A | B |
|
pop
A | B |
|
mgr
A | B |
|
FIGHT
RATING
30% |
|
|
|
|
|
|
|
Co-main event
|
Coming up we have a light heavyweight MMA rules bout between Helio De Lima (ranked 1889 p4p, 2961 weight class) and Amiri Ta Manu Hiri (ranked 286 p4p, 428 weight class). Helio De Lima has the better chin. Will he look to stand and bang today?
 |
|
 |
| 187 cm
26
218
8 - 3 - 0 |
|
191 cm
19
206
6 - 2 - 0 |
Good wrestling
Brawler
Very quick |
|
BJJ Purple Belt
Excellent MT
Good gas tank |
|
| |
|
Ladies and gentlemen. This fight is 3 rounds, in the light heavyweight division.
Introducing the fighter to my left, fighting out of the red corner.
With a record of 8 - 3 - 0, fighting out of Rio de Janeiro, Helio De Lima!
And introducing the fighter to my right, fighting out of the blue corner.
With a record of 6 - 2 - 0, fighting out of New York, Amiri Ta Manu Hiri!
The judges for this bout are William Peck, Steve Smith and Gregory Folan.
The bell rings for round one and we are underway!
De Lima tries for a takedown but Ta Manu Hiri sees it coming a mile off and avoids it easily.
Ta Manu Hiri let fly with a counter punch to the body but it didn't land.
De Lima looks for a takedown but Ta Manu Hiri sprawls well.
De Lima misses with a takedown attempt
and Ta Manu Hiri counters with a nice uppercut.
That's three failed takedown attempts in the round for Helio De Lima. That's going to take a lot out of him.
De Lima misses with a takedown
letting Ta Manu Hiri counter with a right hand.
De Lima shoots in from a long way out. He's driving through with the takedown attempt and he eventually gets it, landing in Ta Manu Hiri's guard.
De Lima lands a nice shot whilst sitting in his opponent's guard.
De Lima throwing strikes but missing.
De Lima is in close to Ta Manu Hiri's body, working some short punches and elbows.
De Lima with a nice head shot there.
Ta Manu Hiri preventing the ground and pound from doing any damage.
De Lima throws a big elbow that misses.
De Lima throws a strike but Ta Manu Hiri rolls with it and manages to sweep. Now he's in guard on top.
Wooooo! Give it up for these two warriors! They are putting on a show!
De Lima is working the butterfly guard. He manages to land a nice scissor sweep and is now in half guard on the top. Nice move.
That's one minute gone in the round.
De Lima thumps the canvas. Not on purpose obviously - he just missed Ta Manu Hiri's head.
De Lima missing with the ground and pound from half guard.
De Lima throws a strike but Ta Manu Hiri avoids it easily and moves to full guard.
De Lima is holding a leg here, probably looking for an ankle lock - he drops back and goes for it! Ta Manu Hiri is in trouble! Is it all over??? No! Ta Manu Hiri has escaped and now he's on top!
De Lima is working from a closed guard but he's struggling to control his opponent.
De Lima working from the bottom, still in full guard. He's managed to get a loose triangle. Ta Manu Hiri doesn't seem to be doing much to defend here, obviously he feels comfortable in the position. Ta Manu Hiri manages to throw the legs off his shoulder and he's back into guard - no problem.
De Lima bucks up whilst keeping hold of a body lock, managing to reverse the position. Now he's in top in Ta Manu Hiri's guard.
That's two minutes gone in the round.
De Lima throwing strikes from guard but Ta Manu Hiri blocks nicely.
De Lima throws an elbow that misses. Ta Manu Hiri uses the momentum to reverse the position. He's now in De Lima's guard. Nice move by Ta Manu Hiri!
Ta Manu Hiri won't allow De Lima to sweep him here.
De Lima is working the butterfly guard. He manages to land a nice scissor sweep and is now in half guard on the top. Nice move.
De Lima lands a big shot. The thud that echoes around the arena is like music to the fans' ears.
De Lima scores with a couple of good hammerfists.
De Lima throwing shots but they're hitting the canvas more than the man.
The crowd cheering loudly, showing their appreciation for the quality fight we're seeing here.
De Lima sitting in half guard, looking to land shots. Ta Manu Hiri defending well though.
The fighters are pressed up against the cage, both looking to find a bit of space to work.
That's three minutes gone in the round.
De Lima missing with some ground and pound from the half guard.
The ref warns both fighters not to hold the cage as they work up against the meshing.
De Lima is looking for a kimura but Ta Manu Hiri is holding onto that half guard position, so it's hard for De Lima to get the leverage.
Ta Manu Hiri has no desire to be mounted, so is trying to control. De Lima is working away from the top position though.
Ta Manu Hiri is refusing to be controlled, as De Lima sits in half guard.
De Lima drops an elbow to the side of Ta Manu Hiri's head.
De Lima scores with a couple of good hammerfists.
De Lima not landing any meaningful shots this time.
De Lima not throwing his punches with enough precision this time.
Ta Manu Hiri avoiding damage under a succession of punches from De Lima.
De Lima is trying for a guillotine from the top but the pressure isn't in the right place so Ta Manu Hiri is just riding it out for now. De Lima eventually gives up the hold.
De Lima missing with the ground and pound from half guard.
That's four minutes gone in the round.
Ta Manu Hiri preventing any damage for now, controlling his opponent's head.
Ta Manu Hiri regains full guard, whilst avoiding punches from De Lima.
De Lima stands up over Ta Manu Hiri, holding his feet. He dives back in and lands a decent shot to the head.
De Lima throws an elbow that misses. Ta Manu Hiri uses the momentum to reverse the position. He's now in De Lima's guard. Nice move by Ta Manu Hiri!
De Lima wants to improve his position but instead Ta Manu Hiri has moved into half guard.
De Lima scores with a few weak punches.
And that is the end of the round. The fighters go back to their corners.
Helio De Lima dominated that round.
The fighters' corners scream their final instructions, as the referee calls time. Here we go, back to the action!
De Lima bobs and weaves into range and then changes levels and scores with a nice takedown into side control.
De Lima sitting in side control, looking to soften his opponent up with elbows and hammerfists but Ta Manu Hiri is avoiding damage well and looking to escape the position.
Ta Manu Hiri takes a nasty elbow to the side of the head.
De Lima wants to control but Ta Manu Hiri is keeping him busy.
De Lima throws an elbow but Ta Manu Hiri slips to the side and avoids it well.
De Lima goes for an armbar here - this could be all over! But no, Ta Manu Hiri has escaped beautifully and is now on top in side control! Oh, that's unlucky for De Lima but great work by Ta Manu Hiri.
We've been informed that Ta Manu Hiri has been working hard on his conditioning in the buildup to the fight.
De Lima is looking to reverse the position.
You can see the frustration on De Lima's face, being in this tough position on the bottom.
Ta Manu Hiri wants to lay and pray for a moment but De Lima keeps working.
That's one minute gone in the round.
De Lima on his back here. We all know that wrestlers don't like being on their back so let's see if De Lima tries to get out of the position.
De Lima tries to buck Ta Manu Hiri off but Ta Manu Hiri is having none of it.
De Lima is working hard here to advance position.
De Lima is trying to get back to half guard. He's pushing on Ta Manu Hiri's leg. Oh but that's left an opportunity for Ta Manu Hiri! He's got an arm triangle... it looks tight! He's rotating and De Lima has tapped! This one is allllll over!
Ladies and gentlemen, after 1:46 of round 2, we have a winner by way of Submission (Arm Triangle). Amiri Ta Manu Hiri!
After the big win, Amiri Ta Manu Hiri made sure to do all the important stuff like thanking his sponsors Dangerous Nutrition and telling the interviewer how much he loves him.
|
|
|
|
|
|
|
|
|
|
|
|
|
|
|
|
|
|
|
|
|
|
|
| S |
C
A |
G |
S |
C
B |
G |
|
S |
C |
G |
|
energy
A | B |
|
hype
A | B |
|
pop
A | B |
|
mgr
A | B |
|
FIGHT
RATING
42% |
|
|
|
|
|
|
|
Main event
|
Coming up we have a super heavyweight MMA rules bout between Leandro Lo (ranked 20220 p4p, 1731 weight class) and Derek Erwin (ranked 371 p4p, 68 weight class). The fight MMA fans around the world have waited their entire lives for!
 |
|
 |
| 198 cm
40
240
14 - 20 - 0 |
|
176 cm
37
175
25 - 16 - 1 |
BJJ Red Belt
Brawler
Insanely flexible |
|
BJJ Red Belt
Excellent MT
Granite chin |
|
| |
|
Ladies and gentlemen. This fight is 3 rounds, in the super heavyweight division.
Introducing the fighter to my left, fighting out of the red corner.
With a record of 14 - 20 - 0, fighting out of Montreal, Leandro Lo!
And introducing the fighter to my right, fighting out of the blue corner.
With a record of 25 - 16 - 1, fighting out of Montreal, Derek Erwin!
The judges for this bout are Elvis Blanc, Alec Ball and William Peck.
The bell rings for round one and we are underway!
Erwin keeps the fight standing with a nice sprawl.
Lo fails with the takedown.
Erwin closes the distance and clinches.
Erwin gets underhooks to prevent Lo's takedown attempt.
That's three failed takedown attempts in the round for Leandro Lo. That's going to take a lot out of him.
Lo drops down looking for an ankle pick but Erwin pulls his leg out and moves away.
Erwin shoots in and bounces Lo off the cage to secure the takedown into guard.
Erwin trying to pass the guard but can't manage it just yet.
We've had a slow start to the round here - hopefully the action picks up.
Erwin keeps trying to improve his position.
Lo throwing his legs up looking for a triangle.
Erwin trying to control the position from guard on top but Lo is wriggling around, looking for whatever he can.
That's one minute gone in the round.
Lo has his foot on Erwin's thigh. He's trying to push off and get in position for a triangle, I think. Erwin works his way back into a safe position though.
Erwin trying to control the position from guard on top but Lo is wriggling around, looking for whatever he can.
Erwin tries to free his leg and advance position but Lo is retaining full guard.
Lo is active off his back here, looking for submissions.
The fighters are pressed up against the cage, both looking to find a bit of space to work.
Lo looking for submissions from the bottom but instead Erwin passes into half guard.
Erwin is figuring out what he wants to do next.
Erwin wants to take a breather but Lo is having none of it.
Lo regains full guard. Nicely done.
Lo will need to keep those long limbs tucked in whilst he's on the ground, to prevent any submissions.
Erwin is stalling in the full guard.
Lo seems to have improved his submission grappling technique since last time we saw him. Let's see if he can pull off a submission.
That's two minutes gone in the round.
Lo is looking for a triangle but Erwin pushes his legs off easily.
Lo looking for submissions from the bottom but instead Erwin passes into side control.
Erwin in side control, just content to control the action for now.
Lo sneaks a leg under to get back to half guard.
Erwin is taking a breather. Lo says something to him but it's hard to make out. Perhaps he's telling him to get on with it and actually do something.
Erwin is trying to control the action in half guard but Lo is working away on the bottom, looking perhaps to get back to full guard.
Lo with the active half guard here but Erwin passes nicely into side control.
That's three minutes gone in the round.
Lo is trying to get back to half guard. He's pushing on Erwin's leg. He's managed it. Nice work.
Lo looking for submissions from an awkward position here.
Lo actively working from the bottom here.
Erwin uses his free foot to push down on Lo's thigh. Eventually he works his other foot free and he's advanced to mount - this is trouble for Lo.
Erwin tries to control but Lo wriggling away.
Erwin controlling from the full mount.
Lo wants to improve position but instead he's given up his back.
That's four minutes gone in the round.
Erwin tries to get the hooks in deep but Lo pushed the leg off.
The ref warns both fighters not to hold the cage as they work up against the meshing.
Lo rolls, trying to escape but Erwin keeps control of the position.
My spies in Gumburcules Gym inform me that Erwin has been getting involved in the gym's BJJ sparring sessions. Let's see whether that pays dividends!
Erwin is trying to stick to Lo's back but Lo is turning into Erwin. He's managed to reverse the position - now he's in Erwin's guard. Polite applause from the crowd in appreciation of some nice Jiu Jitsu by Lo.
Lo stands up and looks to throw the legs aside to pass to side control. Erwin swivels though and keeps the full guard.
Lo postures up as if he's going to throw some strikes but drops back for an ankle! Erwin is in big trouble! He looks ready to tap! But no, he's escaped and dives on top of Lo, into his guard.
Erwin is posturing up here but Lo has hold of an arm and he's gone for an armbar! Erwin tries to roll out but it's too tight and Erwin has to tap! Slick submission there by Lo!
Ladies and gentlemen, after 4:48 of round 1, we have a winner by way of Submission (Armbar). Leandro Lo!
In defeat, Derek Erwin stepped up to the mic, saying 'I didn't lose I just ran out of time'.
|
|
|
|
|
|
|
|
|
|
|
|
|
|
|
|
|
|
|
|
|
|
|
| S |
C
A |
G |
S |
C
B |
G |
|
S |
C |
G |
|
energy
A | B |
|
hype
A | B |
|
pop
A | B |
|
mgr
A | B |
|
FIGHT
RATING
31% |
|
|
|
|
|
|
|
|
|
|
