 |
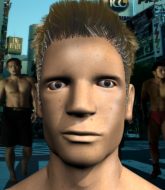
DMMA 390: Bjorkman v Klopstock PBP Commentary |
Undercard bout
|
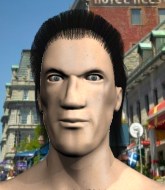
Coming up we have a welterweight MMA rules bout between Mario Leonardo (ranked 3289 p4p, 3176 weight class) and Will Scherma (ranked 387 p4p, 373 weight class). Leonardo comes to the cage accompanied by Price Check Death Threat. Both fighters look fresh as a daisy as they make their way towards the cage.
 |
|
 |
| 185 cm
25
170
10 - 9 - 0 |
|
184 cm
25
183
2 - 4 - 0 |
Good wrestling
Excellent boxer
Insanely flexible |
|
Good wrestler
World class MT
Good gas tank |
|
| |
|
Ladies and gentlemen. This fight is 3 rounds, in the welterweight division.
Introducing the fighter to my left, fighting out of the red corner.
With a record of 10 - 9 - 0, fighting out of Los Angeles, Mario Leonardo!
And introducing the fighter to my right, fighting out of the blue corner.
With a record of 2 - 4 - 0, fighting out of Amsterdam, Will Scherma!
The judges for this bout are Shigeki Fujiwara, Yuuki Gou and Yukihiro Yamamoto.

The bell rings for round one and we are underway!
Leonardo throws out a loose jab but Scherma uses good head movement to avoid it.
The fighters circling - Scherma throws out the jab but it was never going to land.
Leonardo cracks Scherma with a right hand to the side of the head.
Scherma throws a hook to the body but it doesn't connect.
Mario Leonardo seems to be the more aggressive standup fighter in this bout.
Leonardo looking to throw a kick but he's pulled out of it.
Scherma throws an overhand right that lands on Leonardo's shoulder, as Leonardo tries to avoid the shot.
Leonardo rushes in with a sloppy looking punch
and Scherma makes him pay by landing a nice hook to the body before moving out of range.
Nice cross by Scherma.
Leonardo misses with a lunging right hand
and Scherma counters with a left to the body.
Leonardo is looking to clinch but Scherma is avoiding it.

Leonardo darts in and clinches Scherma up against the cage.
Scherma fails to land with a short punch on the inside.
Scherma misses with the head strike.
Scherma misses with a hook to the ribs.
Scherma lands a shoulder strike.
Scherma misses with a hook from the clinch.
The crowd are loving this. Great action here.
A nice left hand lands by Scherma.
Leonardo throws an elbow but it's blocked.
Scherma lands an uppercut.

That's one minute gone in the round.
Leonardo misses with a punch on the inside.
Scherma tried to land a shot to the body but connects with Leonardo's elbow.
Scherma lands a left hand that snaps the head of Leonardo backwards.

Leonardo manages to break the clinch.
Scherma throws a jab when Leonardo was well out of range.
Leonardo loads up on a big right hand but Scherma slips the punch.
Scherma on the wrong end of a nice jab.
Scherma tries to land a body kick
and Leonardo counters with a stiff right hand.

Scherma instigates a clinch.
Scherma misses with a shot to the kidneys.
Scherma tried to land a shot to the body but connects with Leonardo's elbow.
Scherma can't find room to land a body shot as Leonardo controls the action.
Leonardo is trying to work out of this bad position, with his back against the cage.
Leonardo looks like he'd prefer to be striking at range right now.
Good body shot from Scherma.
Leonardo breaks from the clinch.
Leonardo throws an off balance right hand
and Scherma counters with a low kick, right behind Leonardo 's knee.
Leonardo on the wrong end of a nice hook.

That's two minutes gone in the round.
Scherma throws a quick inside leg kick.
Wooooo! Give it up for these two warriors! They are putting on a show!
Leonardo ducks under an overhand right and circles away with a smile on his face.
Nice cross by Leonardo.
Scherma misses with a body shot.
Scherma is moving around nicely and scores here with a single head shot.
Scherma throws a combination but comes up with nothing but fresh air.
Leonardo has been working on his boxing with his coaches at Wolfpack Gym in the buildup to the fight.
Nice body punch from Leonardo.
Leonardo misses with a looping right.
Scherma slips under a jab from Leonardo.
Leonardo swings wildly with a right hand that was never going to find it's target.
Scherma connects with a body shot.
Leonardo misses with a head kick.
Leonardo tries to close the distance and clinch up against the cage but Scherma paws at him with a jab and circles away.
Scherma lands a leg kick that knocks Leonardo off balance momentarily.
Leonardo missing with a left hand there. Scherma was out of range so wasted energy throwing that one.
Leonardo throws a hook but Scherma avoids it easily.
Nice defenses there by Scherma.
Scherma misses with an attempted mid kick.
An attempted straight right counter from Leonardo misses the target.

That's three minutes gone in the round.
Leonardo tries to land with a swinging hook to the body but Scherma was well out of range. Poor timing from Leonardo.
Scherma is moving around nicely and scores here with a single head shot.
Scherma tried to score with a low kick but Leonardo checks it.
Nice defenses there by Scherma.
Leonardo scores with a decent looking hook.
Leonardo uses some good footwork to avoid the body shot by Scherma.
A punch combination from Scherma misses.
Leonardo moves in looking to clinch but Scherma pushes him off.
Leonardo misses with a kick to the body.
Leonardo takes a shot to the nose. Hopefully that hasn't broken it.
Leonardo with a jab.
Leonardo works his jab well there, keeping his opponent at a distance.
Leonardo misses with a straight left.
Leonardo thuds his right hand into Scherma's forehead from close range. That could be painful for both fighters.
Scherma misses with a body shot. Nice footwork from Leonardo.
Fantastic stuff here - a very entertaining period of action, which has drawn cheers from the crowd.
Boom, another hit is landed. "You're gunna get knocked out" taunts Scherma, as that shot connected.
Scherma pivots as if he's going to throw a leg kick but stops half way.
Scherma wants to slow Leonardo down by chopping away at his legs.

That's four minutes gone in the round.
Scherma takes a jab on the nose there. A little bit of blood seems to be coming out. Hopefully that won't affect his breathing.
Leonardo throws a body punch but Scherma moves out of range.
Leonardo tries to grapple but his opponent circles
and Scherma counters with a good right hand that lands right on the jaw.
Leonardo blocks the body kick.
Leonardo throws a quick head kick that skims the top of Scherma's head.
Leonardo moves out of range as Scherma throws a body kick.
Leonardo checks a leg kick.
Leonardo was looking to counter that move with a punch but didn't quite pull the trigger.
Nice defenses there by Scherma.
Leonardo paws at his opponent with the jab and then lunges in with a straight, right on the button.
Scherma staying out of range there.
Scherma tries to keep at a distance but Leonardo has taken the fight into the clinch.
Scherma scores with a nice hook to the head.
The crowd applaud the fighters' efforts here as the round comes to an end.
Leonardo misses with a hook from the clinch.
Leonardo looks like he'd prefer to be striking at range right now.
A head punch on the inside from Scherma fails to land.
And that is the end of the round. The fighters go back to their corners.
A close round but Will Scherma will probably get the nod.
The fighters' corners scream their final instructions, as the referee calls time. Here we go, back to the action!

A punch lands to the side of Leonardo 's head but he takes it in his stride.
Leonardo works his jab well there, keeping his opponent at a distance.
A cross from Leonardo lands.
Scherma has been working his punching technique in the buildup to the fight and it appears to be paying off.
Leonardo connects with a good right hand that stumbles Scherma. Scherma circles away out of range and recomposes himself.
Scherma throws a wild body kick that Leonardo sees coming a mile off.
Scherma takes one on the button.
Scherma swings and misses with a hook to the body.
Scherma throws a hook to the side of Leonardo's head but Leonardo sees it coming and ducks under it beautifully.
Scherma tries a low kick but Leonardo avoids it.
Scherma scores with a reasonable looking shot to the body. Leonardo doesn't seem bothered though.
Jab from Leonardo.
Leonardo checks a leg kick nicely.
Scherma waving his hands out in front of him, looking to distract Leonardo.
The fans in attendance giving it up for the two fighters, who have really let it all hang out in the last minute or so!
Scherma misses with a head kick.
Leonardo throws a hook but Scherma blocks it.
Scherma looks to throw the jab but Leonardo is out of range.
Scherma throws an overhand right that lands on Leonardo's shoulder, as Leonardo tries to avoid the shot.
Leonardo tries to clinch up against the cage, rushing in to close the distance. Scherma manages to break the clinch and circles back to the middle of the mat.
Scherma tries to land with a swinging hook to the body but Leonardo was well out of range. Poor timing from Scherma.
That's one minute gone in the round.
Leonardo lands a jab to Scherma's midsection.
Scherma moves out of range of the body kick.
Scherma dips to his left and cracks Leonardo with an uppercut!
Scherma connects with a body shot.
Scherma blocks a jab.
Leonardo scores with a shot to the body.
Scherma defending well as Leonardo loads up on a big left hand.
A jab from Leonardo misses.
Leonardo misses with a looping right.
Scherma takes an uppercut right on the jaw but it doesn't phase him.
Leonardo doesn't react quick enough there as he takes a shot to the body.
Scherma throws a series of punches but Leonardo moves out of range.
Scherma throws a hook but Leonardo blocks it.
Scherma takes a jab right on the kisser.
This is a great period of action - very entertaining stuff!
Scherma lands with a nice body punch.
Scherma walks into a straight right hand from Leonardo.
Scherma swings and misses with a hook to the body.
Leonardo uses some good footwork to avoid the body shot by Scherma.
That's two minutes gone in the round.
Nice shot lands for Scherma.
Scherma throws a big shot that misses.
Mario Leonardo is winning the standup battle so far.
Scherma throws a leg kick that misses.
Scherma ducks down and throws a hook to the body but Leonardo moves away.
Leonardo misses the jab.
Leonardo lands a jab to the head.
Leonardo connects with a jab.
Leonardo throws a big shot that misses.
Scherma ducks under an overhand right and circles away with a smile on his face.
Leonardo moving in and out of range nicely, whilst landing the scoring shot.
Scherma on the wrong end of a nice hook.
Leonardo tries to clinch up but Scherma circles away and keeps his distance.
Scherma is trying to counter with his kicks.
Leonardo rushes in with a sloppy looking punch
and Scherma counters with a quick right hand to the jaw.
Scherma ducks under a wild hook from Leonardo.
No joy there for Scherma, who threw a few shots but didn't land.
Scherma takes the fight into the clinch.
Leonardo is working hard here but doesn't seem to be able to control effectively, up against the cage.
That's three minutes gone in the round.
Leonardo content to slow the pace in the clinch.
Leonardo pushes off and circles away, back to the middle of the mat.
Leonardo missing with a left hand there. Scherma was out of range so wasted energy throwing that one.
Scherma fakes a jab and scores with a low kick.
Leonardo throws a shot from downtown. Scherma moves away and avoids it.
Leonardo clinches.
Will Scherma seems to be working more effectively in the clinch in the fight so far.
Leonardo blocks a body shot from Scherma.
Leonardo breaks from the clinch.
Scherma misses with a low kick.
Leonardo was looking to counter that last move with a shot to the body but he didn't commit.
Scherma tried to score with a low kick but Leonardo checks it.
Leonardo waving his hands out in front of him, looking to distract Scherma.
Scherma ducks under a wild hook from Leonardo.
Leonardo scores with a decent looking hook.
Scherma throws a body punch but Leonardo moves out of range.
Scherma slips under a jab from Leonardo.
That's four minutes gone in the round.
Scherma loads up on a big right hand but Leonardo slips the punch.
Leonardo tries to keep at a distance but Scherma has taken the fight into the clinch.
Scherma lands a right uppercut that snaps the head of Leonardo backwards.
Leonardo pushes off and circles away, back to the middle of the mat.
We've seen a great period of action over the last minute or so - credit to both fighters for going all out!
Leonardo drives through and clinches with Scherma against the cage.
The pace really dropping off here, momentarily.
Scherma swings wildly with an uppercut but Leonardo uses good head movement to avoid it.
Scherma doesn't land with the attempted body shot.
Scherma keeps control of Leonardo as he tries to wriggle out of the double underhooks.
Scherma has a pretty nasty looking mouse under his right eye.
A head punch on the inside from Scherma fails to land.
Leonardo breaks the clinch.
Leonardo chopped to the floor by a nice leg kick but he springs right back up before Scherma can pounce on him.
Leonardo swings for the body but Scherma moves out of range.
And that is the end of the round. The fighters go back to their corners.
That was a close second round but I would say that Mario Leonardo will probably get the nod.
The fighters get back to their feet, the hooter sounds and we're back to the action! This is the final round!

Scherma buckles his opponent's knee momentarily with a nice leg kick.
Scherma ducks right into an uppercut from Leonardo.
Scherma has a nice red mark on his side after a thudding body kick by Leonardo.
Leonardo darts in and clinches Scherma up against the cage.
Scherma misses with the head strike.
An uppercut on the inside fails to land for Leonardo.
Leonardo leaning his opponent against the cage.
Scherma misses with some punches.
Scherma keeps control of Leonardo as he tries to wriggle out of the double underhooks.
Scherma lands with a right to the head.
We've had a slow start to the round here - hopefully the action picks up.
Scherma lands with a short punch from the clinch.
Scherma misses with a punch to the body.
Scherma working aggressively here.
Leonardo stalling.
Leonardo breaks the clinch.
That's one minute gone in the round.
Scherma takes a shot right to the bread basket.
Leonardo slips a straight right by Scherma.
Leonardo throws a hook but Scherma avoids it easily.
Leonardo throws a hook to the side of Scherma's head but Scherma sees it coming and ducks under it beautifully.
Leonardo looks to throw the jab but Scherma is out of range.
Leonardo uses decent footwork to sidestep a right hand from Scherma.
Scherma scores with a slapping inside leg kick.
Leonardo takes a jab on the nose. He smiles like he loves it and keeps coming.
Scherma lands a nice looking body kick.
Leonardo tries to clinch up but Scherma circles away and keeps his distance.
Leonardo lands a front kick.
Scherma misses with a body shot.
Leonardo ducks down and throws a hook to the body but Scherma moves away.
Scherma uses good head movement to avoid the hook from Leonardo.
Leonardo looks to score with a jab to the body but Scherma is just out of range.
Leonardo circles away from the clinch attempt.
Leonardo takes a thudding leg kick, right into the meat of the thigh.
That's two minutes gone in the round.
Scherma thows a leg kick but Leonardo checks it
and Leonardo counters with a straight right hand.
Fantastic stuff here - a very entertaining period of action, which has drawn cheers from the crowd.
Leonardo avoids the clinch attempt nicely.
Scherma connects with a leg kick.
Scherma tries to land with a swinging hook to the body but Leonardo was well out of range. Poor timing from Scherma.
Scherma wants to land a leg kick but Leonardo is out of range.
Leonardo throws a hook but Scherma blocks it.
Leonardo pushes Scherma up against the cage in a clinch.
Leonardo wants to strike at distance but he can't break free of the clinch.
Leonardo breaks the clinch and we're back to striking at distance.
Scherma throws a hook but Leonardo avoids it easily.
Scherma goes for a spinning back kick but it misses.
It looked like Leonardo wanted to counter with a hook but didn't fully commit.
Scherma looks to score with a jab to the body but Leonardo is just out of range.
Leonardo throwing a counter right hand but Scherma manages to avoid it.
Leonardo clinches up against the cage.
Scherma swings wildly with an uppercut but Leonardo uses good head movement to avoid it.
Leonardo looks like he'd prefer to be striking at range right now.
Leonardo has had enough of the clinch and is looking to separate.
That's three minutes gone in the round.
Leonardo pushes off and circles away, back to the middle of the mat.
Leonardo lands an overhand left. A wild punch that just about connected.
Scherma misses with a leg kick.
Leonardo is looking to counter punch.
Leonardo is hobbling a little on that front leg after taking quite a few leg kicks so far in this fight.
Leonardo lands with an overhand left.
Leonardo is the aggressor but that punch slipped nicely by Scherma.
Scherma fakes a couple of low kicks, before throwing one on the third attempt. It connects and Leonardo has to reset his feet before getting ready to engage.
Leonardo misses with a right hand
and Scherma counters with a crisp hook to the side of the head.
Leonardo looking to throw a kick but he's pulled out of it.
Scherma staying out of range there.
Scherma fails in his attempt to clinch.
Leonardo moves into range and clinches up with Scherma.
A short right hand to the side of the head by Scherma.
Leonardo lands a hook that snaps the head of Scherma backwards.
Leonardo's corner calls for him to break the clinch, which he does.
Scherma scores with a sloppy punch to the body. Not much technique there but it did the business.
Wooooo! Give it up for these two warriors! They are putting on a show!
Scherma throws out a loose jab but Leonardo uses good head movement to avoid it.
That kick from Scherma tenderised Leonardo's leg. Leonardo is trying to keep his angry face on.
That's four minutes gone in the round.
Scherma wants to clinch.
Scherma lands with a shot to the body.
Leonardo throws the left hand but Scherma avoids the punch easily.
Leonardo misses with a straight left.
Leonardo throws a sloppy head kick and Scherma moves out of range easily.
Leonardo is pinned up against the cage taking some big shots here. The referee is looking closely deciding whether he should stop the fight.
Leonardo is looking to land body kicks.
Leonardo moves out of range of the body kick.
Leonardo wants to clinch.
Leonardo staying out of range there.
Scherma walks straight into a jab right on the nose. That one stung - he's blinking and trying to clear his head.
And that's the end of the fight!
That was a close round. You could make an argument for either fighter but I would give it to Mario Leonardo.
I think Leonardo has won this one but let's see what the judges have to say. Over to the ring announcer for the scorecards.
Ladies and gentlemen, after 3 rounds of action, we go to the scorecards for a decision.
Judge Shigeki Fujiwara scores the fight 29:28
Judge Yuuki Gou scores the fight 27:30
Judge Yukihiro Yamamoto scores the fight 29:28
In favor of your winner, by split decision... Mario Leonardo!
An out of breath Mario Leonardo thanked his loyal fans in his post fight interview, giving them credit for his success over the course of his career.
|
|
|
|
|
|
|
|
|
|
|
|
|
|
|
|
|
|
|
|
|
|
|
| S |
C
A |
G |
S |
C
B |
G |
|
S |
C |
G |
|
energy
A | B |
|
hype
A | B |
|
pop
A | B |
|
mgr
A | B |
|
FIGHT
RATING
73% |
|
|
|
|
|
|
|
Undercard bout
|
Coming up we have a light heavyweight MMA rules bout between Neal Robson (ranked 2106 p4p, 2435 weight class) and Holger Frankborger (ranked 257 p4p, 290 weight class). The crowd seem to be enjoying Frankborger's choice of entrance music: Schatten. Over to our ring announcer for the fighter introductions!
 |
|
 |
| 182 cm
25
216
10 - 11 - 0 |
|
191 cm
25
214
4 - 2 - 0 |
Good wrestling
World class boxer
Cardio machine |
|
Good wrestler
World class MT
Good gas tank |
|
| |
|
Ladies and gentlemen. This fight is 3 rounds, in the light heavyweight division.
Introducing the fighter to my left, fighting out of the red corner.
With a record of 10 - 11 - 0, fighting out of London, Neal Robson!
And introducing the fighter to my right, fighting out of the blue corner.
With a record of 4 - 2 - 0, fighting out of Tokyo, Holger Frankborger!
The judges for this bout are Yukihiro Shimada, Taro Takaoka and Kenichi Hosakawa.
The bell rings for round one and we are underway!
Robson fakes low and throws an overhand right that catches Frankborger on the side of the head.
Robson changes levels and scores with a jab to the body.
Robson lands a right hook to the body.
Robson connects with a slap. Keep your fist closed son.
Robson swings widly with a right hand
and Frankborger connects with a straight left hand counter down the middle.
Robson looks to have improved his striking defense since last time we saw him fight.
Robson throws out a token jab with nothing on it.
Frankborger takes a shot right to the bread basket.
Robson swings and misses with a hook to the body.
And an attempted straight right on the counter from Frankborger! But no joy.
Robson throws a hook to the body but it doesn't connect.
Frankborger has been spending a lot of time sparring his boxing in the run up to the fight, trying to sharpen up those hands and look for a knockout.
Frankborger uses some good footwork to avoid the body shot by Robson.
Robson lands a jab to the head.
 It looks like Holger Frankborger has been cut. It looks like Holger Frankborger has been cut.
The crowd are loving this. Great action here.
Robson with a jab.
Robson throws a sloppy body shot
and Frankborger counters with a straight right hand.
Neal Robson seems to be the more aggressive standup fighter in this bout.
That's one minute gone in the round.

Robson lands a left and a right that send Frankborger crashing to the mat, dazed. Robson thinks about following him to the mat but decides to wave him back up to his feet!
 Frankborger is rocked! Frankborger is rocked!
Robson drops a shoulder and throws a monster hook that connects perfectly to the side of Frankborger's head, knocking him out cold! Robson is extatic as he celebrates with his cornermen.
Ladies and gentlemen, after 1:16 of round 1, we have a winner by way of KO (Punch). Neal Robson!
Our winner, Neal Robson, made sure he spent some time buttering up the crowd during his post fight interview, which will no doubt bring him a few more fans.
|
|
|
|
|
|
|
|
|
|
|
|
|
|
|
|
|
|
|
|
|
|
|
| S |
C
A |
G |
S |
C
B |
G |
|
S |
C |
G |
|
energy
A | B |
|
hype
A | B |
|
pop
A | B |
|
mgr
A | B |
|
FIGHT
RATING
82% |
|
|
|
|
|
|
|
Undercard bout
|
Coming up we have a middleweight MMA rules bout between Noah Gordon (ranked 1712 p4p, 2848 weight class) and Keiki Misahawa (ranked 209 p4p, 321 weight class). Both fighters look fresh as a daisy as they make their way towards the cage.
 |
|
 |
| 185 cm
24
200
10 - 5 - 0 |
|
179 cm
23
186
4 - 2 - 0 |
Good wrestling
World class boxer
Cardio machine |
|
Good wrestler
Great elbows
Good gas tank |
|
| |
|
Ladies and gentlemen. This fight is 3 rounds, in the middleweight division.
Introducing the fighter to my left, fighting out of the red corner.
With a record of 10 - 5 - 0, fighting out of Rio de Janeiro, Noah Gordon!
And introducing the fighter to my right, fighting out of the blue corner.
With a record of 4 - 2 - 0, fighting out of London, Keiki Misahawa!
The judges for this bout are Hirohito Nitta, Yuuki Gou and Tatsuya Matsuyama.
The bell rings for round one and we are underway!
Misahawa throws a sloppy body shot
and Gordon connects with a straight left hand counter down the middle.
Misahawa has closed the distance and engaged Gordon in a clinch.
Gordon lands a left hand that snaps the head of Misahawa backwards.
Gordon blocks a body shot from Misahawa.
Nice elbow from Misahawa.
Misahawa gets an overhook and lands an elbow to the side of the head.
Misahawa digs a right hand underneath Gordon's ribcage. Gordon let out a lung full of air as it connected.
We've been hearing reports that Gordon has been drilling takedowns in recent sessions so let's see if that has an impact on the result of this fight.
Gordon misses with a punch on the inside.
A short right from Gordon.
Misahawa lands a nice elbow.
Misahawa throws an elbow that misses.
Misahawa lands a damaging elbow.
We've seen a great period of action over the last minute or so - credit to both fighters for going all out!
A nice left hand lands by Misahawa.
Gordon stalling against the cage.
Gordon displaying some good clinch control by pressing Misahawa up against the cage.
Nice elbow from Misahawa.
That's one minute gone in the round.
Misahawa's head jolts backwards as he takes an uppercut right on the button!
Misahawa lands a nice looking hook to the body, against the cage.
Gordon lands with a short shot to the head.
Gordon lands with a short punch from the clinch.
Misahawa lands a nice elbow from the clinch.
Gordon lands a right uppercut that snaps the head of Misahawa backwards.
Misahawa looks to throw an elbow but misses.
Misahawa lands with a short head shot on the inside.
Gordon is working hard here but doesn't seem to be able to control effectively, up against the cage.
Misahawa misses with a punch to the body.
Gordon goes for a takedown attempt but Misahawa pushes him away and we're back to fighting at a distance.
Misahawa misses with a right hand
and Gordon counters with a nice uppercut.
Misahawa throws a poor cross that misses
and Gordon connects with a straight left hand counter down the middle.
This is a great period of action - very entertaining stuff!
Misahawa tries to land with a swinging hook to the body but Gordon was well out of range. Poor timing from Misahawa.
Gordon looks shocked there as he takes a right hand to the temple.
That's two minutes gone in the round.
Misahawa swings for the body but Gordon moves out of range.
Gordon tries to counter with a takedown but Misahawa is quick to defend against it.
Misahawa misses with a lunging right hand
and Gordon counters with a stiff right hand.
Misahawa is rocked!
Misahawa throws a lazy uppercut
and Gordon counters with a big right hand! Oh Misahawa is in trouble here! Gordon follows up with more strikes and that's it! The ref has stopped it!
Ladies and gentlemen, after 2:22 of round 1, we have a winner by way of TKO (Strikes). Noah Gordon!
|
|
|
|
|
|
|
|
|
|
|
|
|
|
|
|
|
|
|
|
|
|
|
| S |
C
A |
G |
S |
C
B |
G |
|
S |
C |
G |
|
energy
A | B |
|
hype
A | B |
|
pop
A | B |
|
mgr
A | B |
|
FIGHT
RATING
60% |
|
|
|
|
|
|
|
Undercard bout
|
Coming up we have a super heavyweight MMA rules bout between Lamar Karter (ranked 795 p4p, 3048 weight class) and The Devils Outlaw (ranked 54 p4p, 126 weight class). Outlaw has chosen For The Outlawz by Moonshine Bandits as his entrance music. The Devils Outlaw has the better chin. Will he look to stand and bang today?
 |
|
 |
| 205 cm
27
275
10 - 5 - 0 |
|
198 cm
46
285
42 - 23 - 1 |
Good wrestling
Lethal high kicks
Insanely flexible |
|
Good wrestler
Dangerous knees
Heavy handed |
|
| |
|
Ladies and gentlemen. This fight is 3 rounds, in the super heavyweight division.
Introducing the fighter to my left, fighting out of the red corner.
With a record of 10 - 5 - 0, fighting out of New York, Lamar Karter!
And introducing the fighter to my right, fighting out of the blue corner.
With a record of 42 - 23 - 1, fighting out of New York, The Devils Outlaw!
The judges for this bout are Shirou Masuda, Tatsuya Matsuyama and Shigeki Fujiwara.
The bell rings for round one and we are underway!
Outlaw shoots and misses
and Outlaw takes a counter punch right on the button for his troubles.
It looks like The Devils Outlaw has been cut.
Outlaw swings and misses with a hook to the body.
Outlaw moves away from the strike by Karter.
Outlaw slips under a jab from Karter.
Outlaw instigates a clinch.
Karter lands a shot to the body.
Outlaw looks winded!
Karter manages to break the clinch.
Outlaw closes the distance looking to clinch
and Karter makes him pay by landing a nice hook to the body before moving out of range.
We've had a slow start to the round here - hopefully the action picks up.
Outlaw has his front leg slapped to the side - a nice low kick landing there from Karter.
Karter steps in with a hook that catches Outlaw right on the chin and knocks him to the floor! Karter follows him down with more strikes and that's all she wrote! Outlaw looks absolutely devastated.
Ladies and gentlemen, after 0:53 of round 1, we have a winner by way of TKO (Strikes). Lamar Karter!
|
|
|
|
|
|
|
|
|
|
|
|
|
|
|
|
|
|
|
|
|
|
|
| S |
C
A |
G |
S |
C
B |
G |
|
S |
C |
G |
|
energy
A | B |
|
hype
A | B |
|
pop
A | B |
|
mgr
A | B |
|
FIGHT
RATING
68% |
|
|
|
|
|
|
|
Undercard bout
|
Coming up we have a welterweight MMA rules bout between Charles Traynor (ranked 836 p4p, 925 weight class) and Kohinata Minoru Ii (ranked 111 p4p, 125 weight class). Traynor comes into the arena with Crazy Train by Ozzy Osbourne blaring out of the sound system. I don't know about you partner, but I'm pumped for this one!
 |
|
 |
| 182 cm
25
170
13 - 8 - 0 |
|
185 cm
40
186
32 - 15 - 0 |
Good wrestling
World class MT
Insanely flexible |
|
Good wrestler
Excellent MT
Granite chin |
|
| |
|
Ladies and gentlemen. This fight is 3 rounds, in the welterweight division.
Introducing the fighter to my left, fighting out of the red corner.
With a record of 13 - 8 - 0, fighting out of Montreal, Charles Traynor!
And introducing the fighter to my right, fighting out of the blue corner.
With a record of 32 - 15 - 0, fighting out of Tokyo, Kohinata Minoru Ii!
The judges for this bout are Ren Mimura, Taro Takaoka and Yukihiro Shimada.
The bell rings for round one and we are underway!
Traynor scores with a jab to the body.
Traynor lands with a shot to the body.
Minoru Ii moves into the clinch.
Minoru Ii blocks an elbow strike.
Traynor looks to throw an elbow but misses.
Minoru Ii avoids a wild elbow strike from Traynor.
Minoru Ii manages to get underhooks and slows down the pace for a moment.
Minoru Ii is clearly stalling here... Pick up the pace son.
Traynor pushes off and fires off an elbow that misses, before clinching up again, against the cage.
We've had a slow start to the round here - hopefully the action picks up.
Traynor tries to work over Minoru Ii's body with a swooping hook but it only glances the target.
Minoru Ii wants to strike at distance but he can't break free of the clinch.

Minoru Ii pushes off and circles away, back to the middle of the mat.
Traynor throws a series of punches but Minoru Ii moves out of range.
Traynor lands a slapping body shot.
Minoru Ii tries to clinch but Traynor moves out of range.
That's one minute gone in the round.
Minoru Ii misses with a body shot.
Minoru Ii ducks under a wild hook from Traynor.
Minoru Ii is definitely looking for the counter takedowns here.
Minoru Ii shoots in for a takedown - he's clinched up with Traynor but Traynor pushes him off and we're back to square one.
Traynor definitely looks more muscular than last time we saw him fight.
A jab from Traynor misses.
Minoru Ii lets it all go there with a big combo counter but none of the punches connected.
Traynor punishes Minoru Ii's body with a nice straight punch.
Minoru Ii looks shocked there as he takes a right hand to the temple.
Minoru Ii closes the distance and clinches up with Traynor, looking for a takedown. Minoru Ii pushes Traynor against the cage but Traynor circles to the side and manages to break the clinch.
Charles Traynor is looking to keep the fight on the feet at all costs.
Traynor throws a right hand that Minoru Ii ducks under and follows up with a left that Minoru Ii also avoids with ease.
Charles Traynor seems to be the more aggressive standup fighter in this bout.
Minoru Ii throws a body kick but he wasn't in range.
A big right from Traynor misses.
Traynor moving in and out of range nicely, whilst landing the scoring shot.
Minoru Ii's hands are dropping dangerously low here and Traynor connects clean with a right hook that sends him down to one knee! Minoru Ii scrambles back to his feet.
Traynor lands with an uppercut that bounces Minoru Ii off the cage and back into range.
The crowd cheering loudly, showing their appreciation for the quality fight we're seeing here.
Traynor misses with a few strikes there.
That's two minutes gone in the round.
Traynor throws a nice looking combination but Minoru Ii bobs and weaves to avoid any damage.
Traynor drives through and clinches with Minoru Ii against the cage.
Minoru Ii takes a shot to the head.
Traynor misses with a hook to the ribs.
Minoru Ii blocks an elbow strike.
Minoru Ii tries to pull guard but Traynor won't allow it.
Minoru Ii has been looking to improve his clinch game in recent weeks. Traynor seems to have the measure of him in the clinch so far, so let's see if Minoru Ii can turn it around.
Charles Traynor has stuffed three takedown attempts in the round now. That's going to take a lot out of Kohinata Minoru Ii.
With the fighters up against the cage, Traynor throws an elbow but misses.
Traynor's corner calls for him to break the clinch, which he does.
Traynor throws a jab to the body, straight down the pipe. Boom. That sent Minoru Ii stumbling backwards but he manages to regain his composure quickly.
Minoru Ii closes the distance and clinches up with Traynor, looking for a takedown. Minoru Ii pushes Traynor against the cage but Traynor circles to the side and manages to break the clinch.
A left lands for Traynor.
Minoru Ii moves in looking to clinch but Traynor pushes him off.
Traynor has managed to clinch.
Nice elbow from Traynor.
Minoru Ii looking for a takedown.
Traynor misses with a hook from the clinch.
That's three minutes gone in the round.
Traynor lands an elbow inside that Minoru Ii shrugs off.
Traynor prevents the takedown attempt.
A head punch on the inside from Minoru Ii fails to land.
Traynor comes over the top with an elbow. That landed flush.
Traynor escapes the clinch and we're back to striking.
Minoru Ii scores to the head and body with a nice combination!
Minoru Ii moves out of range as Traynor strikes.
Traynor avoids the clinch attempt nicely.
Minoru Ii fails to land the takedown.
Traynor throws a body shot but no joy.
Traynor fakes a jab and then connects with a hook.
Traynor fakes with an overhand right and moves in to clinch with Minoru Ii, pushing him back against the cage.
Minoru Ii tries to pull guard but Traynor holds him up against the cage and eventually Minoru Ii drops back down to his feet.
Minoru Ii is trying to drag Traynor to the mat but Traynor just about manages to keep his footing. He used the cage to his advantage there.
That's four minutes gone in the round.
Traynor breaks the clinch.
Fantastic stuff here - a very entertaining period of action, which has drawn cheers from the crowd.
Traynor throws a combination that misses
and Minoru Ii counters with a left and a right that stings Traynor.
Traynor fakes high and swings low for a body shot but Minoru Ii manages to avoid it.
Traynor misses with a shot to the body
and Minoru Ii counters with a shot to the ribs. That looked like it hurt.
Minoru Ii shoots in but no luck this time.
A cross from Traynor lands.
Traynor throws a jab when Minoru Ii was well out of range.
Some wild striking there from Traynor.
Traynor misses with a jab, cross combination.
Minoru Ii looks for a takedown but Traynor sprawls well.
Traynor takes a swing at Minoru Ii's ribcage but misses.
And that is the end of the round. The fighters go back to their corners.
Charles Traynor dominated that round.
The fighters' corners scream their final instructions, as the referee calls time. Here we go, back to the action!
Minoru Ii uses good head movement to avoid the hook from Traynor.
Minoru Ii with a lazy takedown attempt
letting Traynor counter with a right hand.
Minoru Ii dives in and grabs Traynor's left leg, looking for a takedown. Traynor pushes down on Minoru Ii's head and hops out.
Traynor gets a clinch.
Traynor misses with a body punch.
Traynor throws a blind hook that connects with the side of Minoru Iis head.
Traynor is really dominating this fight. Is there anything that Minoru Ii can do to turn this around?
Minoru Ii is trying to work out of this bad position, with his back against the cage.
Minoru Ii is trying to pull guard but being pressed up against the cage enables Traynor to keep the fight standing.
Charles Traynor has stuffed three takedown attempts in the round now. That's going to take a lot out of Kohinata Minoru Ii.
Traynor gets an overhook and lands an elbow to the side of the head.
Minoru Ii takes an elbow to the temple.
A short body shot lands from Traynor as the two fighters clinch.
We've had a slow start to the round here - hopefully the action picks up.
Traynor lands a nice uppercut.
Traynor breaks from the clinch.
Minoru Ii's hands are dropping dangerously low here and Traynor connects clean with a right hook that sends him down to one knee! Minoru Ii scrambles back to his feet.
The fans in attendance giving it up for the two fighters, who have really let it all hang out in the last minute or so!
Traynor displaying good standup as he scores with a three punch combination.
Traynor rushes Minoru Ii and presses him up against the cage.
That's one minute gone in the round.
Traynor breaks the clinch and we're back to striking at distance.
Traynor uses decent footwork to sidestep a right hand from Minoru Ii.
Minoru Ii shoots in for a takedown but Traynor shows good takedown defense.
Traynor comes forward and lands a shot to the body, then darts back out of range.
Minoru Ii is breathing heavily.
Traynor rushes Minoru Ii and presses him up against the cage.
With the fighters clinched against the cage, Traynor creates a bit of distance for himself and scores with a nice uppercut.
Traynor lands a hook to the body. It's hard to tell if that hurt Minoru Ii or not.
Traynor lands a nice uppercut.
An uppercut to the body lands inside from Traynor.
Traynor looks to throw an elbow but misses.
Traynor presses Minoru Ii against the cage and delivers a mid-strength body shot.
With the fighters clinched against the cage, Traynor creates a bit of distance for himself and scores with a nice uppercut.
Traynor lands a glancing elbow in the clinch.
Traynor breaks the clinch.
Wooooo! Give it up for these two warriors! They are putting on a show!
Traynor throws a series of punches but Minoru Ii avoids them all with ease.
Minoru Ii walks straight into an uppercut. Luckily it didn't land flush.
That's two minutes gone in the round.
Minoru Ii shoots and misses
and Traynor counters with a lovely shot to the body.
Minoru Ii takes a jab right on the nose. That must have hurt but he shrugs his shoulders and looks to return the favor.
A swing and a miss from Traynor.
Traynor throws a combination but it was largely blocked by Minoru Ii.
A punch combination from Traynor misses.
The fighters are starting to get sweaty, which will make takedowns a bit more tricky.
Traynor throws the left hand but Minoru Ii avoids the punch easily.
Traynor connects with a left and a right that sees a clearly hurt Minoru Ii covering up! Traynor comes in with a big uppercut and Minoru Ii goes doooown! He's slumped up against the cage, eyes staring blankly into space.
Ladies and gentlemen, after 2:34 of round 2, we have a winner by way of KO (Strikes). Charles Traynor!
A relieved looking Charles Traynor thanked the fans for their support and gave the usual line about them being amazing. They seemed to believe that he actually meant it.
|
|
|
|
|
|
|
|
|
|
|
|
|
|
|
|
|
|
|
|
|
|
|
| S |
C
A |
G |
S |
C
B |
G |
|
S |
C |
G |
|
energy
A | B |
|
hype
A | B |
|
pop
A | B |
|
mgr
A | B |
|
FIGHT
RATING
69% |
|
|
|
|
|
|
|
Co-main event
|
Coming up we have a lightweight MMA rules bout between Percival Nerdspoof The 3rd (ranked 403 p4p, 459 weight class) and Dakota Reis (ranked 52 p4p, 57 weight class). Nerdspoof The 3rd's ring entrance music is that housewives' favourite, Loser. Reis has chosen Cree Prayer Song - Young Spirit as his entrance music. Over to our ring announcer for the fighter introductions!
 |
|
 |
| 182 cm
27
156
14 - 6 - 1 |
|
180 cm
27
165
9 - 3 - 1 |
Great wrestler
World class boxer
Insanely flexible |
|
Good wrestler
World class MT
Granite chin |
|
| |
|
Ladies and gentlemen. This fight is 3 rounds, in the lightweight division.
Introducing the fighter to my left, fighting out of the red corner.
With a record of 14 - 6 - 1, fighting out of Sydney, Percival Nerdspoof The 3rd!
And introducing the fighter to my right, fighting out of the blue corner.
With a record of 9 - 3 - 1, fighting out of Montreal, Dakota Reis!
The judges for this bout are Sosuke Kotani, Kenichi Hosakawa and Yukihiro Yamamoto.
The bell rings for round one and we are underway!
Reis attempts a leg kick but it's missed by a good margin.
Reis displays good takedown defense there as he swats away a double leg from Nerdspoof The 3rd.
A little jabbing left from Reis on the counter but it doesn't find it's target.
Nerdspoof The 3rd lands with an uppercut that bounces Reis off the cage and back into range.
Nerdspoof The 3rd swings and misses with a hook to the body.
Reis looked like he wanted to counter with a punch but didn't throw it.
Percival Nerdspoof The 3rd seems to be the more aggressive standup fighter in this bout.
Nerdspoof The 3rd moves into range and connects with a jab.
Nerdspoof The 3rd takes a swing at Reis's ribcage but misses.
Nerdspoof The 3rd checks a leg kick.
Nerdspoof The 3rd looks to have improved his striking defense since last time we saw him fight.
A chopping leg kick lands by Reis.
Reis ducks under a wild hook from Nerdspoof The 3rd.
Nerdspoof The 3rd scores with a sloppy punch to the body. Not much technique there but it did the business.
We've had a slow start to the round here - hopefully the action picks up.
A jab from Nerdspoof The 3rd misses.
Reis walks straight into an uppercut. Luckily it didn't land flush.
Reis moves into range and lands a nice leg kick.
Nerdspoof The 3rd looks to score with a jab to the body but Reis is just out of range.
Nerdspoof The 3rd lands a glancing blow to the side of Reis's head.
That's one minute gone in the round.
Nerdspoof The 3rd misses the shot to the body.
Reis will need to close the distance a bit before he attacks - that leg kick was thrown from too far away.
Nerdspoof The 3rd shoots in for a takedown. "I don't think so" says Reis as he avoids it easily.
Reis swings wildly with a hook that is half blocked by Nerdspoof The 3rd.
Nerdspoof The 3rd dips down and scores with a jab to the body.
Jab by Reis.
Nice cross by Nerdspoof The 3rd.
Reis keeps the fight standing with a nice sprawl.
That's three failed takedown attempts in the round for Percival Nerdspoof The 3rd. That's going to take a lot out of him.
A solid body kick from Reis.
Nice sprawl there from Reis as Nerdspoof The 3rd shoots in.
Nerdspoof The 3rd lands a jab to Reis's midsection.
Nerdspoof The 3rd throws a lazy right hand but Reis sees it coming a mile off and sidesteps it easily.
Reis now looks to counter with a shot at the body.
Reis throws out a powerful jab.
Reis has been spending a lot of time sparring his boxing in the run up to the fight, trying to sharpen up those hands and look for a knockout.
This is a great period of action - very entertaining stuff!
Nerdspoof The 3rd ducks down and throws a hook to the body.
That's two minutes gone in the round.
Nerdspoof The 3rd swings for the body but Reis moves out of range.
Reis throws a lazy uppercut
and Nerdspoof The 3rd counters with a quick right hand to the jaw.
Nerdspoof The 3rd on the wrong end of a nice jab.
Nerdspoof The 3rd needs to keep his hands up - Reis had a free shot at his head there.

Nerdspoof The 3rd manages to get an easy takedown there - catching Reis on his heels. He'll look to pass Reis's guard now, I'm sure.
Reis keeping moving, preventing Nerdspoof The 3rd from controlling successfully.
Reis is trying to control the position from the bottom.
A real slowdown in the pace of the fight for a moment, as Reis holds on and takes a little breather.
That's three minutes gone in the round.
Reis can't keep his opponent in guard - Nerdspoof The 3rd advances to half guard, no doubt looking to mount.
Nerdspoof The 3rd trying to control the action but Reis is working from the bottom.
Nerdspoof The 3rd is pressing down on Reis's thigh, looking to free his foot. Reis is holding on for now.
Nerdspoof The 3rd seems very keen to just sit and control from half guard but Reis does not like that idea so much and is remaining active off his back.
Nerdspoof The 3rd tries to pass to full mount but Reis defends it.

Nerdspoof The 3rd seems to be looking for submissions.
That's four minutes gone in the round.
The crowd are starting to boo a lack of action.
Nerdspoof The 3rd is looking for a kimura but Reis is holding onto that half guard position, so it's hard for Nerdspoof The 3rd to get the leverage.
Nerdspoof The 3rd is thinking about going for an arm triangle but he can't free his leg.
The referee wants the fighters to be more active or he's going to reset them on the feet.
Nerdspoof The 3rd is thinking about going for an arm triangle but he can't free his leg.
Nerdspoof The 3rd looking to pass the half guard. Not this time.

The referee decides to stand the fighters back up.
And that is the end of the round. The fighters go back to their corners.
Percival Nerdspoof The 3rd dominated that round.
That's the end of the interval. I'm sure that seemed a lot quicker than a minute for our two fighters! Back to the action.
A big right from Nerdspoof The 3rd misses.
Reis throws a front kick that sends Nerdspoof The 3rd stumbling back into the cage.
Nice uppercut lands for Nerdspoof The 3rd. That snapped Reis's head back.
Percival Nerdspoof The 3rd is winning the standup battle so far.
Reis ducks down and throws a hook to the body but Nerdspoof The 3rd moves away.
Reis with a nice calf kick.
Nerdspoof The 3rd lands a powerful looking uppercut that connected with his opponent's jaw.
A left lands for Nerdspoof The 3rd.
Nerdspoof The 3rd goes for a double leg but Reis avoids the attempt and the two fighters end up clinched against the cage as Reis continues to drive forward.
Reis lands a hook to the body. It's hard to tell if that hurt Nerdspoof The 3rd or not.
Nerdspoof The 3rd misses with a short punch on the inside.
Nerdspoof The 3rd gets a nice trip takedown into half guard.
The fans in attendance giving it up for the two fighters, who have really let it all hang out in the last minute or so!
Reis has no desire to be mounted, so is trying to control. Nerdspoof The 3rd is working away from the top position though.
Reis is not content to let Nerdspoof The 3rd control the position.
Nerdspoof The 3rd in half guard on the top. He's looking for a kimura... He's got it locked and he's managed to free his trapped foot. Reis tries to escape but it's on too tight and he has to tap! Great BJJ skills there from Nerdspoof The 3rd!
Ladies and gentlemen, after 1:57 of round 2, we have a winner by way of Submission (Kimura). Percival Nerdspoof The 3rd!
Percival Nerdspoof The 3rd decided to thank the fans in attendance for making a great atmosphere. It seemed to go down pretty well.
|
|
|
|
|
|
|
|
|
|
|
|
|
|
|
|
|
|
|
|
|
|
|
| S |
C
A |
G |
S |
C
B |
G |
|
S |
C |
G |
|
energy
A | B |
|
hype
A | B |
|
pop
A | B |
|
mgr
A | B |
|
FIGHT
RATING
46% |
|
|
|
|
|
|
|
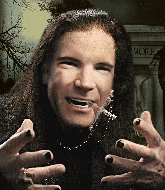
Main event
|
Coming up we have a super heavyweight MMA rules bout between Daniel Bjorkman (ranked 369 p4p, 1672 weight class) and Leonhard Klopstock (ranked 22 p4p, 86 weight class). Both fighters look fresh as a daisy as they make their way towards the cage.
 |
|
 |
| 203 cm
27
300
10 - 1 - 0 |
|
150 cm
32
300
2 - 3 - 0 |
Good wrestling
World class boxer
Granite chin |
|
Excellent grappler
Counter fighter
Granite chin |
|
| |
|
Ladies and gentlemen. This fight is 3 rounds, in the super heavyweight division.
Introducing the fighter to my left, fighting out of the red corner.
With a record of 10 - 1 - 0, fighting out of London, Daniel Bjorkman!
And introducing the fighter to my right, fighting out of the blue corner.
With a record of 2 - 3 - 0, fighting out of Rio de Janeiro, Leonhard Klopstock!
The judges for this bout are Yuuki Gou, Shirou Masuda and Sosuke Kotani.
The bell rings for round one and we are underway!
Boom, another hit is landed. "You're gunna get knocked out" taunts Bjorkman, as that shot connected.
A really sloppy takedown attempt there from Klopstock.
A punch lands to the side of Klopstock 's head but he takes it in his stride.
Bjorkman scores with the left hand. Klopstock knows he should have avoided that one.
Daniel Bjorkman seems to be the more aggressive standup fighter in this bout.
Bjorkman throws a body punch but Klopstock moves out of range.
Klopstock walks into a straight right hand from Bjorkman.
Klopstock takes a jab right on the nose. That must have hurt but he shrugs his shoulders and looks to return the favor.
Klopstock takes one to the side of the head.
It looks like Leonhard Klopstock has been cut.
Klopstock drops his hands momentarily and Bjorkman takes advantage with a crisp shot to the head.
Bjorkman misses with a double jab.
Bjorkman looks to have improved his striking defense since last time we saw him fight.
The crowd are loving this. Great action here.
Bjorkman ducks low and lands a nice hook to the body of his opponent.
Klopstock takes one to the chin there.
Bjorkman with a hook.
Bjorkman bobbing and weaving, closes the distance and lands a hook to the side of Klopstock's head.
Bjorkman comes forward and lands a shot to the body, then darts back out of range.
Bjorkman is really peppering his opponent's head with punches.
That's one minute gone in the round.
Klopstock takes one on the button.
Bjorkman throws a combination but comes up with nothing but fresh air.
Klopstock with the counter takedown but Bjorkman avoids it easily.
Bjorkman keeps his opponent at a distance with a nice jab.
Klopstock ducks right into an uppercut from Bjorkman.
Klopstock shoots in with a takedown attempt and he has Bjorkman pinned against the cage. Bjorkman gets the underhooks and manages to circle away.
Bjorkman lands a vicious shot with the stealth of a sniper and the strength of a viper. Are vipers that strong? I can think of lots of things that are stronger than a viper - not many rhyme with sniper though.
Bjorkman scores with a hook.
Bjorkman is using his reach advantage well here, landing the more effective single shots from range.

Klopstock feints and then dives in with a takedown. That was a long way out but the feint bought him enough time to close the distance and complete the takedown. Now we'll play guard for a bit and see who can get the better of that position.

Bjorkman scrambles and gets back to his feet.
Fantastic stuff here - a very entertaining period of action, which has drawn cheers from the crowd.
Klopstock takes a body punch that cleary hurt but he's trying not to show any weakness.
That's two minutes gone in the round.
Bjorkman jabs Klopstock right on the nose. Klopstock blinks but takes it well.
Klopstock drops his hands momentarily and Bjorkman takes advantage with a crisp shot to the head.
Bjorkman throws a good cross that connects.
Bjorkman throws a series of strikes that have Klopstock backpedaling.
Bjorkman thows a left - swing and a miss!
Good standup being displayed there by Bjorkman as he connects with a hook.
Bjorkman lands with a right hand.
Bjorkman lands with a cross to side of his opponent's head.
Bjorkman gets caught napping as Klopstock dives in and scores a takedown. Bjorkman manages to retain guard.
Klopstock wants to control from the top but Bjorkman keeps moving.

Klopstock thinks about going for a leg but decides against it, in order to maintain the position.
Bjorkman looking for a sweep. Not yet Bjorkman, not yet.
That's three minutes gone in the round.
Bjorkman not looking particularly offensive just at the moment.
Klopstock trying to pass the guard but can't manage it just yet.
Bjorkman is trying to control the position from the bottom.
The referee wants the fighters to be more active or he's going to reset them on the feet.
Klopstock advances position into side control!
Klopstock goes for an armbar! This could be all over! Wait, no, Bjorkman rolls with the submission and now he's on top in Klopstock's guard! Nice work there by Bjorkman!
That's four minutes gone in the round.
Klopstock tries to land a sweep but no joy.
Bjorkman will need to keep those long limbs tucked in whilst he's on the ground, to prevent any submissions.
Klopstock is working the butterfly guard. He manages to land a nice scissor sweep and is now in half guard on the top. Nice move.

Bjorkman is not content to let Klopstock control the position.
Bjorkman wants to improve his position but Klopstock is controlling well.
The fighters are starting to perspire pretty heavily.
Klopstock is looking for a kimura but Bjorkman is holding onto that half guard position, so it's hard for Klopstock to get the leverage.
And that is the end of the round. The fighters go back to their corners.
Daniel Bjorkman dominated that round.
The cut man is working on Leonhard Klopstock's cut.
Well, the break between rounds is over. Let's get back to the scrappin!
Bjorkman jabs at Klopstock's body.
Horrible takedown attempt by Klopstock or perhaps it was just good defense by Bjorkman, which made it look bad.
Klopstock shoots in for a double leg but Bjorkman sprawls well. That's going to sap some energy.
Bjorkman lands a really nice looking cross but Klopstock seems unphased.
Klopstock has a pretty nasty looking mouse under his right eye.
Klopstock takes a jab on the nose. He smiles like he loves it and keeps coming.
Klopstock on the wrong end of a decent looking cross there.
Bjorkman is really head hunting here, hardly looking to strike to the body at all.
Bjorkman scores with a reasonable looking shot to the body. Klopstock doesn't seem bothered though.
Bjorkman misses with a jab and misses with a cross straight after too.
Bjorkman jabs Klopstock right on the nose. Klopstock blinks but takes it well.
Bjorkman connects with a lovely right hand, straight down the pipe.
Bjorkman scores with a jab.
We've seen a great period of action over the last minute or so - credit to both fighters for going all out!
Klopstock takes a hook to the side of the head. I wonder if that's got his ears ringing.
Left hook, right uppercut from Bjorkman.
Klopstock fails with a takedown attempt.
Daniel Bjorkman has stuffed three takedown attempts in the round now. That's going to take a lot out of Leonhard Klopstock.
That's one minute gone in the round.
Boom, another hit is landed. "You're gunna get knocked out" taunts Bjorkman, as that shot connected.
A punch lands to the side of Klopstock 's head but he takes it in his stride.
Klopstock takes a really solid shot there but just smiles back and shrugs his shoulders.
Klopstock fails with the takedown
and Bjorkman counters with a quick right hand to the jaw.
Bjorkman fails to land with a series of punches.
Klopstock shoots in for a takedown - he's clinched up with Bjorkman but Bjorkman pushes him off and we're back to square one.
Bjorkman fakes a head shot and lands one to the body.
Bjorkman lunges at Klopstock with a hook that half lands and is half blocked by Klopstock's hand.
Bjorkman tests Klopstock's chin there with a solid looking shot.
Klopstock fails with a takedown attempt from distance.
That's two minutes gone in the round.
Klopstock takes a body punch but keeps moving.
Daniel Bjorkman is looking to keep the fight on the feet at all costs.
Klopstock is breathing heavily.
This has been an exciting period of action!
Klopstock takes a big uppercut there. He seems a bit wobbly but no, he's OK.
Bjorkman lands a body shot.
Klopstock walks into a straight right hand from Bjorkman.
Bjorkman lands a big right hand that sends Klopstock crashing to the mat! Bjorkman stays standing though and waves Klopstock back to his feet!
Klopstock is rocked!
Bjorkman darts in and lands a big hook, right on the button! Klopstock's legs crumble underneath him as he falls to the canvas! The ref tackles Bjorkman before he gets to land any more shots to his stricken foe.
Ladies and gentlemen, after 2:27 of round 2, we have a winner by way of KO (Punch). Daniel Bjorkman!
In his post fight interview, Daniel Bjorkman started talking himself up. Luckily his charisma kept the crowd on side and gave him a good reception.
|
|
|
|
|
|
|
|
|
|
|
|
|
|
|
|
|
|
|
|
|
|
|
| S |
C
A |
G |
S |
C
B |
G |
|
S |
C |
G |
|
energy
A | B |
|
hype
A | B |
|
pop
A | B |
|
mgr
A | B |
|
FIGHT
RATING
71% |
|
|
|
|
|
|
|
|
|
|
