 |
TD 11 PBP Commentary |
Undercard bout
|
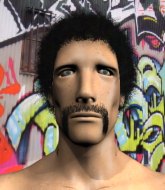
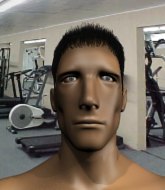
Coming up we have a featherweight MMA rules bout between Jamie Newman (ranked 3514 p4p, 5080 weight class) and Casey Silk (ranked 312 p4p, 357 weight class). Over to our ring announcer for the fighter introductions!
 |
|
 |
| 172 cm
19
145
0 - 2 - 0 |
|
176 cm
26
152
3 - 3 - 0 |
BJJ Purple Belt
Excellent boxer
Hates pizza |
|
BJJ Purple Belt
Basic striking
Granite chin |
|
| |
|
Ladies and gentlemen. This fight is 3 rounds, in the featherweight division.
Introducing the fighter to my left, fighting out of the red corner.
With a record of 0 - 2 - 0, fighting out of Montreal, Jamie Newman!
And introducing the fighter to my right, fighting out of the blue corner.
With a record of 3 - 3 - 0, fighting out of New York, Casey Silk!
The judges for this bout are John Roberts, Chad Campbell and Reed Andrews.

The bell rings for round one and we are underway!
Silk lunges in with swinging rights and lefts but Newman circles away quickly and effectively.
Newman tries to shoot in for a takedown. He's got hold of a leg but Silk swivels and escapes.
Newman scores with a jab to the body.
We've been told by Newman's head coaches at Canadian Combat Academy that he's been working on his takedown defense in preparation for this fight.
Silk takes a head kick and shrugs it off.
Nice takedown defense from Silk. No joy for Newman on that attempt.
A little jabbing left from Silk on the counter but it doesn't find it's target.
Silk tries a switch kick but it misses it's target.
Newman is looking to take this fight into the clinch.
A swing and a miss from Silk.
Newman looked to counter with a high kick but didn't commit.
Silk tries for a takedown but Newman circles away easily
and Newman counters with a one-two to the body.
Casey Silk seems to be the more aggressive standup fighter in this bout.
Silk throws a head kick that misses and slips in the process. He scrambles back to his feet and the fighters circle.
Newman shoots in for a takedown but Silk shows good takedown defense there and keeps this one on the feet.
That's three failed takedown attempts in the round for Jamie Newman. That's going to take a lot out of him.
No luck with that takedown attempt from Silk.

Newman closes the distance and presses his opponent up against the cage.

That's one minute gone in the round.
Silk effectively controlling the action here.
The pace really dropping off here, momentarily.
Silk lands a body shot.
Newman with an attempt at a knee that misses.
Silk tries to score a body lock takedown but Newman shows good agility there to stay on his feet.
Newman keeps the fight in the clinch, despite Silk's efforts to push away.
Newman prevents a body shot from Silk.

That's two minutes gone in the round.
A few boos can be heard. I'm sure they will multiply if the fighters don't pick up the pace.
Silk stalling.
Newman lands a glancing elbow in the clinch.
Silk is defending well against a takedown attempt.
Silk misses with a hook to the ribs.
Newman effectively controlling the action here.

Newman has hold of one of Silk's legs. Silk is fighting the takedown attempt but Newman gets the trip and lands the takedown into guard.
Newman trying to pass the guard but can't manage it just yet.
Newman showing good wrestling skills to control the position.
Silk seems keen to control rather than go for a submission, at least for now.

That's three minutes gone in the round.
Newman preventing the sweep.
Silk has a closed guard, preventing anything of note from happening. Perhaps he's looking to stall.

Newman decides he's had enough of playing guard and decides to stand. Come on Silk, up you get!
Silk wants to clinch up but Newman keeps it at a distance.
Newman displays some good footwork, moving neatly out of range as Silk throws out the jab.
Silk misses with a right hand
enabling Newman to counter with a crisp jab.
Silk fails to land with a series of punches.
Silk throws a combination that misses
and Newman counters with a leg kick that reverborates around the arena.

That's four minutes gone in the round.
Some wild striking there from Newman.
Newman throws a looping left and ducks down for a takedown. He's got his arms around Silk's waist but Silk gets an underhook and avoids the takedown by throwing Newman off to one side.
Silk throws a body punch but Newman moves out of range.
Newman shoots in and drives through. Silk sprawls well.
A slow jab from Silk misses its intended target.
No luck for Newman with that takedown attempt.
Silk loads up on a big right hand but Newman slips the punch.
Silk throws a jab but it's blocked by Newman.
Newman pushes forward with a 1-2 combination that forces Silk back to the cage. Newman follows up with a solid lead hook to the liver.
This has been an exciting period of action!

Newman gets caught flat footed, as Silk shoots in with a quick takedown into guard.

Newman pushes Silk off for just long enough to get back to his feet. Very athletic spring there.
Silk misses with an uppercut. Newman saw that one coming.
And that is the end of the round. The fighters go back to their corners.
Jamie Newman dominated that round.
That's time! Back to the action!

Newman keeps the fight standing with a nice sprawl.
Silk changes levels and looks for a double leg takedown. Newman tries to avoid it but Silk manages to keep hold of a leg and drag Newman to the ground. Newman escapes though and pops straight back up to his feet.
Newman lands three nice shots there - that looked like it hurt!
Newman looking to shoot here. He's gone for it and he's landed a takedown into side control! Oh, that's bad for Silk!
Newman is really dominating this fight. Is there anything that Silk can do to turn this around?

Newman tries for a kimura but Silk is defending well.
Silk gets one leg under and gets the fight to half guard.
Silk tries to roll over but Newman keeps him under control.
That's one minute gone in the round.
Newman is taking a breather. Silk says something to him but it's hard to make out. Perhaps he's telling him to get on with it and actually do something.
Silk gets full guard.
Silk is trying to hold Newman in close to prevent damage but Newman has managed to pass into half guard.
Newman is trying to control. Silk wants to improve his position but can't escape this time.
Newman prevents Silk from improving his position.
That's two minutes gone in the round.
There's not a lot going on here and the crowd are letting the fighters know they're not willing to tolerate a lack of action.
Newman thumps the canvas. Not on purpose obviously - he just missed Silk's head.
Silk keeping his head moving to avoid the ground and pound.
Newman content to control rather than advance.
Newman wants to take a breather but Silk is having none of it.
Silk wants to improve his position but Newman is controlling well.
We've had a lack of effective grappling in the last minute or so, which could well see a referee standup.
Newman is looking to take a break and control but Silk is keeping him honest, looking to work from the bottom.

The referee has motioned to the fighters to stand back up.
That's three minutes gone in the round.
Silk fakes high and swings low for a body shot but Newman manages to avoid it.
Newman shoots in and gets a takedown into Silk's guard.

Silk has an omoplata and is looking to use it perhaps as a submission or perhaps to transition. Newman is in a bit of discomfort here, but he's managed to free himself and has dived into side control! That didn't work out too well for Silk.
Silk struggling a bit here.
Silk manages to get one leg in to regain half guard.
Silk is looking for a sweep. Newman is wise to his cunning plan and keeps the top position.
That's four minutes gone in the round.
Silk blocking the ground and pound attempt from Newman.
Silk is trying to get back to full guard.
Newman throwing shots but Silk is blocking nicely.
Newman is looking to take a break and control but Silk is keeping him honest, looking to work from the bottom.
Silk is looking to improve his position.
Boooooooooooooooooooo!!! God, this has been a terrible round. Come on you two, sort yourselves out!
And that is the end of the round. The fighters go back to their corners.
Jamie Newman dominated that second round.
The corners get their ten second warning. Both fighters stand from their stools and stare each other down, ready to get back to the action. This is the final round!

Newman shoots for a double leg takedown but Silk sprawls well. He's pushed Newman's face into the mat and manages to get back to his feet relatively easily.
Newman misses with a half-hearted attempt at a head kick.
Silk throws a series of punches but Newman moves out of range.
Silk fails with a takedown attempt.
Silk shoots in looking for a takedown. Newman tries to sprawl out of it but Silk keeps driving through. The fighters are pinned against the cage. Newman manages to get underhooks and after a bit of a struggle, circles away and we're back to standing.
Silk looks for a takedown. He's got it. We're now in half guard.
We've had a slow start to the round here - hopefully the action picks up.
Newman has no desire to be mounted, so is trying to control. Silk is working away from the top position though.
Silk is looking to take a break and control but Newman is keeping him honest, looking to work from the bottom.
That's one minute gone in the round.
Newman is trying to stand up here but Silk is controlling him well.
Newman wants to improve his position but Silk is controlling well.
Newman taking some punishment here, with Silk in his half guard.
Newman makes his way to full guard. A much better position for Newman.
Silk slips nicely into half guard.
Newman tries to strike from the bottom but it doesn't land.
Newman is looking to escape.
Newman is refusing to be controlled, as Silk sits in half guard.
That's two minutes gone in the round.
The crowd are showing their displeasure at the lack of action as loud boos ring out around the arena.
Silk winds up and cracks Newman with a swinging punch to the side of the head.
Silk wants to pass to mount but Newman is defending the position.
Newman tries to roll over but Silk keeps him under control.
The fighters are pressed up against the cage, both looking to find a bit of space to work.
Silk missing with some ground and pound from the half guard.
Silk seems like he's working for an arm triangle here. He's freed his trapped foot and he's rotating nicely. Newman is in big trouble! He's tapping out! This one is aaaaaaaaaaaall over!
Ladies and gentlemen, after 2:59 of round 3, we have a winner by way of Submission (Arm Triangle). Casey Silk!
|
|
|
|
|
|
|
|
|
|
|
|
|
|
|
|
|
|
|
|
|
|
|
| S |
C
A |
G |
S |
C
B |
G |
|
S |
C |
G |
|
energy
A | B |
|
hype
A | B |
|
pop
A | B |
|
mgr
A | B |
|
FIGHT
RATING
45% |
|
|
|
|
|
|
|
Undercard bout
|
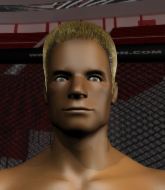
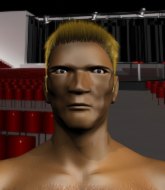
Coming up we have a featherweight MMA rules bout between Giacomo Bandolero (ranked 4688 p4p, 2045 weight class) and Ankle Breaker (ranked 351 p4p, 194 weight class). Bandolero's entrance music is Bandolero. A fine choice. The atmosphere really building for this one as we go over to our ring announcer for the fighter introductions!
 |
|
 |
| 166 cm
21
138
3 - 5 - 0 |
|
167 cm
29
142
8 - 6 - 0 |
BJJ Brown Belt
Excellent boxer
Very strong |
|
Good wrestler
Brawler
Solid chin |
|
| |
|
Ladies and gentlemen. This fight is 3 rounds, in the featherweight division.
Introducing the fighter to my left, fighting out of the red corner.
With a record of 3 - 5 - 0, fighting out of Helsinki, Giacomo Bandolero!
And introducing the fighter to my right, fighting out of the blue corner.
With a record of 8 - 6 - 0, fighting out of Las Vegas, Ankle Breaker!
The judges for this bout are Eddie Farnsworth, Alyssa Summers and Russell Pearce.
The bell rings for round one and we are underway!
Breaker swats away the attempt to clinch by Bandolero.
Breaker gets a takedown into half guard.
Breaker is looking for a kimura but he's never going to get it from there.
Bandolero tries to roll over but Breaker keeps him under control.
Bandolero is looking to sinch up a guillotine here but Breaker pulls his head out easily.
We've had a slow start to the round here - hopefully the action picks up.
Breaker missing with some ground and pound from the half guard.
Bandolero looking for submissions off his back.
Breaker scores with a couple of good hammerfists.
That's one minute gone in the round.
Bandolero wants to get back to full guard.
Breaker is trying to work for a kimura but Bandolero is defending well.
Bandolero is looking to sinch up a guillotine here but Breaker pulls his head out easily.
Bandolero is looking to regain full guard. Not this time though.
Breaker lands strikes from half guard.
Breaker prevents Bandolero from standing back up.
Breaker is working for a submission of some sort.
Breaker lands with a punch from half guard.
Breaker is nestled in close to Bandolero, controlling him well. He's worked in a nice elbow to the side of the head as well, for good measure.
The fighters are pressed up against the cage, both looking to find a bit of space to work.
Breaker winds up and cracks Bandolero with a swinging punch to the side of the head.
That's two minutes gone in the round.
Breaker throwing punches and elbows but they're not doing any damage.
Bandolero is looking to sinch up a guillotine here but Breaker pulls his head out easily.
Breaker is trying to work for a kimura but Bandolero is defending well.
Bandolero works his way to full guard. Good work.
Bandolero has a loose triangle. He'll be looking to tighten that up but Breaker can see exactly what he's planning and manages to posture up and free himself.
Breaker is working the ground and pound from guard. He might want to try advancing position though to get more of an impact.
Bandolero looking for submissions off his back, moving his hips, looking for an opening.
Bandolero looking for submissions off his back, moving his hips, looking for an opening.
Breaker drops back looking for a leg! Bandolero is in trouble here! The fighters roll with the hold and Bandolero manages to kick Breaker off! Breaker jumps back into Bandolero's guard.
That's three minutes gone in the round.
Breaker seems content to control from guard here. He's going to have to remain active though if he doesn't want to get stood back up.
Bandolero working away from the bottom but not quite defensive enough there because Breaker has passed into half guard!
Breaker moves into side control, avoiding a weak kimura attempt from Bandolero.
Bandolero is looking for a sweep.
Breaker is trying to land an Americana. He has the arm isolated but Bandolero is keeping cool and he's avoided the danger for now.
Bandolero can't do much from the bottom here.
That's four minutes gone in the round.
Breaker tries for a kimura but Bandolero is defending well.
Breaker works to advance to full mount. Bandolero defends for a few seconds but eventually he succumbs.
Breaker looking to secure an arm triangle but Bandolero defends it well.
Bandolero tries to reverse the position but Breaker maintains control.
Breaker lands an elbow that was bordering on illegal but the referee lets it go with a warning.
Breaker has the superior BJJ but he's also working some ground strikes into his gameplan.
The crowd thankful this round is nearly over.
Bandolero is looking to improve his position but Breaker isn't that keen on the idea.
Breaker manages to capitalize on a mistake by Bandolero to take his back!
Breaker trying to control.
And that is the end of the round. The fighters go back to their corners.
Ankle Breaker dominated that round.
That's the end of the interval. I'm sure that seemed a lot quicker than a minute for our two fighters! Back to the action.
Breaker gets caught flat footed, as Bandolero shoots in with a quick takedown into guard.
Bandolero throws a big elbow that misses.
Breaker looking for submissions off his back, moving his hips, looking for an opening.
Breaker has been the more effective fighter overall so far.
Breaker is trying to control the position but Bandolero postures up.
Bandolero trying to control the position from guard on top but Breaker is wriggling around, looking for whatever he can.
Breaker has a loose triangle. He'll be looking to tighten that up but Bandolero can see exactly what he's planning and manages to posture up and free himself.
Bandolero distracts Breaker with his right hand and drops a big elbow with his other arm.
We've had a slow start to the round here - hopefully the action picks up.
Breaker keeping moving, preventing Bandolero from controlling successfully.
Breaker trying to control the position here.
Bandolero in full guard, throwing the ground and pound. No damage this time.
That's one minute gone in the round.
Bandolero trying to control but Breaker is working from the bottom.
Breaker escapes his hips to the side and looks to be working for an armbar. Bandolero gives him a little smile and shakes his head. No chance.
Bandolero trying to control the position from guard on top but Breaker is wriggling around, looking for whatever he can.
Ankle Breaker has got the better of the ground game so far.
Breaker managing to control the position.
Breaker throwing short punches from the bottom.
Breaker working from the bottom, still in full guard. He's managed to get a loose triangle. Bandolero doesn't seem to be doing much to defend here, obviously he feels comfortable in the position. Bandolero manages to throw the legs off his shoulder and he's back into guard - no problem.
Bandolero loading up with the ground and pound but he's missing more than he's landing in this flurry.
That's two minutes gone in the round.
Bandolero got a little sloppy there for a moment and Breaker has worked his way into a loose triangle - can he finish it?! No, Bandolero has managed to get both his arms back between Breaker's legs - danger averted.
The ref warns both fighters not to hold the cage as they work up against the meshing.
Bandolero wants to control from the top but Breaker keeps moving.
Breaker looks to be working for a triangle here. Oh, it looks like he might have it! Bandolero has picked Breaker up and slammed him! Breaker can't keep hold of the triangle and Bandolero manages to pass to side control!
Breaker is positioning himself to get back to half guard.
Breaker can't do much from the bottom here.
Bandolero landing a few strikes.
Bandolero tries for an arm triangle. That looks pretty tight to me. Is this one over!?! Possibly, maybe, no Bandolero has let go of the choke. Obviously it wasn't as tight as we thought!
Bandolero wants to work for a kimura but he's foiled early by Breaker, who protects the arm well.
That's three minutes gone in the round.
Bandolero looking for an arm triangle but it's way too loose to do anything.
Breaker is trying to control Bandolero's posture but Bandolero avoids it.
Bandolero tries for an arm triangle. That looks pretty tight to me. Is this one over!?! Possibly, maybe, no Bandolero has let go of the choke. Obviously it wasn't as tight as we thought!
Bandolero tries for a kimura but Breaker is defending well.
Breaker is looking to reverse the position.
Breaker manages to get one leg in to regain half guard.
Bandolero missing with some ground and pound from the half guard.
That's four minutes gone in the round.
The crowd are starting to boo a lack of action.
Breaker is trying to control but can't.
Breaker is controlling Bandolero's position as best he can from this difficult position.
Breaker regains full guard. Nicely done.
Breaker has a loose triangle. He'll be looking to tighten that up but Bandolero can see exactly what he's planning and manages to posture up and free himself.
Breaker is looking for a guillotine. You can't force these things though and Bandolero defends well.
Bandolero looks to be in better condition than last time we saw him fight. Obviously he's been working hard on his cardio.
Breaker working from the bottom, still in full guard. He's managed to get a loose triangle. Bandolero doesn't seem to be doing much to defend here, obviously he feels comfortable in the position. Bandolero manages to throw the legs off his shoulder and he's back into guard - no problem.
Boooooooooooooooooooo!!! God, this has been a terrible round. Come on you two, sort yourselves out!
Breaker is working actively off his back, looking to secure an arm or perhaps work for a triangle.
Breaker is working actively off his back, looking to secure an arm or perhaps work for a triangle.
And that is the end of the round. The fighters go back to their corners.
A close second round but Ankle Breaker will probably get the nod - 10:9.
The fighters' corners scream their final instructions, as the referee calls time. Here we go, back to the action! Ladies and gentlemen, this is the final round!
Bandolero decides to change it up a bit and drives through with a nice takedown into half guard.
Breaker avoiding damage under a succession of punches from Bandolero.
Breaker has no desire to be mounted, so is trying to control. Bandolero is working away from the top position though.
Bandolero seems to be working for a kimura but Breaker defends the submission attempt.
Breaker slips a foot under and gets full guard. Nice work.
We've had a slow start to the round here - hopefully the action picks up.
Breaker controls Bandolero momentarily but Bandolero frees himself.
Breaker has momentary wrist control but Bandolero slips an elbow through the middle.
That's one minute gone in the round.
Bandolero avoids a guillotine attempt easily.
Bandolero postures up as if he's going to throw some strikes but drops back for an ankle! Breaker is in big trouble! He looks ready to tap! But no, he's escaped and dives on top of Bandolero, into his guard.

Bandolero looking for submissions from the bottom here. Moving his hips around, possibly looking for an armbar.
Breaker missing there with some ground and pound from the guard.
Bandolero looking for submissions from the bottom but instead Breaker passes into side control.
Bandolero takes an elbow right on the bridge of the nose and winces in pain.
Breaker is chipping away with strikes.
That's two minutes gone in the round.
The referee tells the fighters to keep busy.
Breaker tries for a kimura. Not really close to a finish though.
Bandolero is looking to reverse the position.
Breaker scores with a couple of short elbows.
Bandolero is not content to let Breaker control the position.
Bandolero is looking to regain half guard here but Breaker keeps moving and retains side control.
Bandolero is putting a lot of effort into getting back to his feet here.
Breaker in side control, trying to ground and pound but not landing this time.
That's three minutes gone in the round.
Bandolero tries to buck Breaker off but Breaker is having none of it.
Bandolero stops Breaker from passing to mount.
Breaker in side control lands a nice looking series of punches and elbows.
Bandolero tries to bench press Breaker off him but Breaker keeps the position.
Breaker lands a few punches from side control.
Bandolero can't do much from the bottom here.
Breaker is looking to finish here, going for an Americana. Bandolero knows the correct defense though, so he's OK.
Breaker working the ground and pound from side control.
Bandolero is trying to get back to half guard.
That's four minutes gone in the round.
Breaker thinks about going for a far side armbar but bails out and retains the dominant position instead.
Breaker is working for what looks like an arm triangle here. Bandolero is trying to escape and Breaker transitions quickly into an armbar! He's slapped it on tight and Bandolero is forced to tap! Nice work there by Breaker! Very nice indeed!
Ladies and gentlemen, after 4:30 of round 3, we have a winner by way of Submission (Armbar). Ankle Breaker!
Ankle Breaker seemed lost for words in his post fight interview but he remembered to thank his fans and directed everyone to his website.
|
|
|
|
|
|
|
|
|
|
|
|
|
|
|
|
|
|
|
|
|
|
|
| S |
C
A |
G |
S |
C
B |
G |
|
S |
C |
G |
|
energy
A | B |
|
hype
A | B |
|
pop
A | B |
|
mgr
A | B |
|
FIGHT
RATING
45% |
|
|
|
|
|
|
|
Undercard bout
|
Coming up we have a welterweight MMA rules bout between Slon Mamontov (ranked 2907 p4p, 2376 weight class) and Rylan Wheeler (ranked 367 p4p, 307 weight class). Both fighters look fresh as a daisy as they make their way towards the cage.
 |
|
 |
| 180 cm
24
179
3 - 0 - 0 |
|
178 cm
21
173
4 - 2 - 0 |
Good wrestling
Brawler
Cardio machine |
|
BJJ Purple Belt
Excellent boxer
Heavy handed |
|
| |
|
Ladies and gentlemen. This fight is 3 rounds, in the welterweight division.
Introducing the fighter to my left, fighting out of the red corner.
With a record of 3 - 0 - 0, fighting out of Rio de Janeiro, Slon Mamontov!
And introducing the fighter to my right, fighting out of the blue corner.
With a record of 4 - 2 - 0, fighting out of Los Angeles, Rylan Wheeler!
The judges for this bout are Columbo Gatti, Lou da Vinci and Jonathan Paton.
The bell rings for round one and we are underway!
Nice takedown defense from Wheeler. No joy for Mamontov on that attempt.
Wheeler scores with a jab to the body.
Mamontov doesn't succeed with the takedown
and Mamontov takes a counter punch right on the button for his troubles.
We've been hearing reports that Mamontov has been drilling takedowns in recent sessions so let's see if that has an impact on the result of this fight.

Oooooh!!! Wheeler has knocked Mamontov down with a huge combo! Wheeler steps away and waves a wobbly Mamontov back to his feet! This one might not go much longer!
 Mamontov is rocked! Mamontov is rocked!
 It looks like Slon Mamontov has been cut. It looks like Slon Mamontov has been cut.
Mamontov gets a double leg takedown into Wheeler's guard.
Oh Mamontov is still in real trouble! Will he be able to recover?!!
This is a great period of action - very entertaining stuff!
Wheeler wants to stand up but Mamontov is controlling him.
Wheeler keeping moving, preventing Mamontov from controlling successfully.
Mamontov seems to have got his legs back now.
Mamontov is stalling in the full guard.
Mamontov trying to control the position from guard on top but Wheeler is wriggling around, looking for whatever he can.
Mamontov slows down the pace of the fight, as he sits in guard.
That's one minute gone in the round.
Wheeler is trying to stand up but he's not managed so far.
Mamontov trying to pass the guard but can't manage it just yet.
Mamontov stops Wheeler from standing up.
The referee decides to stand the fighters back up.
Mamontov looks frustrated there after his takedown attempt is stuffed easily.
That's three failed takedown attempts in the round for Slon Mamontov. That's going to take a lot out of him.
Mamontov fails to land the takedown.
Wheeler looks like he wants to counter punch here.
Wheeler throws a jab but it's blocked by Mamontov.
Mamontov half commits to a counter takedown before pushing away, out of range.
A telegraphed takedown attempt from Mamontov is defended easily by Wheeler.
That's two minutes gone in the round.
There's not a lot going on here and the crowd are letting the fighters know they're not willing to tolerate a lack of action.
Mamontov shoots in for a double leg but Wheeler sprawls well. That's going to sap some energy.
Mamontov fails with the takedown
letting Wheeler counter with a right hand.
Wheeler connects with a body shot.
Slon Mamontov seems to be the more aggressive standup fighter in this bout.
Mamontov with a poor takedown
and Mamontov takes a counter punch right on the button for his troubles.
Mamontov with a poor takedown
and Wheeler counters nicely by changing levels and landing a hook to the body.
Mamontov shoots and misses
and Wheeler counters with a crisp right that sends Mamontov to the canvas! Wheeler follows up with punches from the mount and this one is all over!
Ladies and gentlemen, after 2:47 of round 1, we have a winner by way of TKO (Strikes). Rylan Wheeler!
|
|
|
|
|
|
|
|
|
|
|
|
|
|
|
|
|
|
|
|
|
|
|
| S |
C
A |
G |
S |
C
B |
G |
|
S |
C |
G |
|
energy
A | B |
|
hype
A | B |
|
pop
A | B |
|
mgr
A | B |
|
FIGHT
RATING
43% |
|
|
|
|
|
|
|
Undercard bout
|
Coming up we have a welterweight MMA rules bout between Derrick Barkley (ranked 2858 p4p, 701 weight class) and Bimbo Slaissi (ranked 358 p4p, 91 weight class). Both fighters look fresh as a daisy as they make their way towards the cage.
 |
|
 |
| 189 cm
23
186
4 - 4 - 0 |
|
180 cm
22
180
5 - 1 - 0 |
BJJ Blue Belt
World class boxer
Very strong |
|
Good wrestler
World class boxer
Granite chin |
|
| |
|
Ladies and gentlemen. This fight is 3 rounds, in the welterweight division.
Introducing the fighter to my left, fighting out of the red corner.
With a record of 4 - 4 - 0, fighting out of Las Vegas, Derrick Barkley!
And introducing the fighter to my right, fighting out of the blue corner.
With a record of 5 - 1 - 0, fighting out of St Petersburg, Bimbo Slaissi!
The judges for this bout are Alyssa Summers, Eddie Farnsworth and Lou da Vinci.
The bell rings for round one and we are underway!
Slaissi misses with a straight right.
It looked like Barkley wanted to counter with a hook but didn't fully commit.
Barkley jabs Slaissi to the body, keeping him at a distance.
Slaissi misses with an uppercut
and Barkley cracks him with a counter punch right on the button.
A nice leg kick lands there from Slaissi.
Barkley uses good head movement to avoid the hook from Slaissi.
Slaissi misses with a body shot
and Barkley counters with a left to the body.
Slaissi is looking to land body kicks.
Slaissi just misses with a punch to the body.
It looked like Barkley wanted to counter with a hook but didn't fully commit.
Barkley uses decent footwork to sidestep a right hand from Slaissi.
It looked like Barkley was trying to counter with a body shot coming off that last attack from Slaissi.
We've had a slow start to the round here - hopefully the action picks up.
Barkley will need to close the distance a bit before he attacks - that leg kick was thrown from too far away.
Slaissi uses some good footwork to avoid the body shot by Barkley.
Barkley takes a shot to the body in his stride.
Barkley misses with a body shot. Nice footwork from Slaissi.
Slaissi connects with an inside leg kick.
That's one minute gone in the round.
Slaissi lands a pitter patter jab to the forehead of his opponent.
Boom, another hit is landed. "You're gunna get knocked out" taunts Slaissi, as that shot connected.
Barkley moves out of range of the strikes.
Slaissi with a nice calf kick.
Barkley displays some good footwork, moving neatly out of range as Slaissi throws out the jab.
Slaissi shuffles to his left behind two crisp jabs. Barkley eats them both and turns towards Slaissi to reposition himself and eats a stinging right hand-left hook combo.
Slaissi uses some good footwork to avoid the body shot by Barkley.
Barkley misses with a straight right.
A little jabbing left from Slaissi on the counter but it doesn't find it's target.
Slaissi lands a leg kick and bounces back out of range.
Slaissi misses with a low kick.
Barkley drops his hands and takes a jab to the jaw for his troubles.
A low kick from Slaissi misses
and Barkley counters with a quick right hand to the jaw.
That's two minutes gone in the round.
This has been an exciting period of action!
Slaissi throws a body shot but no joy.
Barkley throwing a counter right hand but Slaissi manages to avoid it.
Slaissi with a nice calf kick.
A big left from Slaissi misses.
Slaissi throws a jab but it's blocked by Barkley.
Barkley appears to be looking for a counter punch to the body.
Bimbo Slaissi seems to be the more aggressive standup fighter in this bout.
Barkley on the wrong end of an overhand right that came out of nowhere.
Barkley shapes like he's going to throw a leg kick but settles back down.
A jab from Slaissi finds it's way through Barkley's defenses.
We've been told by Barkley's head coaches at Primal Concrete Gym that he's been working on his takedown defense in preparation for this fight.
Slaissi looks to throw the jab but Barkley is out of range.
Barkley swung with a counter punch to the body but it didn't connect.
Barkley misses with a wild body shot.
Barkley lands with a right hand.
Barkley slips under a jab from Slaissi.
Slaissi misses with a low kick.
Barkley tries to move into range but Slaissi moves to the side and lands with a nice right hand.
That's three minutes gone in the round.
Slaissi throws a body shot but no joy.
Barkley blocks a head kick by Slaissi.
Slaissi throws a lazy uppercut
and Barkley counters with a nice body shot.
Slaissi connects with a leg kick.
Slaissi fakes a jab and scores with a low kick.
Slaissi needs to keep his hands up - Barkley had a free shot at his head there.
Slaissi misses with a wild combination.
Barkley throws a hook but Slaissi avoids it easily.
Slaissi checks a low kick from Barkley.
Slaissi throws a right and a left that both miss.
Slaissi throws a hook to the side of Barkley's head but Barkley sees it coming and ducks under it beautifully.
That's four minutes gone in the round.
A jab lands there for Slaissi.
Slaissi looks to throw the jab but Barkley is out of range.
Barkley walks straight into an uppercut. Luckily it didn't land flush.
This has been an exciting period of action!
Barkley loads up on a big right hand but Slaissi slips the punch.
Slaissi misses with a right hand
and Barkley counters with an outside leg kick.
Slaissi misses with a straight left.
A little feinted left hand from Barkley on the counter but he doesn't commit to it.
Barkley on the wrong end of a nice low kick. He's acting like it's no big deal but he doesn't want to take many more of those.
Barkley takes a shot to the nose. Hopefully that hasn't broken it.
Slaissi is landing a lot of head punches in this opening round! Barkley had better start moving his head a bit unless he wants his face to turn into mush.
Slaissi scores with a crisp jab that stopped Barkley in his tracks.
Barkley swings for the body but Slaissi moves out of range.
A little jabbing left from Slaissi on the counter but it doesn't find it's target.
A shot to the body from Slaissi misses
and Barkley counters with a straight right hand.
Barkley is hobbling a little on that front leg after taking quite a few leg kicks so far in this fight.
Barkley ducks under an overhand right and circles away with a smile on his face.
Barkley throwing a counter right hand but Slaissi manages to avoid it.
And that is the end of the round. The fighters go back to their corners.
Bimbo Slaissi dominated that round.
That's the end of the interval. I'm sure that seemed a lot quicker than a minute for our two fighters! Back to the action.
Slaissi fakes a couple of low kicks, before throwing one on the third attempt. It connects and Barkley has to reset his feet before getting ready to engage.
Slaissi throws an off balance right hand
and Barkley connects with a straight left hand counter down the middle.
A nice leg kick from Slaissi, right into the meat of the thigh.
Barkley staying out of range there.
A quick step to the side and Barkley tries to counter with a shot to the body but it doesn't connect.
Barkley moves out of range of the body kick from Slaissi.
Barkley is using his height advantage well here, landing a good percentage of his punches.
Barkley staying out of range there.
Barkley misses the shot to the body.
Barkley throws a body shot but no joy.
Barkley takes one on the chin but seems OK.
We've had a slow start to the round here - hopefully the action picks up.
Slaissi lands with a nice body punch.
Slaissi scores with a nice head shot.
Slaissi throws a monster uppercut resembling something out of street fighter but it doesn't land.
A telegraphed right hand from Slaissi misses the target.
That's one minute gone in the round.
Donk. Barkley catches Slaissi right on the button with a cross.
Barkley tries to land with a swinging hook to the body but Slaissi was well out of range. Poor timing from Barkley.
Slaissi looks like he wants to counter punch here.
Barkley takes a swing at Slaissi's ribcage but misses.
Barkley bobs and weaves well there to avoid the strikes.
A counter left hand to the body from Barkley misses its target.
Slaissi lands with a thumping leg kick.
Barkley blocks the body kick.
It looked like Barkley wanted to counter with a hook but didn't fully commit.
Slaissi thows a leg kick but Barkley checks it
enabling Barkley to counter with a crisp jab.
The fighters circling - Slaissi throws out the jab but it was never going to land.
It looked like Barkley was looking amped, ready to throw a big counter but didn't commit.
Slaissi digs a good body shot into Barkley's ribs.
Barkley checks a leg kick nicely.
Barkley is looking to counter punch.
Barkley throws a body punch but Slaissi moves out of range.
Slaissi connects with a solid leg kick.
Slaissi has been the more effective fighter overall so far.
That's two minutes gone in the round.
Slaissi throws a jab but it's blocked by Barkley.
Slaissi dips to his left and cracks Barkley with an uppercut!
Barkley swings widly with a right hand
and Slaissi counters with a good right hand that lands right on the jaw.
The crowd are loving this. Great action here.
Slaissi shuffles to his left behind two crisp jabs. Barkley eats them both and turns towards Slaissi to reposition himself and eats a stinging right hand-left hook combo.
Slaissi throws a good cross that connects.
Slaissi throws a leg kick
and Barkley finishes the little exchange by landing a big kick to the body.
Barkley takes one on the chin but seems OK.
Slaissi on the wrong end of a decent looking cross there.
A big left from Slaissi misses.
Barkley fires out a quick counter leg kick but Slaissi just manages to avoid it.
Barkley misses the jab.
Slaissi misses with a leg kick.
Barkley is looking to counter with a shot to the body.
A bone on bone clash there as Barkley blocks the leg kick.
That's three minutes gone in the round.
Slaissi dances in quickly and lands a nice inside leg kick on Barkley. That did some damage!
Slaissi pushing out the jab but it's not landing.
Barkley misses the shot to the body.
Barkley throws a hook but Slaissi blocks it.
Slaissi avoids the body shot from Barkley.
Slaissi throws an off balance right hand
and Barkley counters with a straight right hand.
Slaissi scores with a sloppy right hand. Barkley should have avoided that one.
Slaissi throws a lazy uppercut
enabling Barkley to counter with a crisp jab.
Slaissi throws a poor cross that misses
and Barkley counters with a right hand to the body.
Slaissi looks to score with a jab to the body but Barkley is just out of range.
Slaissi tests Barkley's chin there with a solid looking shot.
Barkley connects with a leg kick. He turned his hip over nicely there.
That's four minutes gone in the round.
Slaissi lunges in with swinging rights and lefts but Barkley circles away quickly and effectively.
The crowd cheering loudly, showing their appreciation for the quality fight we're seeing here.
Slaissi swings and misses with a shot to the body
and Barkley counters with a crisp hook to the side of the head.
Slaissi looks to land a right hand but Barkley moved out of range.
Barkley tries a low kick but Slaissi avoids it.
Slaissi throws a series of punches but Barkley moves out of range.
Barkley throws a lazy right hand but Slaissi sees it coming a mile off and sidesteps it easily.
Slaissi pushing out the jab but it's not landing.
Slaissi lands a beauty of a right hand that gets the crowd cheering.
Slaissi throws a lazy head kick
and Barkley counters with a good right hand that lands right on the jaw.
Slaissi thows a leg kick but Barkley checks it
and Barkley counters with a straight punch to the midsection.
And that is the end of the round. The fighters go back to their corners.
Bimbo Slaissi showed his class in that round. I'd imagine he'll take it on all the scorecards.
The fighters' corners scream their final instructions, as the referee calls time. Here we go, back to the action! This is the final round!
Barkley scores with a reasonable looking shot to the body. Slaissi doesn't seem bothered though.
Slaissi bobs and weaves well there to avoid the strikes.
Barkley thuds a left hand into Slaissi's body.
Slaissi has his front leg slapped to the side - a nice low kick landing there from Barkley.
Slaissi misses with a low kick.
It looked like Barkley wanted to counter with a hook but didn't fully commit.
Barkley looks like he's developed a pretty tasty lump over his left eye. He'll need to avoid taking much more damage to that.
Barkley slips a jab from Slaissi.
It looked like Barkley wanted to counter with a hook but didn't fully commit.
Barkley slips under a jab.
Barkley keeping at a good range here, avoiding a leg kick.
Barkley was looking to counter that last move with a shot to the body but he didn't commit.
We've had a slow start to the round here - hopefully the action picks up.
Slaissi takes a shot right to the liver - Bas would have been proud of that punch.
Slaissi throws a poor cross that misses
enabling Barkley to counter with a crisp jab.
Barkley throws an off balance right hand
and Slaissi counters with a stiff right hand.
A cross from Slaissi lands.
We are yet to see a takedown attempt from Slaissi in the fight. On paper you would think he is the more dominant ground fighter so let's see if these unusual tactics pay off.
That's one minute gone in the round.
Barkley ducks under a wild hook from Slaissi.
A big left from Slaissi misses.
A big left from Barkley misses.
Some bone on bone action there as Slaissi checks a low kick. Luckily it wasn't a particularly hard one.
Slaissi misses with a body kick.
Barkley was looking to counter that move with a punch but didn't quite pull the trigger.
Nice shot by Slaissi.
Slaissi tries to land with a swinging hook to the body but Barkley was well out of range. Poor timing from Slaissi.
Slaissi ducks down and throws a hook to the body.
Slaissi misses with a hook.
Barkley was looking to counter that move with a punch but didn't quite pull the trigger.
Barkley swings for the body but Slaissi moves out of range.
Bimbo Slaissi seems to be getting the better of the standup.
Slaissi feints and then cracks Barkley's leading leg with a nice low kick. He's obviously looking to slow Barkley down.
Slaissi throws a body punch but Barkley moves out of range.
That's two minutes gone in the round.
Slaissi is looking to slow Barkley down with leg kicks.
Barkley throws a body shot but no joy.
And an attempted straight right on the counter from Slaissi! But no joy.
Slaissi misses with a leg kick
and Barkley counters with a good low kick that Slaissi was not able to check.
Barkley throws a good cross that connects.
Slaissi misses with a right hand
and Barkley connects with a straight left hand counter down the middle.
Fantastic stuff here - a very entertaining period of action, which has drawn cheers from the crowd.
A clash of legs there as Barkley blocks the low kick.
Slaissi fakes with a right hand and throws a good leg kick, right into the thigh. That had to hurt Barkley.
Barkley takes a shot to the body in his stride.
Barkley chopped to the floor by a nice leg kick but he springs right back up before Slaissi can pounce on him.
Slaissi's jab looks to have found its range, popping Barkley under the eye.
Slaissi misses with a hook.
That's three minutes gone in the round.
Slaissi fakes a jab and then connects with a hook.
Barkley walks into a left hand.
Slaissi throws an off balance right hand
and Barkley counters with a straight right hand.
Barkley swings for the body but Slaissi moves out of range.
A low kick from Slaissi is predictable there
enabling Barkley to counter with a crisp jab.
Slaissi throws a monster uppercut resembling something out of street fighter but it doesn't land.
A slow jab from Slaissi misses its intended target.
It looked like Barkley wanted to counter with a hook but didn't fully commit.
Slaissi throws a big shot that misses.
Barkley is looking to counter punch.
A slapping leg kick lands for Barkley.
Derrick Barkley has stepped it up - he knows he needs a finish here!
Slaissi lands a body shot.
Slaissi connects with a looping left hand that seems like it dazed Barkley momentarily.
Oooooooooooh, not good. A low kick from Barkley lands where it shouldn't have, right in the... well, you know what he did? He kicked him in the penis. He's injured, injured bad. The referee sends both fighters to their corners and Slaissi has 5 minutes to recover. He's OK now though... a thumbs up from Slaissi and we're back underway with a touch of gloves.
That's four minutes gone in the round.
Slaissi connects with a leg kick.
Fantastic stuff here - a very entertaining period of action, which has drawn cheers from the crowd.
Barkley throws a nice hook to the body that draws an oooh from the crowd.
Slaissi connects with a body shot that sends Barkley's belly button to the back.
Barkley takes a jab on the nose. He smiles like he loves it and keeps coming.
Slaissi takes an uppercut right on the jaw but it doesn't phase him.
Slaissi takes a big intake of breath there - he's definitely tired.
Slaissi throws a monster uppercut resembling something out of street fighter but it doesn't land.
Slaissi throws a poor cross that misses
and Barkley counters with a left to the body.
Slaissi throws a hard body shot but it just misses.
Slaissi stumbles momentarily as he takes a strong leg kick from Barkley.
Slaissi misses with an uppercut
and Barkley cracks him with a counter punch right on the button.
Barkley lands with a right hand.
And that's the end of the fight!
I would just about give that final round to Bimbo Slaissi.
Well Slaissi has outworked and out performed his opponent in all aspects of the game today. He was simply too good and the decision should be no more than a formality. Over to the ring announcer for the scorecards.
Ladies and gentlemen, after 3 rounds of action, we go to the scorecards for a decision.
Judge Alyssa Summers scores the fight 28:30
Judge Eddie Farnsworth scores the fight 27:30
Judge Lou da Vinci scores the fight 28:30
In favor of your winner, by unanimous decision... Bimbo Slaissi!
|
|
|
|
|
|
|
|
|
|
|
|
|
|
|
|
|
|
|
|
|
|
|
| S |
C
A |
G |
S |
C
B |
G |
|
S |
C |
G |
|
energy
A | B |
|
hype
A | B |
|
pop
A | B |
|
mgr
A | B |
|
FIGHT
RATING
66% |
|
|
|
|
|
|
|
Undercard bout
|
Coming up we have a featherweight MMA rules bout between Ele Meno (ranked 1534 p4p, 3700 weight class) and Wes Loose (ranked 147 p4p, 324 weight class). Over to our ring announcer for the fighter introductions!
 |
|
 |
| 171 cm
26
155
6 - 0 - 0 |
|
168 cm
25
150
2 - 2 - 0 |
BJJ White Belt
Excellent boxer
Good chin |
|
Good wrestler
Counter fighter
Tends to cut |
|
| |
|
Ladies and gentlemen. This fight is 3 rounds, in the featherweight division.
Introducing the fighter to my left, fighting out of the red corner.
With a record of 6 - 0 - 0, fighting out of New York, Ele Meno!
And introducing the fighter to my right, fighting out of the blue corner.
With a record of 2 - 2 - 0, fighting out of New York, Wes Loose!
The judges for this bout are Jonathan Paton, Dean Styles and Russell Pearce.
The bell rings for round one and we are underway!
Meno scores with a one two! Loose had his feet all tangled up there and couldn't avoid the strikes.
Meno fakes low and throws an overhand right that catches Loose on the side of the head.
Meno swings wildly with a right hand that was never going to find it's target.
A looping hook to the body misses from Meno. Loose does a little dance to reset his feet.
Meno lands the left hand.
 Loose is rocked! Loose is rocked!
We've been told by Meno's head coaches at Thunder Gym that he's been working on his takedown defense in preparation for this fight.
Meno throws a combination but comes up with nothing but fresh air.
Loose let fly with a counter punch to the body but it didn't land.
Loose is still on wobbly legs! Can Meno finish him?
Loose gets caught by a brutal right hook which buckles his knees! Loose tries to backpedal with his spaghettilegs but Meno is headhunting and goes for the kill. A jab and a right hook connect and Loose buckles badly as his eyes roll back. The referee steps in and saves Loose!! Loose is complaining but he was clearly out on his feet. Meno throws his mouthpiece into the crowd. Mmmm spit-tastic.
Ladies and gentlemen, after 0:22 of round 1, we have a winner by way of TKO (Strikes). Ele Meno!
|
|
|
|
|
|
|
|
|
|
|
|
|
|
|
|
|
|
|
|
|
|
|
| S |
C
A |
G |
S |
C
B |
G |
|
S |
C |
G |
|
energy
A | B |
|
hype
A | B |
|
pop
A | B |
|
mgr
A | B |
|
FIGHT
RATING
100% |
|
|
|
|
|
|
|
Undercard bout
|
Coming up we have a featherweight MMA rules bout between Rogerio Yamamoto (ranked 1927 p4p, 694 weight class) and Marco Polo (ranked 183 p4p, 70 weight class). This should be fireworks!
 |
|
 |
| 172 cm
21
150
4 - 2 - 0 |
|
170 cm
28
148
9 - 2 - 0 |
BJJ Blue Belt
Great elbows
Very strong |
|
Good wrestler
Solid Muay Thai
Granite chin |
|
| |
|
Ladies and gentlemen. This fight is 3 rounds, in the featherweight division.
Introducing the fighter to my left, fighting out of the red corner.
With a record of 4 - 2 - 0, fighting out of Tokyo, Rogerio Yamamoto!
And introducing the fighter to my right, fighting out of the blue corner.
With a record of 9 - 2 - 0, fighting out of New York, Marco Polo!
The judges for this bout are Steve Montenegro, Alyssa Summers and Eddie Farnsworth.
The bell rings for round one and we are underway!
Yamamoto rushes Polo and presses him up against the cage.
Polo blocks an elbow strike from Yamamoto.
Yamamoto throws an elbow that misses.
Polo working aggressively here.
Nice elbow from Yamamoto.
Both fighters working to control the clinch.
Polo misses with some punches.
Yamamoto blocks a couple of punches on the inside.
Polo misses with the head strike.
Yamamoto can't find room to land a body shot as Polo controls the action.
Polo misses with a short punch on the inside.
Polo fails to land with a short punch on the inside.
Yamamoto pushes off an throws an elbow but Polo leans to the side and avoids it. We're back to clinching against the cage.
Polo lands a hook that snaps the head of Yamamoto backwards.
A head punch on the inside from Polo fails to land.
We've had a slow start to the round here - hopefully the action picks up.
Polo tries a shoulder strike but it doesn't do any damage.
Polo avoids the elbow strike from Yamamoto, against the cage.
Polo swings wildly with an uppercut but Yamamoto uses good head movement to avoid it.
Yamamoto blocks a punch to the side of the head.
An uppercut on the inside fails to land for Polo.
Yamamoto is trying to maintain a safe position but Polo gets an underhook and turns Yamamoto into the cage.
That's one minute gone in the round.
Polo scores with a nice hook to the head.
Yamamoto lands a damaging elbow.
 It looks like Marco Polo has been cut. It looks like Marco Polo has been cut.
Yamamoto is stalling here.
Polo misses with some punches.
Polo swings away with an uppercut that misses.
Yamamoto lands an elbow inside.
Polo misses with a punch on the inside.
A short right hand to the side of the head by Polo.
Yamamoto stalling in the clinch but Polo improves position.
Yamamoto blocks an uppercut.
Polo lands a nice uppercut.
A head punch on the inside from Polo fails to land.
Yamamoto blocks an uppercut.
Yamamoto lands a glancing elbow in the clinch.
Yamamoto misses with a shot to the kidneys.
Polo misses with some punches.
Yamamoto tries to throw a body punch but Polo avoids it by throwing Yamamoto back against the cage.
Polo misses with a short punch on the inside.
This is a great period of action - very entertaining stuff!
Yamamoto lands an elbow inside.
That has opened up Marco Polo's cut even more.
That's two minutes gone in the round.
Yamamoto creates a bit of space for himself and sneaks an elbow through Polo's defenses.
Yamamoto tries to throw a body punch but Polo avoids it by throwing Yamamoto back against the cage.
Polo misses with a punch on the inside.
Polo blocks an elbow strike from Yamamoto.
Yamamoto blocking some punches.
Polo misses with some punches.
A head punch blocked on the inside by Yamamoto.
Yamamoto throws an elbow that misses.
Polo's coach down at Brooklyn Mixed Martial Arts was telling us pre-fight that they have been working on Polo's balance. Obviously they view that as a key factor in the outcome of this fight.
Polo fails to land with a short punch on the inside.
Polo misses with a punch on the inside.
A nice glancing elbow lands by Yamamoto.
Yamamoto looks to throw an elbow but misses.
Polo blocks an elbow strike from Yamamoto.
Yamamoto blocks a punch to the side of the head.
Yamamoto blocks an uppercut.
An uppercut on the inside fails to land for Polo.
Polo misses with a hook from the clinch.
Polo tries a shoulder strike but it doesn't do any damage.
Polo throws a blind hook that connects with the side of Yamamotos head.
A nice glancing elbow lands by Yamamoto.
That's three minutes gone in the round.
Yamamoto blocks an uppercut.
A head punch on the inside from Polo fails to land.
A head punch on the inside from Polo fails to land.
Yamamoto misses with a body punch.
Yamamoto is trying to slow down the pace in the clinch, to catch his breath.
Polo misses with a short punch on the inside.
Yamamoto takes a shot to the head.
Polo misses with a hook from the clinch.
Yamamoto blocking some punches.
Polo avoids a wild elbow strike from Yamamoto.
Polo misses with a punch on the inside.
Yamamoto misses with a body punch.
Polo lands a shoulder strike.
Yamamoto blocks an uppercut.
Polo working aggressively here.
Yamamoto lands a damaging elbow.
Polo blocks an elbow strike from Yamamoto.
Yamamoto struggles to land a body shot inside as Polo controls his hands.
Yamamoto comes over the top with an elbow. That landed flush.
The cut above Marco Polo's eye is starting to cause him problems now.
That's four minutes gone in the round.
Polo lands with a short head shot on the inside.
Yamamoto lands an elbow just above Polo 's eye.
The crowd are loving this. Great action here.
Yamamoto blocks a punch to the side of the head.
Polo lands a left hand that snaps the head of Yamamoto backwards.
Yamamoto blocks a couple of punches on the inside.
Yamamoto struggles to land a body shot inside as Polo controls his hands.
Yamamoto blocks a punch to the side of the head.
Yamamoto comes over the top with an elbow. That landed flush.
Yamamoto blocks a punch to the side of the head.
An uppercut on the inside fails to land for Polo.
Polo misses with a hook from the clinch.
Polo fails to land with a short punch on the inside.
Polo has a couple of punches blocked by Yamamoto.
Yamamoto pushes off an throws an elbow but Polo leans to the side and avoids it. We're back to clinching against the cage.
Polo misses with a hook from the clinch.
Yamamoto blocking some punches.
Yamamoto misses with an elbow strike.
Polo working aggressively here.
A head punch blocked on the inside by Yamamoto.
Yamamoto lands an elbow just above Polo 's eye.
And that is the end of the round. The fighters go back to their corners.
Marco Polo dominated that round.
The cut man is working on Marco Polo's cut.
OK. That's time! The bell goes and we're back to the action.
Yamamoto moves into range and clinches up with Polo.
Yamamoto creates a bit of space for himself and sneaks an elbow through Polo's defenses.
Polo lands a nice uppercut.
Polo misses with a punch on the inside.
Polo misses with a short punch on the inside.
Polo blocks an elbow strike.
Polo lands on the inside with an uppercut.
Polo avoids the elbow strike from Yamamoto, against the cage.
Polo has a couple of punches blocked by Yamamoto.
A head punch on the inside from Polo fails to land.
Marco Polo seems to be working more effectively in the clinch in the fight so far.
Yamamoto is trying to slow down the pace of the fight but Polo is keeping busy.
Polo misses with a hook from the clinch.
Polo misses with a hook from the clinch.
We've had a slow start to the round here - hopefully the action picks up.
Polo swings wildly with an uppercut but Yamamoto uses good head movement to avoid it.
Yamamoto tries to land a shot to the body but it's blocked.
Polo misses with the head strike.
Yamamoto lands a nice elbow.
Marco Polo's cut is absolute horrible now. This looks like something out of a horror film with blood covering both fighters.
Yamamoto lands an elbow inside that Polo shrugs off.
That's one minute gone in the round.
Yamamoto creates a bit of space for himself and sneaks an elbow through Polo's defenses.
The referee calls the doctor in to look at Marco Polo's cut. Oh no, the doctor has called an end to the bout!
Ladies and gentlemen, after 1:13 of round 2, we have a winner by way of TKO (Cut). Rogerio Yamamoto!
|
|
|
|
|
|
|
|
|
|
|
|
|
|
|
|
|
|
|
|
|
|
|
| S |
C
A |
G |
S |
C
B |
G |
|
S |
C |
G |
|
energy
A | B |
|
hype
A | B |
|
pop
A | B |
|
mgr
A | B |
|
FIGHT
RATING
44% |
|
|
|
|
|
|
|
Co-main event
|
Coming up we have a heavyweight MMA rules bout between Jarrod Beard (ranked 1459 p4p, 2041 weight class) and Powder Puff (ranked 182 p4p, 244 weight class). Beard comes to the cage accompanied by Ladies Love Country Boys - Trace Adkins. The fight MMA fans around the world have waited their entire lives for!
 |
|
 |
| 192 cm
22
280
6 - 4 - 0 |
|
189 cm
22
270
7 - 3 - 0 |
Great wrestler
Excellent boxer
Cardio machine |
|
Good wrestler
Excellent MT
Granite chin |
|
| |
|
Ladies and gentlemen. This fight is 3 rounds, for the heavyweight championship of the world!
Introducing the champion to my left, fighting out of the red corner.
With a record of 6 - 4 - 0, fighting out of Montreal, Jarrod Beard!
And introducing the challenger to my right, fighting out of the blue corner.
With a record of 7 - 3 - 0, fighting out of Las Vegas, Powder Puff!
The judges for this bout are John Kavanagh, Bruno Lombardi and Reed Andrews.
The bell rings for round one and we are underway!
Puff ducks under an overhand right and circles away with a smile on his face.
Puff slips a jab from Beard.
Beard catches Puff with a nice straight right. He seems pissed - ooooh, it's on now! On like donkey kong!
Beard's corner calls for a 1-2. Beard obliges with the 1 part as he scores the single shot and moves back out of range.
Beard looks to land a right hand but Puff moved out of range.
Beard misses with a takedown attempt. He shot from a bit too far out.
Puff displays some good footwork, moving neatly out of range as Beard throws out the jab.
Beard walks into a straight right hand from Puff.
Beard throws a hook but Puff avoids it easily.
A swing and a miss from Beard.
We've had a slow start to the round here - hopefully the action picks up.
Puff looks to throw the jab but Beard is out of range.
Beard feinted with a counter takedown.
Puff misses with a wild body shot.
Puff paws at his opponent with the jab and then lunges in with a straight, right on the button.
Beard looks to have improved his striking defense since last time we saw him fight.
Puff scores with a reasonable looking shot to the body. Beard doesn't seem bothered though.
This is a great period of action - very entertaining stuff!
Puff lands a jab to the head.
Puff ducks down into range and throws a picture perfect right hook that connects with Beard's jaw. Beard's eyes stare off into space as he falls to the mat, out cold! Puff does the decent thing and steps back, rather than landing any shots to his unconscious opponent.
Ladies and gentlemen, after 1:55 of round 1, we have a winner by way of KO (Punch). Powder Puff!
Powder Puff is the new heavyweight champion!
Powder Puff decided to thank the fans in attendance for making a great atmosphere. It seemed to go down pretty well.
|
|
|
|
|
|
|
|
|
|
|
|
|
|
|
|
|
|
|
|
|
|
|
| S |
C
A |
G |
S |
C
B |
G |
|
S |
C |
G |
|
energy
A | B |
|
hype
A | B |
|
pop
A | B |
|
mgr
A | B |
|
FIGHT
RATING
73% |
|
|
|
|
|
|
|
Main event
|
Coming up we have a welterweight MMA rules bout between Jeremy Arnason (ranked 563 p4p, 1678 weight class) and Jim Rhat (ranked 75 p4p, 231 weight class). Arnason comes to the cage accompanied by Michael Jackson - Off The Wall. Rhat is bouncing up and down as he enters the arena, backed by Das Ist It. Over to our ring announcer for the fighter introductions!
 |
|
 |
| 178 cm
21
172
7 - 2 - 0 |
|
180 cm
22
172
8 - 1 - 0 |
BJJ Blue Belt
Solid boxing
Cardio machine |
|
Good wrestler
Basic striking
Powerful |
|
| |
|
Ladies and gentlemen. This fight is 3 rounds, in the welterweight division.
Introducing the fighter to my left, fighting out of the red corner.
With a record of 7 - 2 - 0, fighting out of Las Vegas, Jeremy Arnason!
And introducing the fighter to my right, fighting out of the blue corner.
With a record of 8 - 1 - 0, fighting out of Hilo, Jim Rhat!
The judges for this bout are Anthony Taglia, David Schapiro and Steve Montenegro.
The bell rings for round one and we are underway!
Rhat changes levels and drives through with a really nice takedown into side control. Arnason looks really pissed at himself for not defending that better.
Rhat wants to lay and pray for a moment but Arnason keeps working.
Who's going to make the next move?
Rhat working away.
Rhat tries to advance to mount but can't.
Arnason is trying to improve his position.
Arnason is trying to control Rhat's posture but Rhat avoids it.
Arnason manages to get back to half guard.
Rhat looks more muscular than last time we saw him. He must have been on the weights.
Rhat is thwarting Arnason's attempts to control the position.
Arnason controlling the leg, holding on to half guard.
We've had a slow start to the round here - hopefully the action picks up.
Arnason tries to roll over but Rhat keeps him under control.
Rhat passes to full mount!
Rhat punching from mount but Arnason doing a good job of avoiding damage.
That's one minute gone in the round.
Arnason wants to hold on but Rhat pushes him away.
Arnason regains half guard.
Rhat is sneakily working for an arm triangle but Arnason sees it coming and defends easily.
Rhat is pressing down on Arnason's thigh, looking to free his foot. Arnason is holding on for now.
The fighters are pressed up against the cage, both looking to find a bit of space to work.
Arnason wants to control but Rhat is keeping busy.
Rhat throwing shots but they're hitting the canvas more than the man.
Arnason is refusing to be controlled, as Rhat sits in half guard.
Arnason keeping hold of Rhat's head, controlling as best he can.
Arnason won't allow Rhat to pass to mount.
That's two minutes gone in the round.
Rhat is keen to just control but Arnason is a slippery customer.
Arnason keeping control of the position.
The fighters are starting to perspire pretty heavily.
Rhat is working for a kimura but Arnason is defending it quite comfortably.
Arnason preventing any damage for now, controlling his opponent's head.
Arnason wants to control but Rhat is keeping busy and won't allow it.
Arnason has his hands clasped together around Rhat's back. He's all about the action.
Arnason is looking to control Rhat's leg but it's slowly edging free. Can Arnason avoid being mounted?
Rhat wants to take a breather but Arnason is having none of it.
Rhat trying to pass the guard but Arnason defending well.
Arnason is trying to control but can't.
That's three minutes gone in the round.
Rhat works his foot free and advances to mount.
Arnason is desperately trying to improve his position but Rhat has a good base and remains in mount.
Rhat is going oldschool here, as he tries to force Arnason to tap using a forearm choke. This isn't 1993 though, so Arnason shrugs it off.
Arnason is trying desperately to improve position.
Arnason is squirming around, avoiding Rhat's attempts to control the action.
Rhat fails to move to back control.
The ref warns both fighters not to hold the cage as they work up against the meshing.
Rhat jumps to side control looking for an arm triangle but Arnason manages to avoid the submission attempt.
Rhat tries for a kimura but Arnason is defending well.
Arnason struggling a bit here.
That's four minutes gone in the round.
Arnason isn't going anywhere.
Arnason is trying to improve his position.
Arnason is trying to control Rhat's posture but Rhat avoids it.
Rhat is looking for a kimura. He might have it! No, Arnason has escaped the position, nice work there.
Arnason tries to buck Rhat off but Rhat is having none of it.
The crowd thankful this round is nearly over.
Rhat tries to move to mount but Arnason blocks the move with his legs.
Arnason tries to buck Rhat off but Rhat is having none of it.
Rhat has hold of Arnason's arm. He's looking for a kimura. Arnason seems comfortable defending it but Rhat has shifted his position slighty and is cranking on the arm! Arnason is real pain and he's forced to tap out! Arnason is disgusted with himself for not defending it better but Rhat couldn't care less - he's delighted!
Ladies and gentlemen, after 4:55 of round 1, we have a winner by way of Submission (Kimura). Jim Rhat!
Jim Rhat was full of energy after the big win and talked about how he thinks he can do big things in this sport. The crowd were appreciative of his determination to succeed.
Jeremy Arnason was interviewed post fight and said 'I'll be back motherflippers! And when I'm back I will win the rematch easy peasy!'.
|
|
|
|
|
|
|
|
|
|
|
|
|
|
|
|
|
|
|
|
|
|
|
| S |
C
A |
G |
S |
C
B |
G |
|
S |
C |
G |
|
energy
A | B |
|
hype
A | B |
|
pop
A | B |
|
mgr
A | B |
|
FIGHT
RATING
29% |
|
|
|
|
|
|
|
|
|
|

